July 8, 2026
How to Tape Drywall Corners for a Smooth, Pro Finish
Corner joints make or break a drywall job. Get them wrong and you end up with visible seams, cracking, or bulging tape that shows through every coat of paint. Learning how to tape drywall corners properly is the difference between walls that look amateur and walls that look like a pro spent the afternoon on them.
This guide walks you through the exact steps for both inside corners and outside corners , including which tape to use, how much mud to apply, and how to feather your coats so the seam disappears. You'll find the tools you need, the common mistakes that cause cracked or bubbled tape, and the drying times that keep you from rushing a finish that won't hold up.
We've spent over 30 years finishing drywall on homes across the Sacramento Valley, and corner work is where most DIY projects go sideways. Whether you're patching a garage wall, finishing an ADU, or repairing settlement cracks, the technique is the same. Follow these steps and you'll get a smooth, paint-ready corner on your first attempt, no drywall crew required.
What you'll need before taping drywall corners
Good corner work starts before you ever open a mud bucket. Rushing the prep stage is the number one reason DIY taping jobs crack within a year. Gather your tools, pick the right tape for the job, and check the framing underneath before you spread a single pass of compound. Skipping this step is how you end up redoing the whole wall in six months.
Tools and materials
You don't need a contractor's truck full of gear to tape drywall corners well, but a few specific tools make the difference between a smooth finish and a frustrating mess. Paper tape is the standard for most corner work because it creases cleanly and bonds tighter than mesh, especially on inside corners. Mesh tape has its place on flat seams, but skip it for corners since it doesn't hold a crease and tends to bubble under compound.
| Item | Purpose |
|---|---|
| Paper drywall tape | Bonds to compound and reinforces the joint |
| Corner trowel (inside corner tool) | Embeds tape into 90-degree inside corners |
| 6-inch and 10-12 inch drywall knives | Apply and feather successive coats |
| Mud pan | Holds compound while you work |
| All-purpose joint compound | Bedding coat and finish coats |
| Metal or vinyl corner bead | Reinforces outside corners |
| 150-grit sanding sponge or pole sander | Smooths dried compound between coats |
| Utility knife | Trims tape and scores corner bead |
| Bright work light | Reveals shadows and high spots as you sand |
Checking the framing and corner condition
Before taping, run your hand along the corner and check for loose drywall, gaps wider than an eighth of an inch, or nails that have popped through the paper. Loose or unsupported panels will flex under the tape and crack the joint no matter how carefully you finish it, so this is worth five minutes of attention. If you're patching a section rather than finishing new drywall, confirm the panels meet cleanly at the corner with no more than a small gap. Larger gaps need a strip of setting-type compound packed in first so the tape has something solid to bridge.
A corner is only as strong as the framing and compound underneath the tape, not the tape itself.
Setting up your work area
Clear the room of anything that dust or dripping compound could ruin, and lay down a drop cloth if you're working over finished flooring. Room temperature matters more than most DIYers realize. Joint compound cures slowest below 55 degrees Fahrenheit and can skin over too fast above 90, so aim for a space between 65 and 75 degrees if you can control it. Good airflow speeds drying between coats without kicking up dust onto wet mud, so crack a window or run a fan pointed away from your work.
Run through this quick checklist before you start:
- Framing and panel edges are secure with no loose sections
- Gaps wider than 1/8 inch are packed with setting compound
- Tools are laid out within reach: tape, knives, mud pan, corner tool
- Room temperature sits between 65 and 75 degrees Fahrenheit
- Lighting is bright enough to spot shadows and ridges
- Drop cloths are down and dust is controlled
With your materials staged and the corner inspected, you're ready to start applying tape. The next step covers flat seams first, since getting those joints right sets the pattern you'll follow when you move into the corners themselves.
Step 1. Tape the flat seams first
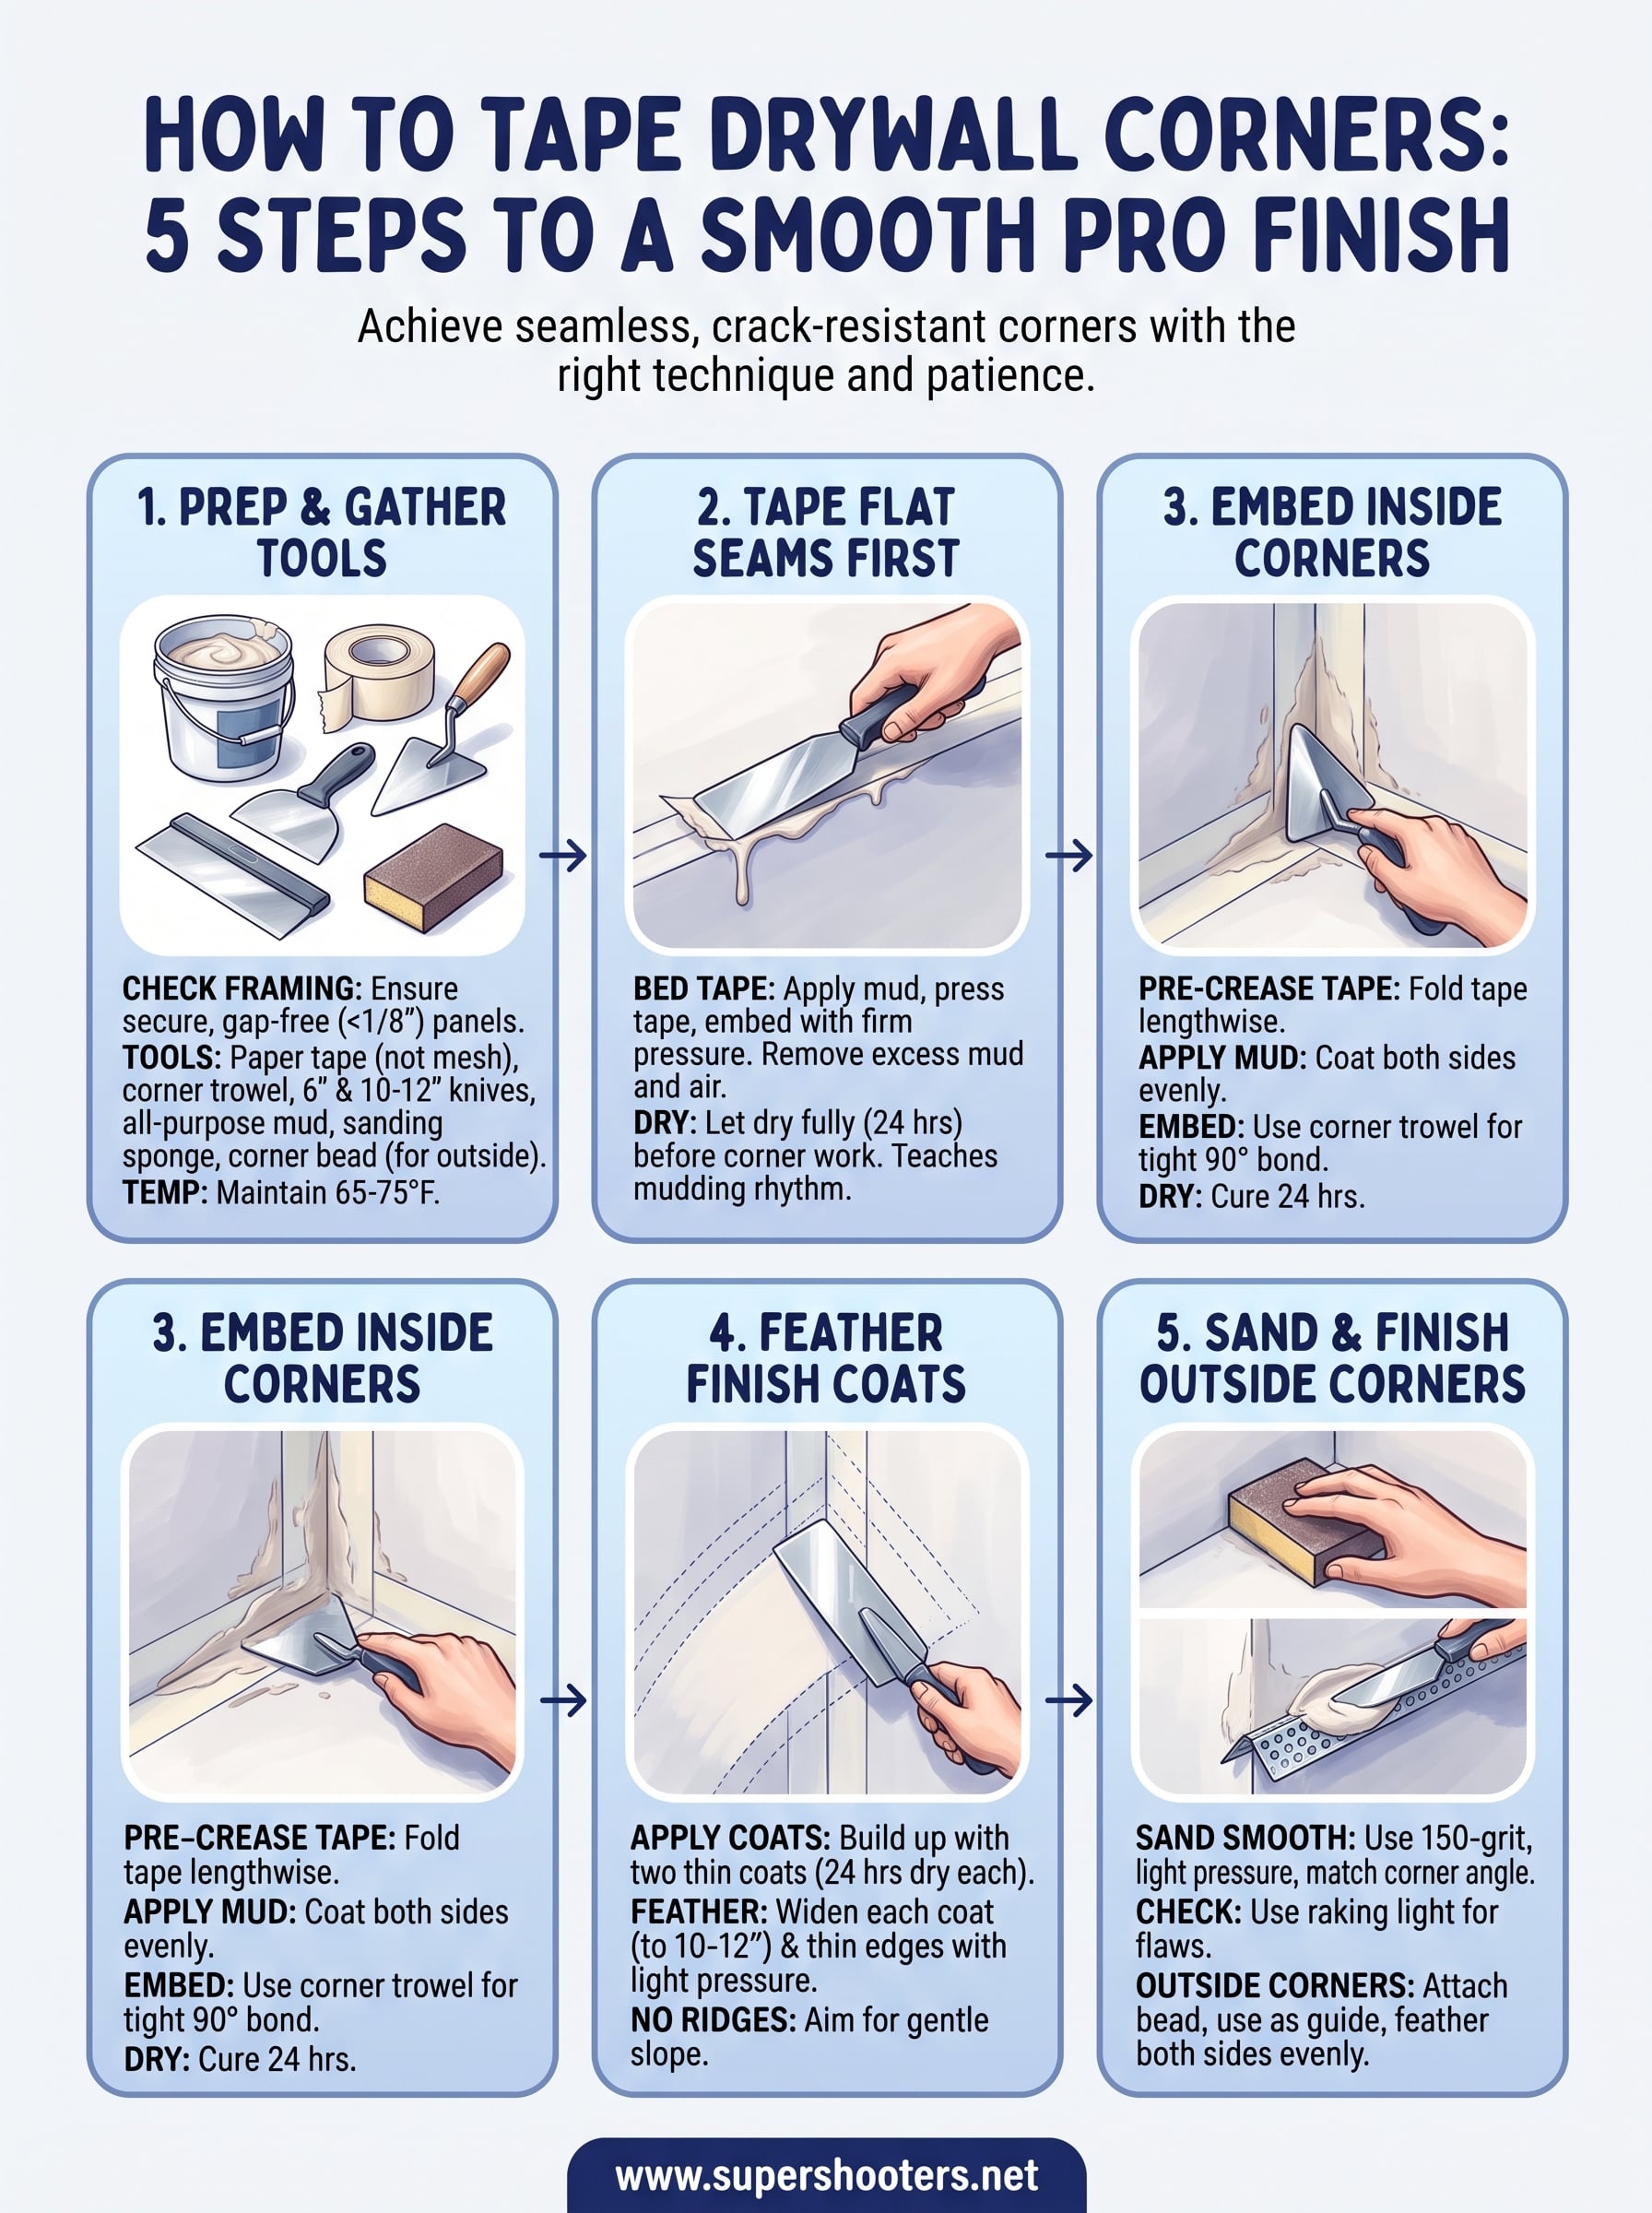
Start on the flat butt and tapered seams before you touch a single corner. Flat seams teach you the mudding rhythm you'll need once you move into tighter corner work, and any mistakes here are easier to fix than a botched corner. Load your 6-inch knife with a thin, even layer of joint compound and run it along the seam, filling the tapered recess where two panels meet.
Bedding the tape into the seam
Apply a bed coat of mud about 4 inches wide down the length of the seam, then press paper tape into it with your fingers, centering it over the joint. Working the knife at a 45-degree angle , drag it firmly over the tape from one end to the other, squeezing out excess mud and air bubbles from underneath. You want just enough compound left under the tape to bond it, not so much that it puddles at the edges. If the tape wrinkles or lifts, pull it up while the mud is still wet and rebed it rather than trying to smooth it over.
A flat seam done right leaves no visible ridge and no trapped air under the tape.
Knowing how much pressure to use
Too little pressure leaves air pockets that bubble later; too much strips the tape of the mud it needs to bond. Aim for firm, even strokes and check your work by holding the knife flat against the wall. A properly bedded seam sits flush with the surrounding drywall, not proud of it.
| Sign | Likely Cause | Fix |
|---|---|---|
| Tape lifts at the edges | Not enough mud underneath | Rewet and rebed immediately |
| Bubbles under tape | Air trapped during embedding | Slice bubble, add mud, smooth flat |
| Mud oozes past tape edges | Bed coat applied too thick | Scrape excess before it dries |
| Tape tears while pressing | Compound too dry or thin | Mix a fresh batch to proper consistency |
Letting the seams dry before moving on
Give the bed coat a full 24 hours to dry before applying a second coat, even if the surface looks dry sooner. Rushing this drying window traps moisture under the tape and sets you up for cracking down the road. Once the flat seams are bedded and drying, you're ready to shift your attention to the inside corners, where the technique changes slightly to account for the 90-degree fold in the tape.
Step 2. Embed the tape into inside corners
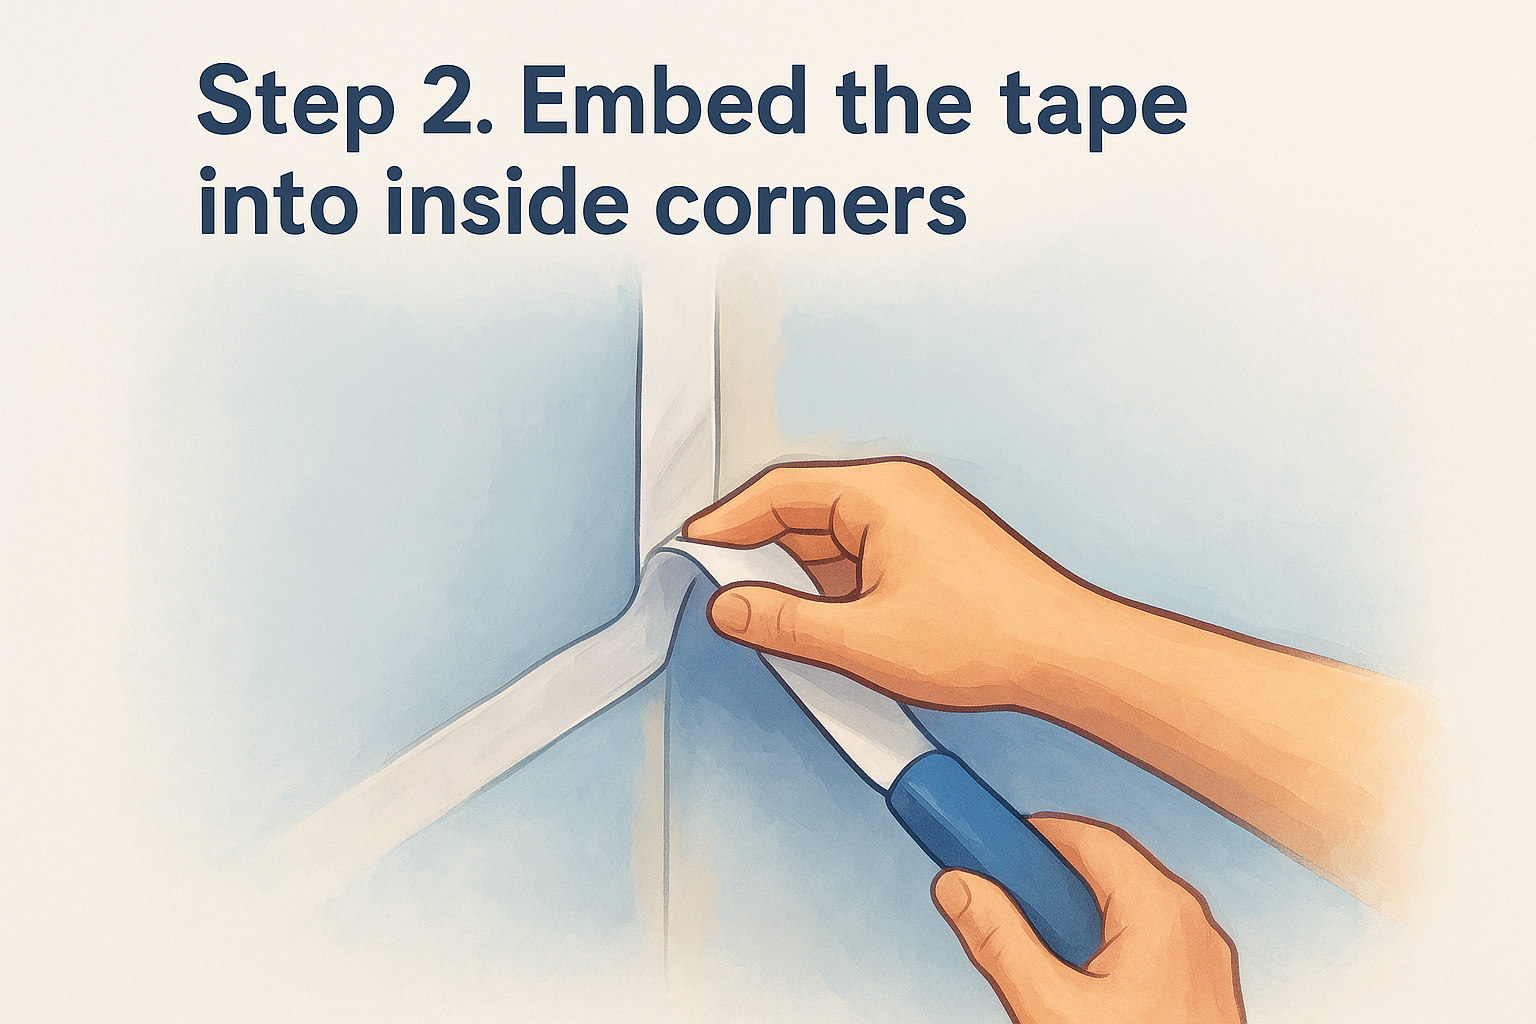
Inside corners need a different move than flat seams because the tape has to fold and hold a crease at 90 degrees instead of lying flat. Pre-creasing your paper tape before you touch any mud saves you from fighting a floppy strip once your hands are covered in compound. Fold a length of tape in half along its center line, running your fingers down the crease so it holds its shape on its own.
Applying mud to both sides of the corner
Load your 6-inch knife and spread a thin, even coat of joint compound on both sides of the corner, about 3 inches wide on each face. Even coverage on both sides matters more than thickness here, since a lopsided bed coat pulls the tape off-center once you press it in. Work from the top of the corner down, or from one end of a shorter section to the other, so you're not reaching back over mud that's already started to skin.
Embedding with the corner tool
Press the creased tape into the wet mud, seating the fold directly into the 90-degree angle so both flaps lie flat against their respective walls. Run your corner trowel down the length of the joint in one smooth pass, applying even pressure to both sides at once. This tool is built specifically for this job, and it embeds both flaps simultaneously without the tape sliding off-center the way it can with a flat knife.
A well-embedded inside corner holds its crease without lifting, even before the mud sets.
If you don't own a corner trowel, a 6-inch flat knife works, but you'll need to do one side at a time and go back over the fold to reset it. Working one side at a time takes longer and risks smearing mud onto the side you already smoothed, so a corner tool is worth the small investment if you're taping more than one room.
Checking for a tight bond
Once the tape is embedded, run your finger lightly along the crease to feel for gaps or air pockets underneath. Wipe away any excess mud that squeezed out past the tape's edges before it dries, since dried ridges are harder to sand flat later. Let this bed coat cure a full day before you move on to the finish coats, the same drying window you gave the flat seams in Step 1.
Step 3. Apply and feather the finish coats
Once your bed coat has cured for a full 24 hours, it's time to build the joint up with two more coats of compound. Feathering the edges wider with each pass is what makes the seam disappear into the wall instead of standing out as a visible ridge. Skip this gradual widening and you'll end up with a hump down the center of every corner that no amount of paint can hide.
Applying the second coat
Load your 10-inch knife with a thin layer of joint compound and run it over the taped corner, extending about an inch past the edges of your first coat on each side. Keep the coat thin here, since a thick second pass takes longer to dry and is harder to feather flat. Work the knife at a low angle, letting one edge ride against the wall while you drag the compound across the joint in a single smooth stroke.
For inside corners, coat one side at a time so you don't drag wet mud across a side you've already finished. For outside corners once you reach Step 5, you'll widen both sides evenly to keep the bead centered.
Feathering isn't about adding more mud, it's about spreading less mud over a wider area with each coat.
Feathering technique
Hold your knife at roughly a 15 to 20 degree angle to the wall and apply lighter pressure toward the outer edges of the coat. Lighter pressure at the edges thins the compound gradually so it blends into the surrounding drywall instead of leaving a hard line. Check your work by running a hand flat across the dried surface; you should feel a gentle slope, not a step.
Drying between coats
Give the second coat another full 24 hours before applying the third and final finish coat, extending the feathered edge another 2 to 3 inches beyond the previous pass. Here's a quick reference for the three-coat build-up:
| Coat | Width | Purpose |
|---|---|---|
| Bed coat | 3-4 inches | Embeds tape into corner |
| Second coat | 6-8 inches | Widens and thins the joint |
| Finish coat | 10-12 inches | Feathers seam invisible |
Temperature and humidity control the drying time as much as the compound itself, so keep that 65 to 75 degree range from Step 1 consistent through every coat. Once the final coat is dry to the touch and shows no cool, damp spots when you press a knuckle against it, you're ready to move on to sanding.
Step 4. Sand the corners smooth
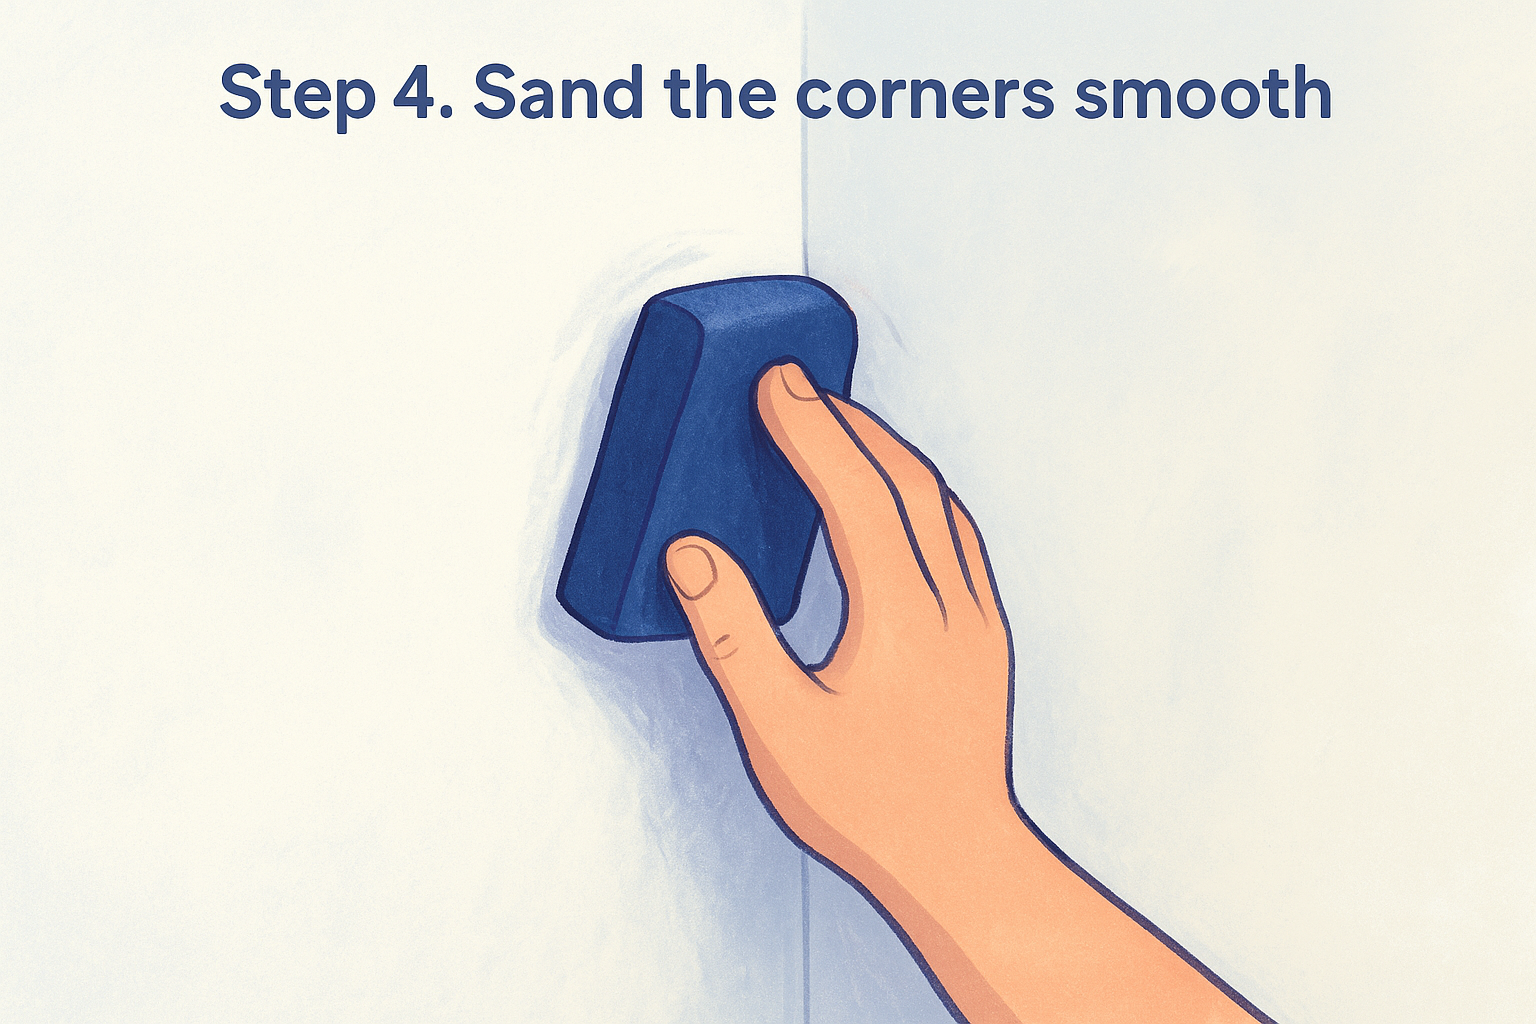
Once the final coat has dried completely, grab a sanding sponge and start smoothing the ridges left by your knife strokes. Light, even pressure is the goal here, since aggressive sanding can gouge the paper tape underneath and force you to remud the whole corner. Work in small circular motions rather than dragging the sponge in long strokes, which tends to dig grooves into soft compound.
Picking the right grit
A 150-grit sanding sponge handles most drywall compound without tearing into the paper tape below it. Coarser grits like 100 cut faster but leave scratches that show through paint, so save them for stubborn ridges and finish with 150 anyway. Wet sanding sponges work well in corners since they raise less dust, though they take a bit longer to level a surface than dry sandpaper on a pole sander.
| Tool | Best For | Watch Out For |
|---|---|---|
| 150-grit dry sponge | General smoothing on flat areas | Clogs quickly, tap out often |
| Wet sanding sponge | Inside corners, dust-sensitive rooms | Slower cutting, needs rinsing |
| Pole sander with 120-150 grit screen | Large flat seams | Too aggressive for tight corners |
Sanding technique for inside corners
Fold your sanding sponge slightly to match the angle of the corner rather than pressing it flat against one side. Matching the sponge to the angle keeps you from sanding a flat spot into one side of the crease while ignoring the other. Move down the length of the joint in short passes, checking your progress every foot or so instead of running the full length in one go.
Sand until the corner disappears under your palm, not until the tape shows through.
Checking your work in raking light
Hold your work light close to the wall at a low angle and let it rake across the corner. Raking light throws shadows into any remaining ridges or low spots that are invisible under normal room lighting. Mark any flaws with a pencil, apply a thin skim coat of compound to those spots, let it dry, and sand again before moving forward.
Once the surface reads flat and smooth under raking light, wipe the corner down with a slightly damp cloth to pull off residual dust. Vacuum the floor and surrounding surfaces before you start the next step, since sanding dust that settles back onto wet mud will show up as grit in your final finish.
Step 5. Tape and finish outside corners
Outside corners take a different approach entirely, since paper tape alone can't survive the traffic these edges take. Corner bead is the standard solution, a metal or vinyl strip that protects the edge while giving you a straight guide to mud against. Whether you're finishing a doorway, a garage opening, or the exposed edge of an ADU wall, the bead goes on before any compound touches the corner.
Choosing and attaching the bead
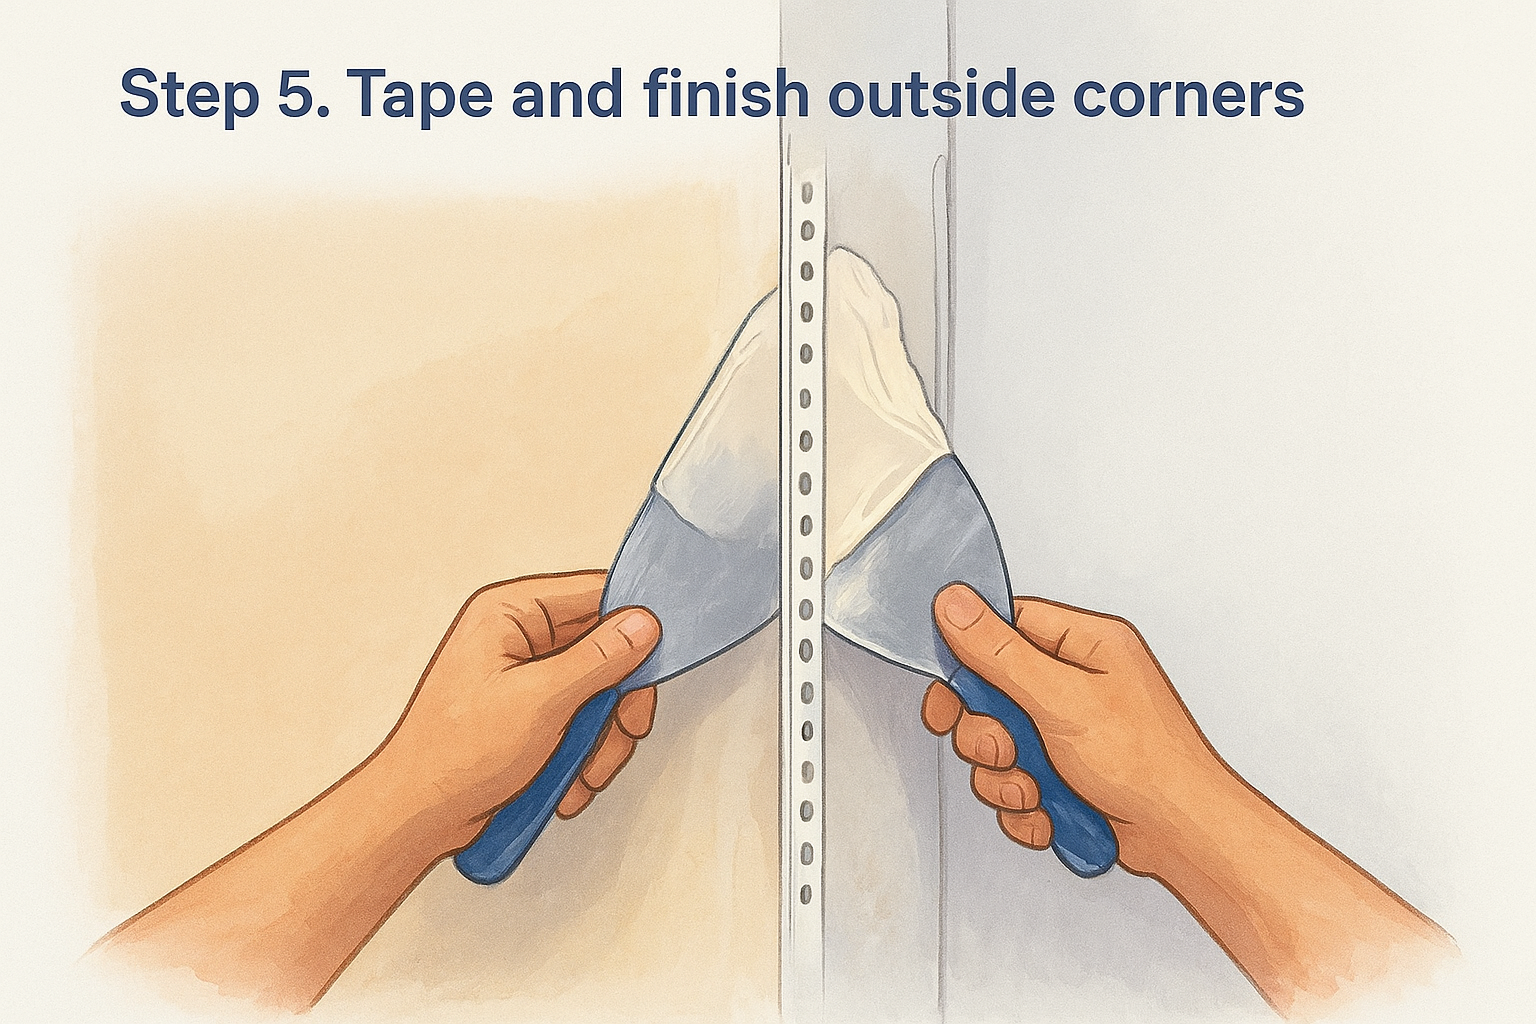
Metal corner bead holds up better in high-traffic hallways and garages, while vinyl bead resists denting and won't rust if it ever gets wet. Cut the bead to length with tin snips or a utility knife, then hold it centered over the corner so it caps both edges evenly. Fasten it with drywall screws every 8 to 10 inches, or crimp metal bead in place with a stapler-style crimping tool if you're working solo without a helper to hold it steady.
A crooked corner bead guarantees a crooked wall, no matter how well you mud it afterward.
Mudding over the bead
Load your 6-inch knife and run compound down one side of the bead, letting the raised edge of the bead act as your straightedge. Ride the knife against the bead as you drag it downward, and the metal or vinyl lip naturally keeps your first coat flat and consistent. Repeat on the other side, then let this coat dry the full 24 hours before widening it.
| Coat | Distance from bead edge | Purpose |
|---|---|---|
| First coat | 2-3 inches | Covers screws and bead flange |
| Second coat | 4-6 inches | Widens the taper |
| Finish coat | 6-8 inches | Feathers into the wall |
Feathering both sides evenly
Each following coat should extend a couple inches further than the last, exactly like the flat seams and inside corners you already finished. Keep both sides balanced as you widen, since a lopsided outside corner reads as crooked even when the bead underneath is perfectly straight. Check your progress by sighting down the corner from a few feet away; the compound should taper smoothly into the wall with no visible step where each coat ends. Sand this corner the same way you sanded the inside corners in Step 4, using light pressure so you don't expose the metal bead underneath.
Fixing common corner taping problems
Even careful work runs into trouble sometimes, and knowing how to diagnose a problem corner saves you from tearing out good drywall over a fixable flaw. Most corner failures trace back to one of three causes: moisture, movement, or a rushed coat. Walk through the symptoms below before you assume the whole joint needs to come out.
Cracking along the seam
A hairline crack running the length of a corner almost always means the framing moved before the compound fully cured, or the tape never got a solid bed coat underneath it. Settlement cracks in older Sacramento Valley homes are common enough that we treat them as a routine repair rather than a red flag. Cut out the cracked section with a utility knife, back it with a strip of setting-type compound for extra rigidity, and retape and refinish that section using the same steps you followed the first time.
A crack that reopens after repair means the movement is still active, not that your patch job failed.
Bubbling or lifting tape
Bubbles trapped under paper tape almost always mean air or excess moisture got sealed in during the bedding step. Slice each bubble open with a utility knife, scrape out the loose compound underneath, pack fresh mud into the gap, and smooth a new layer of tape or compound over the spot before it has a chance to lift further.
Visible seam lines after painting
If a faint shadow line shows up along the corner once the paint dries, the feathering didn't extend far enough or the final coat sat too thick at the edge. Skim a thin layer of compound 2 to 3 inches beyond the visible line, feather it flush, sand once it's dry, and spot-prime before repainting so the patch doesn't flash under the sheen.
| Problem | Likely Cause | Fix |
|---|---|---|
| Crack along seam | Framing movement or weak bed coat | Cut out, reinforce, retape |
| Bubbling tape | Trapped air or moisture | Slice, refill, resmooth |
| Visible seam after paint | Feathering too narrow or thick | Skim wider, sand, spot-prime |
| Nail pops near corner | Fastener backed out | Reset or replace screw, patch, retexture |
Tackle these issues while they're small, and a corner repair takes an afternoon instead of a full wall replacement.
A finish that's ready for paint
Taping drywall corners comes down to patience more than skill. Bed the tape properly , feather each coat a little wider than the last, and give every layer its full drying time before you sand. Rush any one of those steps and the corner will tell on you, usually right after you've painted and can't easily fix it without redoing the whole thing.
Most DIYers who struggle with corners aren't missing technique, they're missing the discipline to let mud cure and sand light. Follow the five steps here in order and you'll get walls that hold up to raking light and years of daily bumps. If a corner turns out cracked, uneven, or beyond what a weekend can fix, don't force it. Our team handles drywall repair and patching across the Sacramento Valley, and we're happy to finish what you started or take the whole job off your hands.
Recent Posts