July 3, 2026
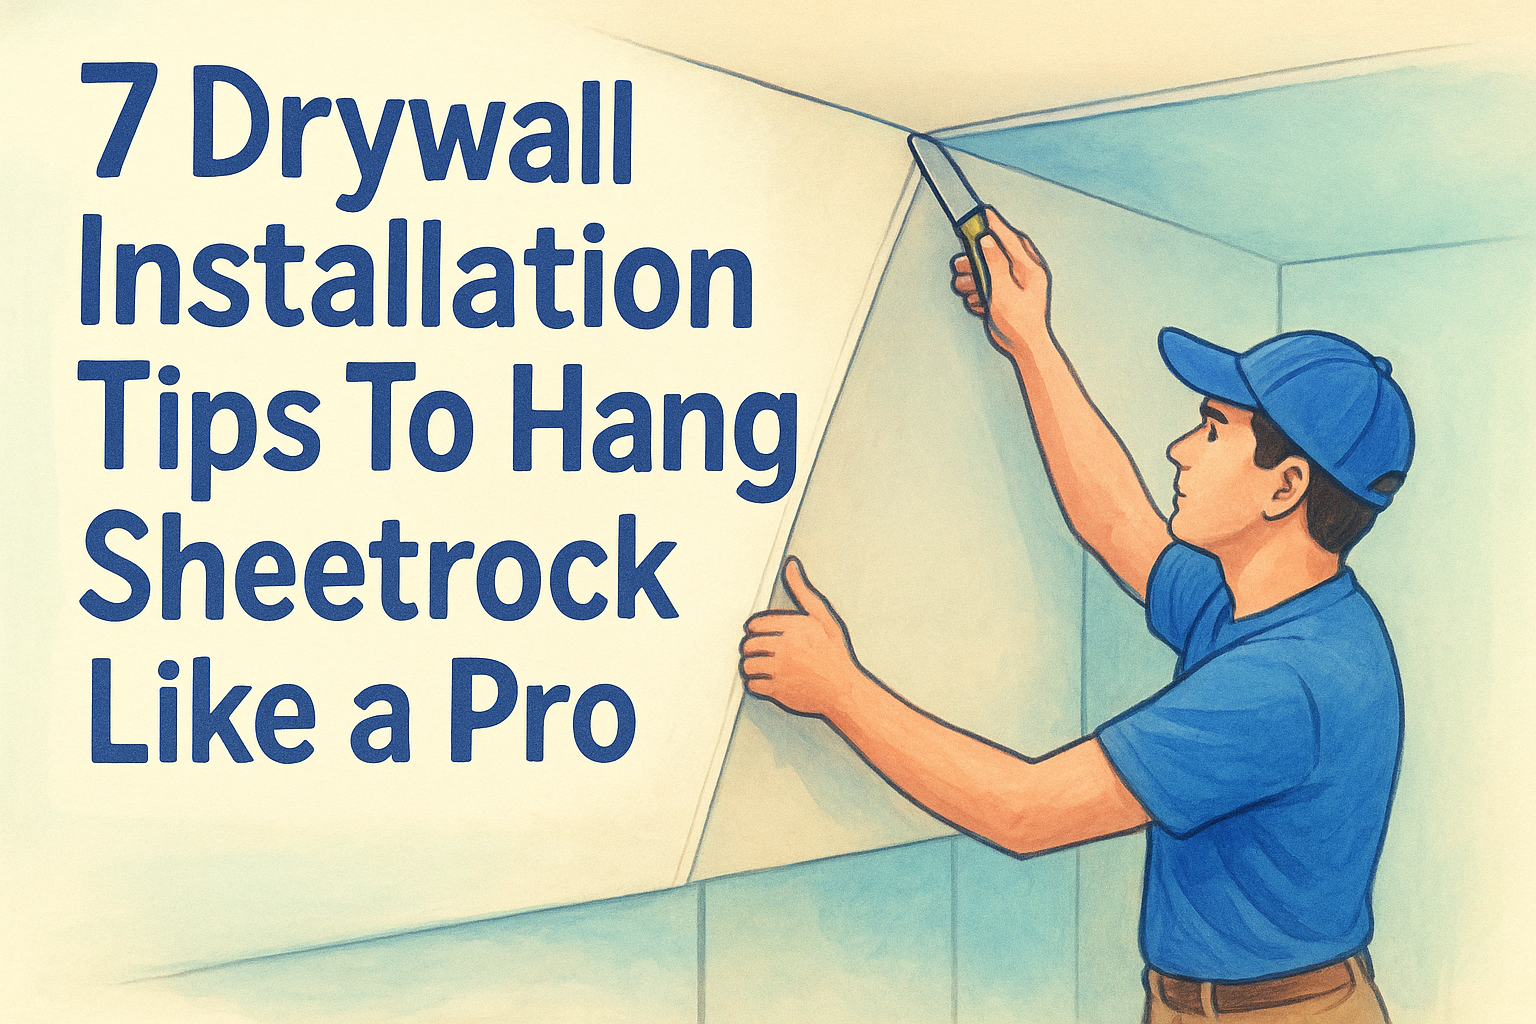
Drywall Finishing: How To Apply Drywall Mud Smoothly
Learning how to apply drywall mud is one of those skills that looks simple when a pro does it, and feels impossibly messy the first time you try it yourself. The difference between a smooth, invisible joint and a lumpy, visible seam comes down to technique, timing, and knowing how each coat builds on the last .
This guide breaks down the entire process from start to finish. You'll learn how to mix your compound to the right consistency, embed tape without bubbles or wrinkles, and apply multiple coats that feather out to a flat, paint-ready surface. We cover the common mistakes that trip up beginners, like applying too much mud at once or sanding between coats too aggressively, and give you the fixes before problems start.
At Super Shooters, we've completed over 10,000 drywall and ceiling projects across the Sacramento Valley in our 30+ years of business. Our crews handle everything from new construction drywall to patching, texturing, and full room finishing. We wrote this guide based on techniques our team uses daily, the same methods that produce clean, professional results on job sites throughout Sacramento, Roseville, Folsom, Elk Grove, and the surrounding areas. Whether you're tackling a small repair yourself or deciding that you'd rather hand it off to a licensed contractor, this article gives you the knowledge to understand exactly what good mudding looks like.
What drywall mud is and which type to use
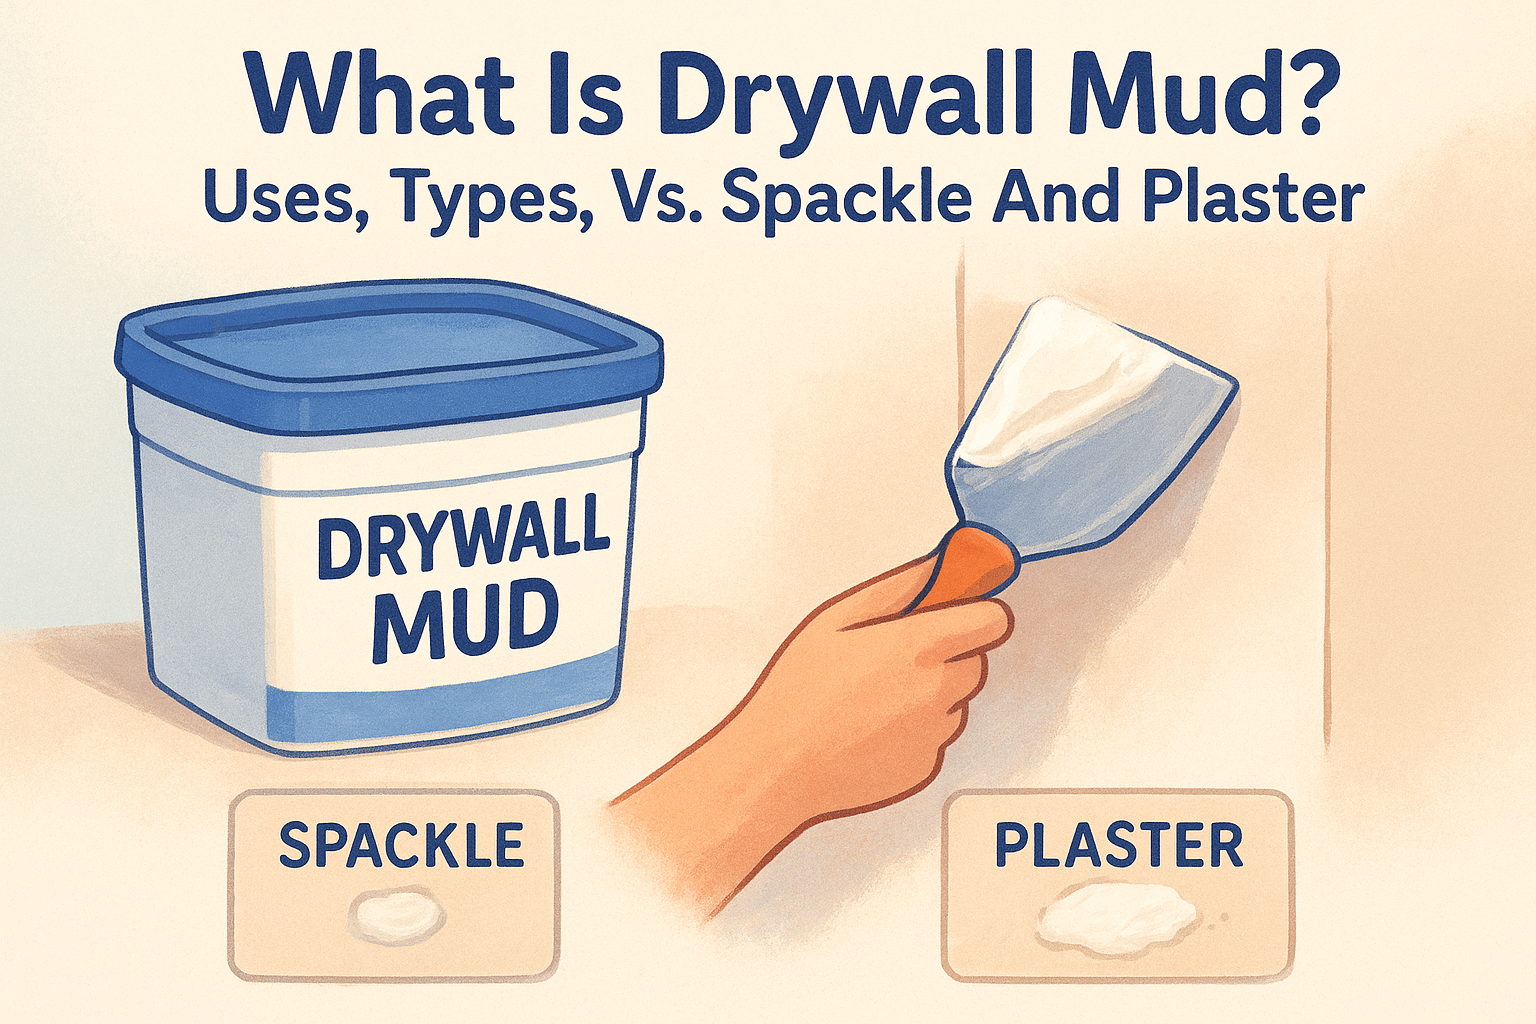
Drywall mud, formally called joint compound , is a gypsum-based paste that fills seams, covers fastener heads, and builds a smooth surface over taped joints. It comes in pre-mixed buckets or as a dry powder you mix with water. The pre-mixed versions are ready to use straight from the bucket, while setting-type powders harden through a chemical reaction rather than just drying out. Understanding the difference between these products before you start saves you a lot of frustration later.
The four main types of joint compound
Not every mud you find at the hardware store works the same way. Each formulation is engineered for a specific job, and using the wrong product at the wrong stage is one of the most common beginner mistakes. Here's a breakdown of what you'll encounter:
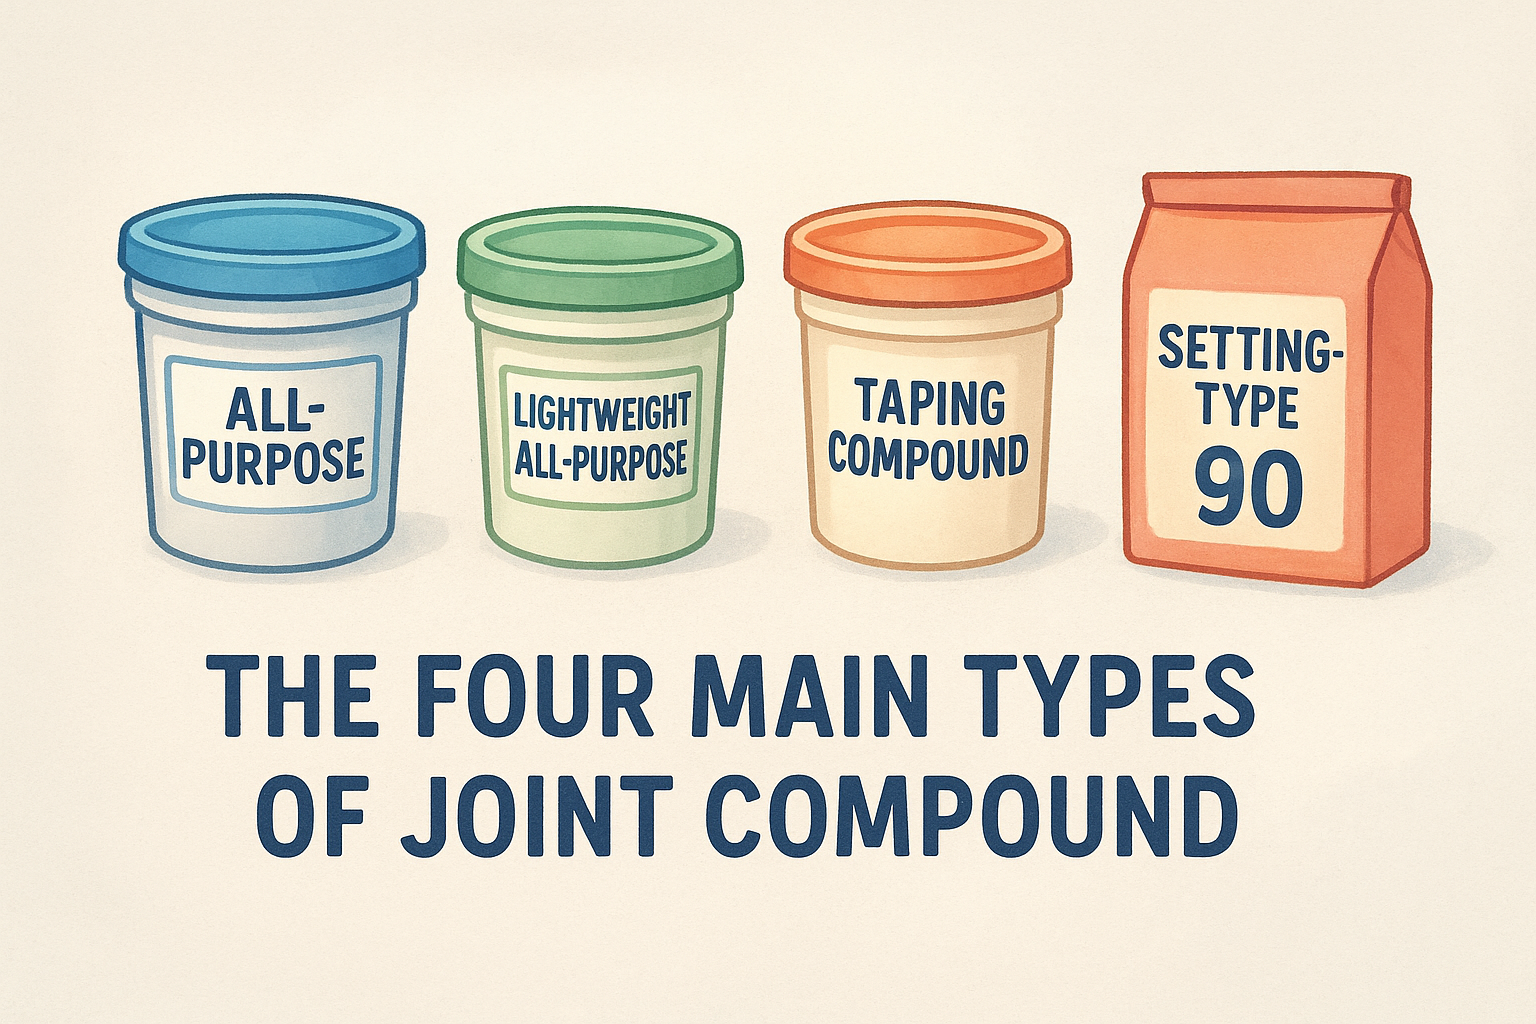
| Type | Form | Best Use | Key Trait |
|---|---|---|---|
| All-purpose | Pre-mixed | All three coats | Versatile, slower to dry |
| Lightweight all-purpose | Pre-mixed | Second and finish coats | Easier to sand, less shrinkage |
| Taping compound | Pre-mixed | First (tape) coat | Strong bond for embedding tape |
| Setting-type (hot mud) | Powder | Filling gaps, first coat | Sets by chemical reaction, very hard |
| Topping compound | Pre-mixed | Finish coat only | Ultra-smooth, weak bond |
Setting-type compound is labeled with a number like "20," "45," or "90" that tells you roughly how many minutes you have before it hardens. This is not drying time; it's a chemical set , so adding more water won't slow it down once mixing starts.
For beginners, a lightweight all-purpose compound handles all three coats without requiring you to buy multiple products.
Which mud to use for each coat
When you learn how to apply drywall mud for the first time, simplicity is your friend. A single bucket of lightweight all-purpose compound covers your tape coat, your filler coat, and your finish coat. It sands easily, shrinks less than standard all-purpose mud, and stays workable long enough for a beginner to adjust and smooth without rushing.
The one exception worth knowing involves damaged or heavily patched areas. If you're filling a gap wider than about 1/4 inch , pack that void with a setting-type compound first. Setting mud doesn't shrink as it hardens, which means the surface stays level and won't crack back open after it dries. Once the setting compound is fully hard, switch back to your lightweight all-purpose for all remaining coats.
A note on pre-mixed consistency straight from the bucket
Pre-mixed compound often arrives thicker than ideal for smooth application. Most experienced finishers thin it slightly before use, which the mixing section of this guide covers in detail. For now, just know that what you pull from a fresh bucket is not necessarily ready to go on the wall. The consistency you're aiming for changes between coats, and recognizing that early makes the rest of the process much clearer.
Tools and materials for clean, smooth results
Having the right tools on hand before you start is what separates a clean, controlled finish from a frustrating fight with the mud. You don't need a full professional kit, but a few specific items make a significant difference in how smooth and even your coats turn out. Cheap tools can work in a pinch, but flexible, quality knives hold an edge better and leave fewer drag marks across the surface.
The knives and trowels you need
The workhorses of any taping job are your drywall knives , also called finishing knives or broad knives. You'll want at minimum three sizes: a 4 to 6-inch knife for your tape coat and tight spots, a 10-inch knife for your filler coat, and a 12-inch knife for your finish coat. Each wider blade lets you feather the compound further out from the joint, which is what creates that gradual, invisible transition when you learn how to apply drywall mud correctly.
A flexible blade matters more than a rigid one. Stiff knives leave tram lines at the blade edges; flexible knives conform to slight wall imperfections and glide more smoothly.
| Tool | Size or Type | Purpose |
|---|---|---|
| Drywall knife | 4 to 6 inch | Tape coat, small patches |
| Drywall knife | 10 inch | Filler coat |
| Drywall knife | 12 inch | Finish coat, feathering |
| Corner bead tool | Standard | Embedding corner tape |
| Mud pan | 14 inch | Holds compound while working |
| Mixing paddle | Drill attachment | Blending compound to consistency |
| Sanding sponge | Fine grit | Light sanding between coats |
| Sanding screen | 120 to 150 grit | Final sanding before prime |
Mixing and finishing accessories
Beyond your knives, you need a mud pan and a mixing paddle fitted to a half-inch drill. The mud pan keeps a workable amount of compound within reach without exposing your entire bucket to air while you work. A mixing paddle conditions the mud to the right consistency in under two minutes, which is far more effective than trying to stir it by hand with a knife.
You'll also want plastic sheeting to cover floors and furniture, painter's tape to protect baseboards and trim, and a bright work light positioned at a low angle so you can spot ridges and thin spots as you go. A basic utility knife and a drywall rasp round out the kit for trimming tape and knocking down dried high spots before your next coat.
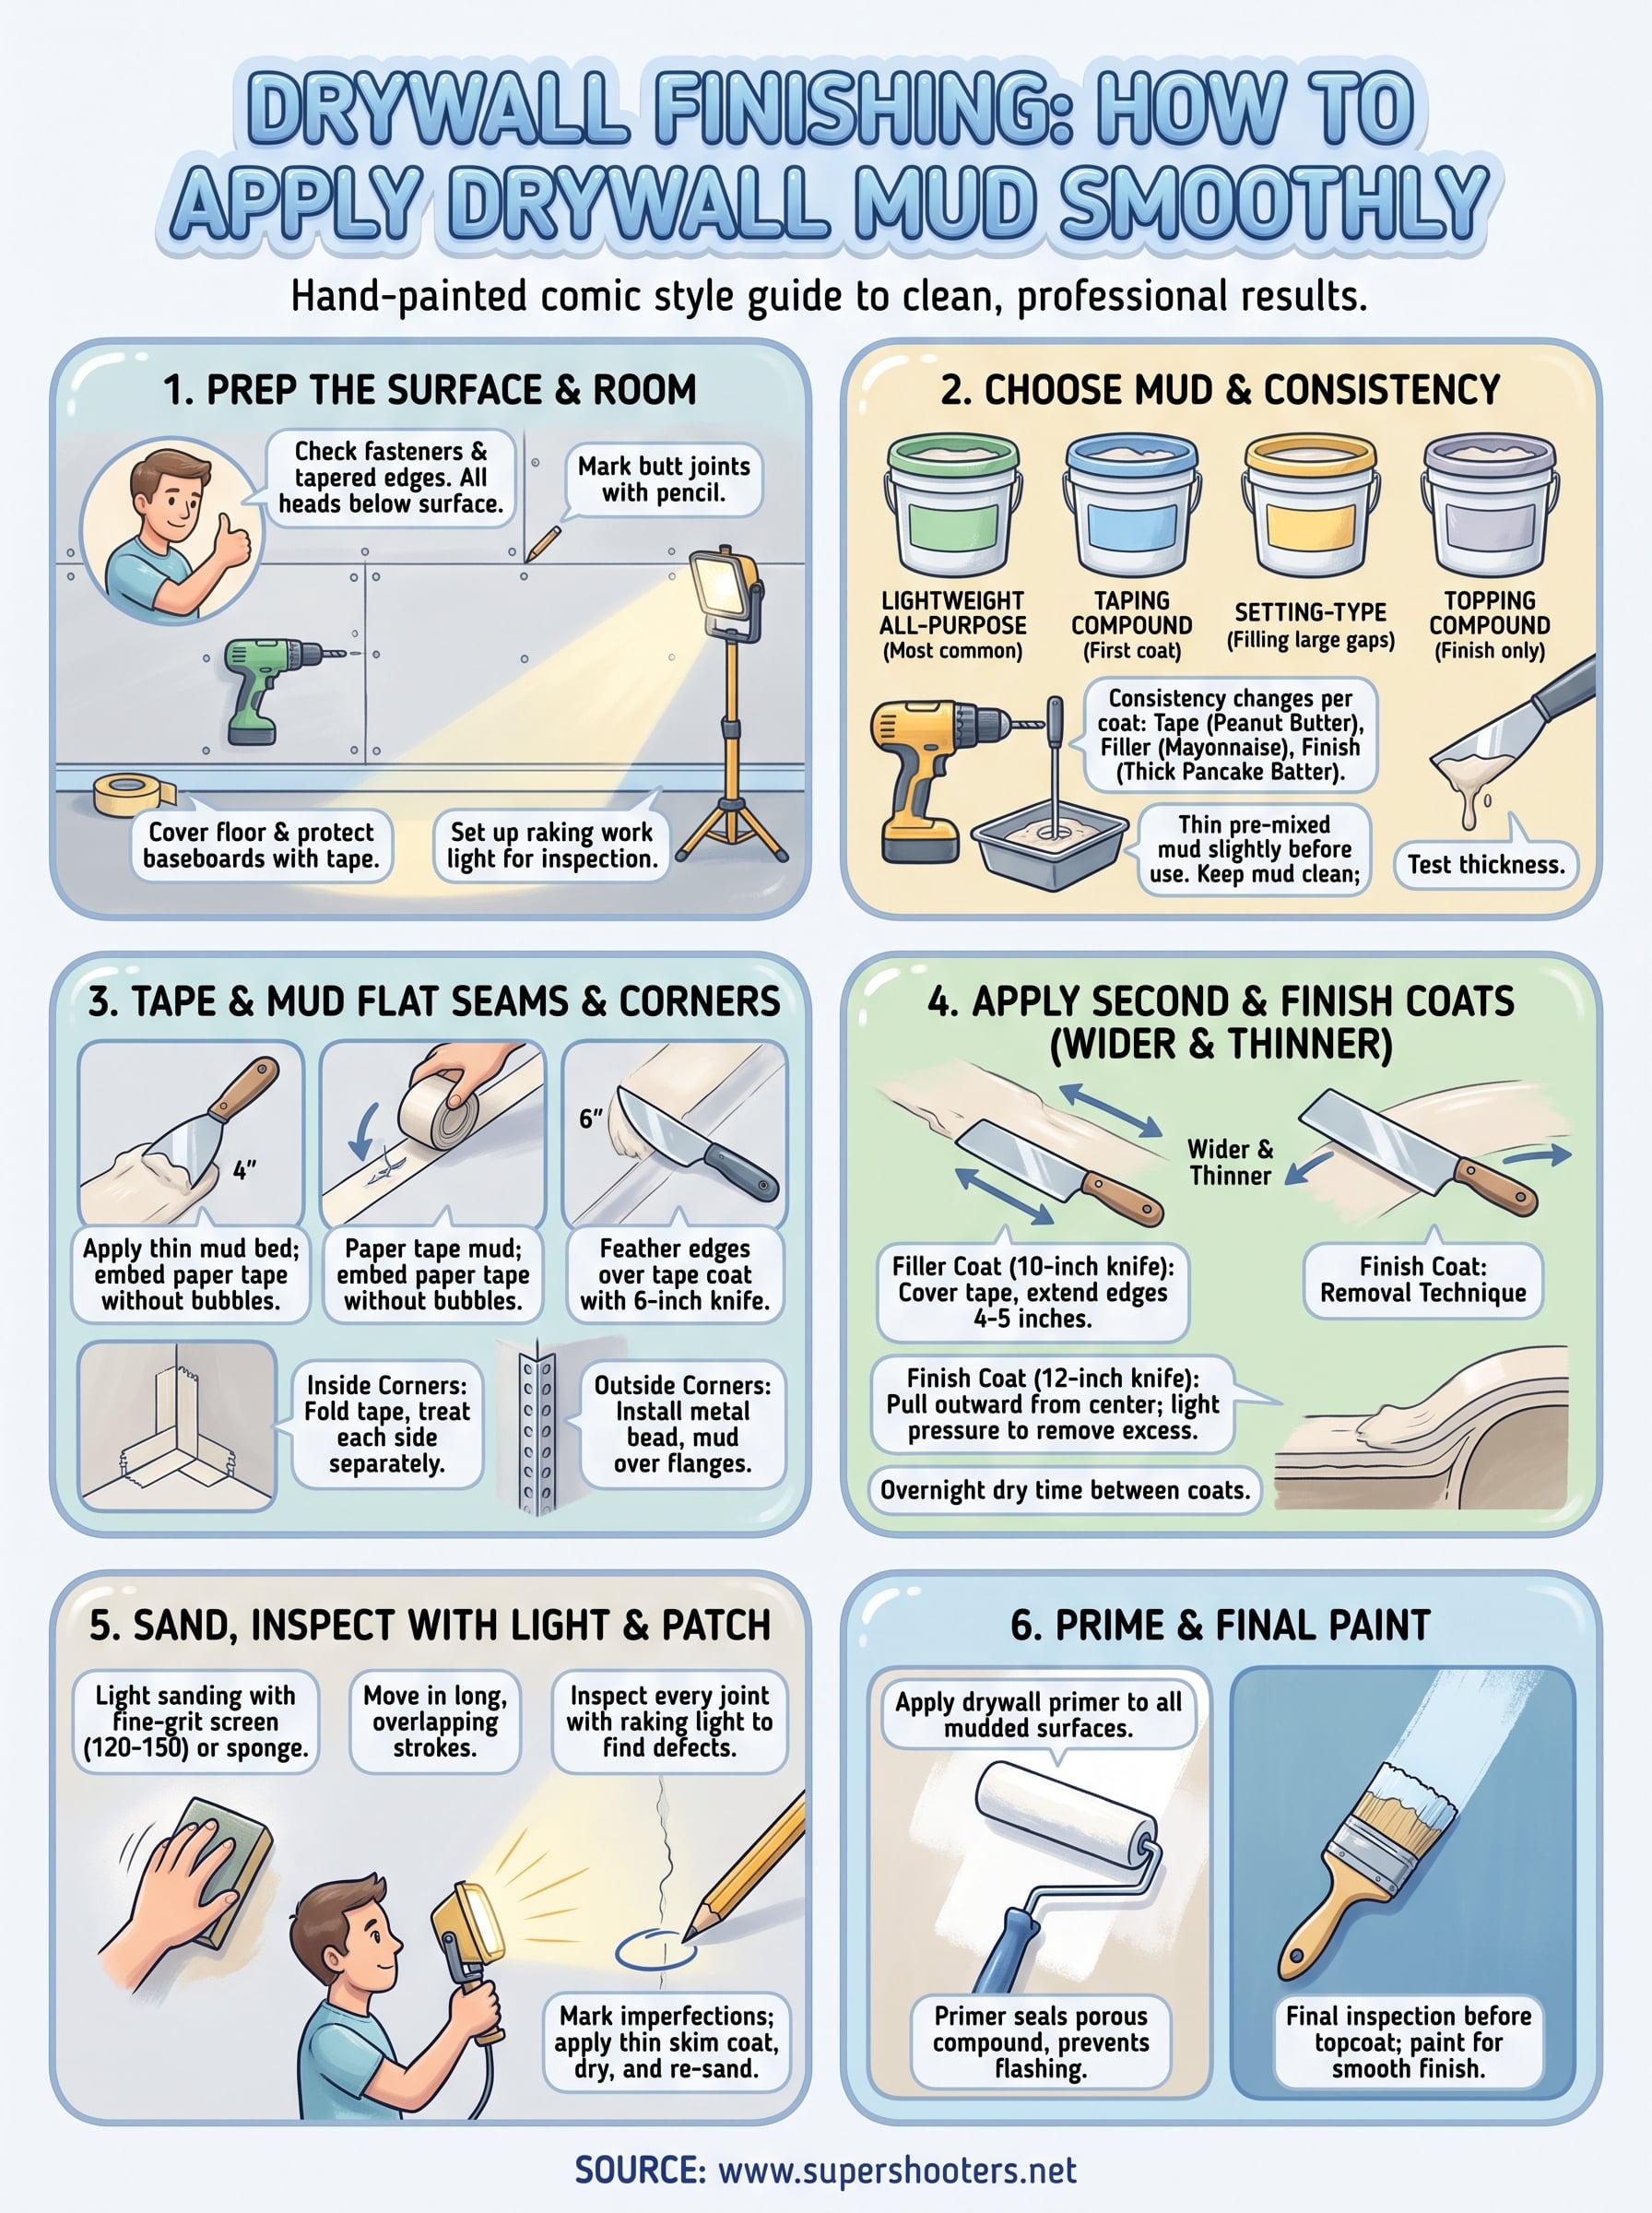
Prep the drywall and room before you start
Good prep work is what keeps small problems from turning into big ones once you're mid-coat with wet mud on your knife. Before you learn how to apply drywall mud properly, you need a surface that's ready to accept compound and a room set up to let you move freely and spot defects while you work. Skipping this step leads to tape that won't stick , bubbles over fasteners, and ridges you won't notice until the paint goes on.
Check the drywall surface for problems
Walk the entire surface and look for anything that will interfere with your first coat. Screw heads and nail heads must sit just below the paper face, not flush with it and not sticking out. Press each fastener with your thumb. If it moves or pops back, drive another screw about two inches away and remove the loose one. A screw that's proud of the surface will tear your knife and leave a drag mark across every coat.
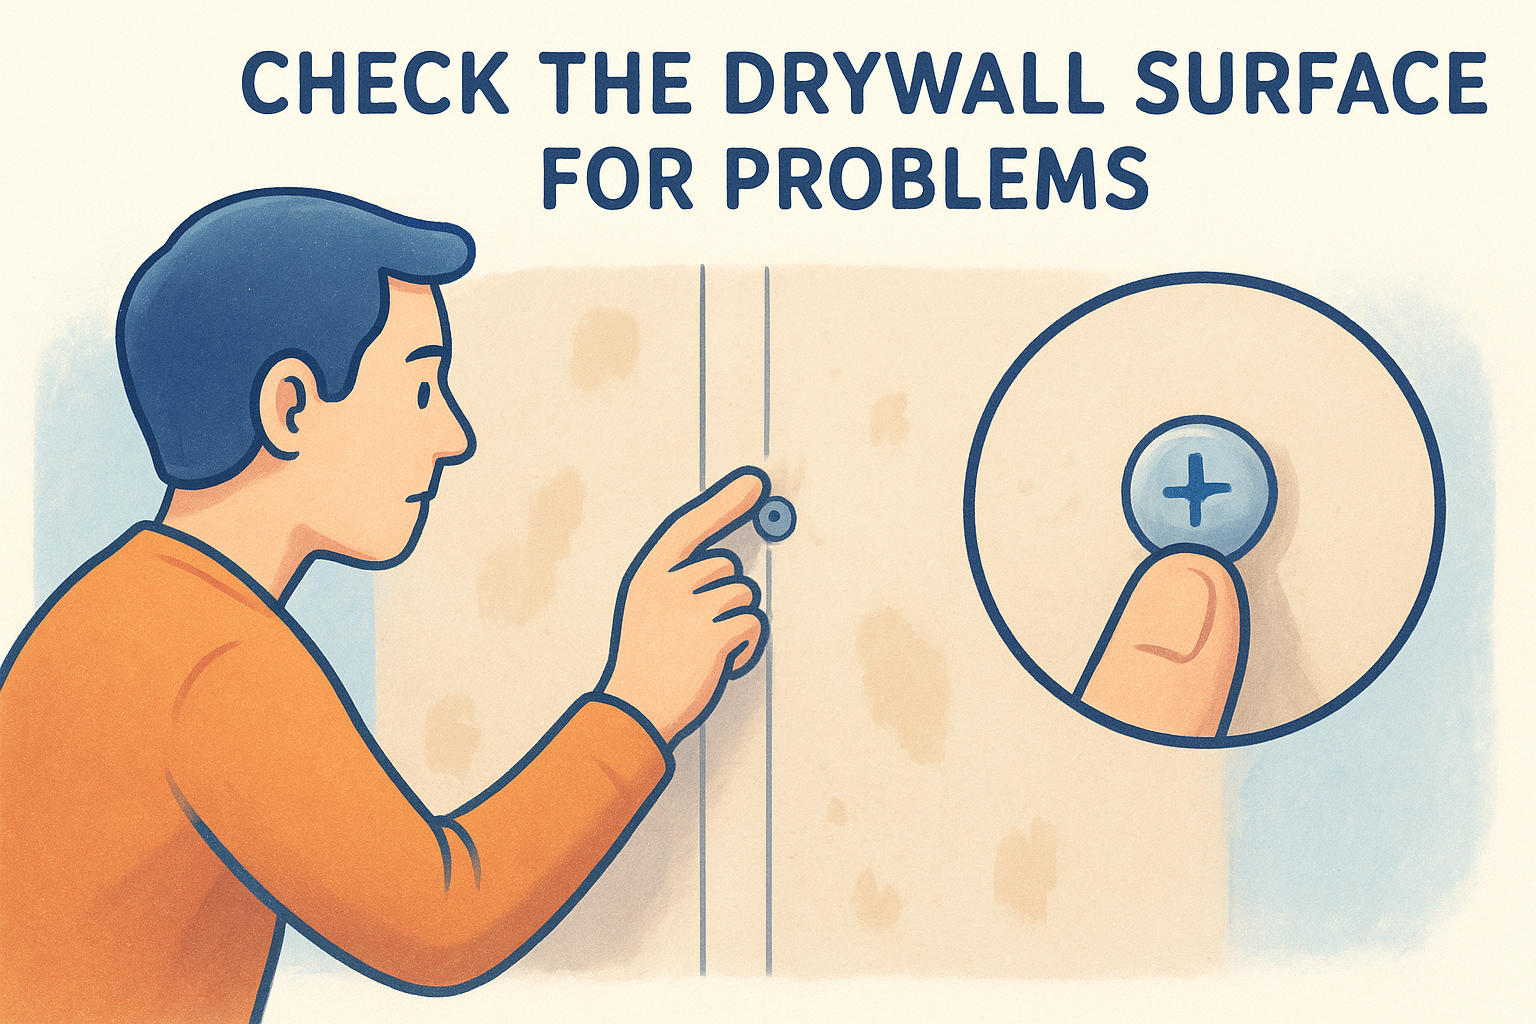
A fastener that sits even slightly above the surface will lift your blade and spread mud unevenly across the entire pass.
Check the factory tapered edges along the long sides of each drywall sheet. These edges are designed to create a slight recess where tape and mud sit without building up above the surrounding surface. Cut edges along ceilings, around windows, or at butt joints do not have this taper, so those areas need extra feathering later. Mark butt joints with a pencil so you remember to widen your coats on those spots.
Set up the room for clean, efficient work
Cover the floor completely with plastic sheeting or canvas drop cloths before you open a bucket. Joint compound dries hard and takes real effort to remove from flooring, especially porous surfaces like hardwood or grout lines. Run painter's tape along baseboards and window casings to protect finished surfaces from accidental tool drag.
Set up a bright work light aimed nearly parallel to the wall at a low angle. This raking light makes ridges, thin spots, and air pockets in your tape coat visible in real time rather than after everything dries. Position it so you can move it from wall to wall as you work. Keep a bucket of clean water and a damp rag nearby for wiping your knives between passes. Dry mud on a blade drags and scores the fresh compound, which creates extra sanding work later.
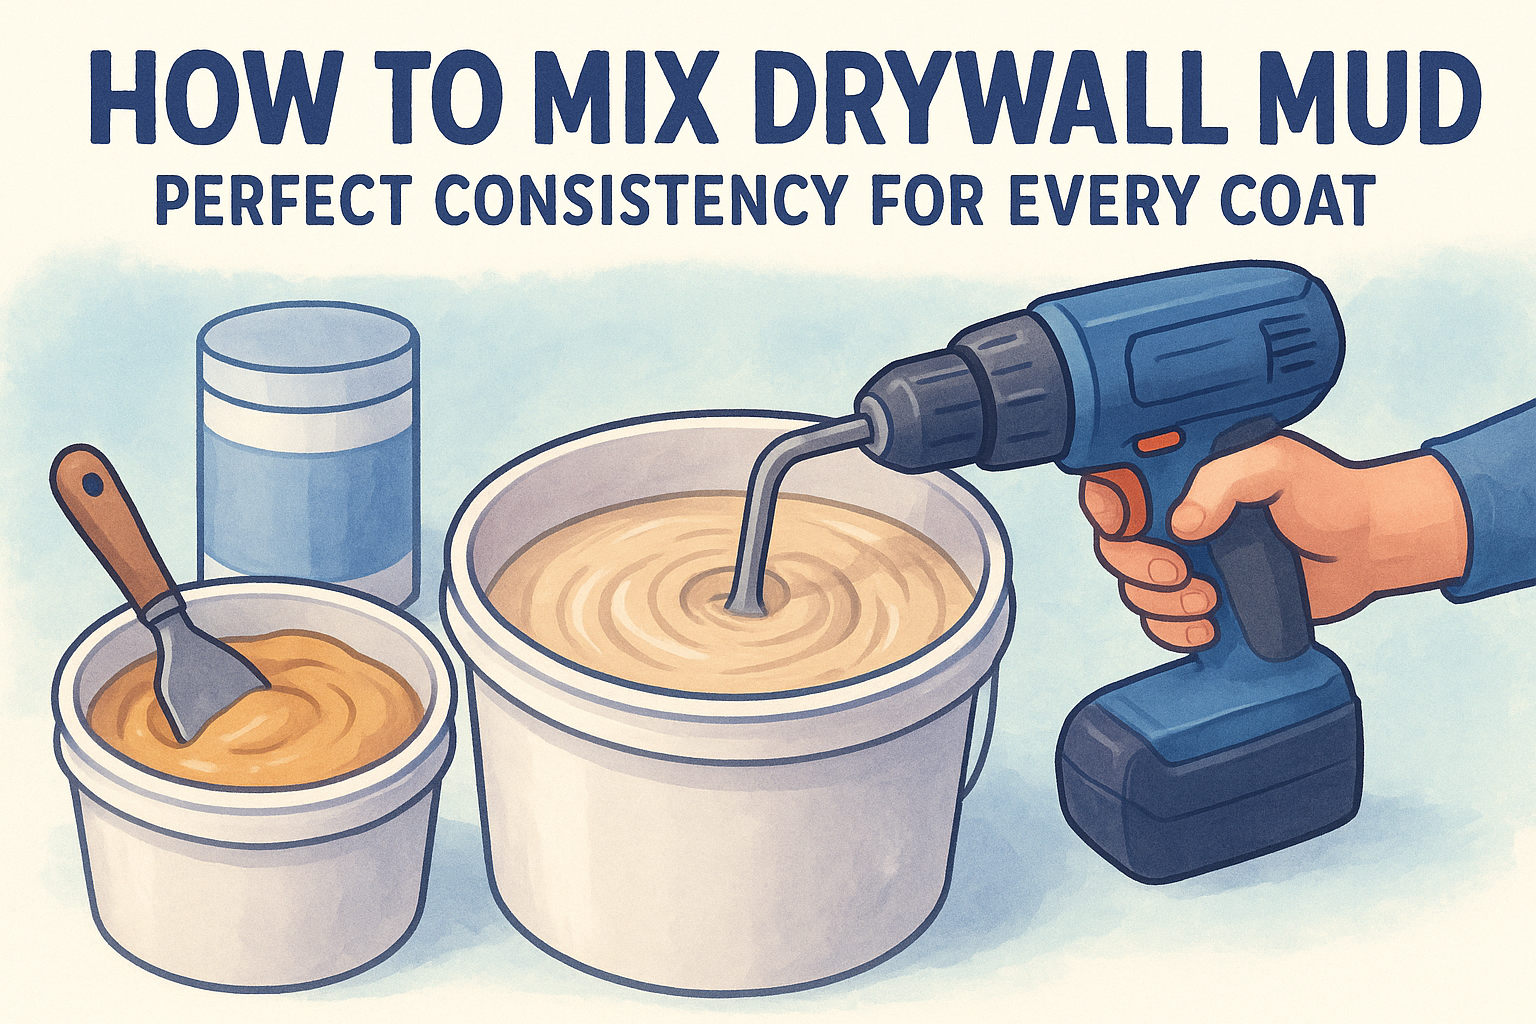
Mix and condition mud for each coat
Pre-mixed compound straight from the bucket is usually too thick to feather smoothly across a joint. The goal when you learn how to apply drywall mud correctly is matching the consistency of your compound to the specific job each coat needs to do. Thick mud tears paper tape and drags under your knife. Thin mud shrinks too much and won't bridge a seam cleanly.
Adjust thickness for each coat
Each coat serves a different purpose, so each coat needs a different consistency. Your tape coat should feel like thick peanut butter. It needs enough body to hold the tape firmly against the drywall without letting it float or slip. Your filler coat should be a little looser, closer to the texture of mayonnaise, so it spreads further under a wide knife without drag. Your finish coat should run even thinner, almost like a thick pancake batter, which lets you feather it out to a nearly invisible edge.
If your knife catches or drags while pulling across the joint, your mud is too thick for that coat.
Use a drill-mounted mixing paddle to condition the compound before every work session. Add water in small amounts , roughly a tablespoon at a time, and mix for 30 to 60 seconds before testing the consistency on your knife. Pour the water in at the edge of the bucket rather than directly onto the center of the mud so it incorporates evenly without trapping air pockets.
Keep mud clean between sessions
Contaminated compound causes more finish problems than almost anything else. Dried chunks from the rim of the bucket or a dirty knife will score your fresh coats and leave drag marks that require extra sanding. Before you pull compound from your bucket, skim off any dried crust from the surface and the sides with a clean knife and discard it.
After each work session, press a sheet of plastic wrap directly onto the surface of the mud before sealing the lid. This direct contact keeps air from reaching the compound and forming a hard skin overnight. When you return the next day, mix the mud again with your paddle rather than just stirring the top layer. Consistent texture throughout the entire bucket gives you more predictable results from the first pass to the last coat.
Tape and mud flat seams the right way
Flat seams run along the tapered factory edges of your drywall sheets and form the majority of joints you'll deal with on any room. When you learn how to apply drywall mud over these seams, the goal is a tight, bubble-free tape bed that holds firmly to the paper face and gives each following coat a stable foundation. A taped seam that lifts or bubbles in the first coat will telegraph through every coat on top, so getting the tape coat right is the most important step in the entire process.
Apply the tape coat without air pockets
Start by loading your 4 to 6-inch knife with a modest amount of compound and spread a thin, even layer directly over the seam. This bed should be just thick enough to wet the tape, roughly 1/8 inch deep , running the full length of the joint. Cut your paper tape to length before you start so you're not fumbling with a roll while mud is drying on the wall.
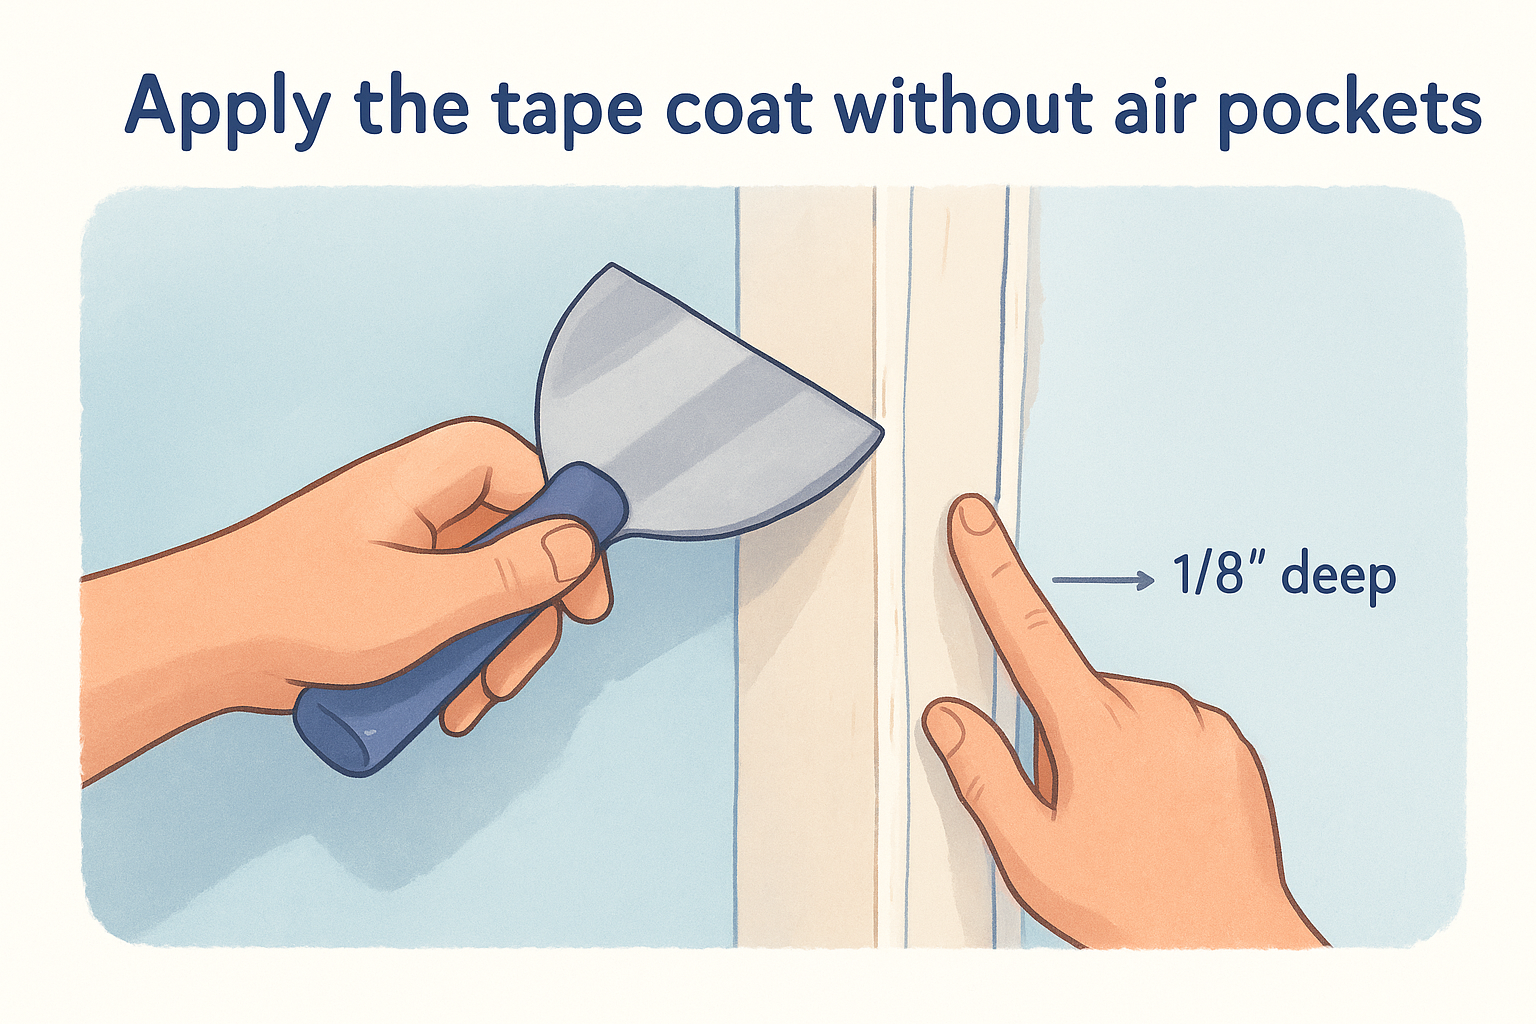
Press the tape into the wet mud with your fingers, centering it over the seam. Then hold your knife at a shallow 15 to 20-degree angle and draw it firmly down the tape from top to bottom in a single pass. Apply enough pressure to squeeze the compound out from behind the tape without wiping it completely bare underneath. You need a thin, continuous layer of mud between the tape and the drywall at all times.
If the tape floats or wrinkles under your knife, you either have too much mud behind it or you're not applying enough pressure on the blade.
Feather the edges on flat seams
Once the tape sits flat, apply a thin layer of compound over the tape to fill the paper weave. Use your 6-inch knife and keep the cover coat thin and even , spreading it an inch or two on each side of the tape. A heavy layer over the tape coat will crack as it dries because there's nothing solid behind it to support the thickness.
Feathering works by gradually thinning the compound toward both outer edges so the transition from mud to bare drywall stays gradual rather than abrupt. On factory-tapered edges, the recess gives you natural room to blend. On butt joints , where two cut edges meet flush, widen your feathering to at least 10 inches on each side to keep the joint invisible once paint goes on.
Mud inside corners and outside corners cleanly
Corners are where most beginners struggle when figuring out how to apply drywall mud , because a knife can only work one wall at a time. The key is to treat each side of the corner as its own separate coat, let one side set up before touching the other, and use the right materials so the edges stay crisp and straight without cracking or peeling over time.
Inside corners: paper tape and a light touch
Inside corners form where two walls meet or where a wall meets a ceiling. You'll use paper tape folded along its center crease to cover these joints, not mesh tape, because paper holds the angle without tearing and stays flexible as the house settles slightly over time.
Apply a thin bed of compound to both sides of the corner with your 4 to 6-inch knife before you place the tape. Fold the paper tape along its pre-scored center crease and press it into the corner with your fingers. Then use your knife to embed each side separately, starting with one wall and pulling downward, then switching to the other. Keep your blade nearly parallel to the wall surface so you don't dig into the opposite side.
Let one side dry for at least 30 minutes before going back over the opposite side, or your knife will drag wet mud from wall to wall and pull the tape loose.
After both sides are dry, apply a thin finish layer to each side with a 6-inch knife , feathering the compound two to three inches out from the corner onto the flat wall surface.
Outside corners: metal bead and straight edges
Outside corners take more abuse than inside corners, so they need a metal corner bead rather than tape alone. Nail or screw the bead directly over the corner with the flanges flat against each wall face. Check it with a level before you secure the second side.
Apply compound over both flanges using your 6-inch knife, pulling away from the bead's nose onto each wall. The nose of the bead acts as your depth guide, so keep your blade riding along it to maintain a flat, consistent surface. Feather each side out four to six inches from the corner. Your second and third coats will widen that feathered edge further, blending the bead smoothly into the surrounding wall surface without a visible ridge.
Apply second and finish coats with fewer ridges
Your tape coat locked the tape down and sealed the seam. The second and third coats exist to blend that seam invisibly into the surrounding wall surface. Each coat needs to be wider and thinner than the one before it, which is how the gradual feathering effect gets built up without creating a visible hump over the joint.
Widen your filler coat with a bigger knife
Switch to your 10-inch knife for the filler coat. Load the blade with a moderate amount of compound and pull it across the joint in one long, steady stroke. The goal is to cover the tape completely and extend the edges at least four to five inches on each side of the center line. A wider coat means a more gradual slope, which is what keeps the joint from reading as a ridge under flat or eggshell paint.
Keep your knife angle consistent at roughly 20 to 25 degrees from the wall surface. A steeper angle digs into the drying mud at the edges and leaves lines. A shallower angle spreads the compound too thin in the center before the edges feather out. After your first pass, run the knife back along the same stroke with lighter pressure to knock down any ridges you left on the first pull. Let this coat dry completely, typically overnight , before moving to your finish coat.
Never apply your finish coat over a filler coat that feels cool to the touch, which means it still holds moisture and will shrink further under the new layer.
Finish coat technique for a flat, smooth surface
When you learn how to apply drywall mud for the finish coat, think in terms of removal rather than application. You're laying a thin, wet layer onto the wall and then pulling most of it back off with your 12-inch knife , leaving behind just enough compound to fill any surface texture from the previous coat. This approach leaves far fewer ridges than trying to lay a perfectly smooth layer in a single pass.
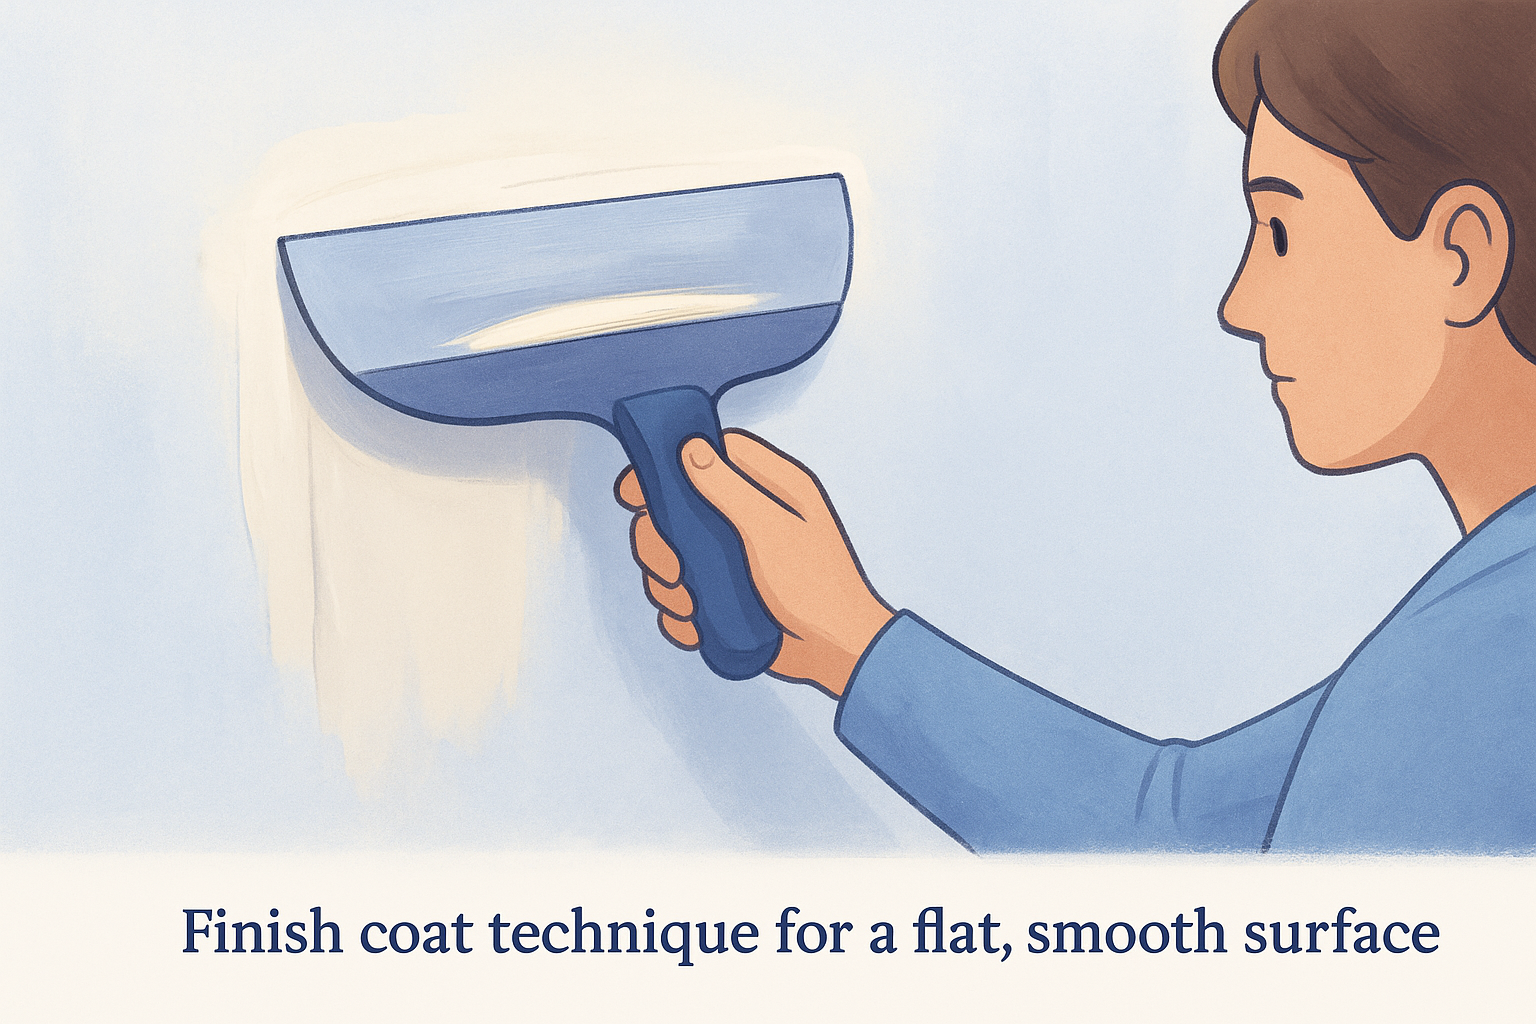
Start each pass from the center of the joint and pull outward toward the feathered edges rather than running the full length of the wall in one stroke. Overlap each pass by about half the blade width. Use very light pressure on the return stroke to remove the excess without digging back into the coat underneath. Wipe your knife clean on the mud pan edge after every single pass so dried bits don't score the fresh surface.
Sand, inspect with light, and prime for paint
Once your finish coat is completely dry, the final steps determine whether all the work you put into learning how to apply drywall mud actually shows in the finished surface. Sanding, inspecting, and priming are not afterthoughts. They're the stage where small mistakes become obvious and where catching them early costs you minutes instead of hours.
Sand with the right grit and the right pressure
Your finish coat needs light sanding with 120 to 150 grit sanding screen rather than aggressive sanding with coarse paper. The finish coat is thin, and heavy pressure cuts through it quickly, leaving low spots you'll need to fill again. Hold your sanding block flat against the wall and move it in long, overlapping strokes that follow the length of the joint rather than scrubbing in circles.
Between your filler coat and finish coat, use a fine-grit sanding sponge instead of a screen. The sponge knocks down ridges and blade lines without removing the underlying coat. Wipe the surface with a dry cloth after each sanding pass to clear the dust before you inspect.
Never sand a coat that still feels cool or slightly damp to the touch, because wet compound loads the paper and tears rather than smoothing.
Inspect every joint with a raking work light
After sanding, position your work light at a sharp, low angle to the wall so the beam rakes across the surface rather than shining straight at it. This raking light throws every ridge, hollow, and scratch into sharp relief. Marks you completely missed under normal overhead lighting will show up clearly under raking light.
Walk slowly along each wall and mark any defects with a light pencil circle . Common problems at this stage include blade lines from the finish coat, thin areas where the tape texture shows through, and small pinholes along the center of the joint. Apply a skim coat of thinned compound to each marked area, let it dry fully, and sand again before moving to prime.
Prime the surface before paint
Bare joint compound is porous and absorbs paint unevenly, which creates visible dull spots called flashing on the finished wall. Apply a coat of drywall primer to all mudded surfaces before any topcoat. Roll the primer on and cut in around trim with a brush. Let it dry completely, give the surface one final inspection under raking light, and address any remaining defects before your paint goes on.
Wrap-up and what to do next
Now you know how to apply drywall mud from the first tape coat through the final sanding pass. The process follows a clear sequence: prep the surface, mix your compound to the right consistency for each coat, embed tape without bubbles, and build wider and thinner with every pass. Each coat does a specific job , and respecting that sequence is what produces a flat, paint-ready result.
Most homeowners find the technique manageable on small repairs but run into trouble on full rooms, especially when dealing with butt joints, ceiling seams, or patches that need to blend into existing texture. If your project involves more than a few square feet, getting a professional to handle it saves you time and avoids costly rework. Our team has finished over 10,000 projects across the Sacramento Valley. Check out our drywall repair and patching service to get a free estimate.
Recent Posts