September 10, 2026
Drywall Repair How-To: A Step-by-Step Guide for Any Hole
Every house collects them eventually: a doorknob dent in the hallway, a hairline crack over the doorframe, a fist-sized hole from moving a dresser. If you've searched drywall repair how to because you're staring at damage and don't know where to start, you're in the right place. Small holes, hairline cracks, and gaping tears each need a different fix, and using the wrong approach usually means doing the job twice.
This guide walks through patching drywall by damage type, from a nail hole you can fill in five minutes to a hole big enough to need a scrap of new drywall and joint tape. We'll cover the tools worth buying, the compound that actually sands smooth, and the drying times that make or break a paint-ready finish.
We've spent over 30 years and 10,000-plus projects repairing walls across the Sacramento Valley, so these tips for patching drywall come from what actually holds up, not just what looks fine on day one. If your damage turns out bigger than a weekend project, or you're dealing with an older popcorn ceiling that might need professional removal instead of a patch, that's exactly the kind of call our crew handles every day.
What you need before you start a drywall repair
Grabbing random supplies from under the sink is how most DIY drywall repairs go sideways. Matching your tools to the damage matters more than having a full toolbox, and a lot of the frustration people run into with drywall patching tips they find online comes from using the wrong compound or skipping the primer step. Before you touch the wall, take five minutes to sort what you actually need by the size of the hole you're fixing.
Tools worth keeping on hand
Here's the short list of tools every DIYer needs, covering roughly 90% of residential drywall repairs, from a nail hole to a hole the size of a dinner plate.
| Tool | What it's for |
|---|---|
| 4-inch and 6-inch putty knives | Spreading and feathering compound |
| Drywall saw or utility knife | Cutting out damaged sections |
| Sanding sponge (medium/fine grit) | Smoothing dried compound |
| Mud pan | Holding compound while you work |
| Stud finder | Locating framing for larger patches |
| Drop cloth or old sheet | Catching dust and debris |
You don't need every item for a single nail hole, but if you're patching more than one spot in the same afternoon, having all six on hand saves you multiple trips back to the garage.
Materials that match the size of the damage
Joint compound isn't one-size-fits-all, and knowing which compound suits which repair is where a lot of first-timers waste money. Lightweight, pre-mixed compound (the kind sold in tubs) works fine for small dents and hairline cracks because it dries fast and sands easily. Setting-type compound, the powder you mix yourself, sets up harder and holds better for taped seams and larger patches, but it dries in as little as 20 minutes, so you have to work quickly and won't get a second chance to spread it slowly.
Use lightweight compound for anything smaller than a doorknob dent, and setting-type compound for anything you're taping.
Outside of compound, stock up on self-adhesive mesh patches for small to medium holes, paper joint tape for taped seams, a scrap of drywall matching your wall's thickness (usually 1/2 inch) for larger cutouts, and a can of drywall primer. Skipping primer is the single most common reason patches show up as a slightly different sheen once the wall is painted, even when the color match is perfect.
When to test before you sand
Before you start sanding into an older wall, especially in a house built before the 1980s, stop and think about what's actually in that texture. Popcorn ceilings and some older wall textures from that era can contain asbestos, and sanding disturbs it in a way that's genuinely dangerous to breathe. If your home was built before 1980 and you're not sure what's under that texture, get asbestos testing done before you start scraping or sanding. It's a cheap test and it removes all the guesswork.
Getting this part right upfront saves you from redoing a repair a week later because the compound didn't hold or the primer step got skipped. If your project turns out to involve older texture that needs testing or removal rather than a simple patch, that's a job better handled by a licensed crew than a weekend project, and it's exactly the kind of work our team at Super Shooters handles across the Sacramento Valley.
Step 1. Fix small dents, nail holes, and cracks
Small damage is the easiest category to fix, and it's also where most people overwork the repair. A single nail hole or doorknob dent doesn't need mesh, tape, or a trip to the hardware store for drywall scraps. It needs a dab of compound, a putty knife, and about ten minutes of your time spread across two visits to the wall.
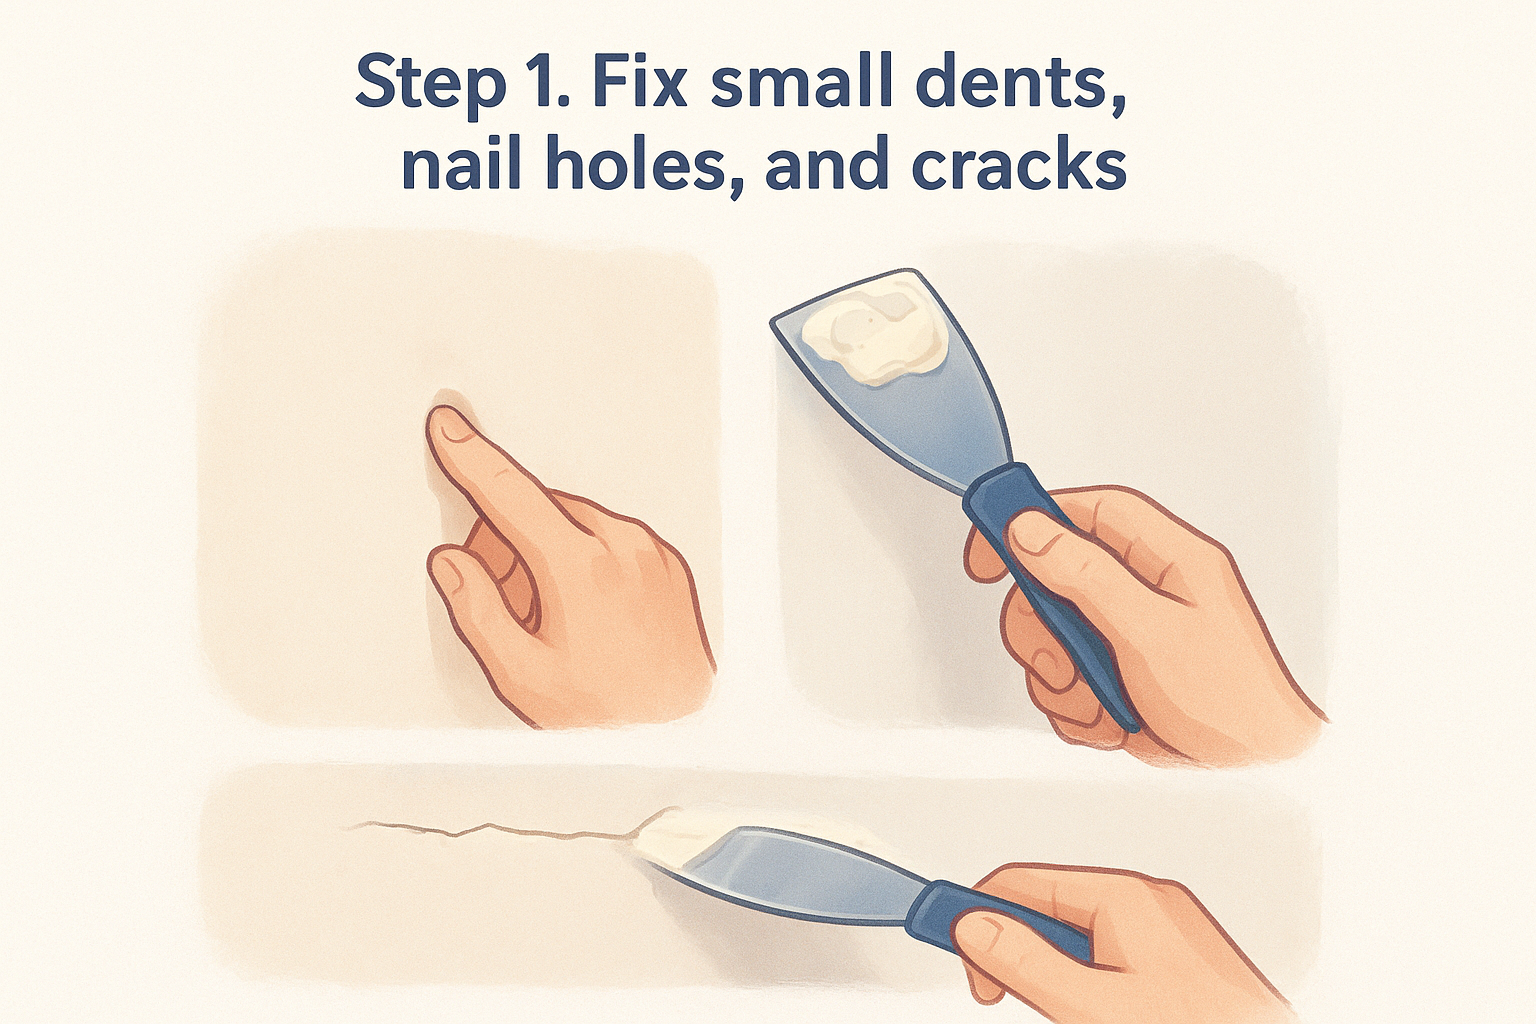
Filling dents and nail holes
Start by pressing the edges of the hole inward with your thumb or the handle of your putty knife. Loose paper or crumbled gypsum around the edge won't hold compound, so knock it flat before you fill anything. Load a small amount of lightweight compound onto your 4-inch putty knife and press it into the hole at an angle, dragging across so the blade scrapes off the excess rather than leaving a mound. Let it dry fully, usually two to four hours for lightweight compound, then check it against the wall with your hand. If you can feel a dip, add a second thin coat rather than one thick one. Thick single coats crack and shrink as they dry, which is exactly what you're trying to avoid.
A thin second coat beats one thick coat every time, because thick compound shrinks and cracks as it cures.
Repairing hairline cracks
Repairing drywall cracks so they don't come back works differently than filling dents, because cracks open and close slightly with temperature and humidity, especially over doorframes and windows. Widen the crack slightly with the corner of your utility knife, just enough to give the compound something to grip rather than sitting on the surface. Apply compound directly into the crack, feather it out two to three inches on either side with your 6-inch knife, and let it dry. For cracks longer than about eight inches, press a thin strip of paper joint tape into a first coat of compound before it dries, then cover with a second coat once that's set. This keeps the crack from reopening within a few months, which is the single most common complaint with skipped-tape crack repairs.
Sand lightly with a fine-grit sponge once everything is fully dry, wipe away the dust, and the spot is ready for primer. These small fixes are the fastest wins in any drywall repair, and getting them right builds the same technique you'll use on bigger patches next.
Step 2. Patch small holes with a self-adhesive patch
Anything from a quarter-sized hole up to about six inches across is the sweet spot for a self-adhesive mesh patch , one of the more useful drywall patching tips for anyone patching a small hole in the wall themselves instead of cutting into the wall or tracking down a scrap of matching drywall. These patches are fiberglass mesh with an adhesive backing, and they bridge the gap so compound has something to grip instead of falling straight through into the wall cavity.
Picking the right patch
Before anything else, measure the hole and grab a patch that overlaps it by at least an inch on every side. Patches come in a few standard sizes, usually 4-inch, 6-inch, and 8-inch squares, and buying one size too small is the most common reason this repair fails, so it's worth comparing patching kits by hole size first. If your hole is closer to eight inches across, you're pushing the upper limit of what mesh alone can support, and Step 3 is probably the better route.
Sticking it down and mudding over it
Clean any loose paper or gypsum crumbs from around the hole, then press the patch firmly against the wall so the adhesive grips flat with no bubbles or curled edges. Once it's set, load your 6-inch putty knife with setting-type compound and spread a thin coat directly over the mesh, feathering the edges out two to three inches beyond the patch itself.
The mesh only holds if compound covers every square inch of it, so don't rush the first coat.
Let that first coat set according to the package (often 20 to 45 minutes for setting-type compound), then apply a second, wider coat that feathers even further out, blending the edge into the surrounding wall so there's no visible ridge.
Drying and checking your work
Here's the quick sequence to follow once the patch is stuck down:
- First coat directly over the mesh, feathered 2-3 inches out
- Let it set fully before touching it
- Second coat feathered wider than the first
- Run your hand over the dried surface checking for ridges or dips
- Add a thin third coat only if needed
Giving each layer time to fully harden, rather than sanding a still-soft coat, is what keeps this repair from telegraphing through fresh paint months later.
Step 3. Cut out and support larger holes
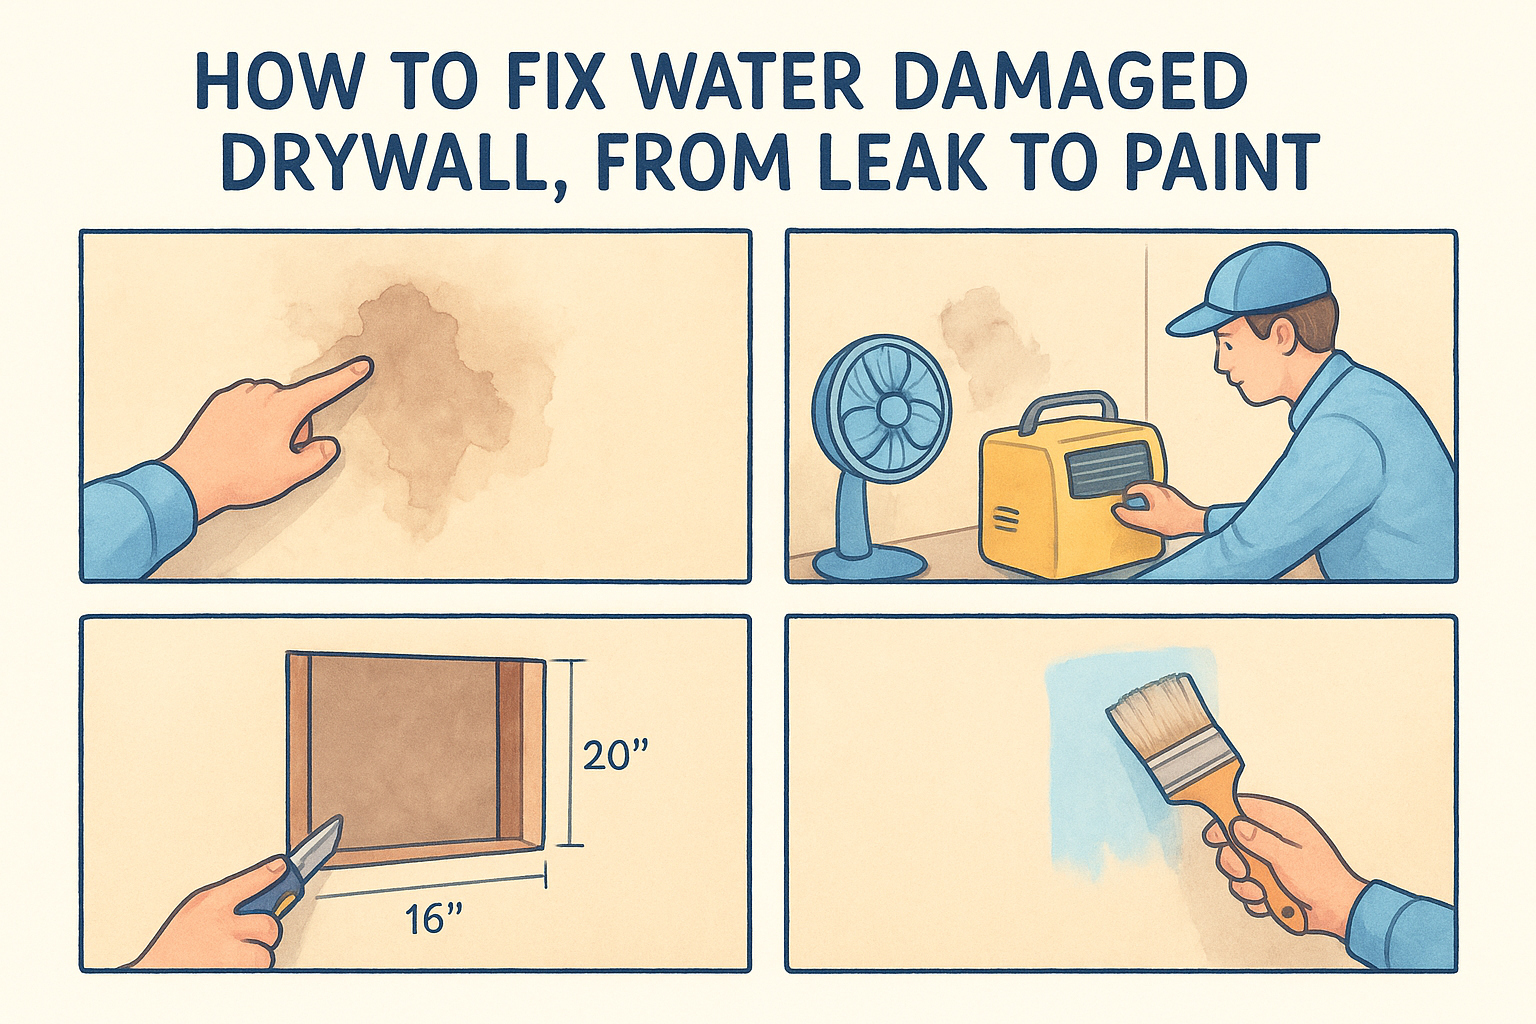
Once a hole gets bigger than about six inches, mesh patches stop being reliable. Larger holes need a solid backing behind the patch, not just a bridge of fiberglass mesh, because there's nothing left inside the wall cavity to hold compound in place. This step is where a lot of drywall repair how to guides get vague, but the process is straightforward once you know the sequence used for a cleat-backed or California patch on a large hole: square up the damage, add support behind it, then cut a piece of new drywall to match.
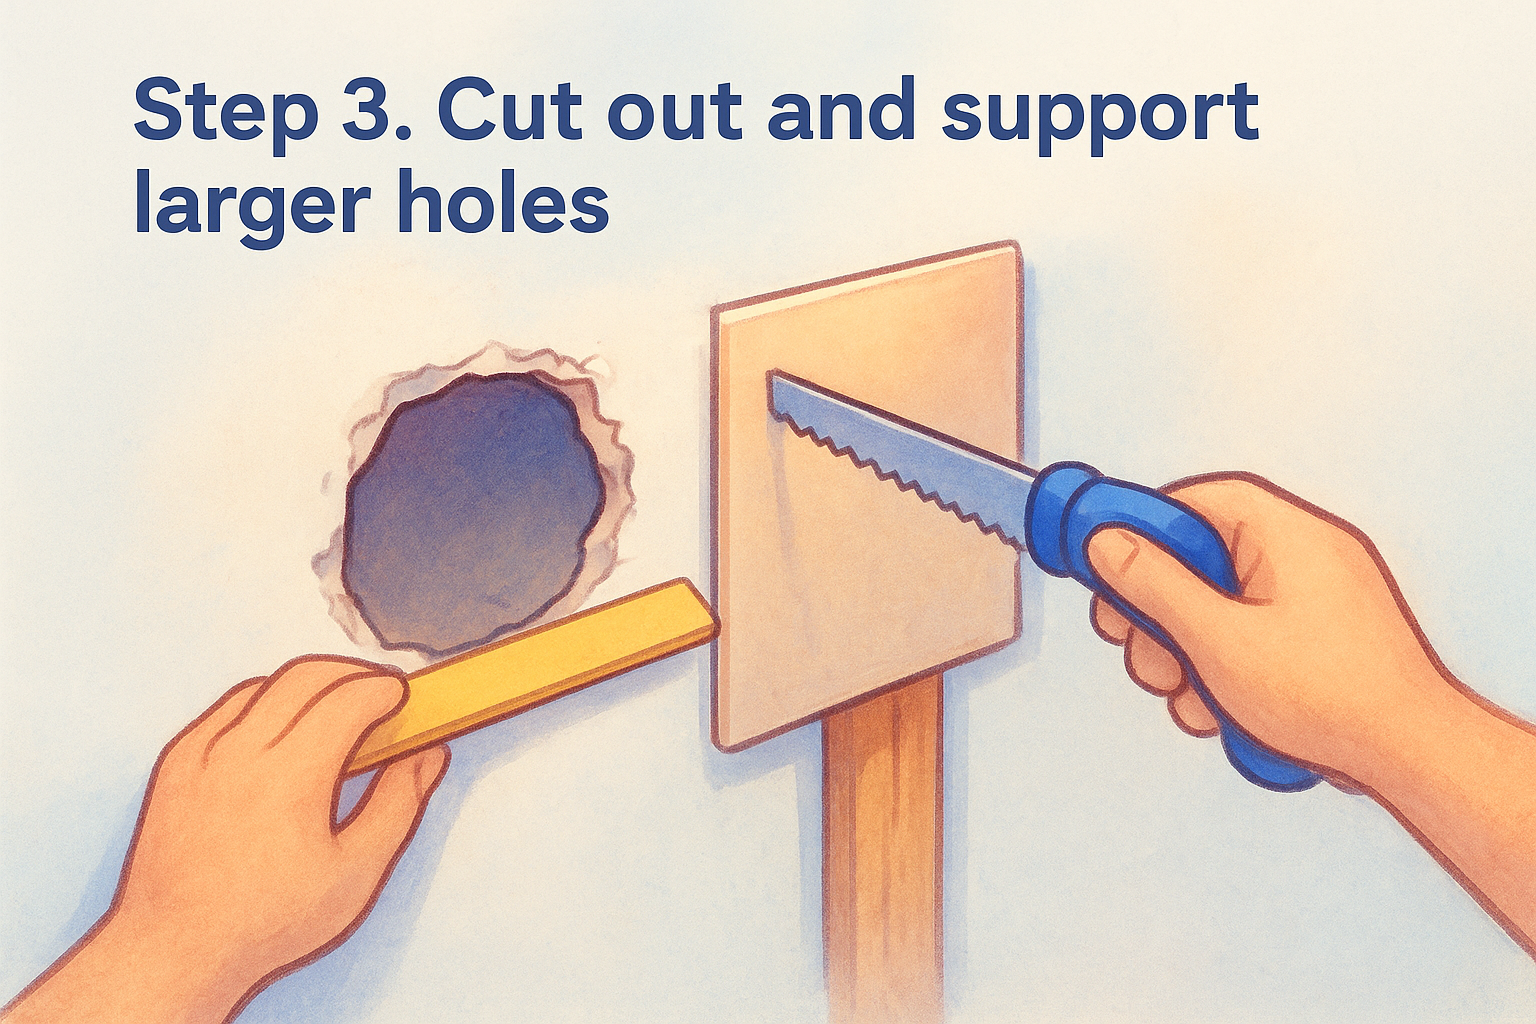
Squaring up the hole
Start by tracing a straight-edged square or rectangle around the damaged area, a few inches larger than the hole itself so you're cutting into solid material on all sides. Use a level or a framing square to keep the lines straight, then cut along them with a drywall saw. A clean rectangle is far easier to patch than an irregular hole, and it gives you a straight edge to butt your new drywall piece against later.
Adding backing behind the hole
If the hole falls between studs, which most do, you'll need something inside the wall for the patch to screw into, either wood backing or metal clips that anchor a patch without studs. Cut two lengths of 1x2 or 1x3 wood scrap a few inches longer than the hole's height. Slide each piece halfway into the opening so it sits behind the drywall edge, then screw through the existing wall into the wood on both sides, pulling it snug against the back of the drywall. This gives you a ledge running along the top and bottom (or sides) of the opening for the new piece to attach to.
Without backing behind the hole, your patch has nothing to hold onto once compound and tape are added.
Cutting the replacement piece
Measure the opening and cut a scrap of drywall matching your wall's thickness, usually 1/2 inch, to fit snugly inside it. Here's what to check before you screw it in:
- Thickness matches the surrounding wall exactly
- Piece fits the opening with no more than a 1/8-inch gap on any edge
- Backing strips are screwed tight with no wobble
- Cut edges are clean, not crumbled or torn
Screw the new piece into the backing strips, keeping screw heads slightly recessed without tearing the paper face. That gives you a flush, supported surface ready for tape and compound in the next step.
Step 4. Install the patch and tape the seams
With the new drywall screwed into place, the seams around its edges are the weak point in any drywall repair how to project, and this is the step where rushing shows up as a hairline crack six months later. Choosing paper joint tape over the self-adhesive mesh you used for smaller holes is right here, because paper bends into the seam and locks in place under compound rather than sitting on top of it. Setting-type compound works best for this stage since it hardens fast and holds the tape tight while you move on to feathering.
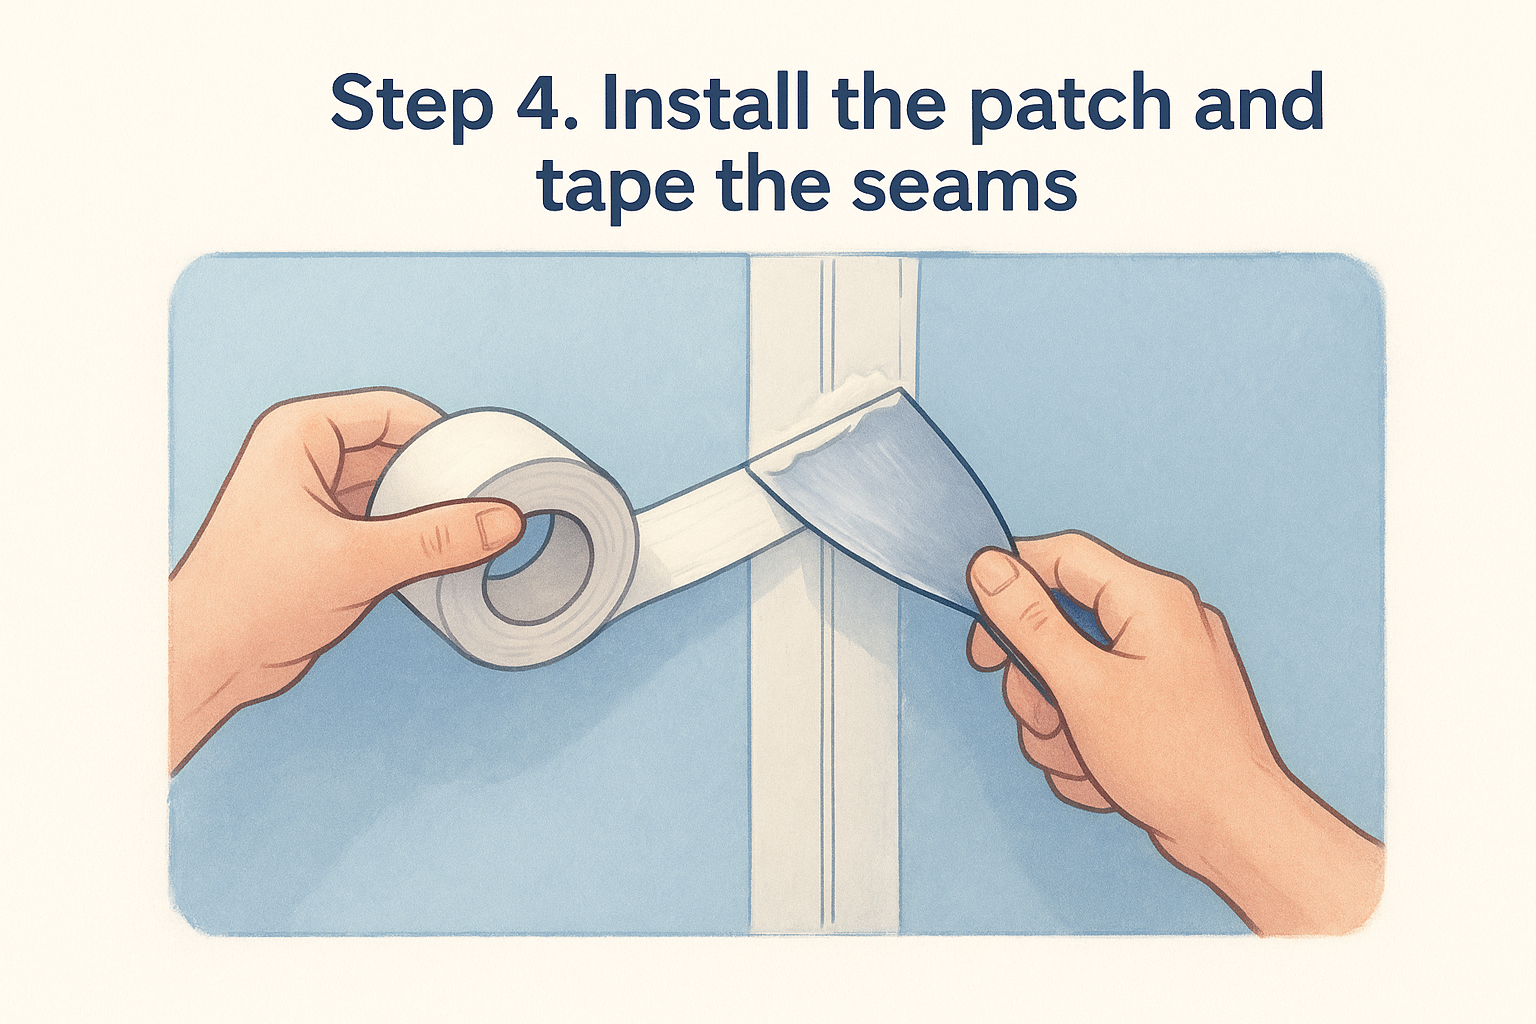
Embedding the paper tape
Load your 6-inch putty knife with a thin layer of compound and spread it directly along each seam where the new piece meets the old drywall. Press a strip of paper tape into the wet compound, centering it over the seam, then run your knife over it firmly enough to squeeze out the extra compound and any trapped air. Work from the middle of the strip outward toward the ends so you don't create ripples.
Tape that's embedded loosely or left with air bubbles underneath is the number one reason patched seams crack within a year.
Repeat this on all four sides of the patch, including the top and bottom seams where you added backing strips, plus any corners where the new piece meets an inside or outside wall angle.
Covering the screw heads and checking the surface
Don't skip the screw heads while you're at it. A quick sequence keeps you from missing a spot:
- Dab compound over every screw head, smoothing flush with the surrounding drywall
- Tape and bed all four seams around the patch
- Scrape excess compound off with your knife at a low angle
- Check the whole patch under raking light for gaps or lifted tape edges
Let everything set fully, usually 20 to 45 minutes for setting-type compound, before moving on. Touching a seam too early pulls the tape loose and undoes the work you just did, so give it the full set time even if it looks dry on top.
Step 5. Apply joint compound, sand, and paint
Once the tape is embedded and the screw heads are covered, the rest of this drywall repair how to process is about building up thin layers until the patch disappears into the wall. Rushing this stage is the fastest way to end up with a visible ridge or a shadow line once paint goes on, so plan for at least two mud coats beyond the embedding coat and give each one a full set before touching it again.
Building up the compound coats
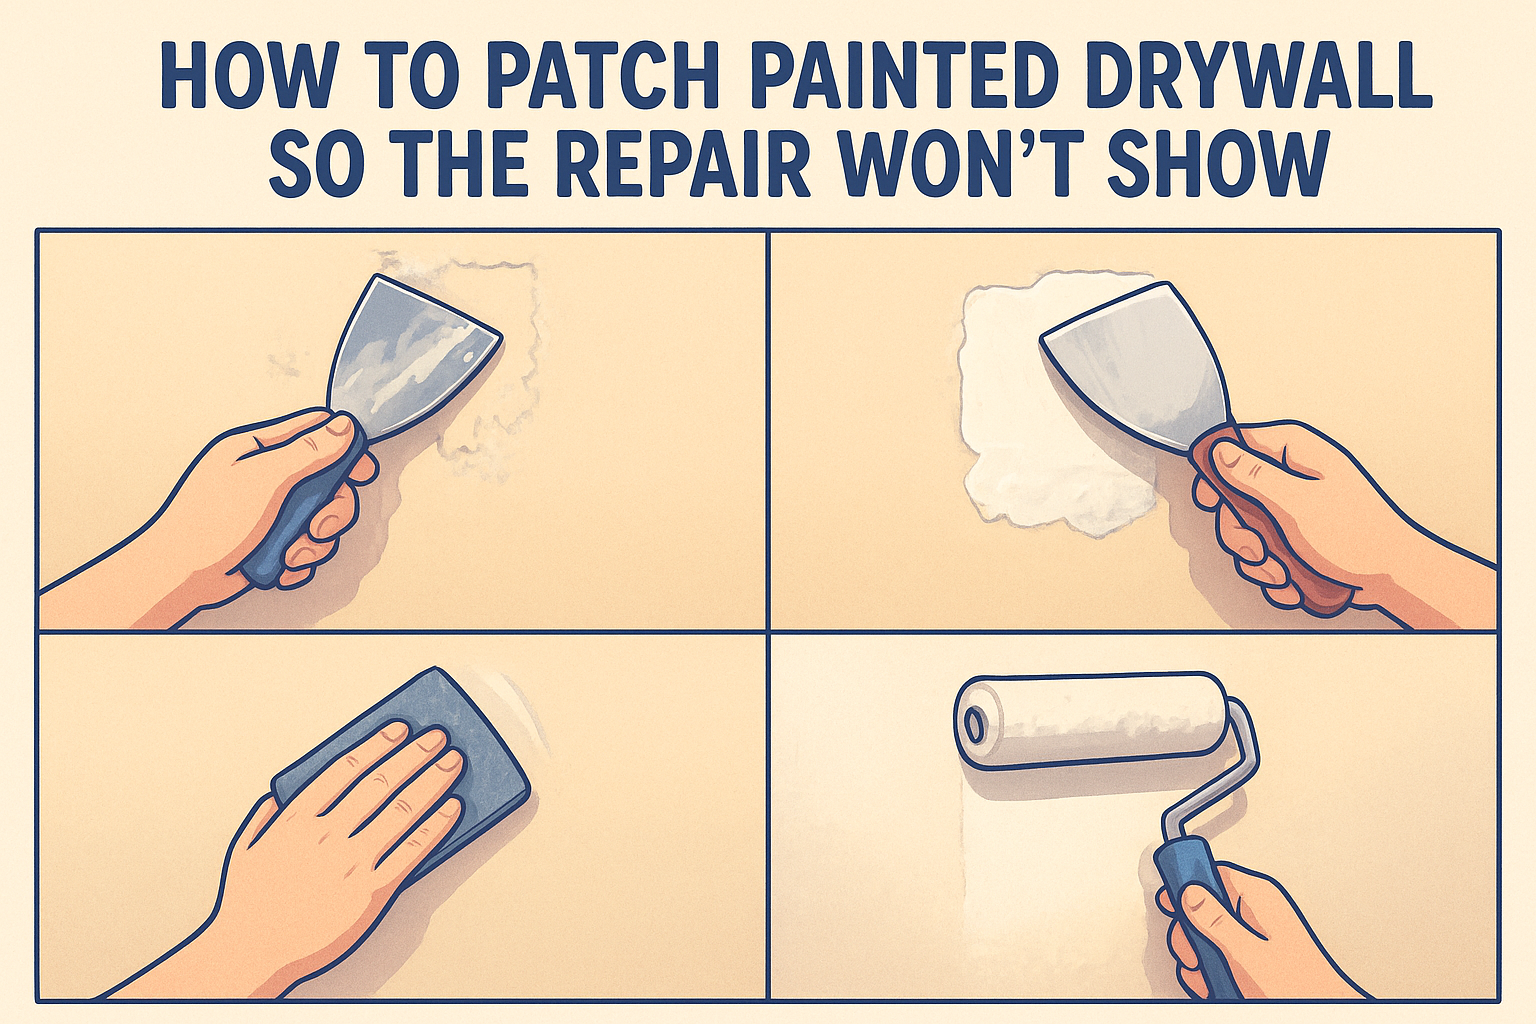
Switch to your 6-inch or even a 10-inch putty knife for these wider coats, since a bigger blade spreads compound thinner and feathers the edges further out with less effort. Apply the second coat over the entire taped area, feathering drywall mud four to six inches beyond the first coat's edge so the transition to the surrounding wall is gradual rather than abrupt. Let it set fully, then apply a third coat if you can still feel any ridge with your hand, feathering even wider than the second.
A patch that feels perfectly flat under your palm before sanding will look flat after paint. One you're not sure about won't.
Sanding without leaving marks
Once the final coat is bone dry, which for setting-type compound usually means how long a patch needs before you can paint it, sand with a fine-grit sanding sponge using light, circular passes rather than digging in one spot. Wipe the dust away with a barely damp cloth and check the surface under raking light from a lamp or flashlight held at an angle. Any dips or ridges show up clearly this way, and it's far easier to fix them now with a thin skim coat than after primer is on.
Priming and painting for a seamless finish
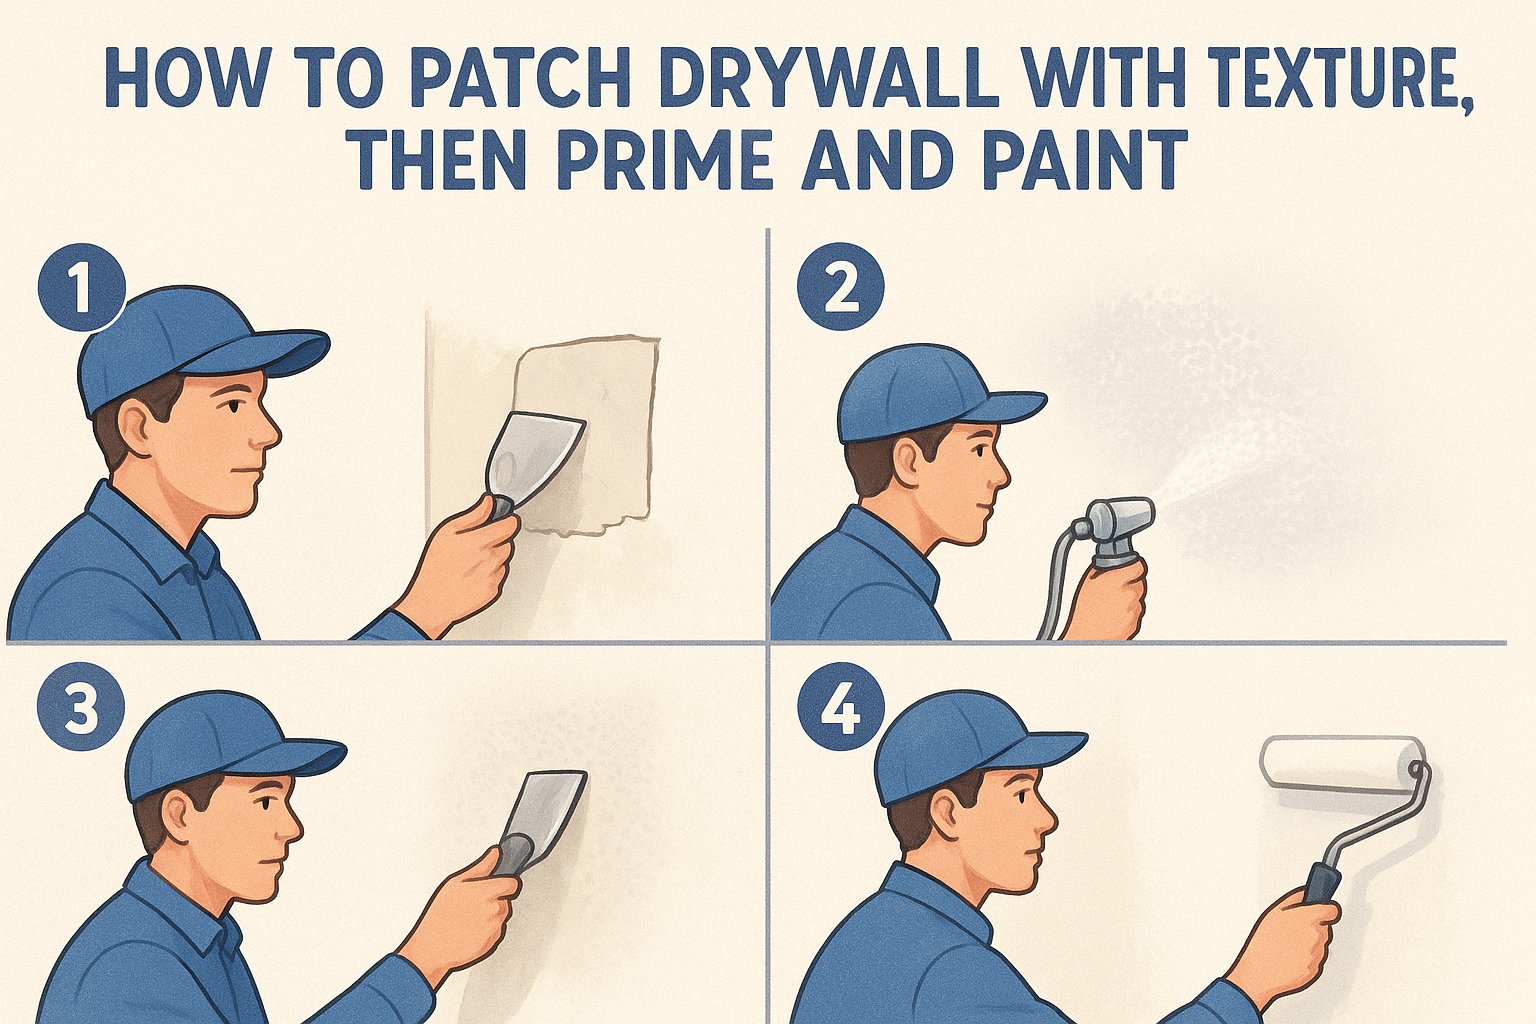
Never skip primer on a fresh patch. Compound absorbs paint differently than the surrounding wall, and without primer the patch will show up as a dull or shiny spot under certain light even with an exact color match. Roll on a coat of drywall primer, let it dry per the can's instructions, then apply your wall paint edge to edge rather than just dabbing the patch itself, since spot-painting almost always leaves a visible outline. If your ceiling or wall has texture, match the patch texture to the surrounding wall before priming, not after, so the primer and paint sit evenly over the whole surface.
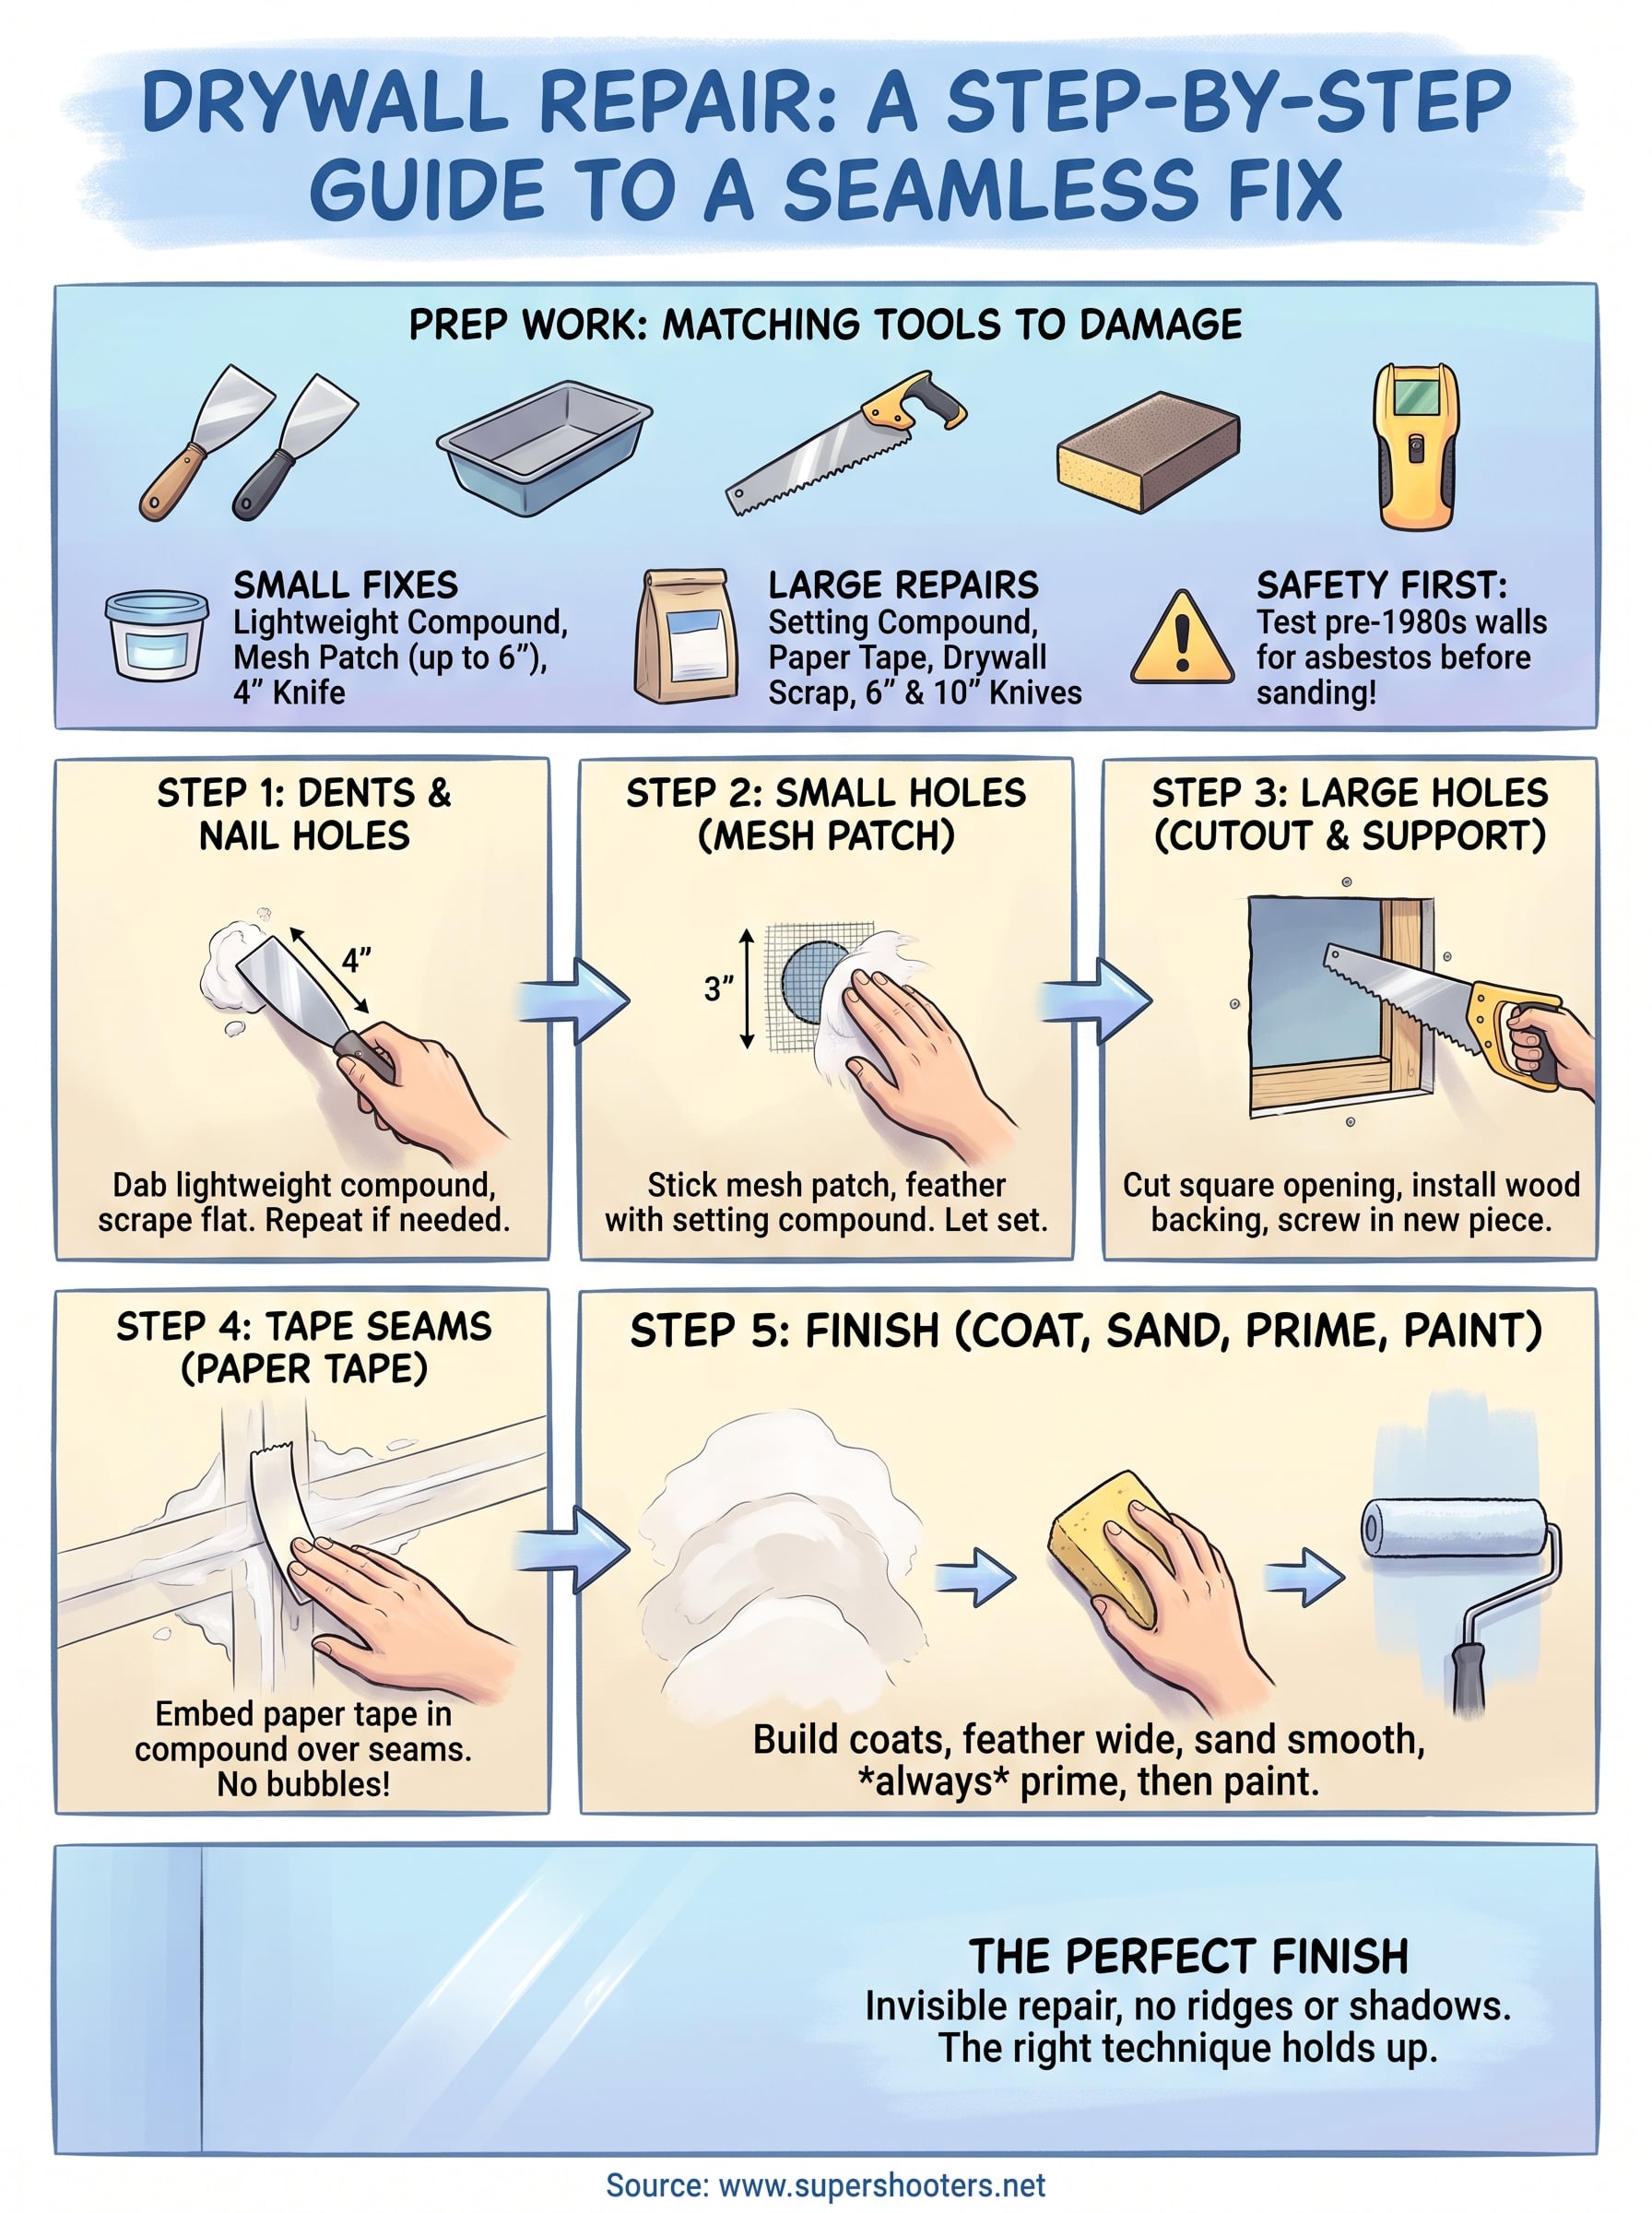
A repair that blends in for good
A good drywall repair disappears. No ridge under your palm, no shadow under a lamp, no crack creeping back six months later. That comes down to matching the technique to the damage, giving compound the full set time it needs, and never skipping primer before paint. Follow the steps in order and even a hole big enough to need backing and tape will end up looking like it was never there.
Some repairs are worth handing off, though. If sanding reveals texture that might contain asbestos, or the damage turns out bigger than a patch, stop and call someone who does this daily. Our crew at Super Shooters has fixed walls across the Sacramento Valley for over 30 years, and we'd rather talk you through a simple fix than sell you a job you don't need. When you're ready for a second opinion or a repair beyond DIY, schedule a free estimate for professional wall patching.
Recent Posts