Share this article

July 18, 2026

Paper Tape vs. Mesh Tape Drywall: Which One Should You Use?

If you're staring down a drywall repair or a new install and wondering which tape to grab, you're not alone. The paper tape vs mesh tape drywall debate trips up plenty of DIYers and even some contractors who skip the comparison and just grab whatever's on the shelf. That choice matters more than most people think, because the wrong tape leads to visible seams, cracking, or callbacks a few months down the road.

Here's the short answer: paper tape gives you stronger, flatter joints when embedded correctly with compound, while mesh tape offers easier application thanks to its self-adhesive back, but it needs setting-type compound to hold up long term. Neither one is universally better. The right pick depends on the joint type, your skill level, and whether you're patching a small crack or taping a whole ceiling.

We've taped thousands of seams across Sacramento Valley homes over 30 years, and in this guide we break down how each tape performs on butt joints, corners, and repairs, where each one fails, and which tape we reach for on our own jobs so you can finish yours with confidence.

Why the tape you choose affects your project's outcome

Every seam in your drywall is a weak point until it's taped and finished correctly. The tape you pick determines whether that seam disappears into the wall or becomes a visible line that shows up under certain lighting, especially after the house settles or the seasons change. Sacramento Valley homes see real temperature swings between summer and winter, and that expansion and contraction puts stress on every joint in the house.

Strength versus flexibility

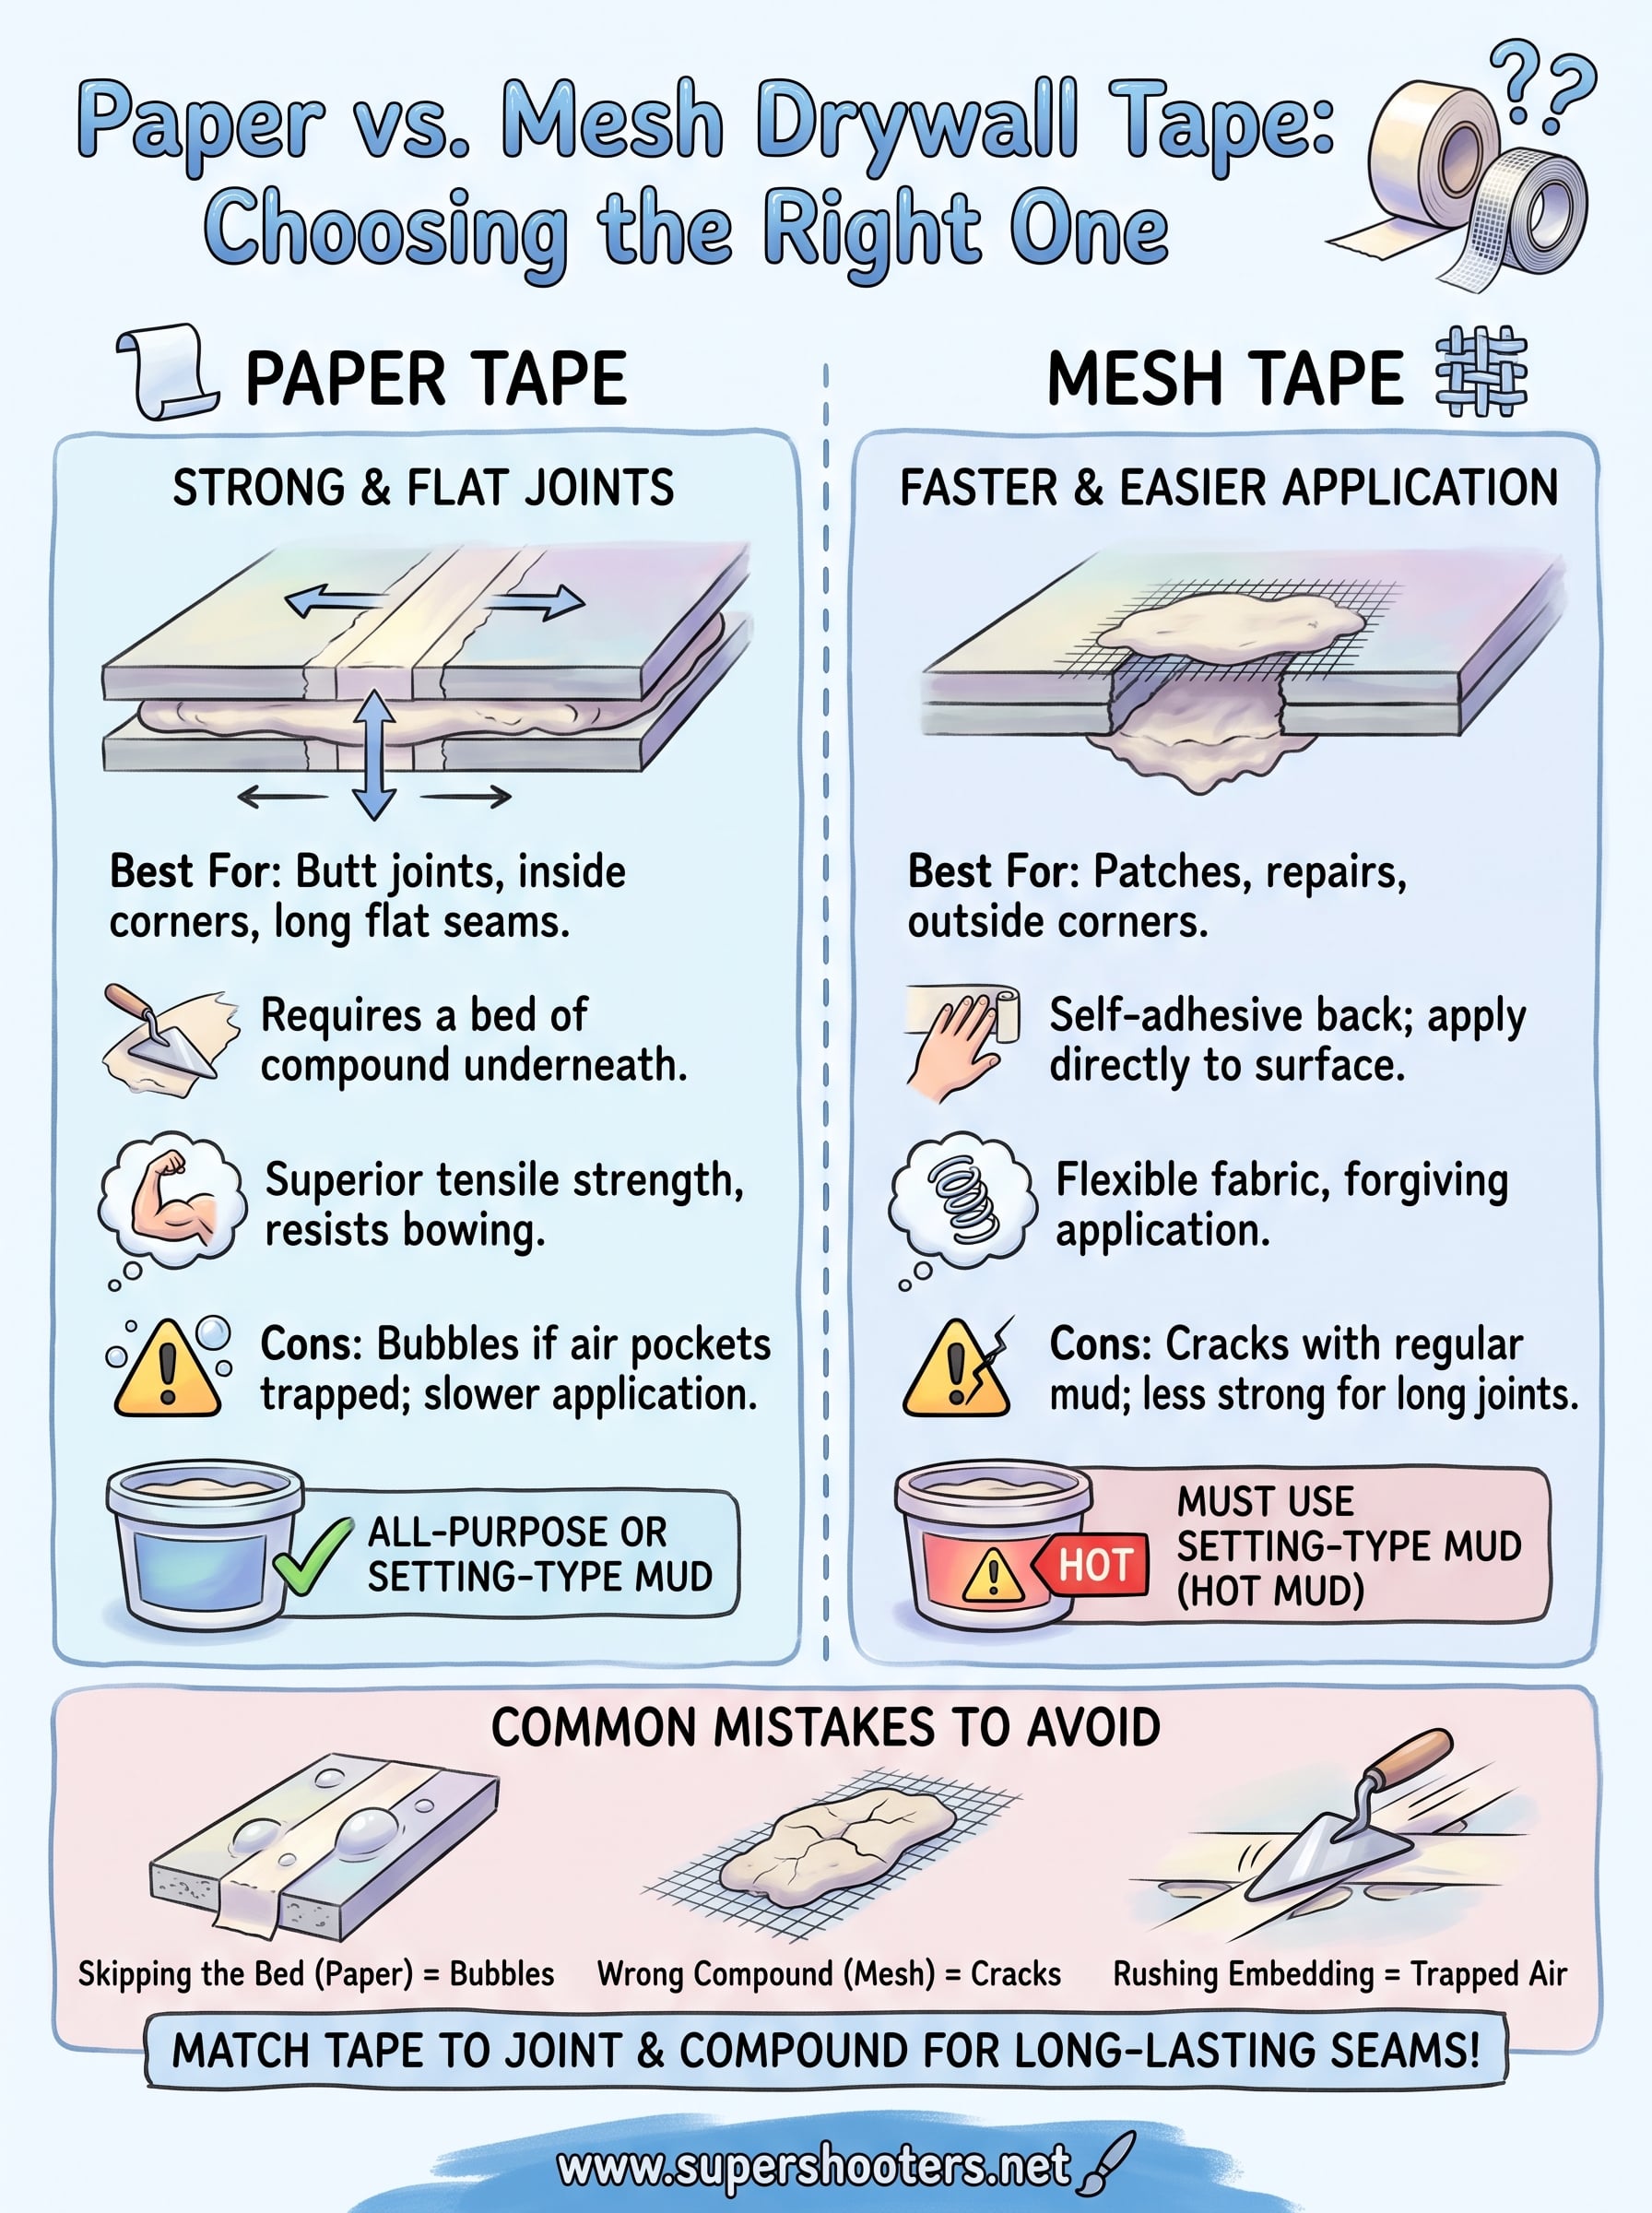
Paper tape has almost no stretch, which gives it superior tensile strength once it's embedded in compound. That rigidity helps it resist the kind of bowing you get on long butt joints. Mesh tape, by contrast, has some give built into its woven fabric, which makes it forgiving during application but less resistant to the pulling forces that cause seams to crack over time.

Risk of bubbling and cracking

Get the technique wrong and both tapes will fail, just in different ways. Paper tape bubbles when air pockets form underneath it during embedding. Mesh tape cracks along the seam when it's paired with regular joint compound instead of a setting-type compound that actually bonds to it.

The tape doesn't fail on its own, it fails when it's matched with the wrong compound or technique for the job.

Long-term appearance

Homeowners rarely notice tape choice until a hairline crack appears six months later, right where the seam sits. That's the real cost of picking the wrong tape or rushing the embedding step, and it's why we treat tape selection as part of the actual repair plan, not an afterthought you grab off the shelf on the way to the job.

How to choose between paper and mesh tape

Start with the joint type, not personal preference. Butt joints and inside corners call for paper tape because its rigidity keeps the seam flat and resists the bowing that shows up on long, flat runs. Mesh tape works best on patches, repairs, and outside corners where speed matters more than maximum tensile strength.

Match the tape to the compound

Mesh tape only performs when it's embedded with setting-type joint compound , sometimes called hot mud. Regular pre-mixed compound doesn't bond well enough to mesh, and that mismatch is the number one reason mesh seams crack. Paper tape works fine with either setting compound or standard all-purpose mud, which gives it more flexibility on the job.

Consider your skill level

Factor Paper Tape Mesh Tape
Application speed Slower Faster
Compound required Any Setting-type only
Best for Butt joints, flat seams Patches, repairs
Forgiveness for beginners Low Higher

If you've never taped a seam before, mesh feels easier because it self-adheres. But easier isn't always stronger, and that's the tradeoff you're weighing here.

How to apply paper tape and mesh tape correctly

Getting either tape to hold starts with the same basic move: lay down a bed of compound before the tape ever touches the wall. Skip that step and you're just gluing paper or mesh to bare drywall, which guarantees bubbles and lifting within weeks.

Applying paper tape

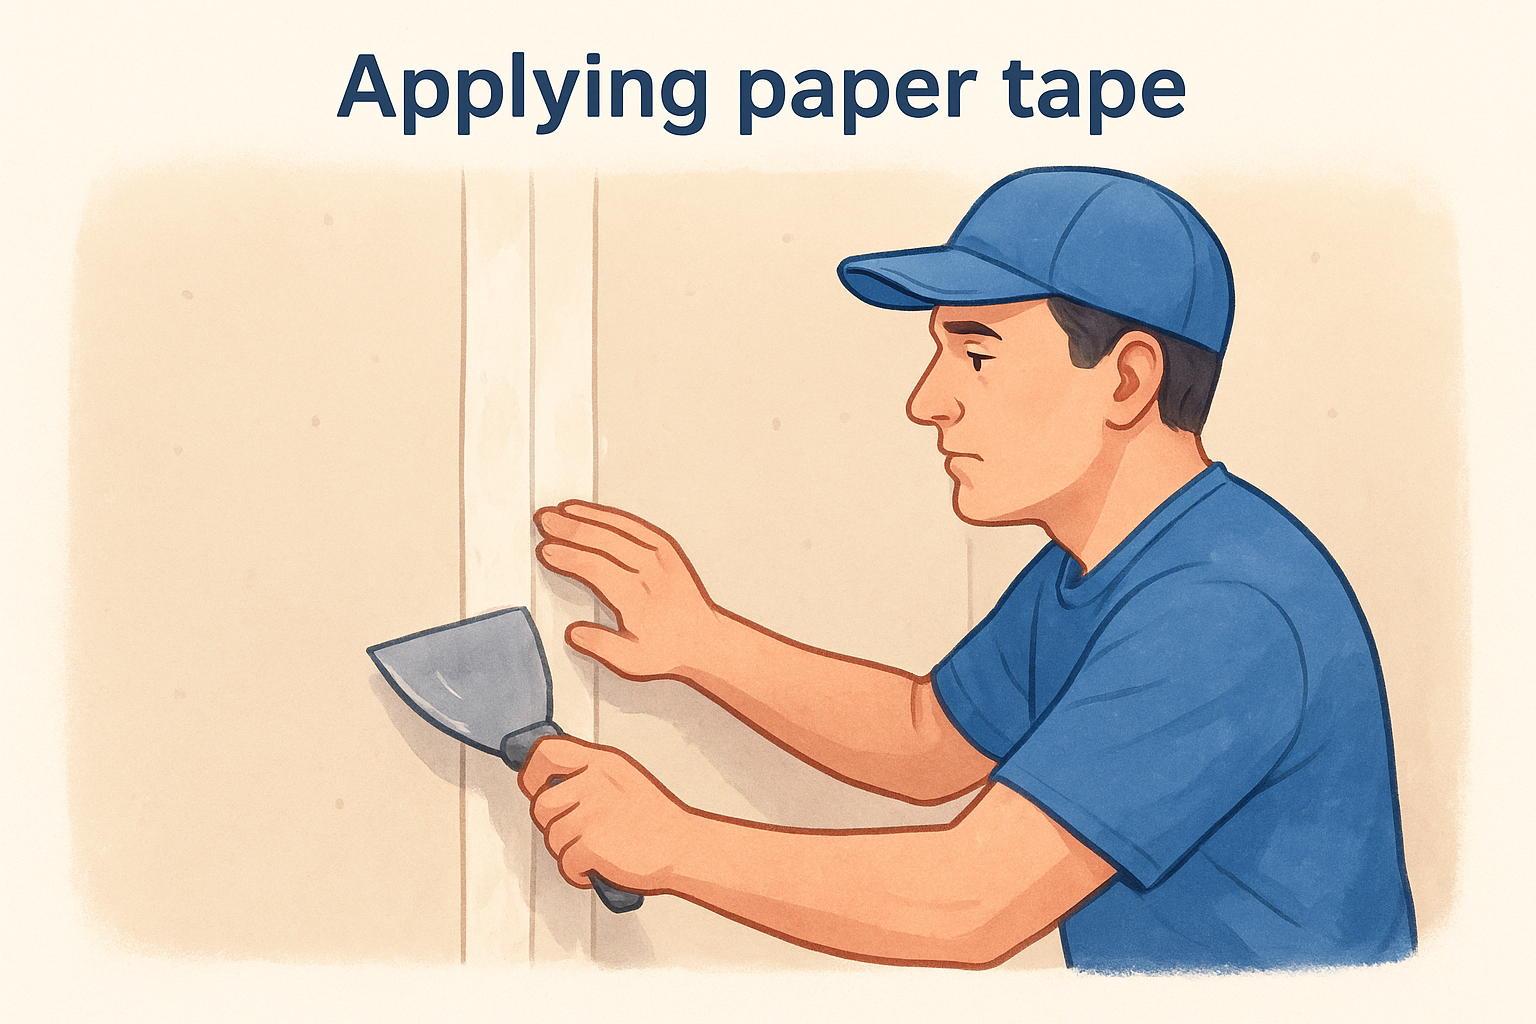
Spread a thin layer of joint compound over the seam, press the paper tape into it, then run a taping knife down the center with firm, even pressure to force out air and excess mud. You want a smooth, flat bed with no wrinkles before you move to the finish coats.

Applying mesh tape

Mesh tape sticks to the drywall on its own, so you press it directly over the seam first, then cover it with setting-type compound. Work the mud into the mesh openings so the compound locks through the fabric instead of sitting on top of it.

If the compound doesn't pass through the mesh, the tape isn't actually bonded, it's just floating on the surface.

Either way, let each coat dry fully before sanding or adding the next layer.

Common mistakes that lead to bubbling and cracks

Most taping failures trace back to a handful of repeatable errors, not bad luck or bad tape. Skipping the compound bed under paper tape is the biggest one. Press paper tape onto dry drywall and you'll see bubbles within days, because there's nothing holding it flat against the surface.

Rushing the embedding step

Dragging the knife too fast or with uneven pressure leaves trapped air pockets under the tape. Those pockets look fine when wet but bubble up as the compound dries and shrinks.

Wrong compound for mesh

Using regular pre-mixed mud instead of setting-type compound on mesh tape is the fastest way to get cracked seams. The mud sits on top of the mesh instead of bonding through it, so the first bit of house movement splits the joint.

Every crack you see later started as a shortcut taken during application, not a flaw in the tape itself.

Sanding too early

Sanding before each coat fully cures weakens the bond and leaves a rough, uneven finish that telegraphs through paint. Let each layer dry completely before touching it with sandpaper or adding another coat.

When to call a professional drywall contractor

Some jobs reward a DIY attempt, and some just punish it. Small patches, a single cracked corner, or a repair behind a couch are fine to tackle yourself if you're patient with the drying times. But whole-room retaping, ceiling work, or any joint on a popcorn ceiling removal job is a different animal, especially in older Sacramento Valley homes where you might be dealing with texture layers or hidden damage behind the drywall.

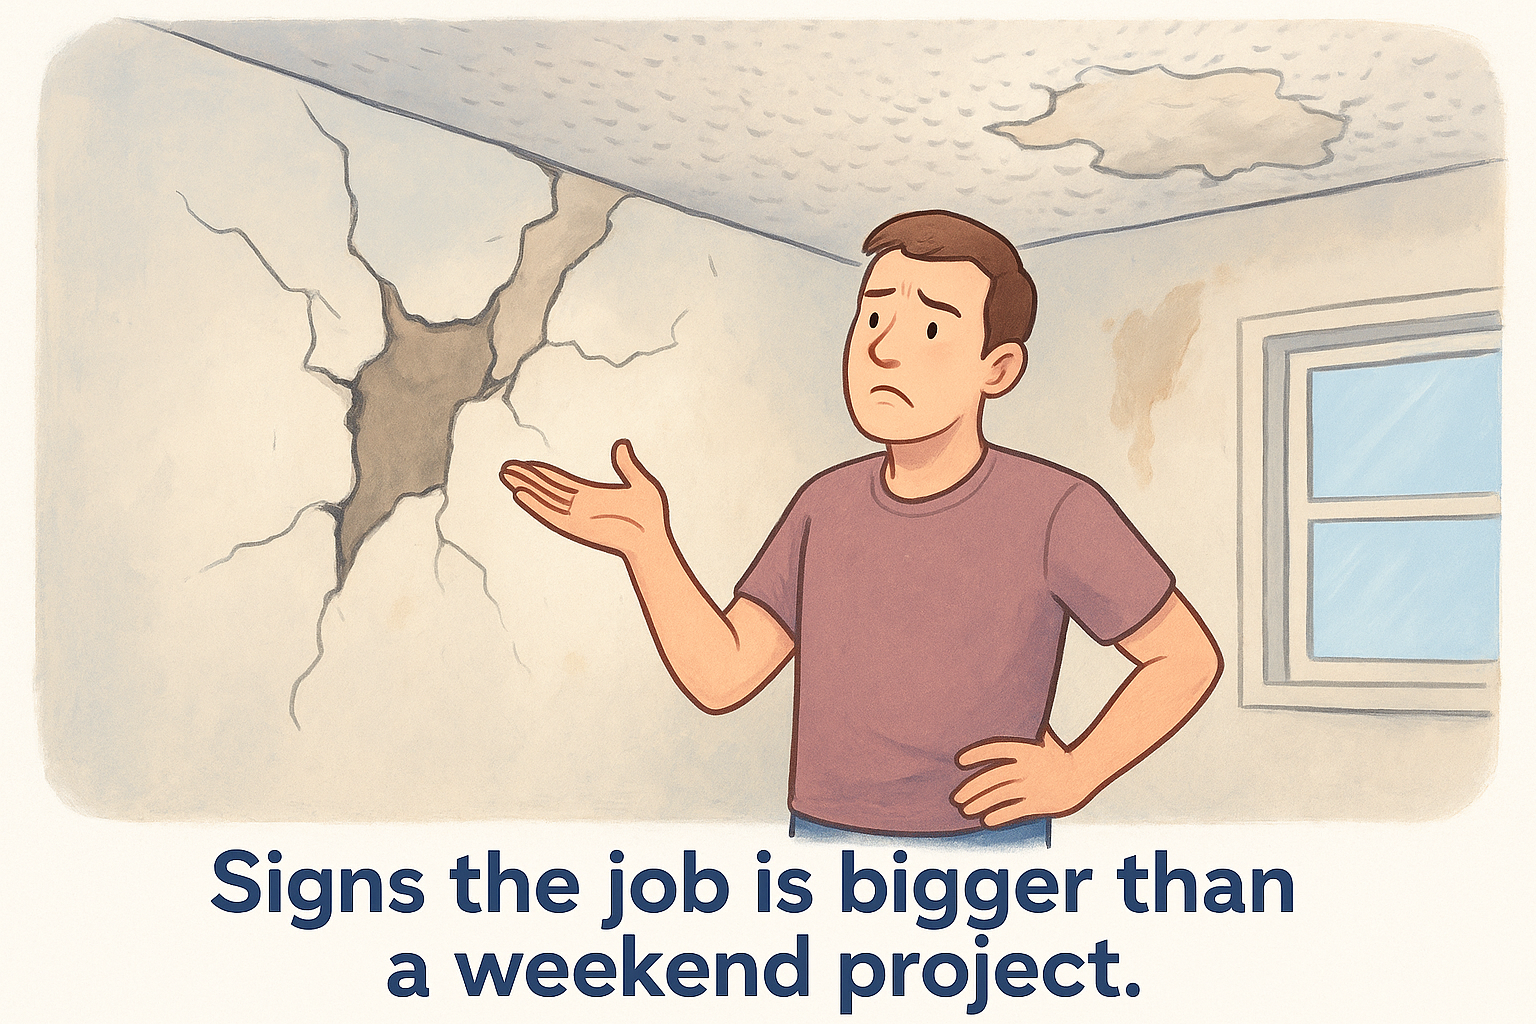
Signs the job is bigger than a weekend project

Watch for these before you commit to doing it yourself:

  • Cracks that keep coming back after repair
  • Ceilings with texture that's flaking or already loose
  • Water stains suggesting damage behind the surface
  • Multiple rooms needing taping at once
  • Any suspicion of an older acoustic ceiling that might contain asbestos

A patch job that keeps failing usually means the problem is bigger than the tape.

Why experience matters on larger jobs

A crew that's taped thousands of seams knows which compound and tape combination fits your specific wall, your home's age, and your local climate. That judgment call is hard to learn from a video. If your project checks more than one box above, it's worth getting a free estimate before you start cutting into drywall you can't easily replace.

Getting seams that hold up over time

Paper tape and mesh tape both work, but only when you match them to the right joint and the right compound. Paper tape earns its place on butt joints and corners where flatness matters most. Mesh tape saves time on patches and repairs, as long as you back it with setting-type compound instead of regular mud. The tape itself rarely fails; rushed embedding, skipped compound beds, and mismatched mud cause almost every crack and bubble we get called out to fix.

Get the basics right and your seams should outlast the paint job around them. If you're staring at a ceiling full of old texture, a cracked wall from settling, or a repair that keeps coming back no matter what you try, don't gamble on another patch. Reach out for a free drywall repair estimate and let our crew handle the seams that need to actually last.

Recent Posts

By cinchweb July 20, 2026
Learn how to fix water damaged ceiling drywall: find the leak source, cut and patch drywall, match texture, and know when to call Super Shooters.
By cinchweb July 18, 2026
See a full asbestos popcorn ceiling removal cost breakdown by room, plus testing, disposal, and finishing fees. Get a free itemized estimate today.
By cinchweb July 17, 2026
See the real popcorn ceiling asbestos removal cost per room and square foot, plus permits, testing, and disposal fees homeowners often miss.
By cinchweb July 16, 2026
Learn how to install drywall on ceiling alone using a DIY T-brace, chalk lines, and screw patterns—plus when to call Super Shooters for help.
By cinchweb July 14, 2026
See how popcorn ceiling removal cost per square foot breaks down by room size, asbestos testing, and DIY vs. pro rates—plus real Sacramento Valley pricing.
By cinchweb July 13, 2026
Learn drywall taping tips and tricks for pro-smooth walls: mud consistency, tape embedding, feathering coats, and corner finishing techniques.
By cinchweb July 13, 2026
Learn what drywall taping is, the 5-step process, paper vs mesh tape, tools needed, common mistakes, and costs from Sacramento Valley pros.
By cinchweb July 12, 2026
See real 2026 price ranges by room and learn how much does popcorn ceiling removal cost near Sacramento Valley, plus hidden fees to budget for.
By cinchweb July 10, 2026
Learn how to clean walls before painting with our step-by-step guide covering supplies, dust removal, TSP mixing, rinsing, and drying to prevent peeling.
Show More