Share this article

August 20, 2026

How to Patch a Small Hole in Drywall Yourself

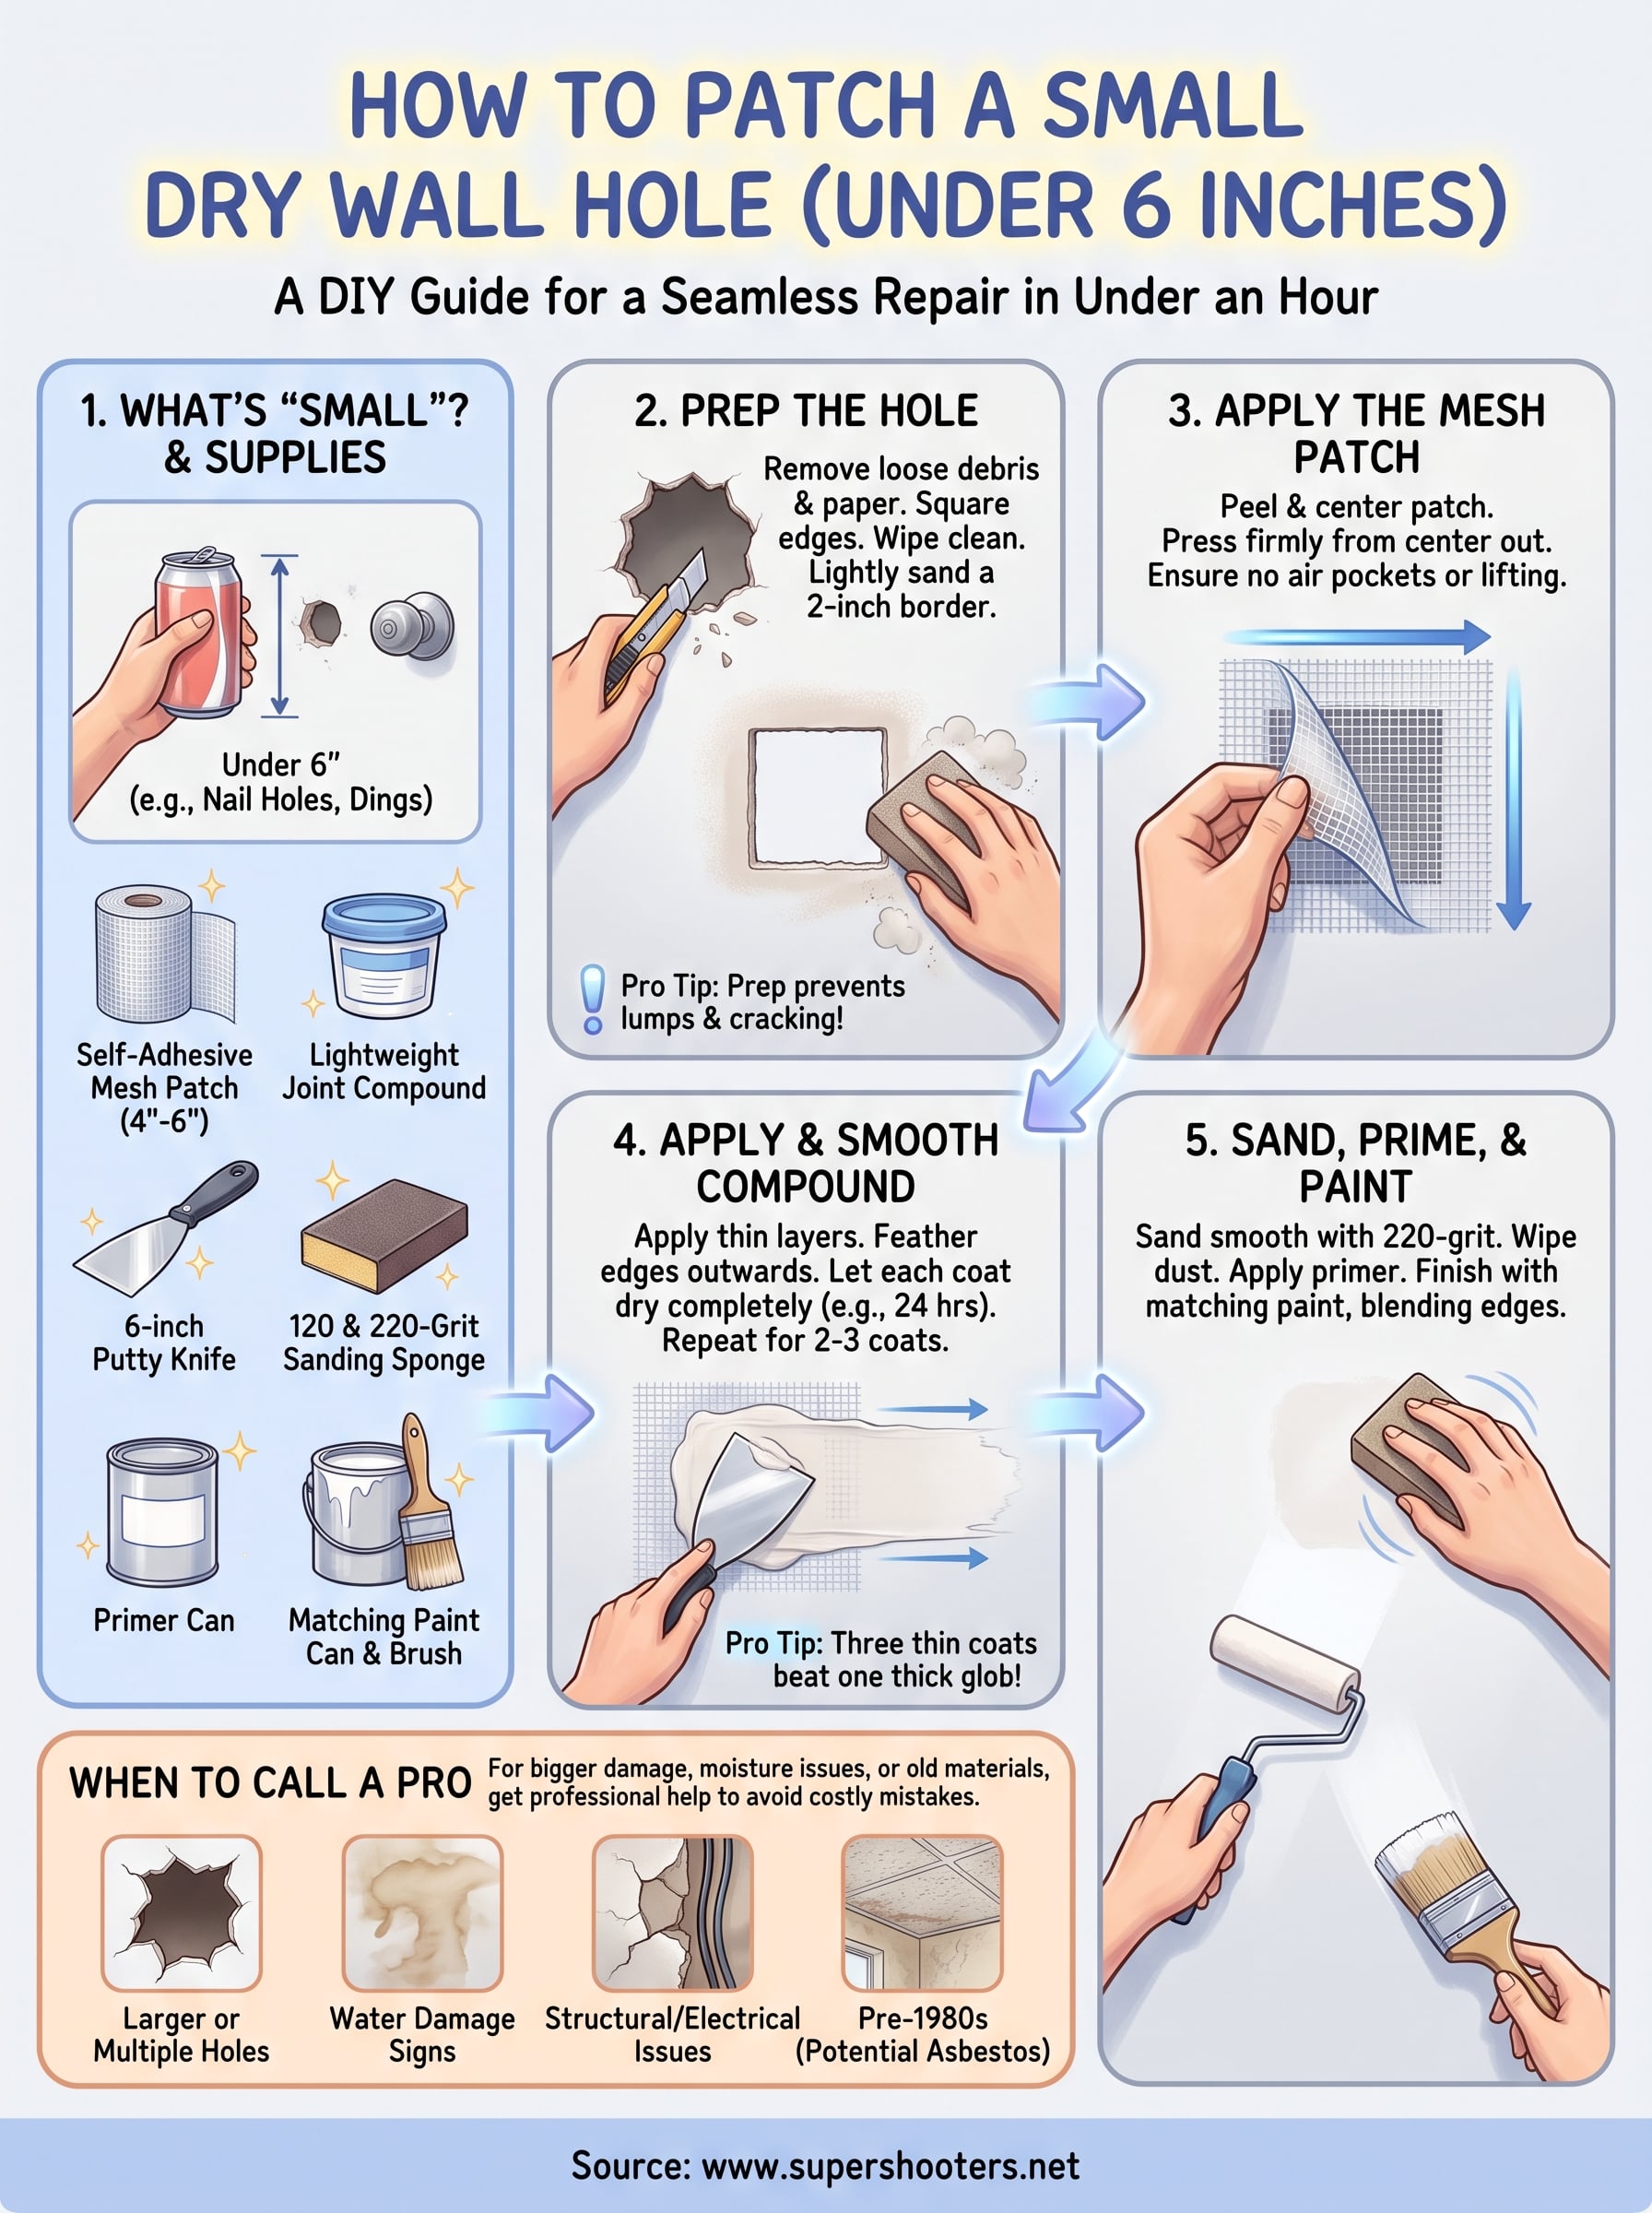
That doorknob dent or nail hole staring at you from the hallway wall doesn't need a contractor visit. Learning how to patch a small hole in drywall is one of the most useful skills a homeowner can pick up, and for holes under six inches, you can get a smooth, paint-ready repair in under an hour with about $20 in supplies from any hardware store.

This guide walks you through patching small holes in drywall the same way our crews do it on the small repair calls we get across Sacramento, Roseville, and Folsom. You'll get the exact tools and materials list, the step-by-step process for prepping the hole, applying joint compound, sanding it flush, and matching wall texture to your patch so the repair actually disappears.

We've patched thousands of walls over 30 years, and the small stuff is where most homeowners either save real money or make a mess that's harder to fix later. If your damage turns out to be bigger than expected, or you hit something unexpected like water staining behind the drywall, we cover when it's time to call in a pro instead of pushing through a DIY drywall hole repair on your own.

What counts as a small hole and what you'll need

What actually qualifies as small

Most nail holes, doorknob dings, and picture-hanger gouges under 6 inches across fall into the DIY-friendly category. Patching small drywall holes at this size doesn't require cutting into studs or matching seams, because you're bridging the gap with mesh or a self-adhesive patch rather than rebuilding a section of wall. Anything wider than a soda can, or damage that reveals crumbling insulation, wiring, or daylight from the other side, has moved past this guide's scope. If you're patching small holes in drywall left by furniture moves or curious kids, you're squarely in the zone this method covers.

A hole you can cover with your palm is almost always a same-afternoon fix, not a contractor job.

Building your supply list

Gathering the tools you need for DIY patching before you start saves you from wet-compound trips to the hardware store. Skip the temptation to eyeball quantities. A single small tub of joint compound and one patch kit handle several repairs, so buy the smallest sizes you see.

Item Purpose Typical Cost
Self-adhesive mesh patch (4"-6") Bridges the hole for holes under 6 inches $3-$6
Lightweight joint compound (small tub) Fills and smooths over the patch $8-$12
6-inch putty knife Applies and feathers compound $5-$8
120- and 220-grit sanding sponge Smooths dried compound flush $4-$6
Primer (small can or sample size) Seals patch before painting $5-$10
Matching wall paint Final blend-in coat Often already on hand
Utility knife Trims loose paper and debris Usually already owned

Once you've got these on your workbench, how to patch a small hole in drywall stops feeling like guesswork and becomes a quick, repeatable process. Total spend usually lands under $25, and most items last through several future repairs, so you're set for the next doorknob incident too.

Step 1. Prep the hole and surrounding area

Before any compound touches the wall, you need a clean, stable surface to work with. Loose paper edges, crumbling gypsum, or leftover nail fragments will telegraph through your finished patch no matter how carefully you sand later. Prepping the hole and surrounding area takes five minutes but determines whether your repair holds up for years or cracks within a season.

Grab your utility knife and work through these steps in order:

  1. Remove loose debris by gently pressing around the hole's edges and pulling away any hanging paper or crumbled drywall.
  2. Square off ragged edges with the utility knife so the mesh patch has a clean, flat surface to grip.
  3. Wipe the area with a dry cloth to clear dust, then check for moisture stains or soft spots, since these signal a bigger problem than a simple hole.
  4. Lightly sand a two-inch border around the hole with your 120-grit sponge to knock down any raised texture or old paint ridges.

Skipping the prep step is the number one reason DIY patches look lumpy or crack within months.

Check the wall for flex or give when you press near the hole. Solid resistance means you're ready to move forward. Soft, spongy drywall usually points to water damage hiding behind the surface, which needs a different fix entirely. Once your hole is clean, squared, and dust-free, you've done the part most homeowners rush through, and it's what separates a lasting patching drywall small hole job from one you'll be redoing next year.

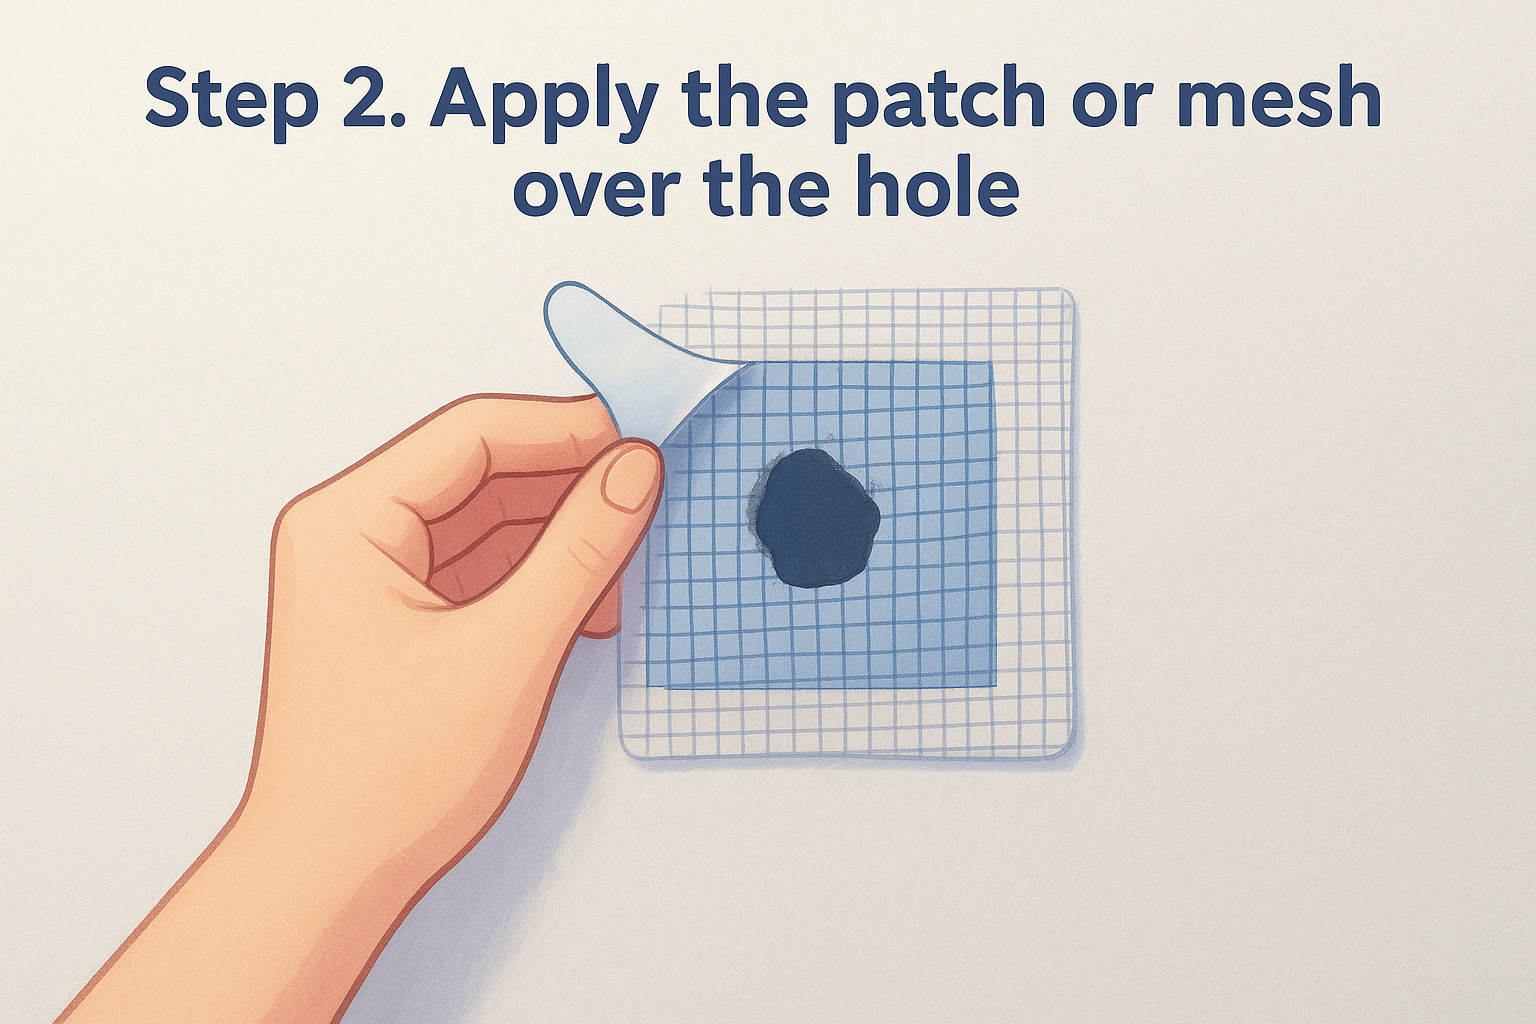
Step 2. Apply the patch or mesh over the hole

With the hole cleaned and squared off, it's time for the actual patch or mesh application that bridges the gap. Peel the backing off your self-adhesive mesh patch and center it directly over the hole, pressing firmly from the middle outward so no air pockets form underneath. The adhesive backing grabs onto drywall paper on contact, so you get one good shot at placement before it's locked in.

Follow this order for a clean bond:

  1. Peel the backing off the mesh patch just before applying it, keeping the adhesive side untouched.
  2. Center it over the hole , leaving at least an inch of overlap on solid drywall in every direction.
  3. Press firmly from the center out , smoothing toward the edges with your fingers or the flat of the putty knife.
  4. Check the edges for lift or bubbling, and press again until the mesh lies completely flat against the wall.

A patch that isn't fully flush will telegraph a ridge through every coat of compound you add later.

Metal patch kits with a stiff backing work the same way for slightly larger holes, but for anything under six inches, self-adhesive fiberglass mesh is faster and cheaper than choosing between mesh and paper tape. Once the mesh sits flat and adhered on all sides, you're ready to bury it under joint compound, which is where the wall actually starts looking whole again.

Step 3. Apply and smooth the joint compound

Now you'll bury the mesh under joint compound, building it up in thin layers rather than one thick glob. Applying and smoothing joint compound correctly is what turns a visible patch into an invisible one, and rushing this step is where most DIY jobs go sideways with lumps and ridges that show up the moment paint hits the wall.

Work through these coats in order, letting each one dry fully before moving to the next:

  1. Load a thin layer of compound onto your putty knife and spread it over the mesh, covering about two inches past the patch edges.
  2. Feather the edges by angling the knife and dragging outward, feathering drywall mud so it tapers to nothing instead of ending in a hard line.
  3. Let the first coat dry for 24 hours, or check your product label since how long a drywall patch takes to dry varies and some lightweight compounds cure faster.
  4. Apply a second, wider coat if the first shows any dip where the mesh sits, feathering even further out this time.

Three thin coats always beat one thick coat when you're patching small holes in drywall.

Resist the urge to load up the knife for a one-and-done application. Thick compound shrinks and cracks as it dries, and you'll end up sanding through to bare mesh. Two to three thin coats of drywall mud, each feathered wider than the last, give you a flat surface that blends into the surrounding wall instead of announcing itself. Once your final coat dries hard and shows no shrinkage cracks, you're ready to sand it smooth.

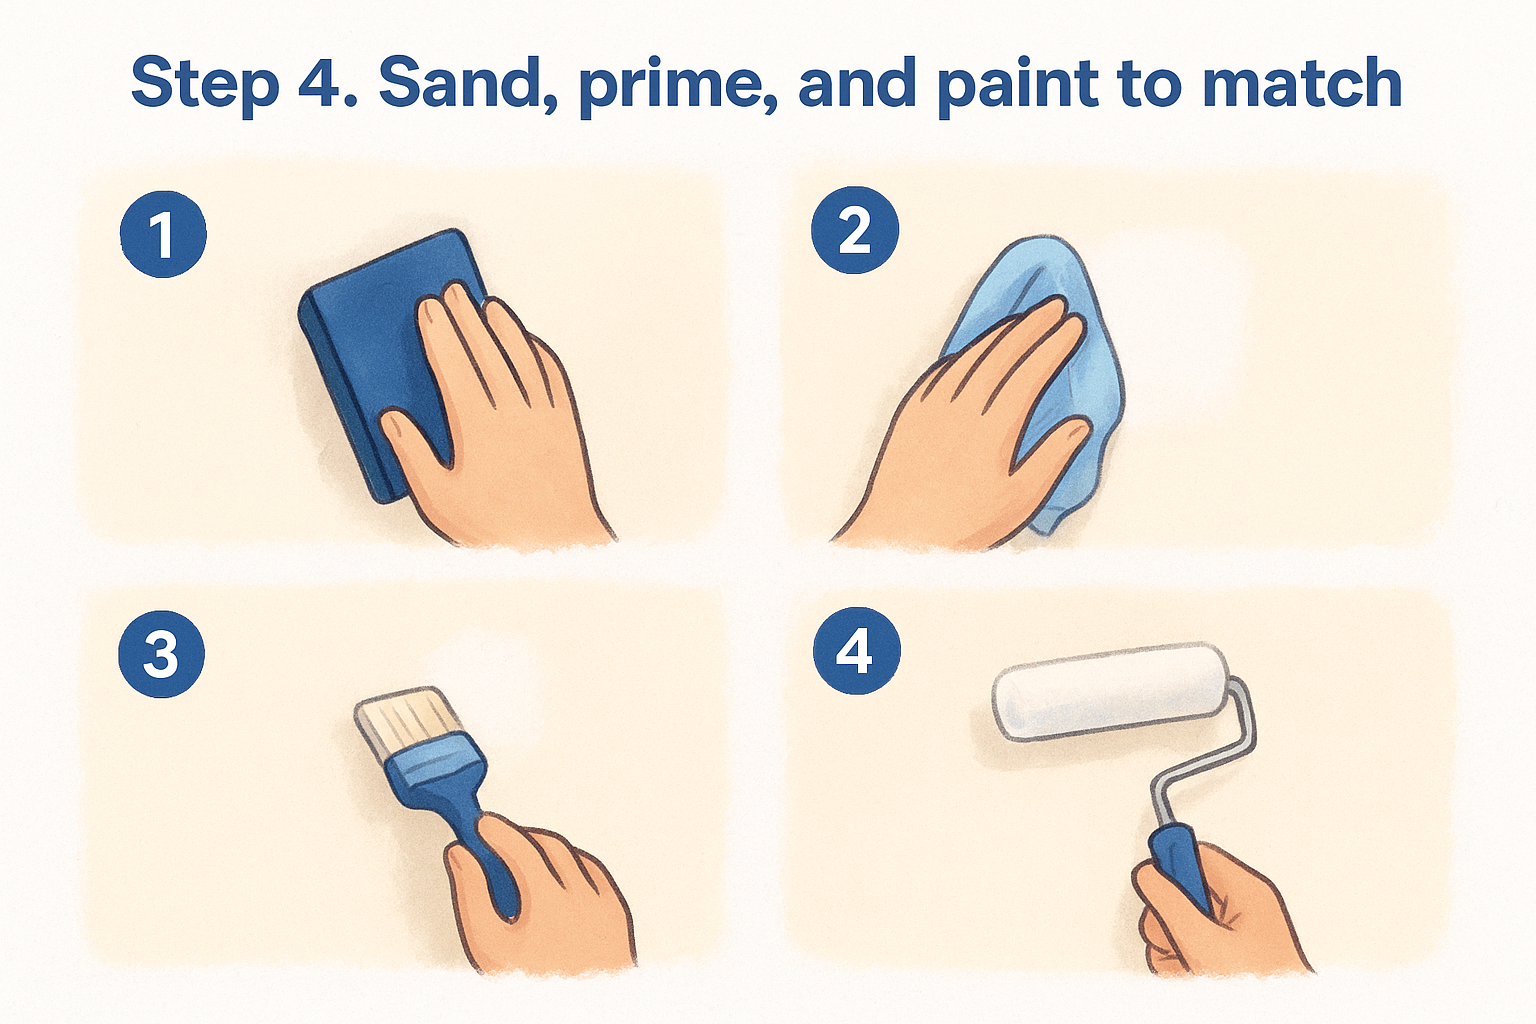
Step 4. Sand, prime, and paint to match

Once your final coat of compound is bone dry, grab the sanding sponge and work in small circles rather than back-and-forth strokes, which can gouge the soft surface. Sanding and priming the patch is what makes the difference between a repair you can see and one you can't, so take your time here instead of rushing to paint. Run your hand over the area when you think you're done. If you feel any ridge or dip, hit it with another light pass before moving on.

Follow this sequence for a finish that disappears into the wall:

  1. Sand with 220-grit in gentle circles, checking often so you don't sand through to the mesh underneath.
  2. Wipe away dust with a damp cloth and let the wall dry completely before priming.
  3. Prime the patch with a small brush or foam roller, covering slightly past the repaired area so the finish coat blends evenly.
  4. Paint with matching wall paint , using a roller if you have leftover paint from the original job for the truest color match.

Skipping primer is the fastest way to end up with a dull, flat-looking patch under glossy wall paint.

Priming matters because bare joint compound absorbs paint differently than the surrounding wall, leaving a visible flat spot known as flashing even after a full coat. Two coats of matching paint, feathered slightly beyond the primed area, finish the job and leave you with a wall nobody would guess was ever damaged.

When it's time to call a professional

Some jobs stop being a weekend project the moment you open up the wall. Larger or multiple holes , signs of water damage in your walls like stains that keep coming back, soft or crumbling drywall beyond the patch area, or damage near electrical boxes all signal it's time to hand things off. Homes built before the 1980s also carry a real risk of asbestos in old texture or ceiling material, and that's not something to sand through on a guess without licensed asbestos testing and abatement.

Following these steps, you can handle nail holes, doorknob dings, and small dents yourself with confidence and a clean result. But when the damage is bigger, spreading, or tied to something structural, pushing through a DIY fix usually costs more to undo later than calling in help from the start.

If your repair has grown past a small patch job, our team handles everything from minor holes to full wall sections. Get in touch for a free estimate on professional drywall patch repair in the Sacramento area.

Recent Posts

By cinchweb August 24, 2026
Learn how do you repair hole in drywall with sizing tips, patching methods, texture matching, and when to call Super Shooters for tricky repairs.
By cinchweb August 21, 2026
Compare 8 top drywall patching kit picks by hole size, price, and dry time, plus when to call a pro instead of DIY.
By cinchweb August 20, 2026
Learn how to paint a popcorn ceiling step by step, asbestos testing, prep, tools, and application tips from Sacramento's Super Shooters experts.
By cinchweb August 19, 2026
Learn joint compound drywall repair step-by-step: tools, taping, feathering, sanding tips, and when to call Super Shooters for professional help.
By cinchweb August 17, 2026
Discover the 6 essential tools for drywall repair, plus costs and tips—and learn when Sacramento Valley homeowners should call a pro instead.
By cinchweb August 16, 2026
Discover 5 must-have popcorn ceiling removal tools, from bagged scrapers to asbestos test kits, plus when to call Super Shooters instead.
By cinchweb August 15, 2026
Learn how to vet drywall repair contractors, what to expect during repairs, pricing factors, and how licensing and warranties protect your home.
By cinchweb August 14, 2026
Learn how to repair ceiling cracks for good with mesh tape, setting compound, texture matching, and expert tips on when to call a pro.
By cinchweb August 13, 2026
Learn how to set up plastic sheeting for popcorn ceiling removal, seal vents and fixtures, and contain debris safely. Free Sacramento Valley estimates.
Show More