July 13, 2026
Drywall Taping: What It Is and Why It Matters
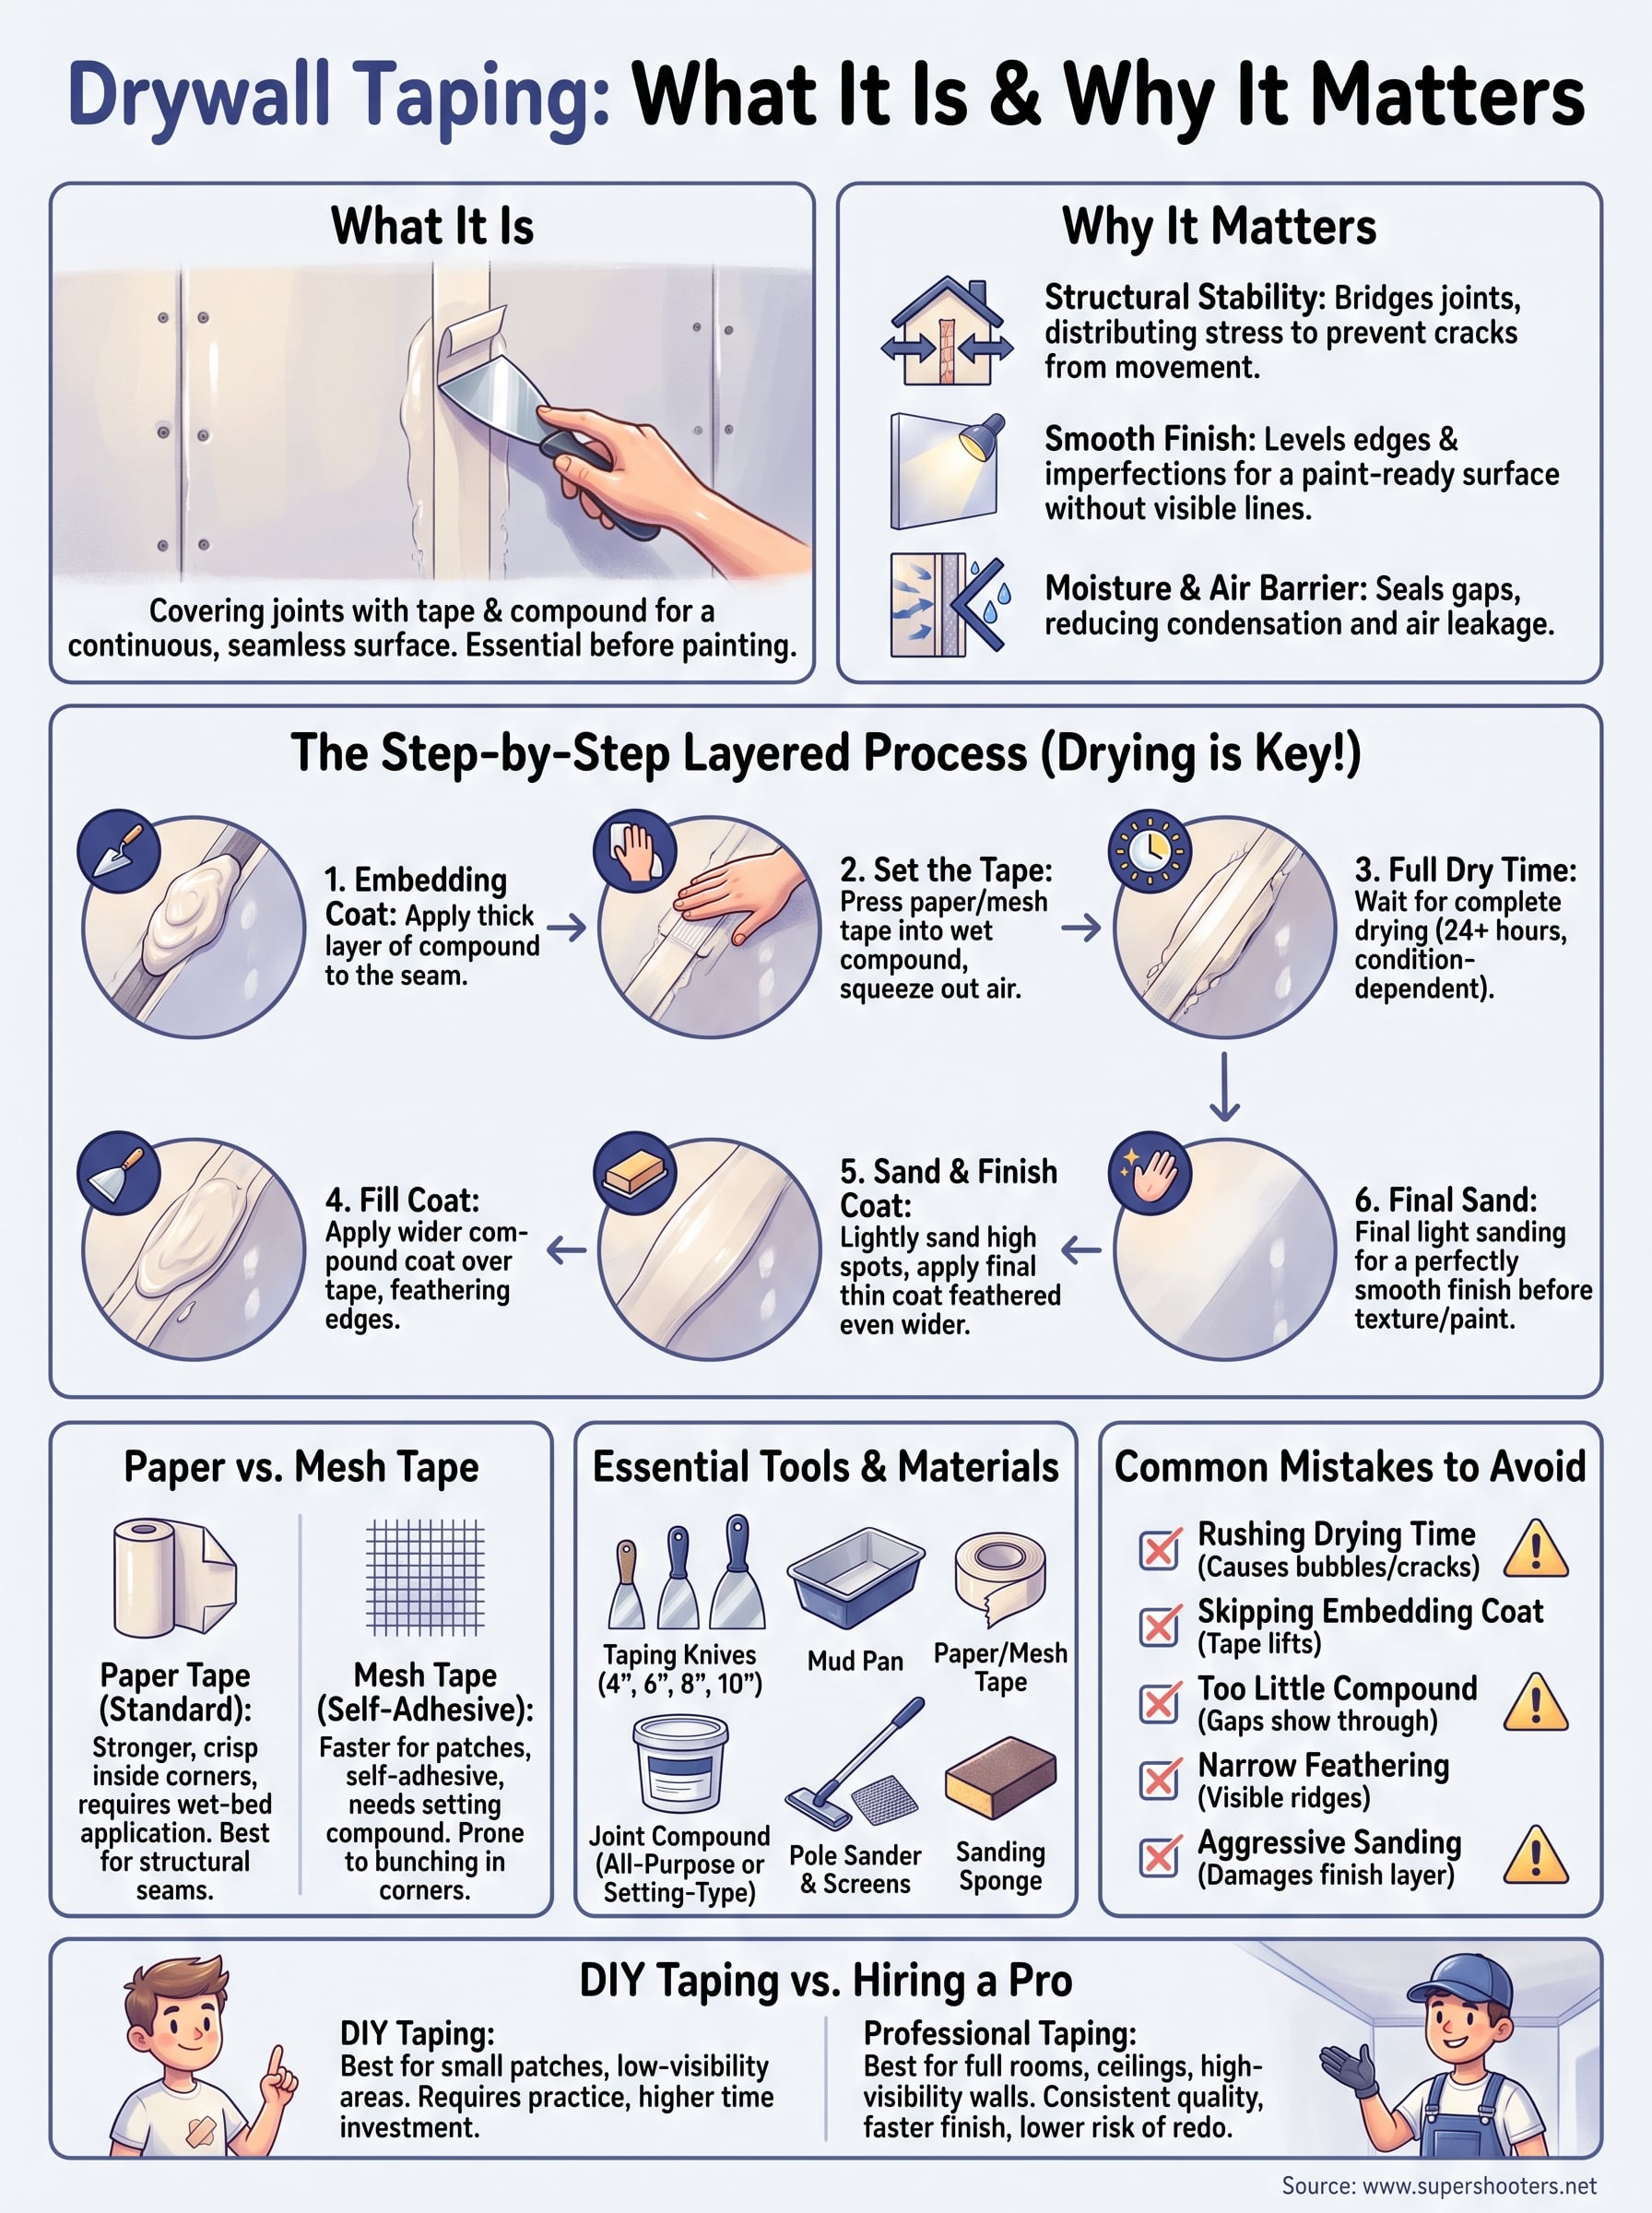
Every drywall installation has seams where sheets meet, and those seams show up as raised lines or cracks if you skip a step. What is drywall taping ? It's the process of covering those joints with paper or mesh tape and joint compound so the wall or ceiling looks like one continuous surface instead of a patchwork of panels. Without it, you'd see every edge, screw dent, and corner once paint goes on.
Taping matters because it's what turns a room full of hung drywall into a finished, paintable surface. Skip it or rush it, and you'll get visible seams , bubbling tape, or cracks that reappear within a year, especially in a home that settles or shifts with the seasons. Done right, it creates a smooth, durable finish that holds up for decades.
In this article, we'll walk through what drywall taping actually involves, the materials and coats that go into it, and why the technique matters as much as the product. We've spent over 30 years finishing drywall for homeowners across the Sacramento Valley, so we're sharing what actually holds up on real walls, not just in theory.
Why drywall taping matters for your walls
Drywall panels alone can't hide their own edges. Every seam between sheets creates a weak point that will crack, gap, or telegraph through paint if it's left uncovered. Taping bridges those joints and spreads out the stress across a wider area, so the wall flexes as one piece instead of cracking along the seam line. This is the core reason drywall taping exists at all: it turns individual panels into a single, continuous surface that can handle normal house movement without splitting apart.
Structural stability across seams
Homes move. Foundations settle, temperatures swing between summer and winter, and framing lumber shrinks as it dries out over the years. Untaped joints have nowhere to distribute that stress, so they crack first, usually right along the seam or at inside corners. Tape embedded in joint compound acts almost like fiberglass reinforcement in a boat hull. It holds the compound together under tension so a small shift in the framing doesn't turn into a visible crack you have to patch later.
Taping is what keeps a hairline shift in your foundation from turning into a crack running across your ceiling.
A smooth, paint-ready surface
Beyond structural strength, taping is also what makes a wall look finished. Raw drywall seams sit slightly recessed or raised depending on how the sheets were hung, and screw or nail heads leave small dimples across the surface. Compound and tape fill and level all of that out, so when you run a light across the wall at night, you see a flat plane instead of a grid of panel edges. This matters more than most homeowners expect. Paint doesn't hide imperfections, it highlights them, especially with satin or semi-gloss finishes that catch light at an angle.
Keeping moisture and air from getting through
Seams aren't just cosmetic weak points, they're also gaps in your wall's air and moisture barrier. Unsealed joints let humid air pass through the wall cavity, which can contribute to condensation issues inside the wall over time, particularly in bathrooms, laundry rooms, and homes near the Sacramento River where humidity swings are more noticeable. Properly taped and coated seams close that gap. It's a small detail that plays a real role in a wall's long-term performance, not just its appearance.
What happens when taping gets skipped or rushed
We've torn out plenty of walls over 30 years where a previous job skipped steps to save time, and the pattern is always the same. Here's what shows up when taping is done poorly or skipped:
- Ridge lines appear along every seam once paint is applied, especially under natural light
- Bubbling or peeling tape where compound wasn't applied evenly underneath
- Recurring cracks at the same seam every year or two, usually worse after a hot summer
- Nail pops where fastener heads push through the compound and tape
- Uneven texture absorption , where untaped areas soak up more paint and look blotchy
Any one of these problems means redoing the section, which usually costs more in labor than doing it right the first time. That's the practical argument for taking taping seriously, not skipping it, and not rushing the drying time between coats.
Why it's worth getting right the first time
Homeowners planning a remodel, garage conversion, or ADU build in the Sacramento Valley often underestimate how much taping quality affects the final walkthrough. A rushed taping job might look fine the day it's painted, but problems tend to surface within the first year, right when you're least expecting to redo drywall work. Getting it right the first time protects your investment in the rest of the finish, from texture to paint to trim, and it's a big part of why drywall taping deserves more attention than it usually gets in a renovation budget.
How drywall taping works step by step
Taping isn't a single action, it's a layered process with drying time built into every stage. Rush any coat and you trap moisture under the next layer, which leads to bubbling or cracking down the road. Here's the sequence we follow on every job, whether it's a full room or a single patch.
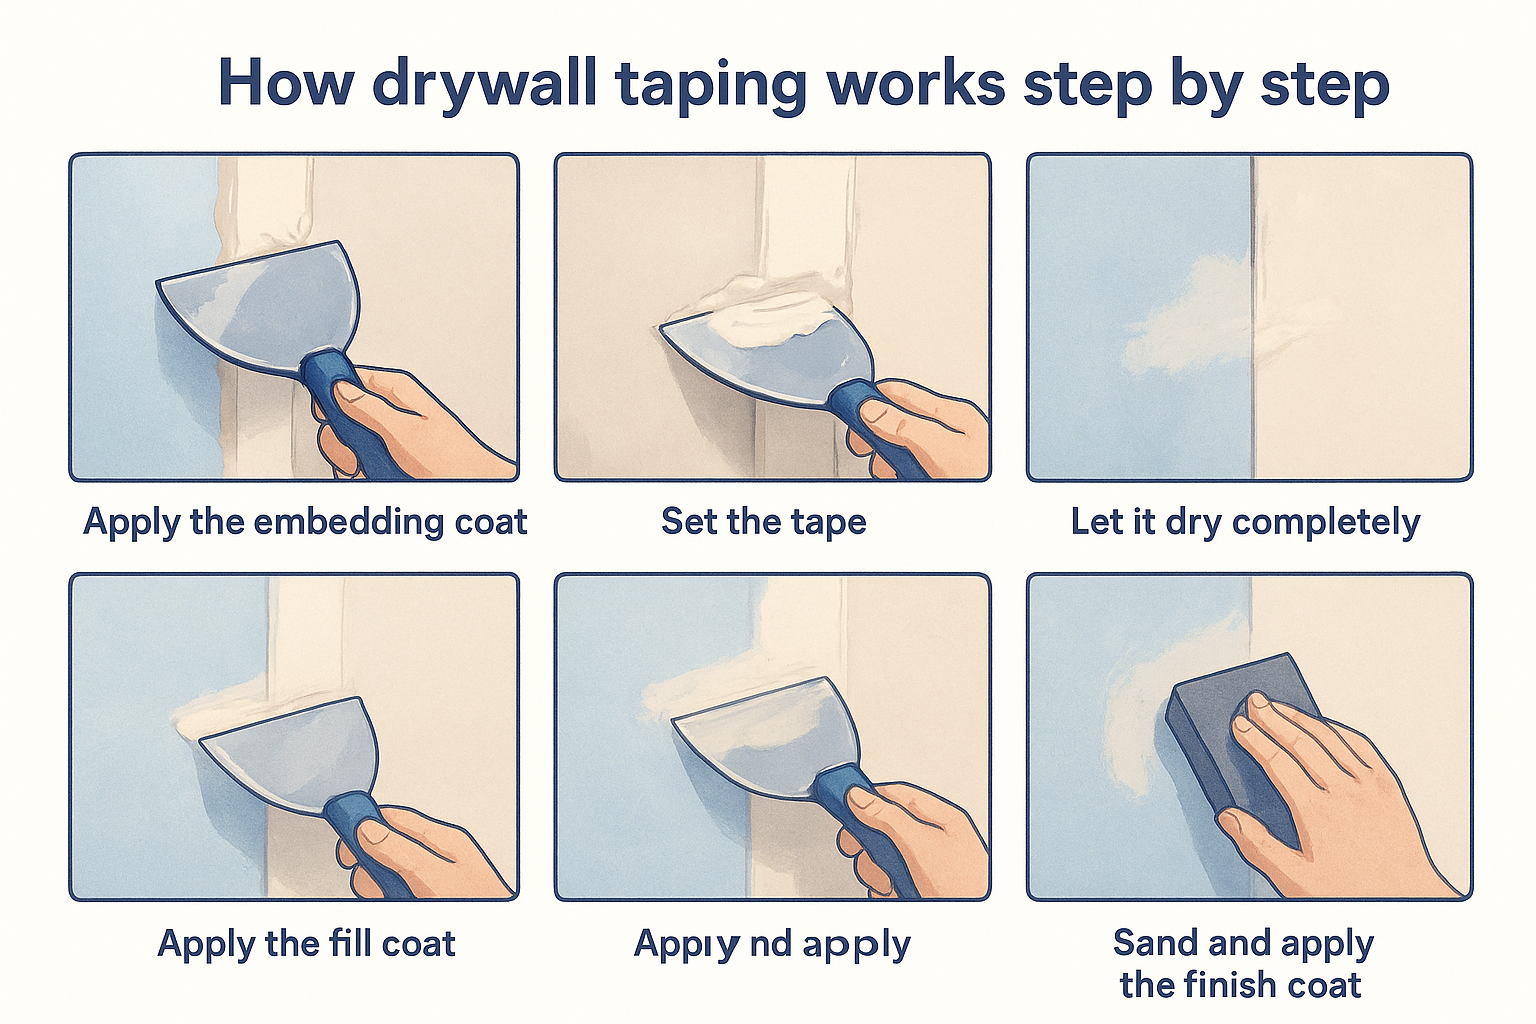
Step 1: Apply the embedding coat
First, spread a layer of joint compound directly over the seam with a 4 to 6 inch taping knife. This coat isn't for looks, it's the adhesive layer that the tape will bed into, so it needs to be thick enough to fully cover the joint without gaps or dry spots.
Step 2: Set the tape
Next, press paper or mesh tape into that wet compound and run your knife down the seam to squeeze out air bubbles and excess mud. The tape should sit flat with a thin, even layer of compound showing through on both edges. Trapped air under the tape is the number one cause of bubbling once the wall dries and gets painted.
Step 3: Let it dry completely
Then wait. Drying time depends on humidity and temperature, but plan on 24 hours minimum before the next coat in most Sacramento Valley conditions. Skipping this step is the most common shortcut we see on rushed jobs, and it's the one that causes the most callbacks.
Every taping problem we've ever fixed traces back to one shortcut: not letting the previous coat dry before adding the next.
Step 4: Apply the fill coat
Once dry, apply a second, wider coat of compound over the tape, feathering the edges out several inches beyond the first coat. This fill coat levels out the ridge left by the tape and starts blending the seam into the surrounding wall surface.
Step 5: Sand and apply the finish coat
After the fill coat dries, lightly sand any high spots, then apply a final, thin finish coat that feathers even further out than the fill coat. This is the coat that determines how invisible the seam will be once texture and paint go on. Here's a quick rundown of the full sequence:
- Embedding coat over the seam
- Tape pressed and set into wet compound
- Full dry time, typically 24 hours
- Fill coat, feathered wider than the first
- Sand, then finish coat feathered widest of all
- Final sand before texture or paint
Why the sequence matters more than the product
Homeowners often ask which brand of compound or tape makes the biggest difference, but honestly, technique and patience matter more than the product on the shelf. We've seen premium compound fail because someone rushed the drying time, and we've seen basic materials hold up for 20 years because every coat was applied and dried correctly. The process is what makes drywall taping work, not any single material in it.
Paper tape vs mesh tape: which one to use
Walk into any hardware store and you'll find two options sitting side by side on the shelf: paper tape and mesh tape. Both cover a seam, but they behave differently once compound goes on and the wall starts to move over time. Choosing the wrong one for the situation is one of the more common reasons a taping job fails early, so it's worth understanding what each does before you pick up a roll.
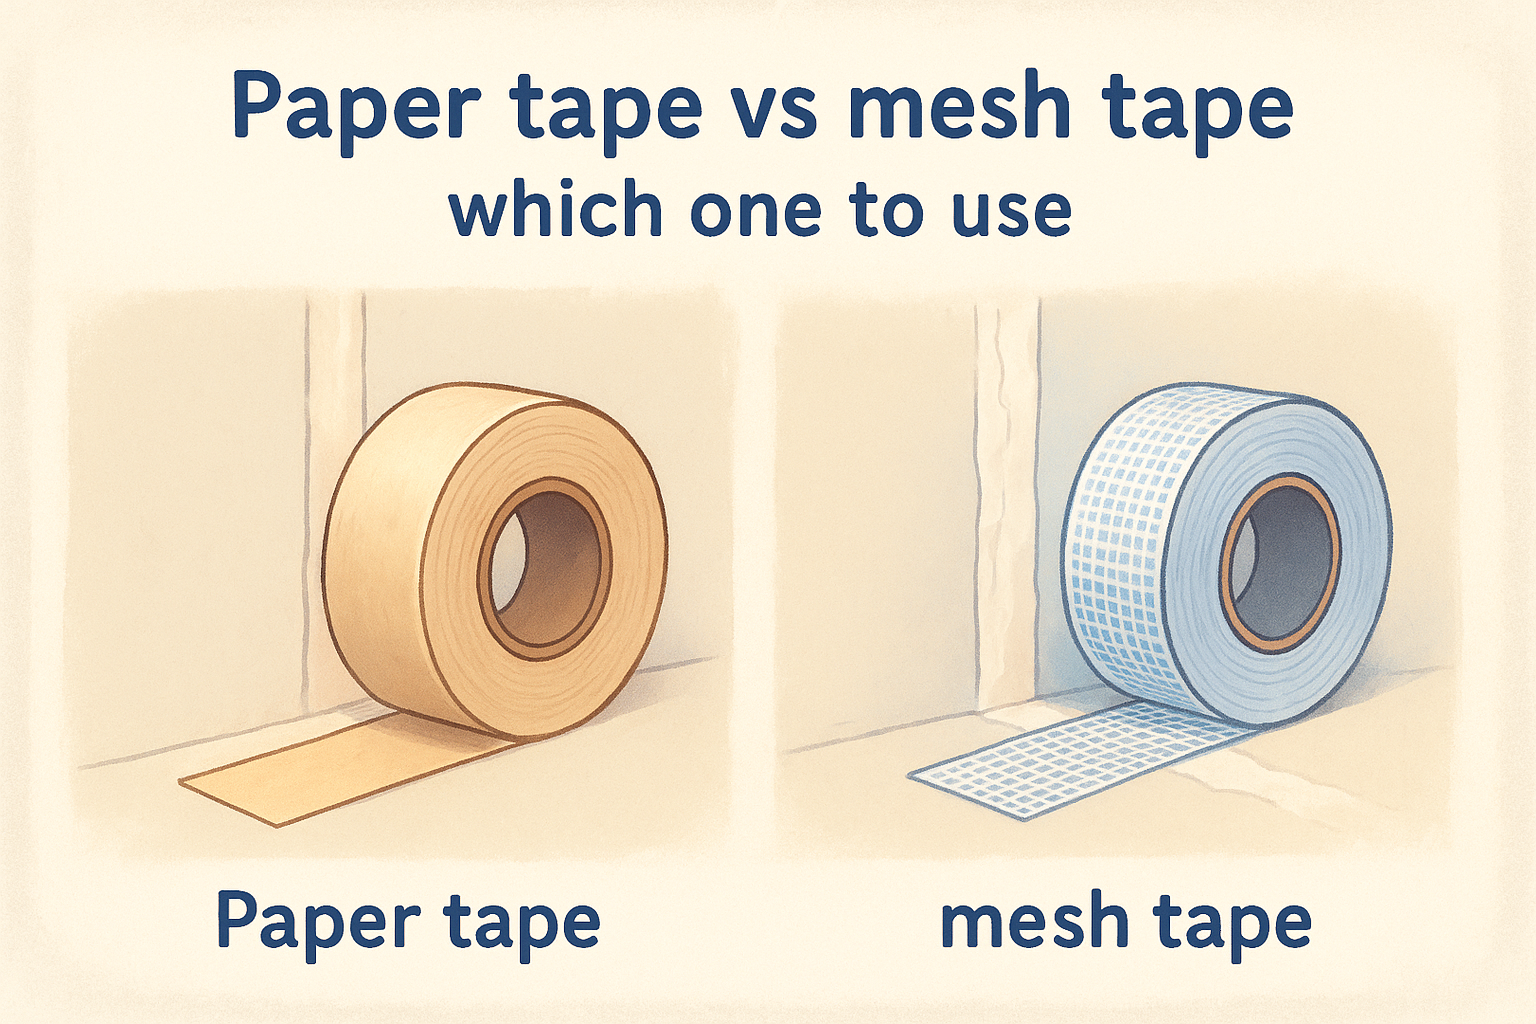
Paper tape
Paper tape has been the standard in professional drywall work for decades, and for good reason. It's thin, it creases cleanly down the center for inside corners, and it embeds flat into wet compound with almost no risk of trapped air once you run a knife over it correctly. Crisp inside corners are where paper tape really earns its reputation, since mesh tends to bunch or wrinkle when folded. The tradeoff is that paper requires more care during the embedding step. Skip the wet-bed application and it can bubble or lift.
Mesh tape
Mesh tape is self-adhesive fiberglass, so you can press it directly onto a dry seam without a wet bed underneath. That makes it faster for straight seams and repairs, which is why a lot of DIYers reach for it first. Self-adhesive backing speeds up the job, but mesh doesn't fold cleanly into corners, and it needs a setting-type compound rather than standard all-purpose mud to bond properly and resist cracking.
Paper tape wins on strength and corners, mesh wins on speed, and mixing them up on the wrong seam is how cracks come back.
Comparing the two side by side
| Factor | Paper Tape | Mesh Tape |
|---|---|---|
| Best for | Flat seams and inside corners | Flat seams and quick repairs |
| Compound needed | All-purpose or setting-type | Setting-type compound only |
| Corner performance | Excellent, creases cleanly | Poor, tends to bunch |
| Crack resistance | Very high with proper embedding | Good, but weaker under stress |
| Ease of use for beginners | Requires practice | Easier, self-adhesive |
Which one we use on the job
On every job across the Sacramento Valley, we default to paper tape for structural seams and corners, and we save mesh for small patches or repairs where speed matters more than long-term flex resistance. Newer homes with more framing movement benefit from paper tape's higher tensile strength, especially on ceilings where sagging or seasonal shifts put more stress on the joint. Repairs on an existing wall, where you're patching a small hole rather than taping a full seam, are a reasonable place for mesh tape and setting compound to save time without compromising the result.
Tools and materials you'll need
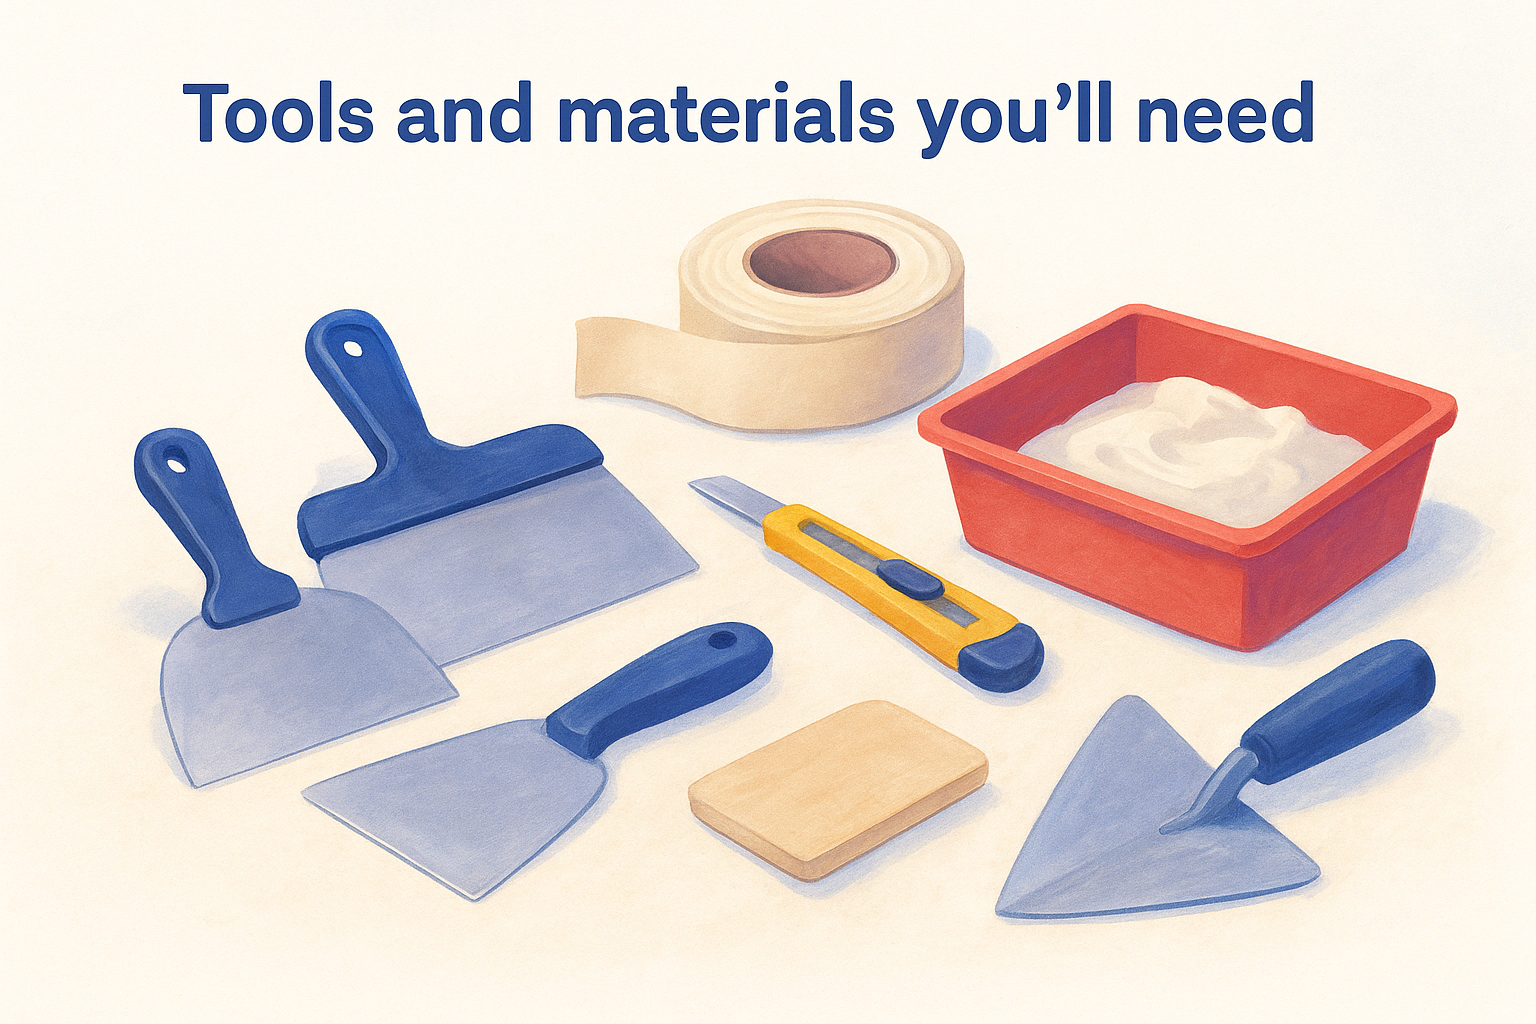
Getting drywall taping right doesn't require a truckload of gear, but showing up without the right knives or compound will slow you down and hurt the finish. Basic hand tools handle most of the work, and the materials you choose determine how forgiving the process is for a first-timer. Here's what actually sits in our trucks on a taping day.
Hand tools that do the heavy lifting
First, you need a set of taping knives in different widths, typically 4, 6, 8, and 10 inches, since each coat gets progressively wider as you feather the seam into the wall. A mud pan keeps your compound workable and close at hand instead of digging into a bucket every few minutes. Round off the kit with a utility knife for trimming tape, a corner trowel if you're taping inside corners regularly, and a hawk if you prefer loading compound that way instead of a pan.
Compound and tape options
Next comes the material that does the structural work: joint compound and tape. All-purpose compound works fine for embedding paper tape and handles most fill and finish coats, while setting-type compound dries faster through a chemical reaction rather than evaporation, which matters on humid days or when you're on a tight schedule. Choose your tape based on the seam, as covered earlier, paper for corners and structural joints, mesh for quick patches. Buying pre-mixed compound in a bucket saves time over powder, though powder stores longer if you're not using it all in one job.
The right tools don't make you a finisher, but the wrong ones will slow down even a skilled one.
Sanding and cleanup supplies
Once the coats are dry, you'll need sanding supplies to knock down ridges before texture or paint goes on. A pole sander with 120 to 150 grit screens covers large wall and ceiling areas without you climbing a ladder every few feet, and a sanding sponge handles corners and tight spots the pole can't reach. Keep a shop vac or dust-control sander nearby, since drywall dust travels further than most homeowners expect and settles on every surface in the room.
A quick shopping list
Here's a straightforward list to work from before you start a taping project:
- Taping knives (4", 6", 8", 10")
- Mud pan or hawk
- Utility knife
- Corner trowel
- Paper tape and/or mesh tape
- All-purpose or setting-type joint compound
- Pole sander with 120-150 grit screens
- Sanding sponge
- Shop vac or dust-control sander
- Drop cloths and painter's tape for surrounding surfaces
Missing even one of these, especially the wider knives, tends to show up later as visible ridges once paint hits the wall.
Common drywall taping mistakes to avoid
After 30 years of fixing other people's drywall work, we see the same handful of mistakes over and over. Recognizing these patterns before you start a taping project saves you from redoing entire walls, and it explains why some jobs look great on day one but fall apart within a year.
Rushing the drying time between coats
This is the mistake behind more callbacks than anything else. Wet compound trapped under a fresh layer has nowhere to go, so it eventually pushes through as a bubble, a soft spot, or a crack once the wall finally dries out completely. Humidity and temperature both slow drying, so a coat that dries in 12 hours during a dry Sacramento summer might need double that in a damp, closed-up room during winter.
A drywall seam that looks dry on the surface can still be wet underneath, and that's where cracks start.
Skipping the embedding coat
Some DIYers try to save a step by pressing tape directly onto a bare seam without a wet bed of compound underneath. Dry-set tape never bonds properly, and it lifts the first time the wall flexes even slightly. The embedding coat isn't optional, it's the layer that actually holds the tape in place long-term.
Using too little compound, or spreading it too thin
A thin, starved coat leaves gaps where the tape isn't fully covered, and those gaps show up later as faint lines or actual cracks. Thin compound layers also dry unevenly, which creates the exact stress points taping is supposed to prevent. Loading enough mud onto the knife and pressing firmly matters more than most first-timers expect.
Not feathering the edges wide enough
Each coat should spread wider than the last, but a lot of DIY jobs stop feathering too soon, leaving a visible hump right at the edge of the tape. Narrow feathering creates a ridge you can see under any angled light, even after paint and texture go on. Widening each coat by a few extra inches solves this almost every time.
Sanding too aggressively
Over-sanding cuts through the paper on paper tape or thins the compound layer so much that the tape shows through as a faint line once paint hits the wall. Aggressive sanding feels productive, but it undoes the leveling work the fill and finish coats were meant to accomplish.
A quick checklist to catch these before they cost you
- Let every coat dry fully, even if it takes longer than planned
- Never set tape onto a dry, unprepped seam
- Load enough compound so no dry spots show through
- Widen each coat's feathered edge past the one before it
- Sand lightly, checking with a light held at an angle
Catching even one of these early keeps a small taping job from turning into a full wall replacement down the road.
DIY taping vs hiring a professional
Taping a small patch after hanging a shelf is a different project than taping an entire garage conversion or ADU. Scale and visibility are what separate a reasonable DIY job from one that's better left to a professional crew. A single seam behind a bookshelf forgives more mistakes than a ceiling seam under recessed lighting, where every ridge and shadow line shows up the moment the sun hits it.
When DIY taping makes sense
Given a small repair, patching a hole from a doorknob or taping one seam in a closet, doing it yourself is a reasonable way to save money. Small, low-visibility areas give you room to practice technique without a costly redo if the first coat comes out uneven. If you've got patience for the drying time between coats and you're not in a rush to paint, a DIY approach can produce a decent result on limited square footage.
When to call a professional
However, once you're talking about full rooms, ceilings, or any wall that gets direct light from a window or fixture, the margin for error shrinks fast. Feathering technique takes practice to get invisible, and most first-time tapers leave a visible ridge at the edge of every coat because they stop widening too soon. If you're finishing an ADU, garage conversion, or a full remodel where the walls need to look factory-smooth under paint, a crew that's done thousands of seams will catch problems you won't see until the paint's already dry.
A DIY patch behind a couch is forgiving. A DIY ceiling under a skylight is not.
Comparing the tradeoffs
| Factor | DIY Taping | Professional Taping |
|---|---|---|
| Best for | Small patches, low-visibility spots | Full rooms, ceilings, visible walls |
| Time investment | Higher, learning curve slows you down | Lower, experienced crews move fast |
| Tool cost | You buy everything upfront | Included in the job |
| Finish quality | Variable, depends on practice | Consistent, tested over many jobs |
| Risk of redo | Higher on first attempts | Lower, backed by warranty work |
What tips the decision
Money matters, but so does how much your walls will be scrutinized once they're painted. Areas with strong side lighting, open floor plans, or high ceilings punish small taping errors more than a closet ever will. Time is the other factor people underestimate. Between drying, sanding, and multiple coats, a single room can eat an entire weekend for someone doing this for the first time, while an experienced crew often finishes the same space in a day. If you're weighing the two options for a project bigger than a patch or two, it's worth getting a professional opinion before you commit a weekend and a stack of materials to a wall that's going to be the first thing guests notice.
What drywall taping typically costs
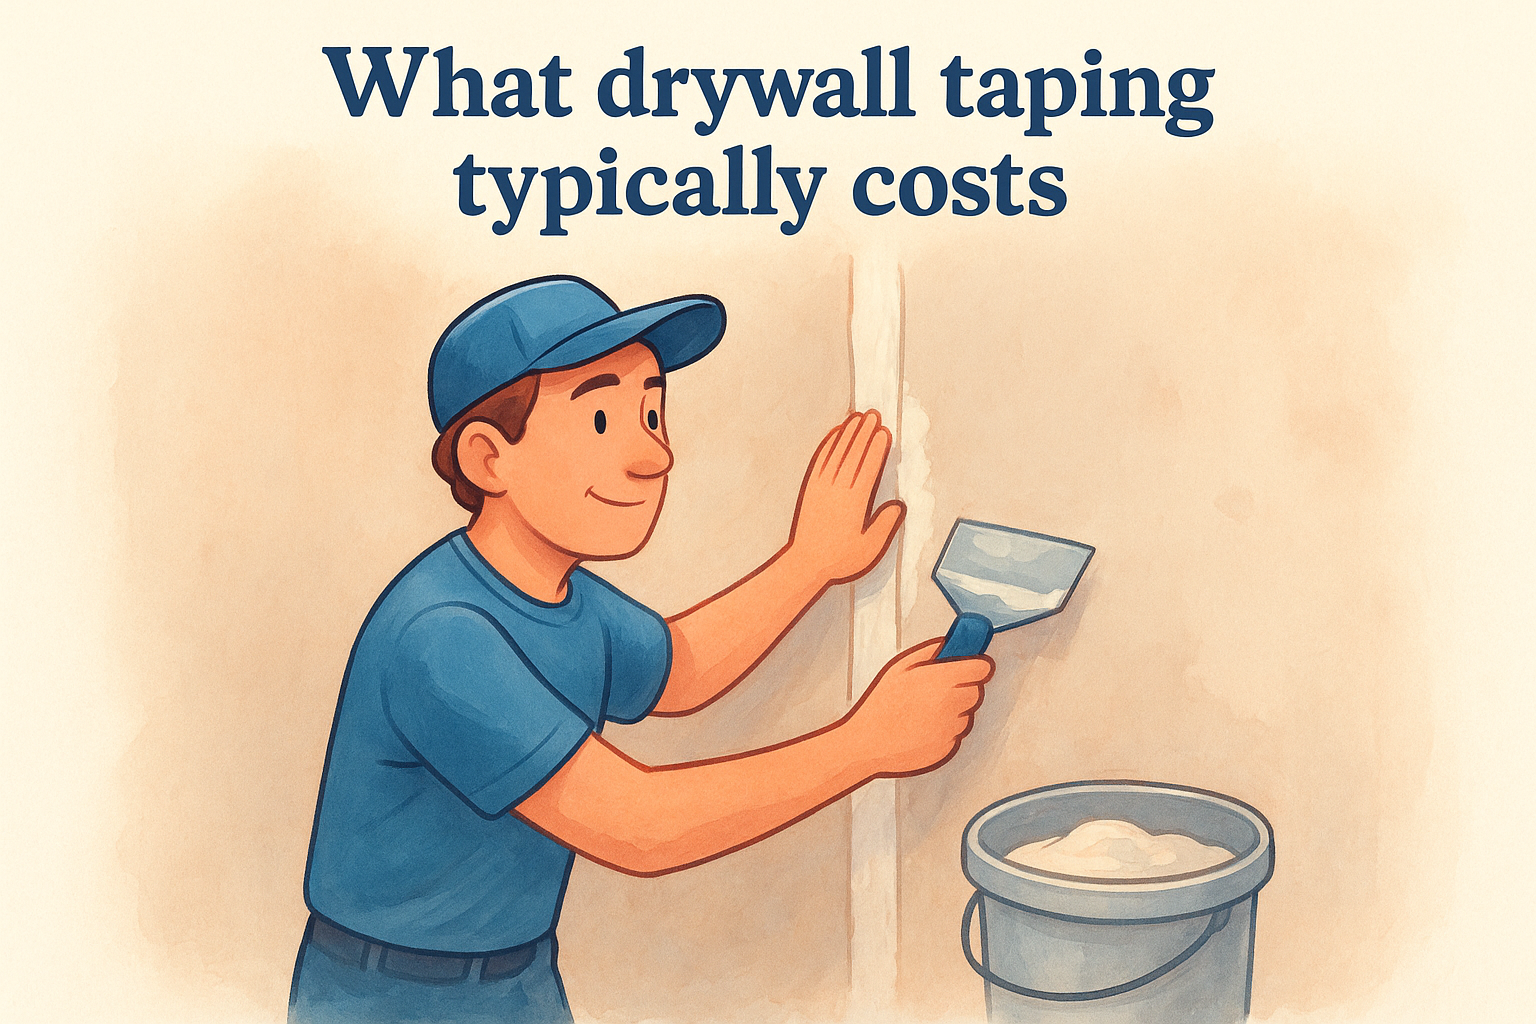
Cost is usually the first question homeowners ask, and the honest answer is that taping costs vary based on square footage, ceiling height, and how much of the seam needs repair versus fresh installation. A single patched hole costs almost nothing in materials, while a full ADU or garage conversion involves enough labor and drying time to add up quickly. Knowing the rough ranges helps you budget before you start pulling quotes.
What drives the price up or down
Several factors push a taping job's cost higher than a basic per-square-foot estimate. Ceiling work costs more than wall taping because of the overhead angle and the scaffolding or stilts needed to reach it safely. Older homes with uneven framing often need extra coats to level seams that newer construction wouldn't require. Access also matters, a garage with open studs is faster to tape than a finished room where furniture and flooring need protection first.
Typical price ranges
Here's a general breakdown of what taping runs in the Sacramento Valley market, keeping in mind that quotes vary by contractor and project scope:
| Project type | Typical cost range |
|---|---|
| Small patch or repair | $75 to $200 |
| Single room (walls only) | $300 to $800 |
| Full room with ceiling | $600 to $1,500 |
| ADU or garage conversion | $1,500 to $4,000+ |
A small patch costs less than a dinner out, but a rushed full-room job costs more to fix than it would have cost to do right the first time.
Materials vs labor
Materials themselves are cheap. A bucket of compound and a roll of tape might run $30 to $60 total for an average room. Labor is where the bulk of the cost sits, since taping demands multiple coats with drying time between each one, and a crew is paying for that time even when they're not physically working on your walls. This is also why DIY seems cheaper on paper but often costs more in redone sections once mistakes surface after painting.
Why free estimates matter
Because every home is different, ceiling height, framing condition, existing damage, a walk-through beats guessing from a price chart. We offer free in-home consultations across the Sacramento Valley precisely because square footage alone doesn't tell the whole story. A quote based on an actual look at your walls protects you from surprise charges once a crew opens up a seam and finds more damage than expected, and it's the only way to get a number you can actually budget around.
Getting your walls ready for a lasting finish
Drywall taping is what separates a wall that looks finished from one that just looks patched. Every step, from the embedding coat to the final feathered edge, exists to keep seams invisible and cracks from coming back after the paint dries. Skipping steps saves an afternoon now and costs you a redo later, usually right when you're least prepared for it.
Whether you're patching a single seam or finishing an entire ADU, the same rule applies: technique and patience matter more than the brand of compound in the bucket. If your project is bigger than a small patch, or your walls already show cracks and bubbling from a rushed job, it's worth getting eyes on it before you commit a weekend to redoing someone else's mistake. Our crew has been fixing and finishing walls across the Sacramento Valley for over 30 years, and we're happy to take a look. Reach out for drywall repair and patching and get a finish that actually lasts.
Recent Posts