July 16, 2026
How to Install Drywall on a Ceiling by Yourself
Hanging drywall overhead is a two-person job for a reason. The panels are heavy, awkward, and gravity fights you the entire time. But if you're renovating solo, or your helper canceled at the last minute, you still need to know how to install drywall on ceiling surfaces without throwing out your back or ending up with sagging joints.
The short answer is that you can do it alone if you use the right setup. A T-brace made from scrap lumber or a rented panel lift takes the weight off your arms while you screw the sheet into place, and working with 48-inch panels instead of full 4x12 sheets makes the whole process manageable for one person.
In this guide, we'll walk through measuring and cutting panels to fit your ceiling joists, building or renting the support tools that let you work solo, and the fastening pattern that keeps seams from cracking later. If your project turns out to be bigger than a weekend DIY job, or you uncover an old acoustic ceiling underneath, our crew at Super Shooters has handled ceiling drywall across the Sacramento Valley for over 30 years and can finish it for you.
What you need before hanging a ceiling alone
Getting your gear together before you climb the ladder saves you from stalling out mid-panel with your arms shaking and a sheet balanced on your head. Solo ceiling drywall work depends on having the right tools staged and ready, because once a panel is up, you don't have a free hand to go dig through the garage. Spend an hour gathering everything below and the actual hanging goes faster than most people expect.
Tools that make it possible alone
A few specific tools separate a smooth solo install from a frustrating one. You don't need a full contractor's truck, but skipping these will cost you time and probably a few curse words.
- Cordless drill or drywall screw gun with a depth-sensing bit so screws sink flush without tearing paper
- Drywall T-square (48-inch) for straight, accurate cuts
- Rotary cutout tool or drywall saw for electrical boxes and fixture openings
- Panel lift (rental) or homemade T-brace to support the sheet while you screw it in
- Stud finder to mark joist locations before you start
- Chalk line for snapping consistent joist lines across the whole ceiling
- Utility knife with fresh blades for scoring and snapping sheets
- Tape measure and pencil for marking cut lines directly on the panel
Renting a panel lift for a day typically runs $50 to $75 depending on your area, and it's worth every dollar if you're doing more than one room. If you'd rather build your own support, a T-brace costs under $15 in scrap lumber and takes 20 minutes to assemble, which we'll cover in the next section.
Choosing the right panel size and thickness
Most pros hang half-inch drywall on ceilings with joists spaced 16 inches apart, but you should check your local code before buying material. Working alone changes the calculus on panel size too. Full 4x12 sheets weigh over 60 pounds and are nearly impossible to maneuver by yourself, so 48-inch by 96-inch panels are the practical choice for a one-person job.
| Panel Thickness | Max Joist Spacing | Approx. Weight (4x8 sheet) | Best Use |
|---|---|---|---|
| 1/2 inch | 16 inches on center | 54 lbs | Standard ceilings, solo-friendly |
| 5/8 inch (Type X) | 24 inches on center | 71 lbs | Garages, fire-rated assemblies |
| Lightweight 1/2 inch | 16 inches on center | 43 lbs | Best option for solo installs |
Lightweight half-inch drywall cuts nearly 20% off the weight you're wrestling overhead, and that difference matters when there's no one else holding the other end.
If your ceiling joists run 24 inches on center, you'll need 5/8-inch board regardless of who's hanging it, since half-inch panels will sag between joists that far apart. Check the specs on your local building department's site or the International Code Council if you're unsure which rating applies to your project.
Safety gear and ceiling prep
Overhead work puts dust and debris directly in your eyes, so don't skip protection here. You'll want safety glasses, a dust mask rated for drywall particulate, and knee pads if you're working from a step stool for long stretches. Before any of that matters, though, walk the room and confirm there's no existing acoustic or popcorn texture hiding above a lower ceiling, since older homes in the Sacramento Valley sometimes have layered ceilings that need testing for asbestos before you cut into anything. Sturdy stepladders on both sides of your work area, positioned so you can move a few feet between screw points without climbing down, will keep the whole project moving without unnecessary trips up and down.
Step 1. Measure and cut your drywall panels
Accurate measurements save you from a wasted panel, and wasted panels hurt more when you're already short on hands. Start by snapping a chalk line across every joist so you can see exactly where your fasteners need to land once the panel is overhead and you can't check underneath it anymore. Measure the room's width and length, then sketch a quick layout on paper showing where each sheet will land, staggering the seams so they don't line up with the seams on the wall below.
Marking and scoring the panel
Lay your panel flat across two sawhorses or a spare table before cutting anything. Marking cut lines with a T-square keeps your edges straight, which matters more on ceiling panels than wall panels since a crooked edge overhead is harder to hide with texture. Score along your line with a sharp utility knife, snap the sheet away from the cut, then run the blade down the back paper to separate the two halves cleanly.
- Measure twice before marking, since drywall doesn't forgive a bad cut the way lumber does
- Cut panels about 1/4 inch short of the total span to leave room for expansion
- Sand rough edges lightly with a rasp so panels butt together without gaps
- Label the back of each panel with its destination before moving on to the next cut
Cutting around fixtures before you lift anything
Measure and mark any electrical box or vent opening while the panel is still on the sawhorses, not after it's overhead. Trying to cut a fixture hole while balancing a sheet on a T-brace is how people end up dropping panels or gouging the surrounding drywall. Use your rotary cutout tool for round or rectangular openings, and double-check your measurements against the actual joist layout, not just the electrician's rough-in notes, since those sometimes shift during framing.
Every cut you make on the ground is a cut you don't have to fight through while holding a 40-pound panel over your head.
Stacking cut panels for easy access
Once you've cut and labeled your panels, stack them in the order you'll hang them, with the first panel on top. This step matters more when you're working alone, because you won't have a second person to dig through a pile looking for the right sheet while you're standing on a ladder. Lean the stack against a wall near your work area rather than flat on the floor, since flat stacking makes the bottom panels harder to grab without help. A little organization here keeps your momentum going once you start lifting panels into place.
Step 2. Build a T-brace to hold panels by yourself
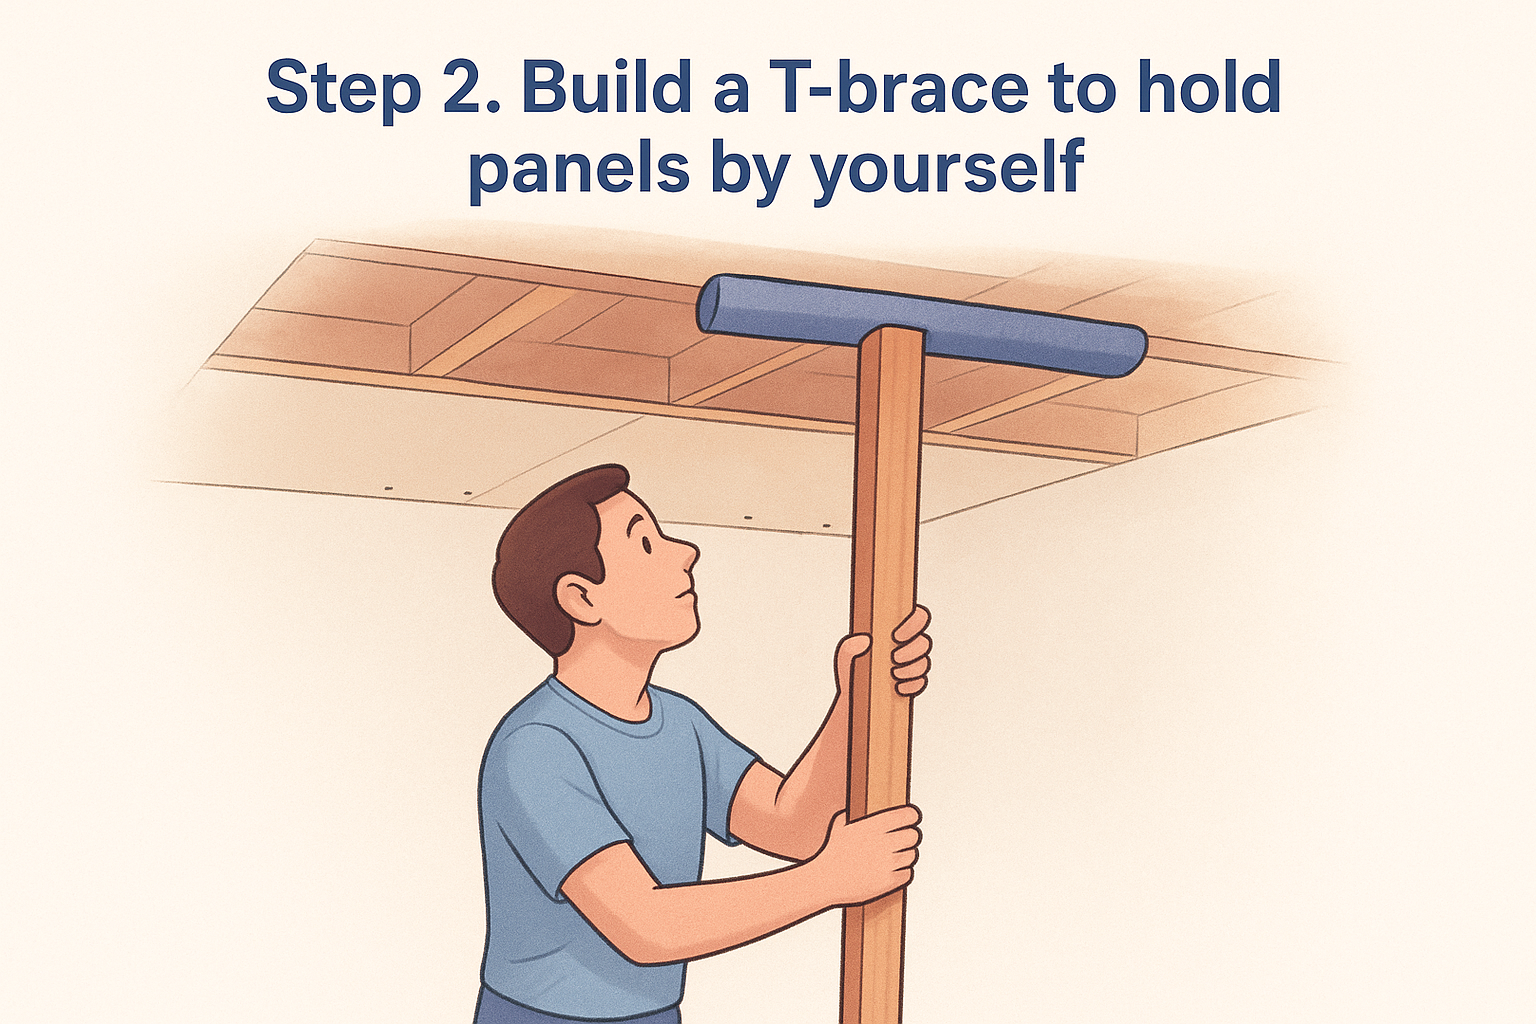
A T-brace is the single tool that makes solo ceiling drywall possible. It's nothing more than a long pole with a crossbar padded on top, and you jam it under a panel to hold the sheet against the joists while your hands are free to drive screws. Skip this step and you'll be balancing a 40-plus-pound sheet on your head while fumbling for a drill, which is exactly how backs get thrown out and panels get dropped.
Materials and build steps
You can build a working T-brace in about 20 minutes with lumber you probably already have lying around a job site. Building your own T-brace costs less than a fast food meal and holds up for job after job if you store it flat.
 Materials:
- One 2x4, cut to (ceiling height minus 1-2 inches)
- One 2x4, cut to 30-36 inches for the crossbar
- Wood screws (2.5-inch)
- Scrap carpet, foam pipe insulation, or an old towel
Steps:
1. Cut the long 2x4 about 1 to 2 inches shorter than your ceiling height.
2. Center the 30-36 inch crossbar on top of the long piece to form a T.
3. Drive three 2.5-inch screws through the long piece into the crossbar.
4. Wrap the crossbar in scrap carpet or foam insulation and secure with staples or tape.
5. Test the brace against the ceiling before loading a panel on it.
The padding matters more than it looks. Padding the crossbar with carpet or foam keeps the brace from denting or tearing the drywall's paper face when it's under load, and a torn face weakens the panel right where you need it strongest.
Sizing it to your ceiling height
Get the length right and the brace practically holds itself in place through friction alone. Cut the long piece a bit short, then wedge a scrap shim between the brace and the floor once the panel is pressed against the joists, which locks everything tight without you having to lean on it. Too long and it won't fit under the ceiling at all; too short and it won't hold the panel snug against the joists while you work.
A properly sized T-brace holds a panel flush against the joists on its own, freeing both your hands for the screw gun.
Renting instead of building
If you're only doing one ceiling and don't want another tool cluttering the garage afterward, a rented panel lift does the same job with less physical strain, especially on ceilings above 9 feet. Either option works, but the T-brace wins on cost if you've got more than one room ahead of you.
Step 3. Lift, position, and screw the panel in place
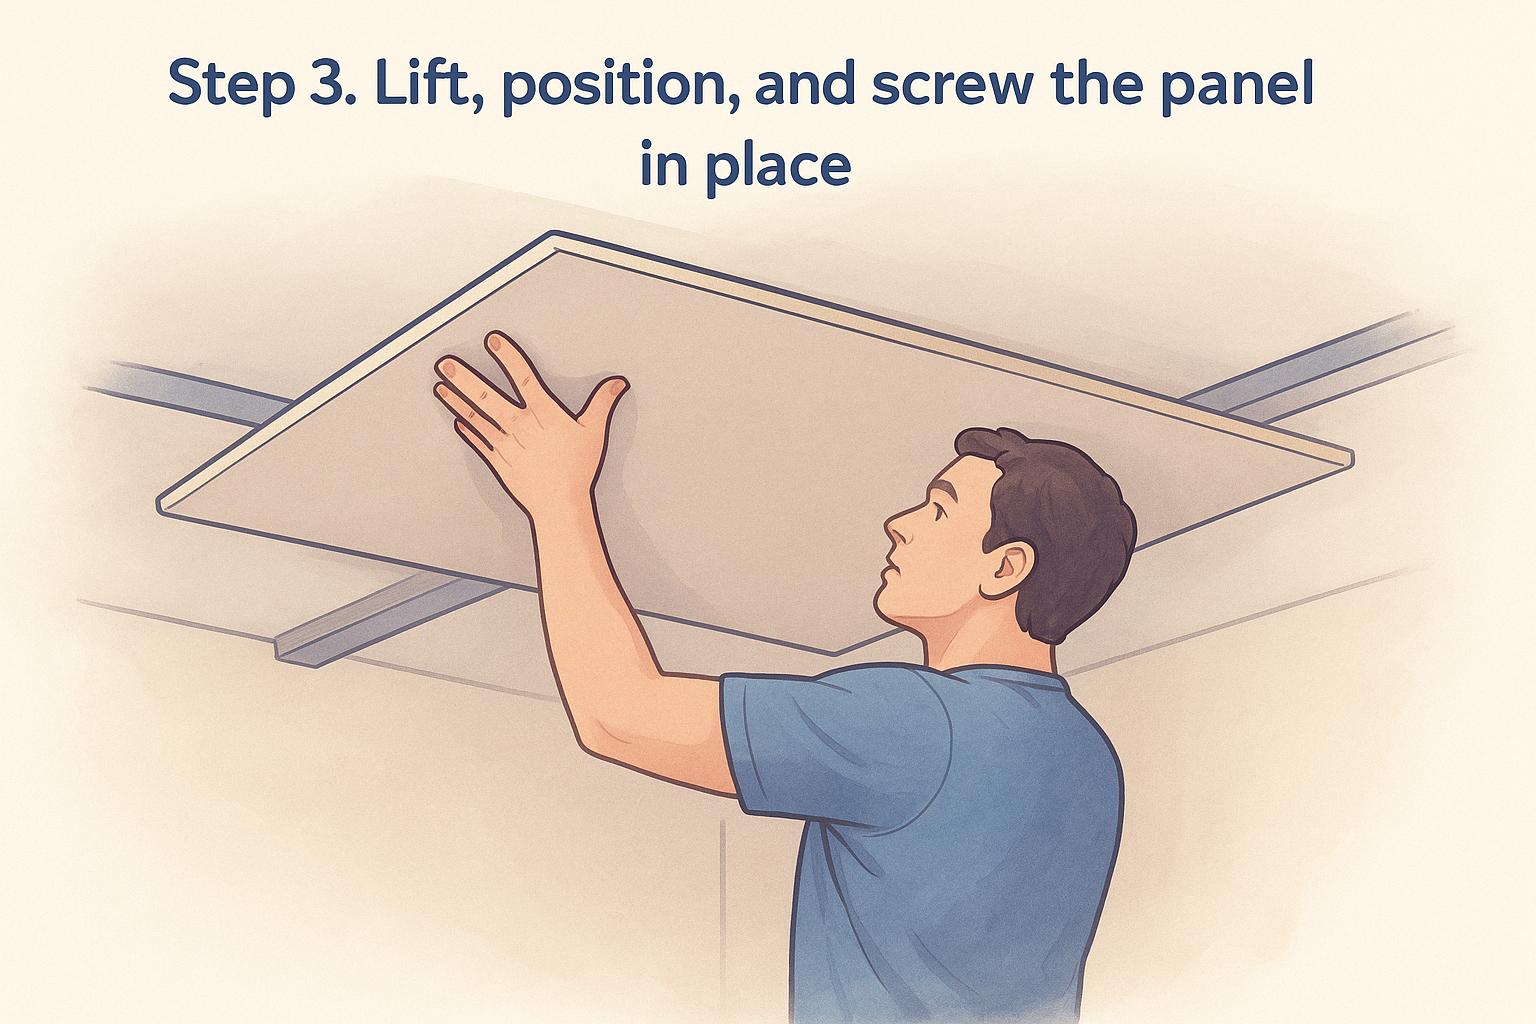
Getting the panel from the floor to the ceiling is the moment most solo installs go wrong, so slow down here even if your arms are begging you to rush. Lifting the panel overhead works best if you rest one edge on your head and shoulder first, walk it toward the T-brace, then swing the free end up onto the crossbar while your head holds the other side steady. Once both ends are roughly in place, step back and check the panel against your chalk lines before you drive a single screw.
Positioning against your layout lines
Nudge the panel until its edges line up with the chalk lines you snapped earlier, and confirm the seam falls on the center of a joist, not floating between two of them. Checking joist alignment now, before any screws go in, saves you from pulling a fastener back out later because it missed solid wood. Push the panel tight against the adjoining sheet so the seam closes without a gap, since gaps here mean extra mud and tape work down the line.
A panel that's square to its layout lines before the first screw goes in will stay square for the life of the ceiling.
Driving screws in the right pattern
Start fastening from the center of the panel and work outward toward the edges, which keeps the sheet from bowing away from the joists as you go. Space screws roughly every 12 inches along each joist, and keep them at least 3/8 inch from any edge so you don't blow out the paper. Sink each screw just below the surface, enough to leave a slight dimple without tearing through the face paper, since a torn dimple won't hold mud properly later.
- Start at the center joist and move outward in both directions
- Space fasteners 12 inches apart along every joist
- Keep screws 3/8 inch minimum from panel edges
- Sink heads to a slight dimple, not flush and not proud
- Check the panel is still snug against the brace before removing it
Releasing the brace and checking your work
Once every joist along the panel is fastened, ease the T-brace out from under the sheet and run your hand along the seams to feel for any high spots or gaps. Removing the brace too early is a common mistake that leads to a sagging corner, so double check every screw line before you pull it free. If everything feels flush and tight, move your ladder, reposition the brace, and start the next panel using the same routine you just finished.
Step 4. Cut openings and prep the ceiling for finishing
With panels hung, you still need to open up any spots you couldn't cut ahead of time, like a fixture box that shifted slightly once the sheet went up. Cutting openings after hanging is riskier than cutting on the sawhorses, since you're working overhead with dust falling straight into your face, but sometimes a light fixture or vent doesn't line up perfectly and you have no choice. Locate the opening from below by pressing your palm against the panel to feel the edge of the box through the drywall, then mark it lightly with a pencil before you commit to a cut.
Finding and cutting fixture openings
Use a rotary cutout tool with a bit designed for drywall, since a jigsaw or reciprocating saw gives you far less control when you're cutting blind from underneath. Start the cut slow, feel for the edge of the electrical box with the bit, and trace the perimeter rather than trying to plunge straight through in one pass.
- Locate the box edge by hand before you turn on any tool
- Cut slightly inside your mark, then widen the hole gradually until the fixture fits
- Vacuum the opening immediately, since drywall dust falls straight into your eyes overhead
- Test-fit the fixture cover before moving your ladder away
A hole cut too large around a fixture means visible gaps no amount of texture will fully hide.
Checking every seam and screw before finishing
Before you call the hanging phase done, walk the entire ceiling with a bright work light held at an angle, since raking light shows every high screw and every panel edge that's sitting proud of its neighbor. Checking seams for gaps now, while you can still access the ceiling easily with your ladder in place, saves a second trip later once your tools are packed away. Fix any screw that didn't dimple properly by backing it out, filling the hole with a bit of drywall compound, and driving a new screw an inch away.
Prepping for tape, mud, and texture
Once every seam is tight and every screw sits correctly, sweep the room and wipe down the panel faces so joint compound has a clean surface to bond to. If you're planning to match existing texture elsewhere in the house, take a photo of the surrounding ceiling now, since texture patterns are easier to match while the reference is fresh and the room is still set up for the work. From here, taping, mudding, and texturing follow the same process as any drywall job, solo or not, and that finishing stage is where most homeowners either commit to learning a new skill or decide to bring in help.
Knowing when to call in a pro
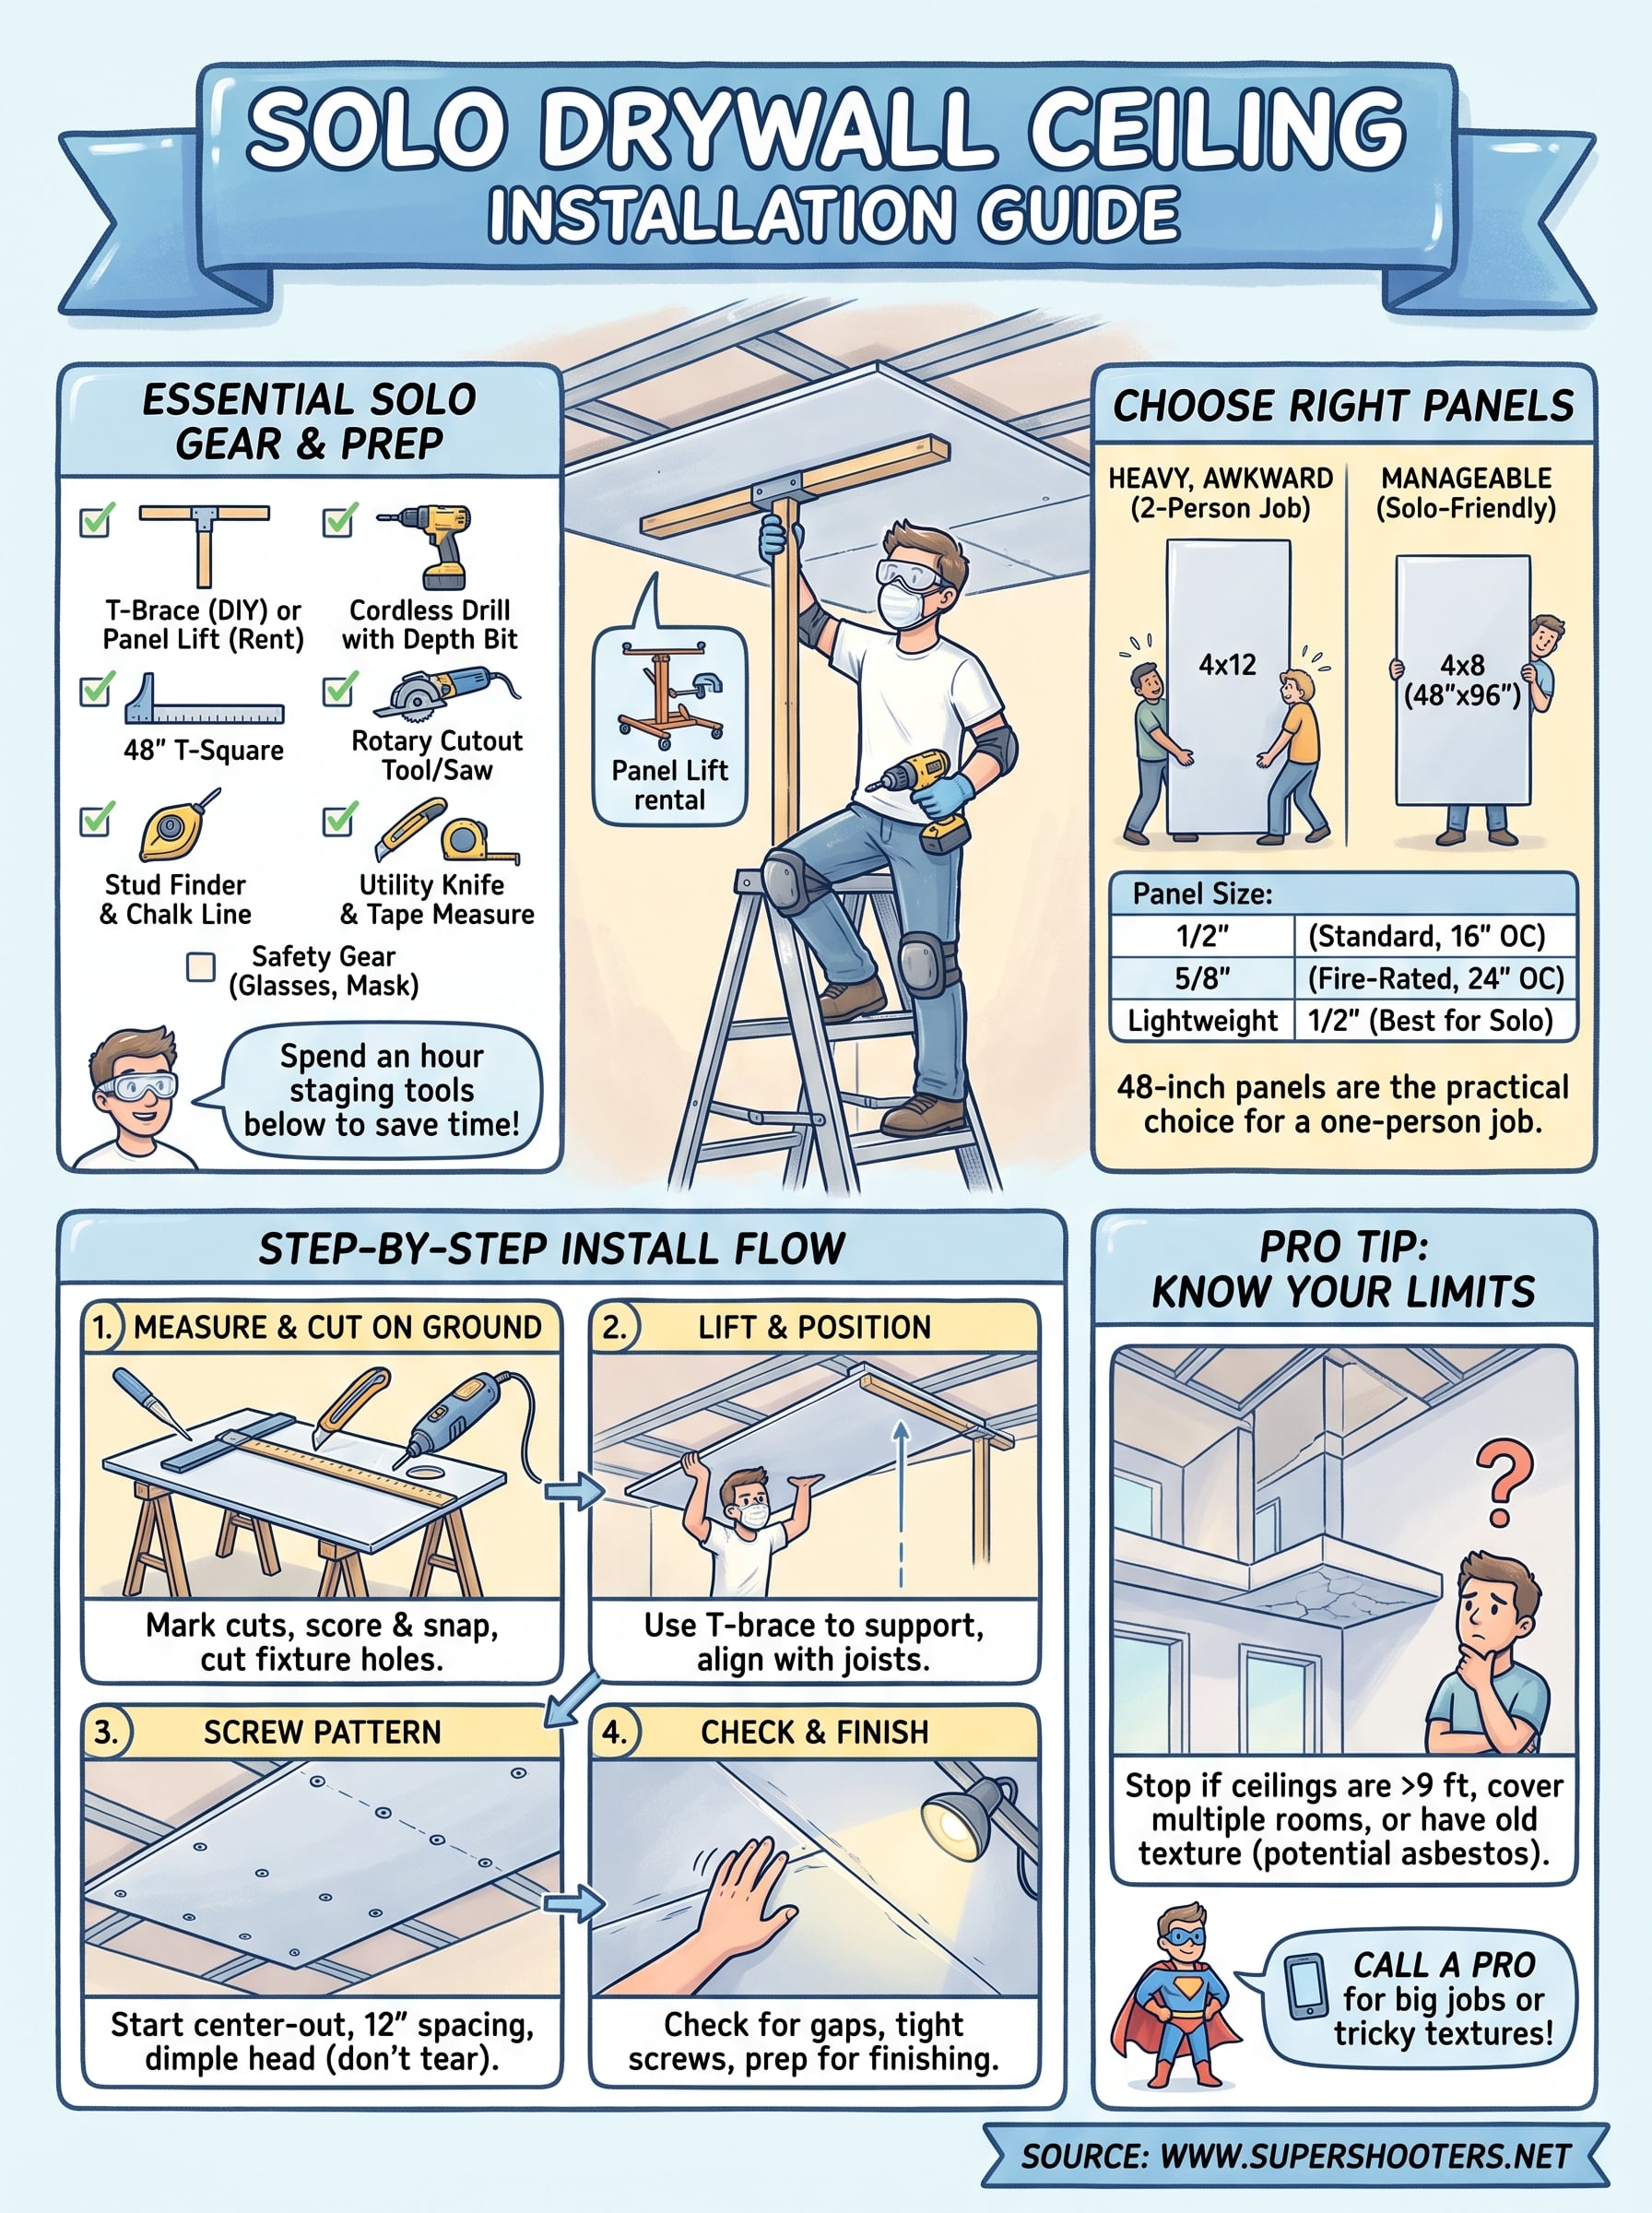
Solo drywall on a ceiling is doable with a T-brace, the right panel size, and patience for measuring twice. But knowing your limits matters more than pushing through a project that's outgrown a weekend. If your ceiling spans more than one room, sits higher than 9 feet, or you find old acoustic texture that might contain asbestos, that's the point to stop and call someone with the right equipment and training.
Think about what you actually gained from reading this: a real sense of whether your ceiling is a solo job or a bigger undertaking. That's worth more than a rushed install you'll be fixing next year. Bringing in professional help doesn't mean you failed at DIY, it means you recognized when the risk outweighed the savings.
If your project turns out bigger than expected, or you're staring at a suspicious ceiling texture, reach out for professional drywall installation and let our crew finish it right.
Recent Posts