May 9, 2026
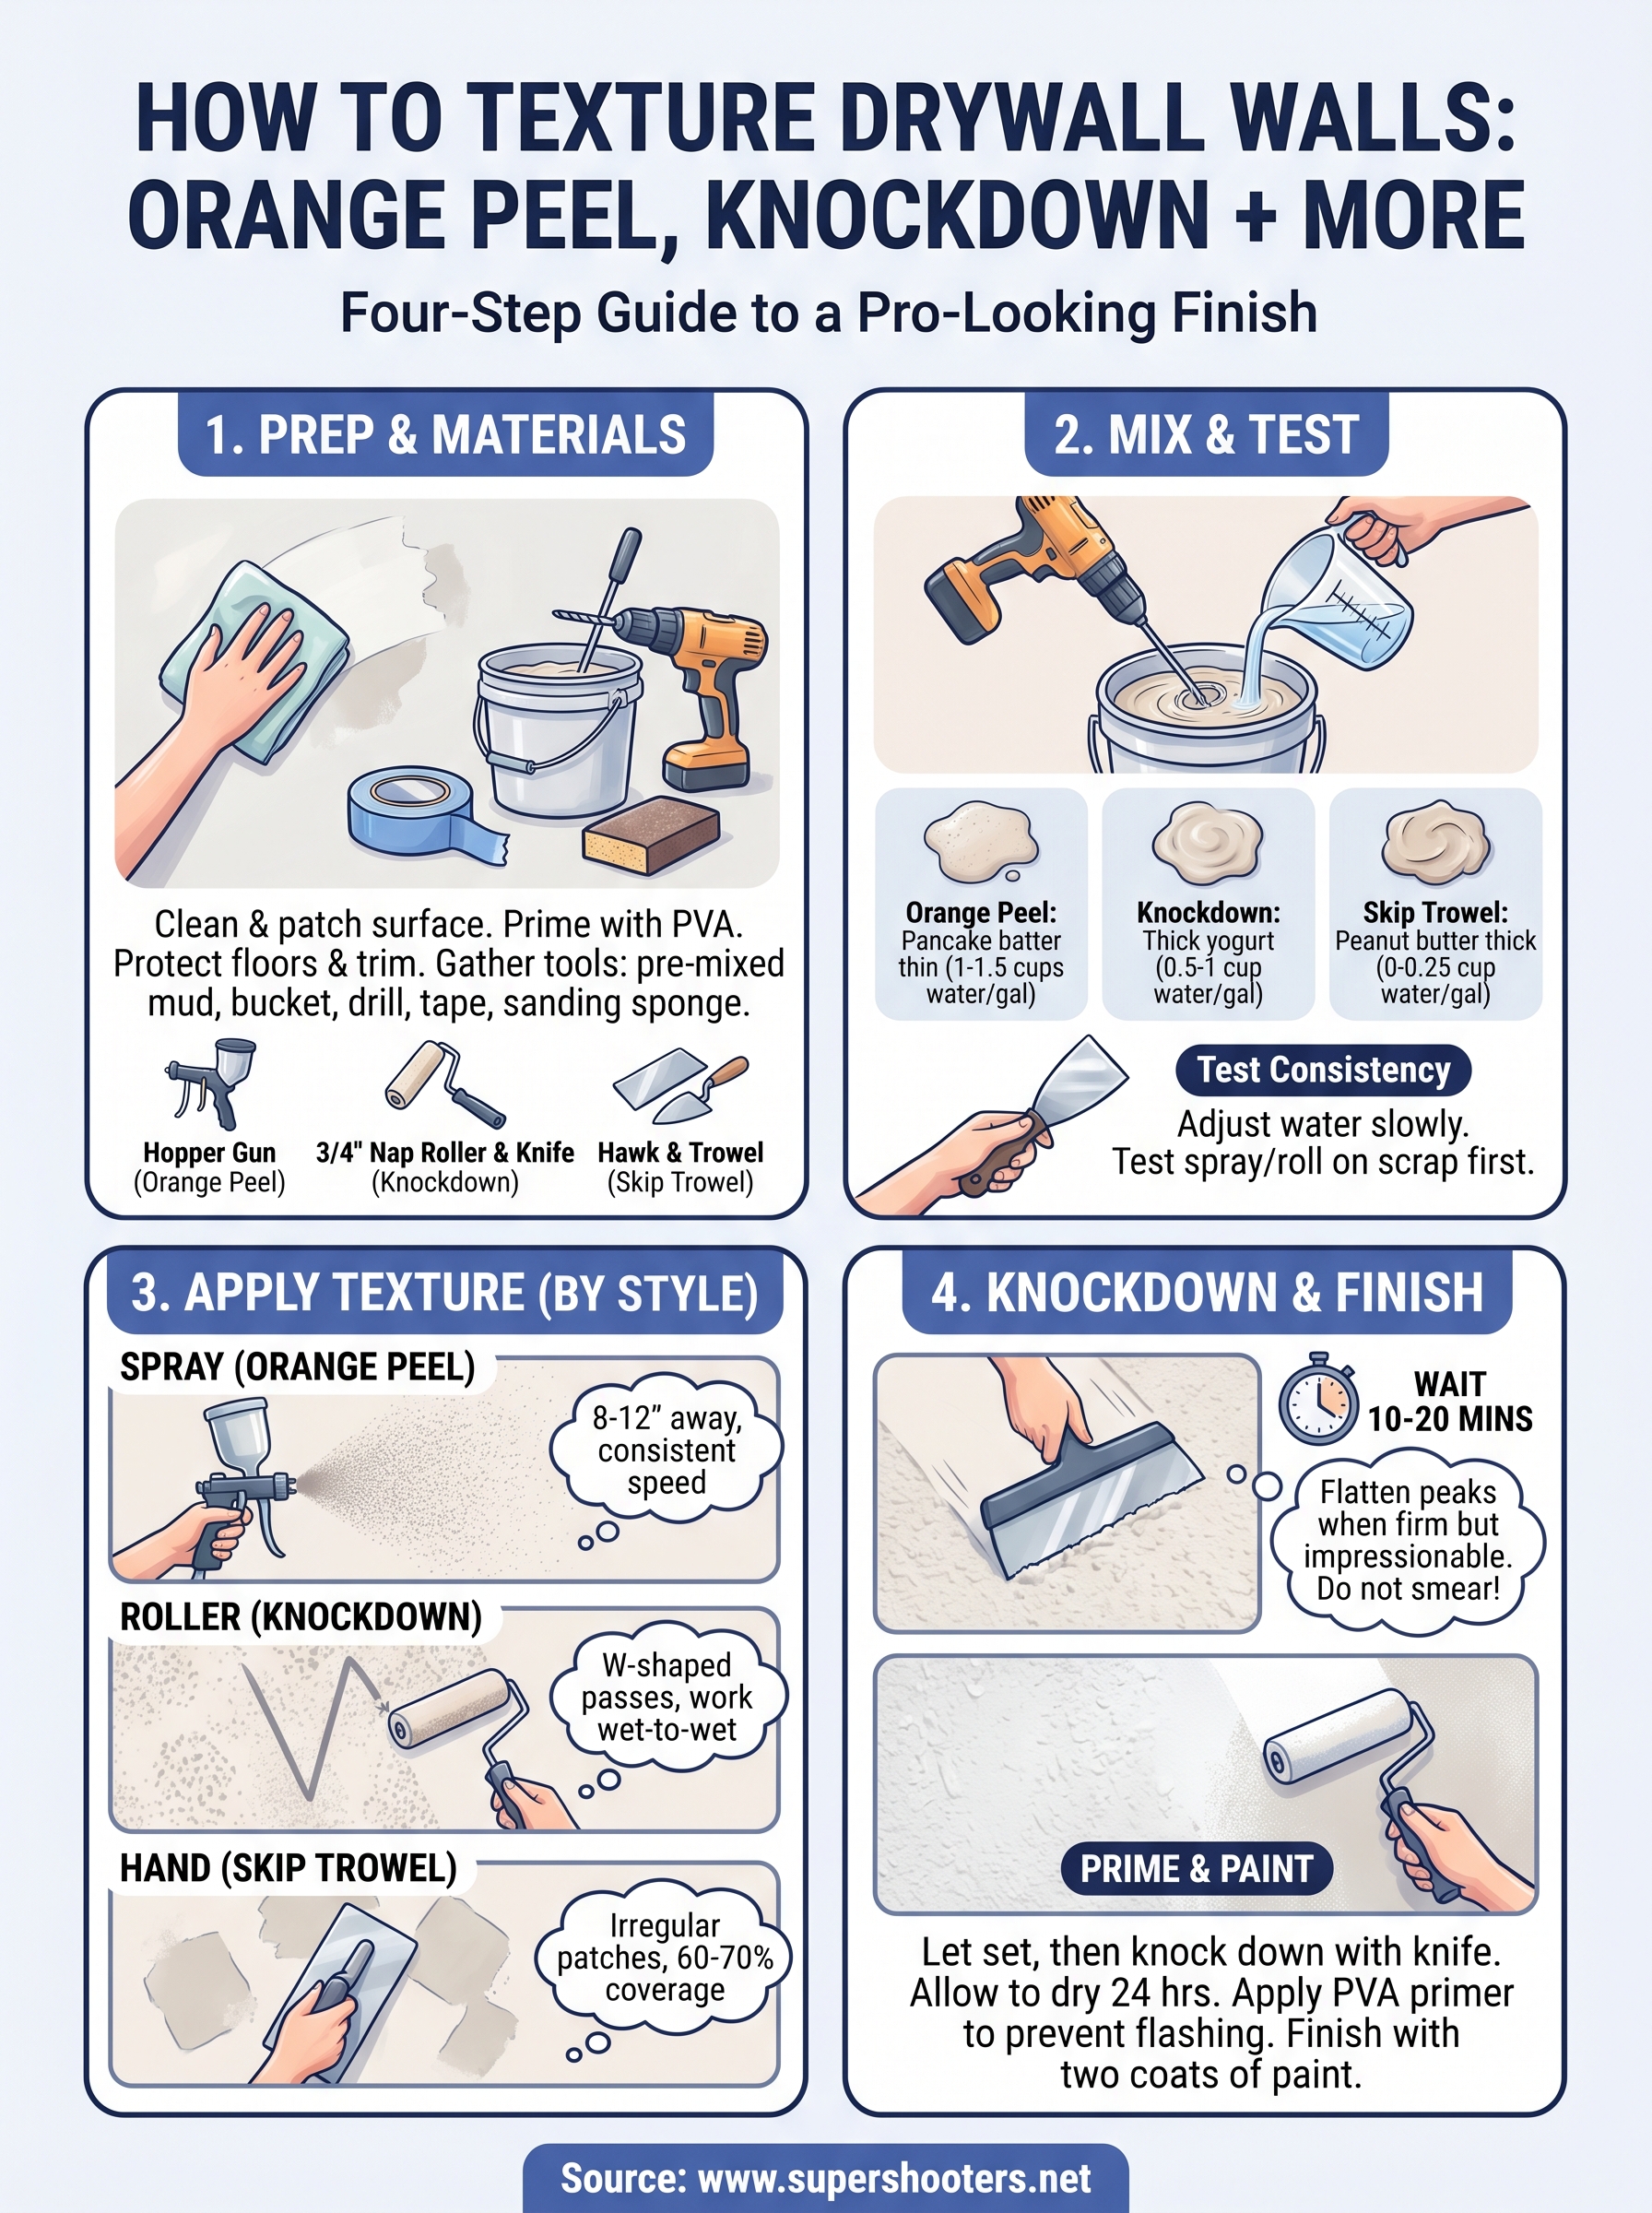
How To Texture Drywall Walls: Orange Peel, Knockdown + More
Learning how to texture drywall walls can save you money on smaller projects and give you a real sense of accomplishment. Whether you're finishing a garage, patching a repair, or updating a room that's been staring back at you bare and boring, texture is what turns flat drywall into a finished surface with character . Orange peel, knockdown, skip trowel, each style creates a different look and feel, and each one calls for a slightly different approach.
At Super Shooters, we've applied texture to walls and ceilings across more than 10,000 projects throughout the Sacramento Valley over our 30+ years in business. That hands-on experience has taught us what works, what doesn't, and where DIYers tend to run into trouble. We put this guide together to share that knowledge, so you can get clean, consistent results on your own or know when it's time to call in a pro.
Below, you'll find step-by-step instructions for the most popular drywall texture styles, along with the tools and materials you'll need for each. We also cover surface prep, common mistakes, and tips our crew relies on daily to keep finishes looking sharp. By the end, you'll have a clear plan for tackling your texture project with confidence.
Before you start: pick materials, prep, and stay safe
Before you dive into how to texture drywall walls, you need the right materials in front of you and a clean, properly prepped surface to work on. Skipping prep is the single most common reason texture jobs look uneven or fail to hold over time. Taking 30 to 60 minutes to get organized before you open any compound will save you from fixing avoidable mistakes later.
The tools and materials you need
Your tool list depends on which texture style you plan to use, but several items carry across all methods. At minimum, you'll need pre-mixed drywall joint compound (also called mud), a mixing paddle and drill , a clean bucket for thinning, painter's tape, plastic sheeting to protect floors and trim, and a 120-grit sanding sponge for surface prep. For specific application methods, add the following to your cart:
| Texture Style | Key Tools |
|---|---|
| Orange peel | Hopper gun or aerosol texture can, air compressor |
| Knockdown | 3/4" nap roller, knockdown knife or wide drywall knife |
| Skip trowel | Hawk and trowel, margin trowel |
| Slap brush | Wide stipple brush or stomp brush |
| Sand texture | 1/2" nap roller, coarse additive or pre-mixed sand texture compound |
Keep a bucket of clean water and extra mud within arm's reach during the job. You'll use water to adjust consistency as you go, and running out mid-wall forces you to mix a new batch that may not match your original ratio , which shows up clearly in the finished surface.
Prep the surface the right way
Clean, flat drywall gives texture something solid to grip. Start by checking for loose paper, popped screws, or open seams. Drive any raised screws flush with the surface and apply a thin coat of setting compound over screw dimples and seams, letting it dry fully before you sand smooth.
Skipping surface prep is the fastest way to get texture that cracks, peels, or highlights every flaw underneath.
Wipe down the wall with a lightly damp cloth to pull up sanding dust after you finish. Then apply a coat of PVA drywall primer before you texture. Bare, unprimed drywall will suck moisture out of your compound too fast, causing it to dry unevenly and reducing long-term adhesion between the texture and the wall.
Cover floors with drop cloths or rosin paper taped at the edges. Run painter's tape along the ceiling line , baseboard, and all trim. Texture compound is much harder to remove once it dries on surfaces it shouldn't be on, so protect everything before you mix a single scoop of mud.
Check for asbestos before disturbing old texture
If your home was built before 1980 and you're texturing over or removing existing popcorn or acoustic material , stop before you sand or scrape anything. Many older homes used texture products that contained asbestos fibers , which become dangerous when disturbed and airborne. This is a serious health and legal issue, not just a precaution.
You can purchase an EPA-recognized test kit at a local hardware store, or hire a licensed abatement contractor to collect and analyze a sample. Do not sand, scrape, or apply water to old texture until you confirm what's in it. If the test comes back positive, leave the removal to a licensed professional with proper equipment . In California, disturbing asbestos-containing material without the correct credentials on a permitted project carries real legal and financial consequences on top of the health risks.
Step 1. Choose the texture and match what you have
The texture style you pick shapes everything that follows, from the tools you buy to how long the job takes. If you're patching a section of wall, your goal is to blend with what's already there. If you're starting fresh on a bare room, you have more freedom to choose based on the look you want. Either way, choosing the right texture before you mix any mud saves you from hours of rework.
Match the texture to the room and what's already on the walls
When you're patching or repairing, pull a chip or scraping of the existing texture and hold it against good light. Look at the scale of the peaks and the spacing between them. A tight, fine spray pattern like orange peel looks very different from a broader, flattened knockdown pattern. If your patch doesn't mirror the surrounding wall closely, it will read as a repair even after you paint.
The best patch is one nobody knows is there, and that only happens when you match the existing texture scale and depth exactly.
For a whole room, think about the finish style common in the rest of your home . Sacramento Valley homes built in the 1980s and 1990s often feature orange peel or knockdown on walls and ceilings. Newer construction sometimes uses a smoother level 5 finish. Keeping consistent texture throughout your home protects resale value and makes the space feel intentional rather than patched together.
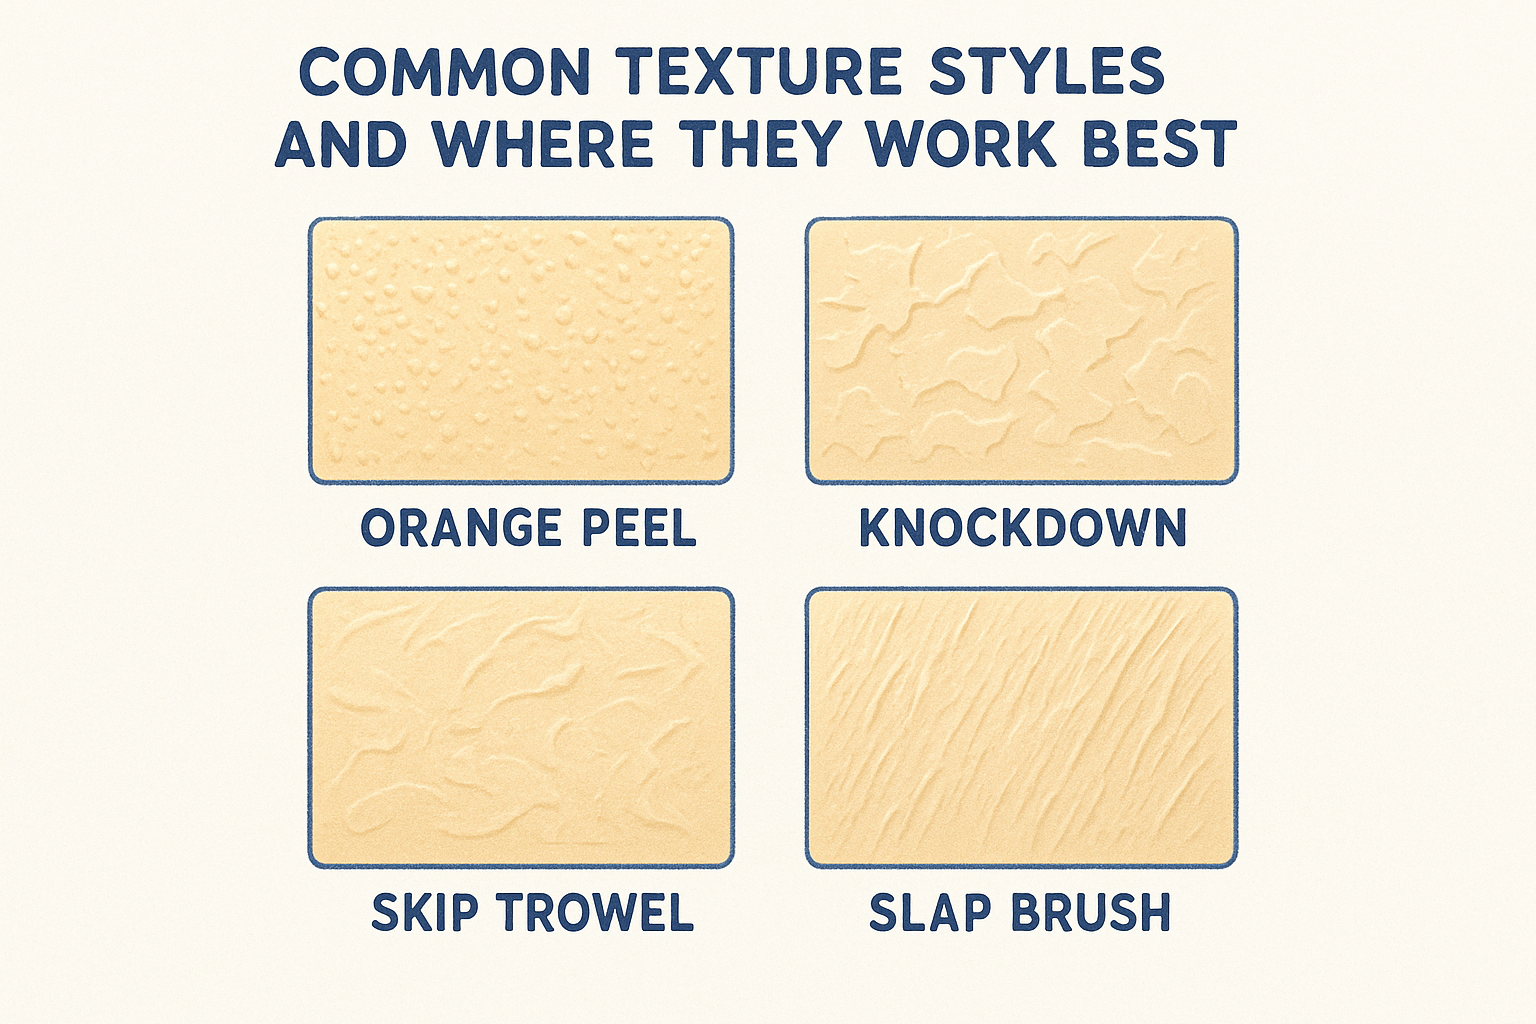
Common texture styles and where they work best
Knowing how to texture drywall walls means knowing which style suits the surface, the room, and your skill level . Here's a quick breakdown of the most popular options :
| Texture Style | Best For | Skill Level |
|---|---|---|
| Orange peel | Walls and ceilings in most rooms | Beginner to intermediate |
| Knockdown | Living rooms, bedrooms, hallways | Intermediate |
| Skip trowel | Feature walls, high-end finishes | Intermediate to advanced |
| Slap brush | Ceilings, utility spaces | Beginner |
| Sand texture | High-traffic walls, garage interiors | Beginner |
Orange peel and slap brush are the most forgiving for first-time DIYers because small inconsistencies disappear into the pattern. Skip trowel demands more practice because you apply it by hand, and uneven trowel pressure shows up clearly once the mud dries. Start with a simpler style on a closet or utility room wall before moving to a main living space.
Step 2. Mix drywall mud to the right thickness every time
Getting your mud to the right consistency is the most overlooked part of learning how to texture drywall walls. Too thick and it won't spray or roll out evenly. Too thin and it sags, runs, or won't hold a peak. The ratio you use directly determines the texture pattern you get , and every method requires a slightly different target thickness before you pick up any tool.
Know the right consistency for each texture
Pre-mixed joint compound straight from the bucket works as a starting point for every texture style, but you'll almost always need to add water to thin it down. The right consistency varies by method, and using a rough target ratio takes the guesswork out of your first batch.
| Texture Style | Target Consistency | Water to Add (per gallon of mud) |
|---|---|---|
| Orange peel (hopper gun) | Thin, like pancake batter | 1 to 1.5 cups |
| Knockdown (roller) | Medium, like thick yogurt | 0.5 to 1 cup |
| Skip trowel | Thick, like peanut butter | 0 to 0.25 cup |
| Slap brush | Medium-thin, like heavy cream | 0.75 to 1 cup |
| Sand texture | Medium, like oatmeal | 0.5 cup |
Add water in small increments of 1/4 cup at a time . Pouring in too much water at once makes it nearly impossible to recover the batch without adding more dry compound, which throws off the whole mix.
A batch that's too thin will cost you twice the drying time and half the texture definition, so always add less water than you think you need on the first pour.
How to mix and test before you commit
Use a mixing paddle attached to a drill set to low speed. Mix for at least two minutes until the compound is smooth and free of lumps . Scrape the sides and bottom of the bucket with a margin trowel halfway through to pull in any unmixed pockets near the edges.
Test the consistency using the knife drag method before you touch any wall. Drag a putty knife across the surface of your mud and lift it straight up. For knockdown, the peak should hold its shape and curl slightly at the tip . For orange peel applied through a spray gun, the mud should drip off the knife slowly in a thin, even stream. Run this test on a scrap piece of drywall or cardboard first, adjust your mix as needed, then move to the wall.
Step 3. Apply texture by method: spray, roller, or hand
With your mud mixed and your surface primed, you're ready to put compound on the wall. The method you use to apply it determines the texture pattern you end up with, so matching your technique to your chosen style is just as important as getting your mix right. This step covers the three core application methods and exactly how to execute each one for clean, consistent results.
Spray application for orange peel
Load your hopper gun with the thinned compound and connect it to your air compressor. Set the air pressure between 25 and 40 PSI to start, then test the spray pattern on a piece of scrap drywall before touching the wall. Hold the gun 8 to 12 inches from the surface and move in slow, steady horizontal passes with consistent speed. Moving too fast creates sparse, thin coverage, and moving too slow builds heavy blobs that won't look like orange peel.
Adjust the nozzle opening and air pressure together on your scrap piece until the spatter size matches the existing texture in the room.
For patches under two square feet, aerosol texture cans work as a substitute if you don't own a hopper gun. Shake the can thoroughly and test the spray pattern on cardboard before you commit to the wall.
Roller application for knockdown
Pour your medium-consistency mud into a roller tray and load a 3/4-inch nap roller evenly. Roll compound onto the wall using overlapping W-shaped passes , working in sections no larger than 4 by 4 feet. You want a random, stippled surface with irregular peaks throughout. Keep these points in mind as you roll:
- Work wet edge to wet edge so sections blend without hard seam lines
- Reload the roller before it runs dry to avoid thin, patchy spots mid-pass
- Never roll over a section twice once the surface starts to skin over; it tears the texture
Hand application for skip trowel
Learning how to texture drywall walls by hand requires the most control of the three methods. Load your hawk with a palm-sized scoop of thick compound, then press small, irregular patches of mud onto the wall with a trowel held at a low angle. Target 60 to 70 percent surface coverage , leaving deliberate gaps between each trowel pass. Vary your angle and pressure with each stroke so no two patches look the same.
Step back from the wall every few minutes to check your pattern distribution from a distance . What looks uneven up close usually balances out across a full wall, so move forward and fill gaps before the mud begins to set.
Step 4. Let it set, knock it down, then prime and paint
The final step in learning how to texture drywall walls is also the most patience-dependent. Rushing the dry time before you do your knockdown pass is the fastest way to smear your texture flat and lose the definition you worked to build. Let the compound set until it transitions from dark, wet gray to a lighter, matte surface before you touch it with any tool.
Time the knockdown pass correctly
Knockdown texture gets its name from the step where you drag a wide, flexible drywall knife across the surface at a low angle to flatten the peaks without wiping out all the texture . Timing this pass is everything. Too early and your knife smears the compound flat. Too late and the mud has hardened past the point where your blade can flatten anything at all.
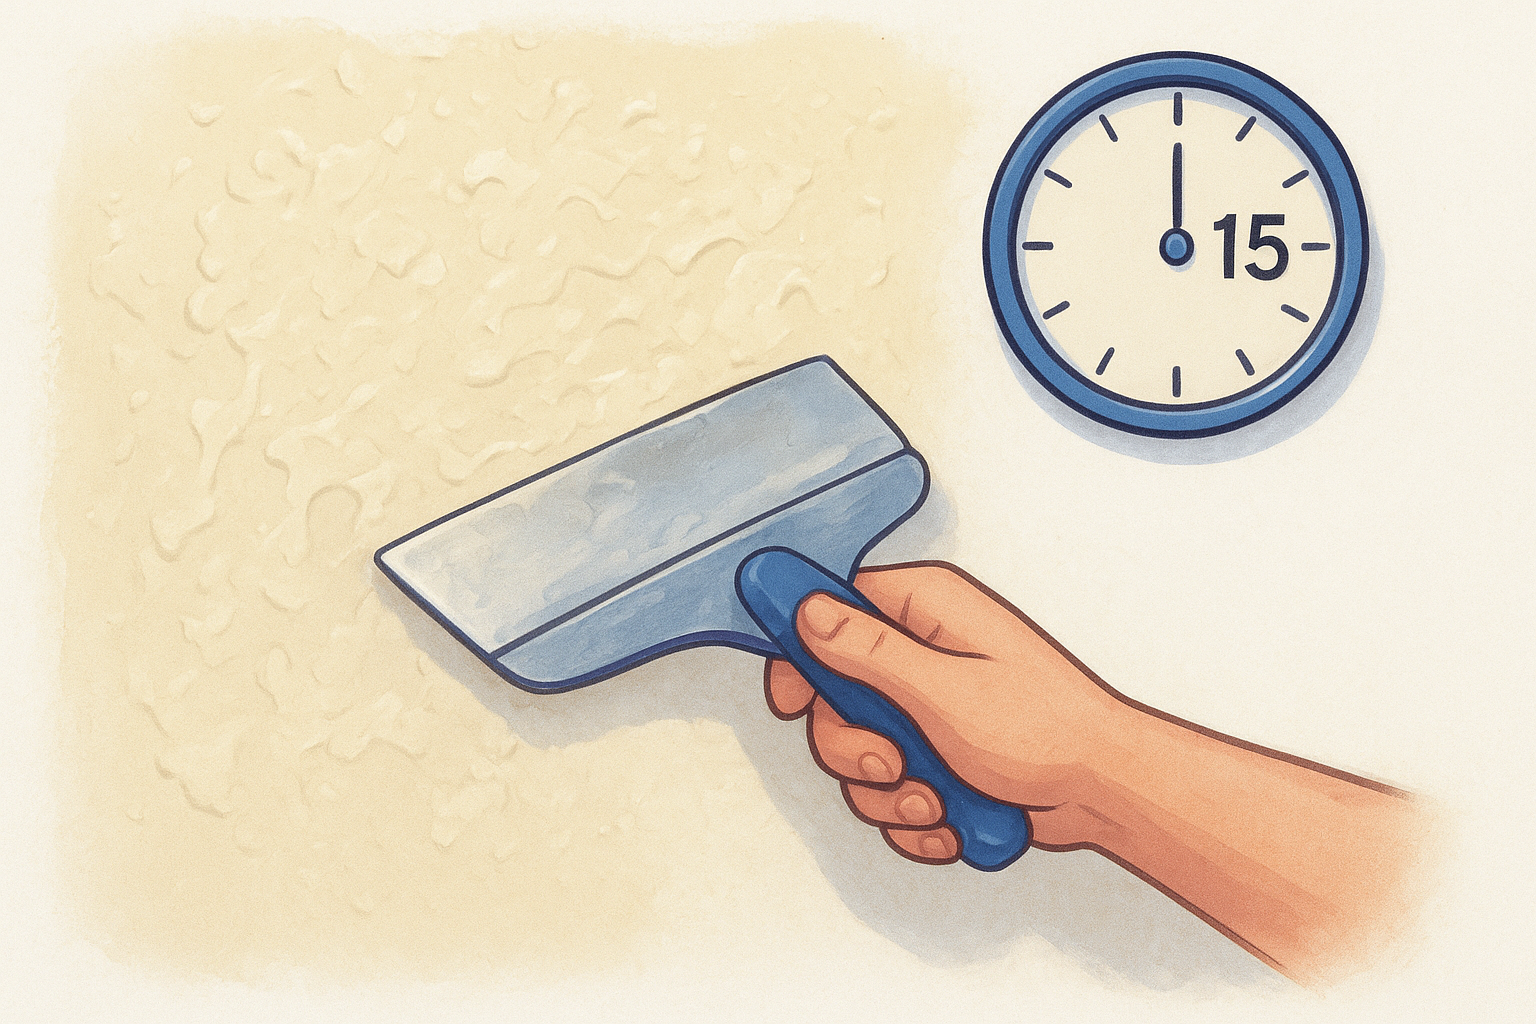
Check the mud every five minutes after application by pressing a knuckle lightly to a corner of the wall; it should feel firm but still leave a faint impression when it is ready.
Wait approximately 10 to 20 minutes after rolling or spraying before you attempt the knockdown pass, though dry time shifts based on humidity, room temperature, and how thick you applied the compound. Hold your 12-inch knockdown knife at a 10 to 15 degree angle and pull it across the surface with light, consistent pressure. Work in long, single strokes without scrubbing back and forth across the same spot.
Prime before you paint, every time
Once your texture dries completely , which takes a minimum of 24 hours in normal indoor conditions, you need to prime before paint goes on. Skipping primer over fresh texture causes a problem called flashing, where the porous compound absorbs paint unevenly and leaves dull, flat spots visible at any angle once the sheen dries.
Apply a PVA drywall primer using a 3/4-inch nap roller to get into the texture peaks without pressing them flat. Roll in slow, even passes and let the primer dry fully according to the manufacturer's directions before applying your finish paint coat. Two coats of paint applied over a properly primed surface will give you consistent sheen and color across every square foot, with no visible patchiness where your texture transitions from flat board to compound peaks.
Wrap-up and when to call a pro
Now you know how to texture drywall walls from prep through paint, covering the most common styles and the specific techniques that keep each one clean and consistent. Follow the steps in order, mix your mud to the right thickness, time your knockdown pass correctly, and prime before you paint. Those four habits separate a professional-looking finish from a repair that never quite blends.
Some projects are better handed off. If you're working with asbestos-containing material , dealing with water damage that runs deeper than surface drywall, or texturing a large room where consistency matters for resale, hiring an experienced crew saves you time and prevents costly mistakes. At Super Shooters, our team has completed more than 10,000 projects across the Sacramento Valley and knows how to get texture right the first time. Get a free estimate from Super Shooters and we'll handle the hard parts for you.
Recent Posts