September 12, 2026
How to Sand Drywall for a Smooth, Paint-Ready Finish
Every drywall job comes down to this moment. You've taped, mudded, and waited for the compound to dry, with the whole drywall finishing process behind you, and now you're staring at a wall full of ridges, high spots, and sanding dust just waiting to happen. Learning how to sand drywall correctly is what separates a wall that looks patched from one that looks like it was never touched at all.
This guide walks you through the exact process pros use to get a paint-ready finish : the right grit sandpaper, how to check your work with raking light, when to switch from a hand sander to a pole sander, and how to avoid the classic mistake of sanding through the paper face and exposing the gypsum core. You'll also learn how to manage dust, a real concern in older Sacramento Valley homes where you might be working near textured or even asbestos-containing ceilings.
We've spent over 30 years finishing drywall on homes across the region, and the sanding step is where most DIY projects go wrong. Follow these steps in order, and you'll get a smooth wall surface ready for primer on your first pass, not your third.
What you need before you start sanding drywall
Getting a smooth finish starts long before you pick up sandpaper. Rushing into a job without the right gear is how most homeowners end up chasing dust around the house for a week or gouging a fresh coat of joint compound. Gathering your materials first means you won't be running to the hardware store mid-project with mud dust in your hair. Take twenty minutes to lay everything out before you touch the wall.
Tools and materials checklist
You don't need a contractor's truck full of gear, but a few must-have drywall repair tools make the difference between a smooth wall and a frustrating afternoon. Here's what to have on hand before you start sanding drywall joint compound :
- Sanding sponge (medium and fine grit) for corners and curves
- Pole sander with a swivel head for ceilings and tall walls
- Sandpaper or mesh screens in 120, 150, and 220 grit
- A hand sanding block for detail work around outlets and trim
- A bright work light or clip lamp for raking light checks
- A shop vacuum with a fine-dust filter
- Plastic sheeting and painter's tape for containment
- A dust mask rated N95 or higher, plus safety glasses
A smooth wall starts with the right tool in your hand, not just the right technique.
Safety gear you shouldn't skip
Drywall dust is fine, chalky, and gets everywhere, including your lungs if you're not careful. Wearing a proper respirator matters more than most DIYers think, especially if you're sanding a large room or working overhead on a ceiling for more than an hour. A basic paper dust mask from the hardware store aisle isn't enough for extended sanding sessions. Look for an N95 or P100 rating, and pair it with safety glasses since dust falling from overhead work has a way of finding your eyes no matter how careful you are.
Gloves help too, particularly if you're using a pole sander where the friction and vibration can wear on your hands over a few hours. If you have any respiratory sensitivity or asthma, consider adding a box fan in a window, blowing outward, to help pull dust out of the room while you work.
A note on older Sacramento Valley homes and asbestos
Sanding compound is one thing, but if you're working near or on a textured or acoustic ceiling in a home built before 1980, stop and think before you sand anything. Popcorn ceilings and some older joint compounds in this region can contain asbestos, and disturbing that material with a sander releases fibers into the air where they're easily inhaled. This isn't a scare tactic. It's the reason licensed contractors test suspect material before touching it with any abrasive tool.
If your project involves sanding near or repairing walls adjacent to an older ceiling, get the ceiling tested for asbestos first. The EPA has clear guidance on identifying and handling asbestos-containing materials safely, and it's worth a read before you start: EPA's asbestos guidance. If your home falls into this category, our team removes asbestos ceilings under full containment and can also finish the drywall repair once the hazardous material is gone, so you're never sanding blind in a home with unknown ceiling materials.
Once you've got your tools staged, your respirator ready, and any asbestos concerns ruled out, you're set to start the actual sanding process. The next step is prepping the room itself, because containing dust before it spreads saves you hours of cleanup later.
Step 1. Prep the room and protect your space
Sealing off the room before you sand saves you from finding drywall dust in your kitchen cabinets three days later. Drywall dust travels farther than you'd expect, riding on air currents through doorways, vents, and even keyholes. Containing the workspace before you make a single pass with sandpaper is the difference between a two-hour cleanup and a two-day one.
Seal the room off first
Tape plastic sheeting over doorways, closet openings, and any HVAC vents in the room. If the room has a return air vent, cover it completely, since a running furnace or AC system will pull fine dust straight into your ductwork and spread it through the whole house. Roll a damp towel and lay it along the bottom of any door you can't seal with plastic. Turning off your HVAC system entirely while you sand is worth the temporary discomfort, especially if you're working in summer heat common across the Sacramento Valley.
Seal the room before you sand, or you'll be cleaning dust out of rooms you never touched.
Protect floors, fixtures, and furniture
Lay down drop cloths or rosin paper across the entire floor, taping the seams so they don't shift underfoot while you're moving a pole sander around, the same way you would when working through a full room prep checklist before painting. Remove furniture if you can, and if you can't, cover it completely with plastic sheeting secured with painter's tape. Take light fixtures, outlet covers, and switch plates off the wall or cover them with painter's tape, since fine dust works its way into switches and can cause problems down the line.
Here's a quick prep checklist before you touch a single wall:
- Seal doorways and vents with plastic sheeting
- Cover or remove furniture and fixtures
- Lay drop cloths across the entire floor
- Turn off HVAC and ceiling fans
- Set up a box fan blowing dust outward through a window
- Stage your tools and safety gear within reach
Set up your ventilation and lighting
Position a box fan in a window so it pushes air, and dust, out of the room rather than recirculating it. Crack a second window on the opposite side if possible to create airflow across the space. While you're at it, set up your work light now rather than after you start sanding. Good lighting during prep means you'll spot high spots and shadow lines before you even pick up a sanding sponge, which saves you a step later when you're checking your work with raking light.
Step 2. Choose the right sandpaper and sanding tool
Grabbing whatever sandpaper is left over from a woodworking project is a common mistake, and it's why so many DIY walls end up gouged or hazy with swirl marks. Choosing the correct grit matters more than the brand of sandpaper you buy. Drywall compound is soft compared to wood, so a grit that works fine on a cabinet door will chew straight through the paper face of your drywall and expose the fibrous core underneath, a repair headache you don't want.

Match the grit to the job
Start coarse enough to knock down ridges, then move to a finer grit for the final smoothing pass. Most pros stick to a three-stage progression rather than jumping straight to fine paper, since skipping the middle grit leaves faint scratch marks that show up under paint sheen.
| Grit | Best Use | Notes |
|---|---|---|
| 120 | Knocking down heavy ridges and tool marks | Use sparingly, easy to oversand |
| 150 | General seam and joint smoothing | The workhorse grit for most walls |
| 220 | Final finish pass before priming | Removes fine scratches, won't gouge |
A drywall sanding screen, the mesh-style abrasive many pros prefer over paper, clogs less with fine dust and lasts longer across a full room.
Pick your tool based on the surface
A hand sanding block works well for small patches and detail areas, but it's slow going across an entire wall or ceiling. A pole sander with a swivel head covers ground fast on ceilings and tall walls, letting you stand upright instead of hunching over a stepladder for hours. Sanding sponges, especially the ones with a firm side and a soft side, handle inside corners and curved trim where a flat block can't reach.
The right sandpaper grit prevents damage a fine grit alone can't fix.
Overworking one spot with any tool is the fastest way to sand through the paper face, so keep the tool moving in light, even passes rather than pressing hard in one place. Sanding drywall joint compound properly means letting the abrasive do the work, not your arm strength. Once your tools are matched to the surface, you're ready to move to the seams themselves, where most of the visible ridges live.
Step 3. Sand the seams and joints
Seams are where the real work happens, since that's where two sheets of drywall meet and where your joint compound sits thickest. Sanding the seams first gives you a clear read on how the rest of the wall will behave, because if a taped seam is uneven, everything around it will look uneven too, no matter how well you smooth the field areas later. Work in good light so you can actually see the ridges you're knocking down instead of guessing.
Work top to bottom, seam by seam
Start at the top of each seam and work down in long, even strokes rather than short scrubbing motions. Short strokes concentrate pressure in one spot and that's exactly how you sand through the paper face into the gypsum core underneath. Use your 150-grit sandpaper or mesh screen for this first pass, checking every few strokes with your fingertips to feel for ridges rather than relying on your eyes alone. A ridge you can feel is a ridge that will show under paint.
Feel for ridges with your fingertips before you trust your eyes to catch them.
Feather the edges into the surrounding wall
A seam that's flat in the middle but drops off sharply at the edges will still show a shadow line once it's painted. Feathering the compound edges means blending mud gradually into the surrounding drywall across the outer inch or two of the taped area so there's no visible transition. Angle your sanding block slightly at the edges rather than pressing flat, and taper your pressure off as you move away from the center of the seam.
Common seam-sanding mistakes to avoid
A few habits ruin more seams than bad joint compound ever does:
- Pressing too hard in one spot instead of letting the grit do the work
- Sanding in circles instead of long, straight strokes along the seam
- Skipping the fingertip check and relying only on visual inspection
- Sanding a seam that hasn't fully cured, which tears the paper tape
- Ignoring screw dimples until after the seams are done, wasting a pass
Once a seam feels smooth and level under your hand, move to the next one rather than chasing perfection on a single spot. You'll circle back during the raking light check later in this guide, so don't over-sand now trying to catch every microscopic flaw. With the seams and joints handled, the corners and tight spots around trim are next, and they call for a different touch than a flat pole sander can give you.
Step 4. Smooth corners and hard-to-reach spots
Inside corners, outlet boxes, and the tight strip above baseboard trim trip up more DIYers than any flat seam ever will, which is why taping drywall corners calls for its own technique. Corner sanding requires a different motion than the long straight strokes you used on the seams, because a flat pole sander or block just can't reach into a 90-degree angle without gouging one side of it. Slow down here. This is where a rushed pass costs you an extra coat of mud.
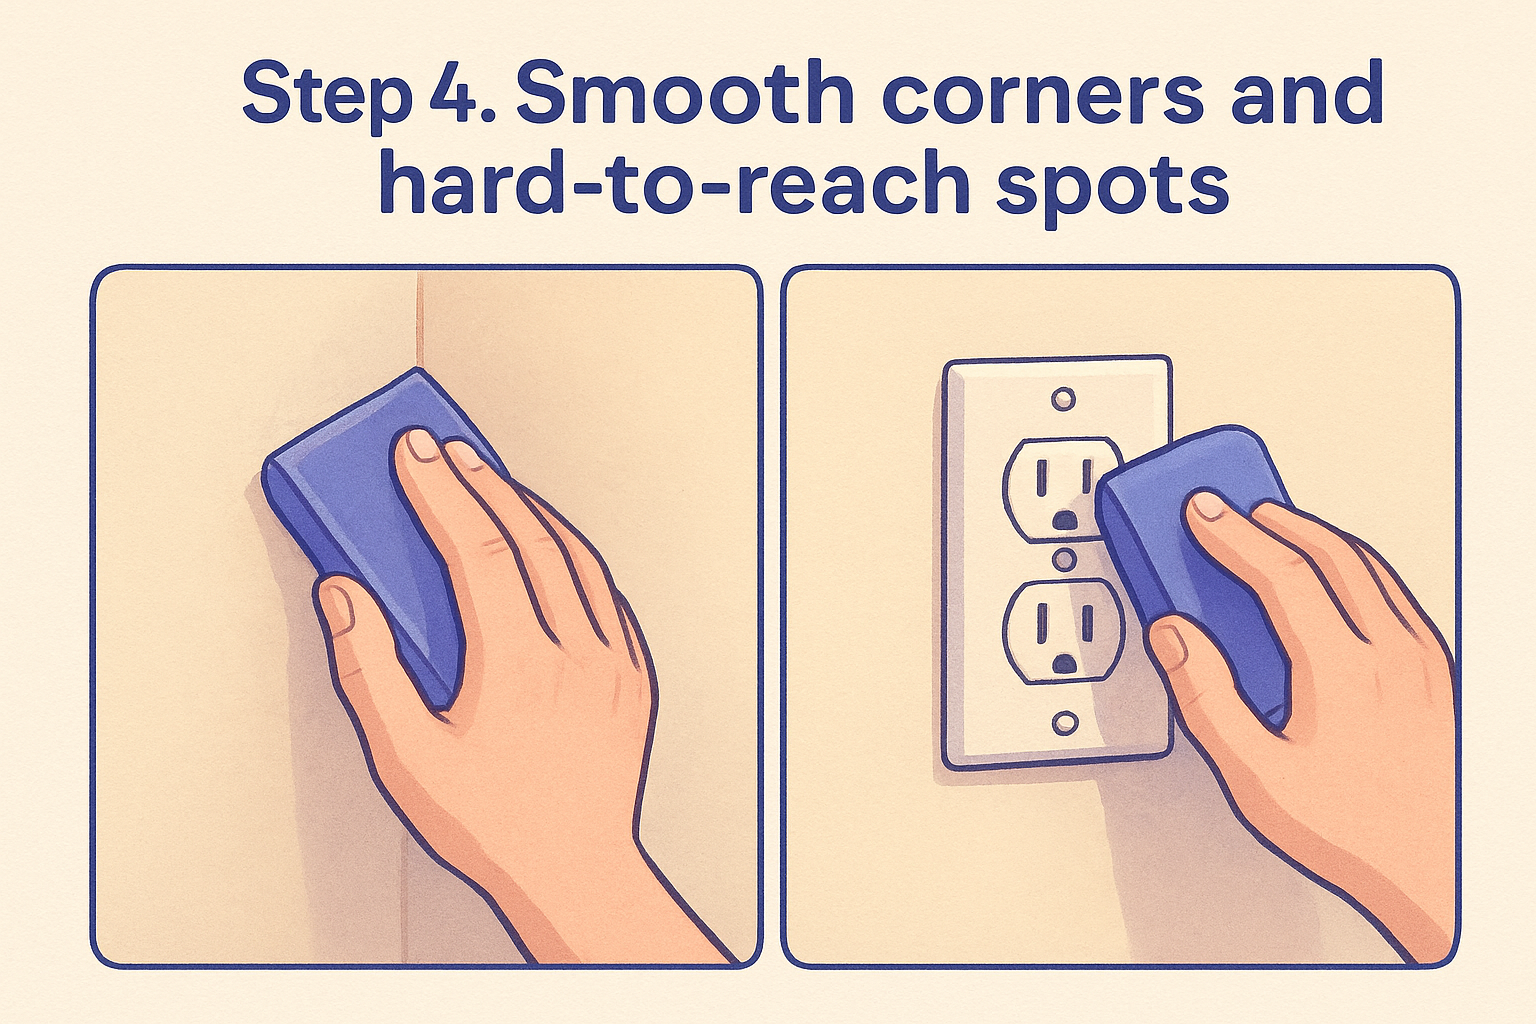
Handle inside corners with a folded sanding sponge
Fold a medium-grit sanding sponge along its natural crease and work it into the corner with light, even pressure on both sides at once. Run it vertically along the full length of the corner rather than scrubbing side to side, which tends to round over one wall while leaving the other untouched. Using a sanding sponge instead of a rigid block here matters because the sponge flexes to match the angle instead of fighting it. Check your progress with your fingertips every few passes, since inside corners hide ridges better than flat wall does thanks to the shadow the angle itself creates.
Corners hide flaws that flat walls show immediately, so check them by feel, not by eye.
Work carefully around outlets, switches, and trim
Outlet boxes and switch plates create small, awkward islands of compound that are easy to oversand or under-sand. Use a small hand sanding block or a folded piece of sandpaper for these spots, and go slow enough that you don't round off the drywall edge right at the box opening, which creates a gap once the cover plate goes back on. The strip of wall just above baseboard trim needs the same careful attention, since a pole sander often can't get flush against that lower edge without hitting the trim itself.
A few tricks make these tight spots faster:
- Fold sandpaper into quarters for detail work around boxes and switches
- Use a sanding sponge's corner edge for tight trim lines
- Keep a small handheld light nearby to spot shadows in recessed areas
- Wipe the area with a dry cloth periodically so dust doesn't hide remaining ridges
Once every corner feels smooth under your hand and the areas around trim and outlets are flush, you've covered the spots most homeowners rush through or skip entirely. That attention to detail is what separates a wall that looks professionally finished from one with faint lines showing at every corner once the paint goes on.
Step 5. Check your work with a raking light
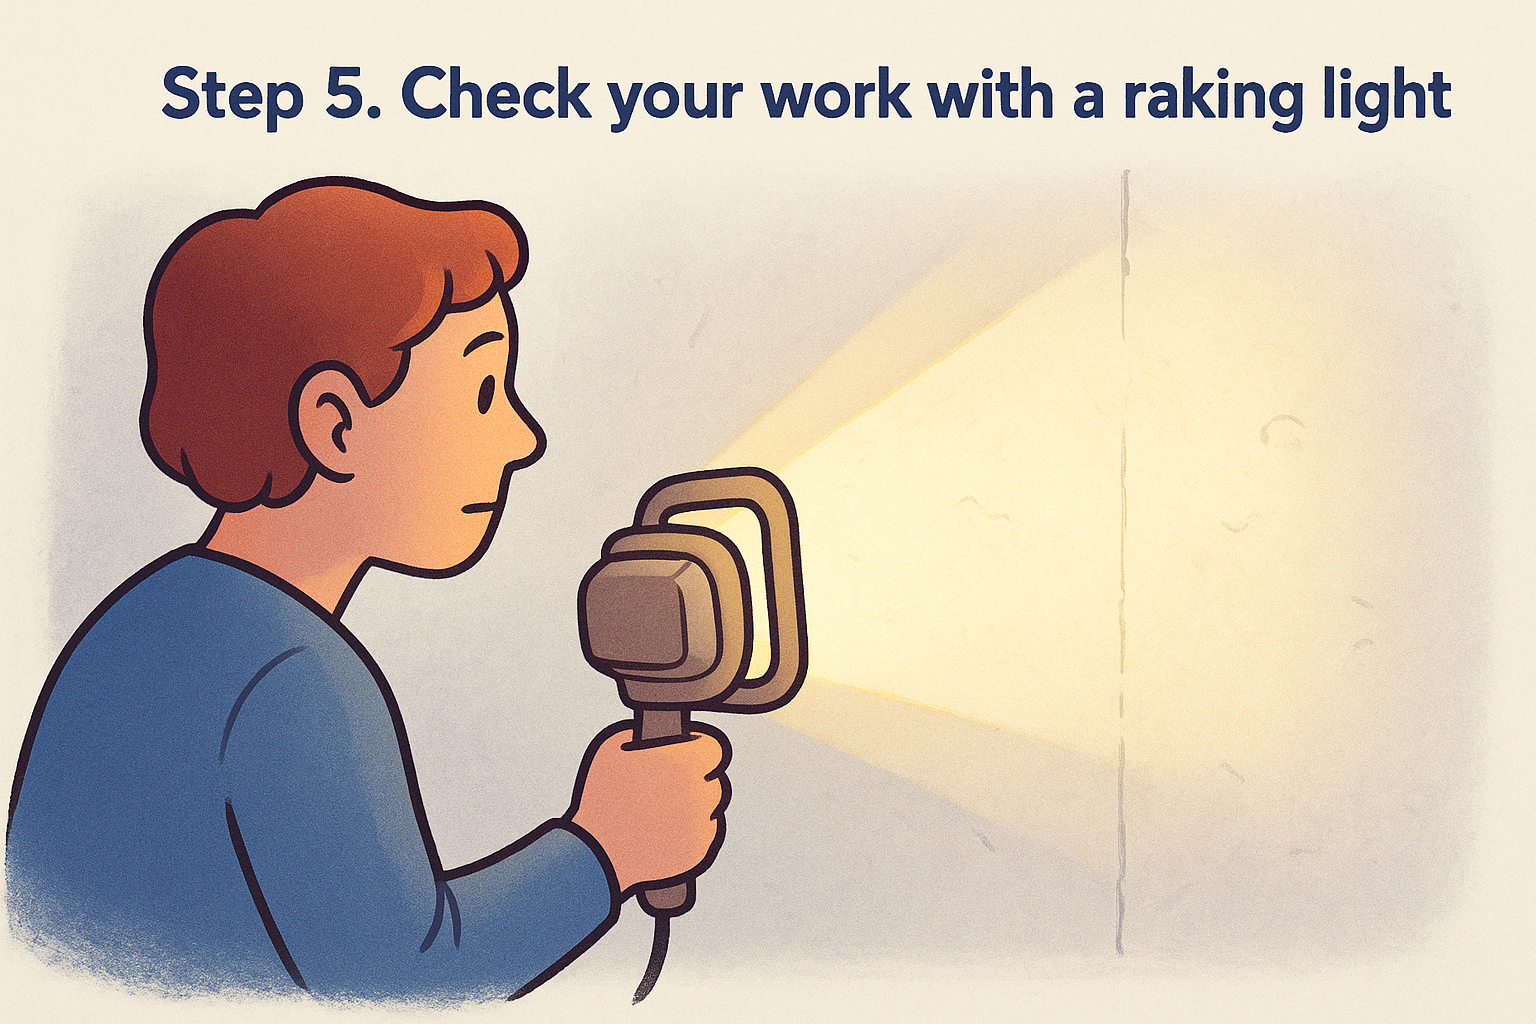
Fingertips catch most ridges, but light catches what your hands miss. Raking light inspection means holding a bright work light or clip lamp low against the wall and shining it sideways across the surface, so every bump, dip, and sanding swirl casts a shadow you can actually see. Overhead room lighting flattens everything and hides flaws that will be glaringly obvious the moment sunlight or a lamp hits the wall at an angle after painting. Skip this step and you're gambling that your first coat of primer won't reveal problems you thought you'd already fixed.
Set up the light at the right angle
Hold the light source close to the wall, no more than a foot or two away, and angle it so the beam travels almost parallel to the surface rather than straight at it. This grazing angle exaggerates every imperfection: a shallow dip becomes a visible shadow, and a slightly proud seam throws a thin dark line along its edge. Work in a darkened room if you can, since ambient daylight washes out the shadows you're trying to spot. Move the light slowly along each wall and across the ceiling, pausing at every seam, corner, and screw dimple you sanded earlier.
A raking light shows you the truth a normal work lamp hides.
Scan the wall systematically
Don't wave the light around randomly. Work section by section so you don't miss a spot, and mark anything that catches a shadow with a light pencil circle right on the wall. A quick pass looks like this:
- Start in one corner and move the light horizontally across each seam
- Sweep vertically down every inside and outside corner
- Check the ceiling separately, since overhead flaws show differently under grazing light
- Circle any shadow, ridge, or divot you spot with a pencil
- Step back and check the whole wall from a few feet away, then repeat the raking light pass once more
Don't erase your pencil marks once you find them. Marking flaws directly on the wall keeps you from losing track of a flaw once you set the light down and move to the next section, which happens more often than you'd think once you've been staring at a wall for an hour. Those marked spots are exactly what you'll tackle in the next step.
Step 6. Spot-fix imperfections and re-sand
Those pencil circles from your raking light pass are your roadmap now. Spot-fixing imperfections means addressing each marked flaw individually instead of re-sanding the entire wall from scratch, which wastes time and risks flattening areas that were already fine. Grab your finer 220-grit paper for this pass, since most of what's left at this stage is minor rather than the heavy ridges you tackled early on.
Sort your flaws before you touch anything
Not every circled spot needs the same fix. A shallow depression usually needs a thin skim of joint compound matched to the repair, while a raised ridge just needs another light sanding pass. Take a minute to sort what you marked:
- Low spots or divots : apply a thin skim coat with a 4 or 6-inch putty knife, feathering the edges well past the flaw
- High ridges or bumps : hit them again with 220-grit paper, checking with your fingertips every few strokes
- Fuzzy or torn paper tape : stop sanding immediately, since more sanding here tears the tape further; skim over it instead
- Screw dimples still visible : add a second thin coat of compound rather than sanding, since sanding won't fill a depression
Sand what's raised, skim what's sunken. Sanding a low spot only makes it lower.
Let repairs cure before you re-sand
Any spot that needed a fresh skim of compound has to dry completely before you touch it with sandpaper again. Rushing this step is one of the most common reasons DIY walls end up with a patchy texture once painted, since wet compound smears under an abrasive instead of sanding down cleanly. Give thin skim coats at least a few hours in normal humidity, longer in the damper months across the Sacramento Valley since drying time for a fresh patch stretches with moisture, and press a fingertip gently against the patch to confirm it's fully hard before you sand.
Once those repairs are dry, sand them with the same 220-grit paper you used elsewhere, feathering the new compound into the surrounding wall exactly like you did with the original seams. Repeat your raking light check on just the repaired sections rather than the whole room again. This second inspection is quicker since you're only confirming a handful of spots, not scanning an entire wall from scratch. If a spot still shows a shadow, skim it again rather than sanding harder, since compound is cheap and paper face is not something you can put back once it's gone.
Step 7. Clean up dust and prep for priming
Dust left behind after sanding will ruin an otherwise perfect wall the moment you roll on primer, since it traps in the finish and creates a gritty texture you'll feel for years. Removing every trace of dust is part of cleaning walls properly before painting, and it isn't optional no matter how clean the wall looks from across the room. Fine gypsum dust settles on every horizontal surface in the room, and some of it clings to the wall itself through static, so a quick swipe with a dry rag won't cut it here.
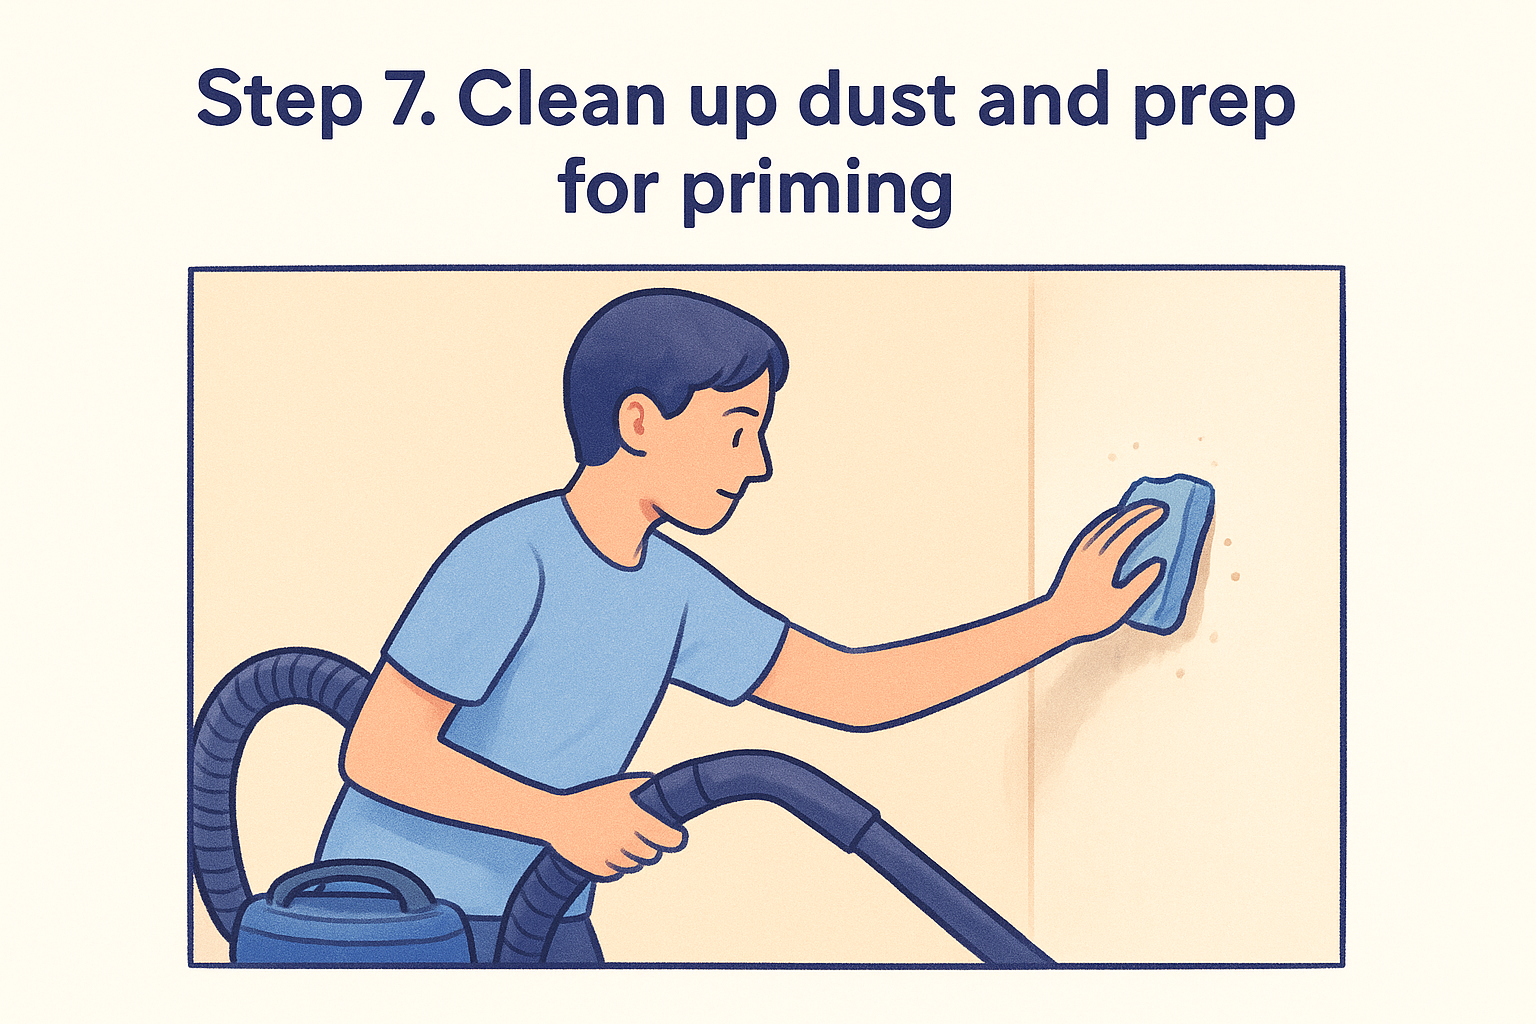
Vacuum before you wipe anything down
Grab your shop vacuum with a fine-dust filter and go over the entire wall, ceiling, and trim first, holding the nozzle close but not touching the surface. Skipping straight to a wet wipe just turns dry dust into a muddy paste that's harder to remove and can leave streaks once it dries. Work top to bottom so falling dust from higher sections lands on areas you haven't cleaned yet, then vacuum the floor last, moving slowly enough to pull dust out of drop cloth seams and corners where it collects.
Vacuum first, wipe second, or you'll be smearing dust instead of removing it.
Wipe down with a damp sponge, then check for haze
Follow the vacuum pass with a barely damp sponge or tack cloth, wringing it out often so you're not dragging a wet film across the wall. A slightly damp sponge picks up the fine residue vacuuming leaves behind without soaking the compound underneath, which can reactivate it and create new soft spots. Let the wall dry fully, then run your raking light across it one more time to check for a dust haze that can flatten paint sheen unevenly.
A quick pre-priming checklist keeps you from missing a step:
- Vacuum wall, ceiling, and trim with a fine-dust filter
- Wipe down with a barely damp sponge, working section by section
- Vacuum floors and remove drop cloths carefully to avoid kicking dust back up
- Let the wall dry completely before priming
- Run a final raking light check for haze or missed dust
Once the wall reads clean and dry under raking light, you're ready for a coat of drywall primer, which seals the compound and gives your paint an even surface to grip, and it's also the point where a glass-smooth Level 5 drywall finish pays off under high-gloss paint.
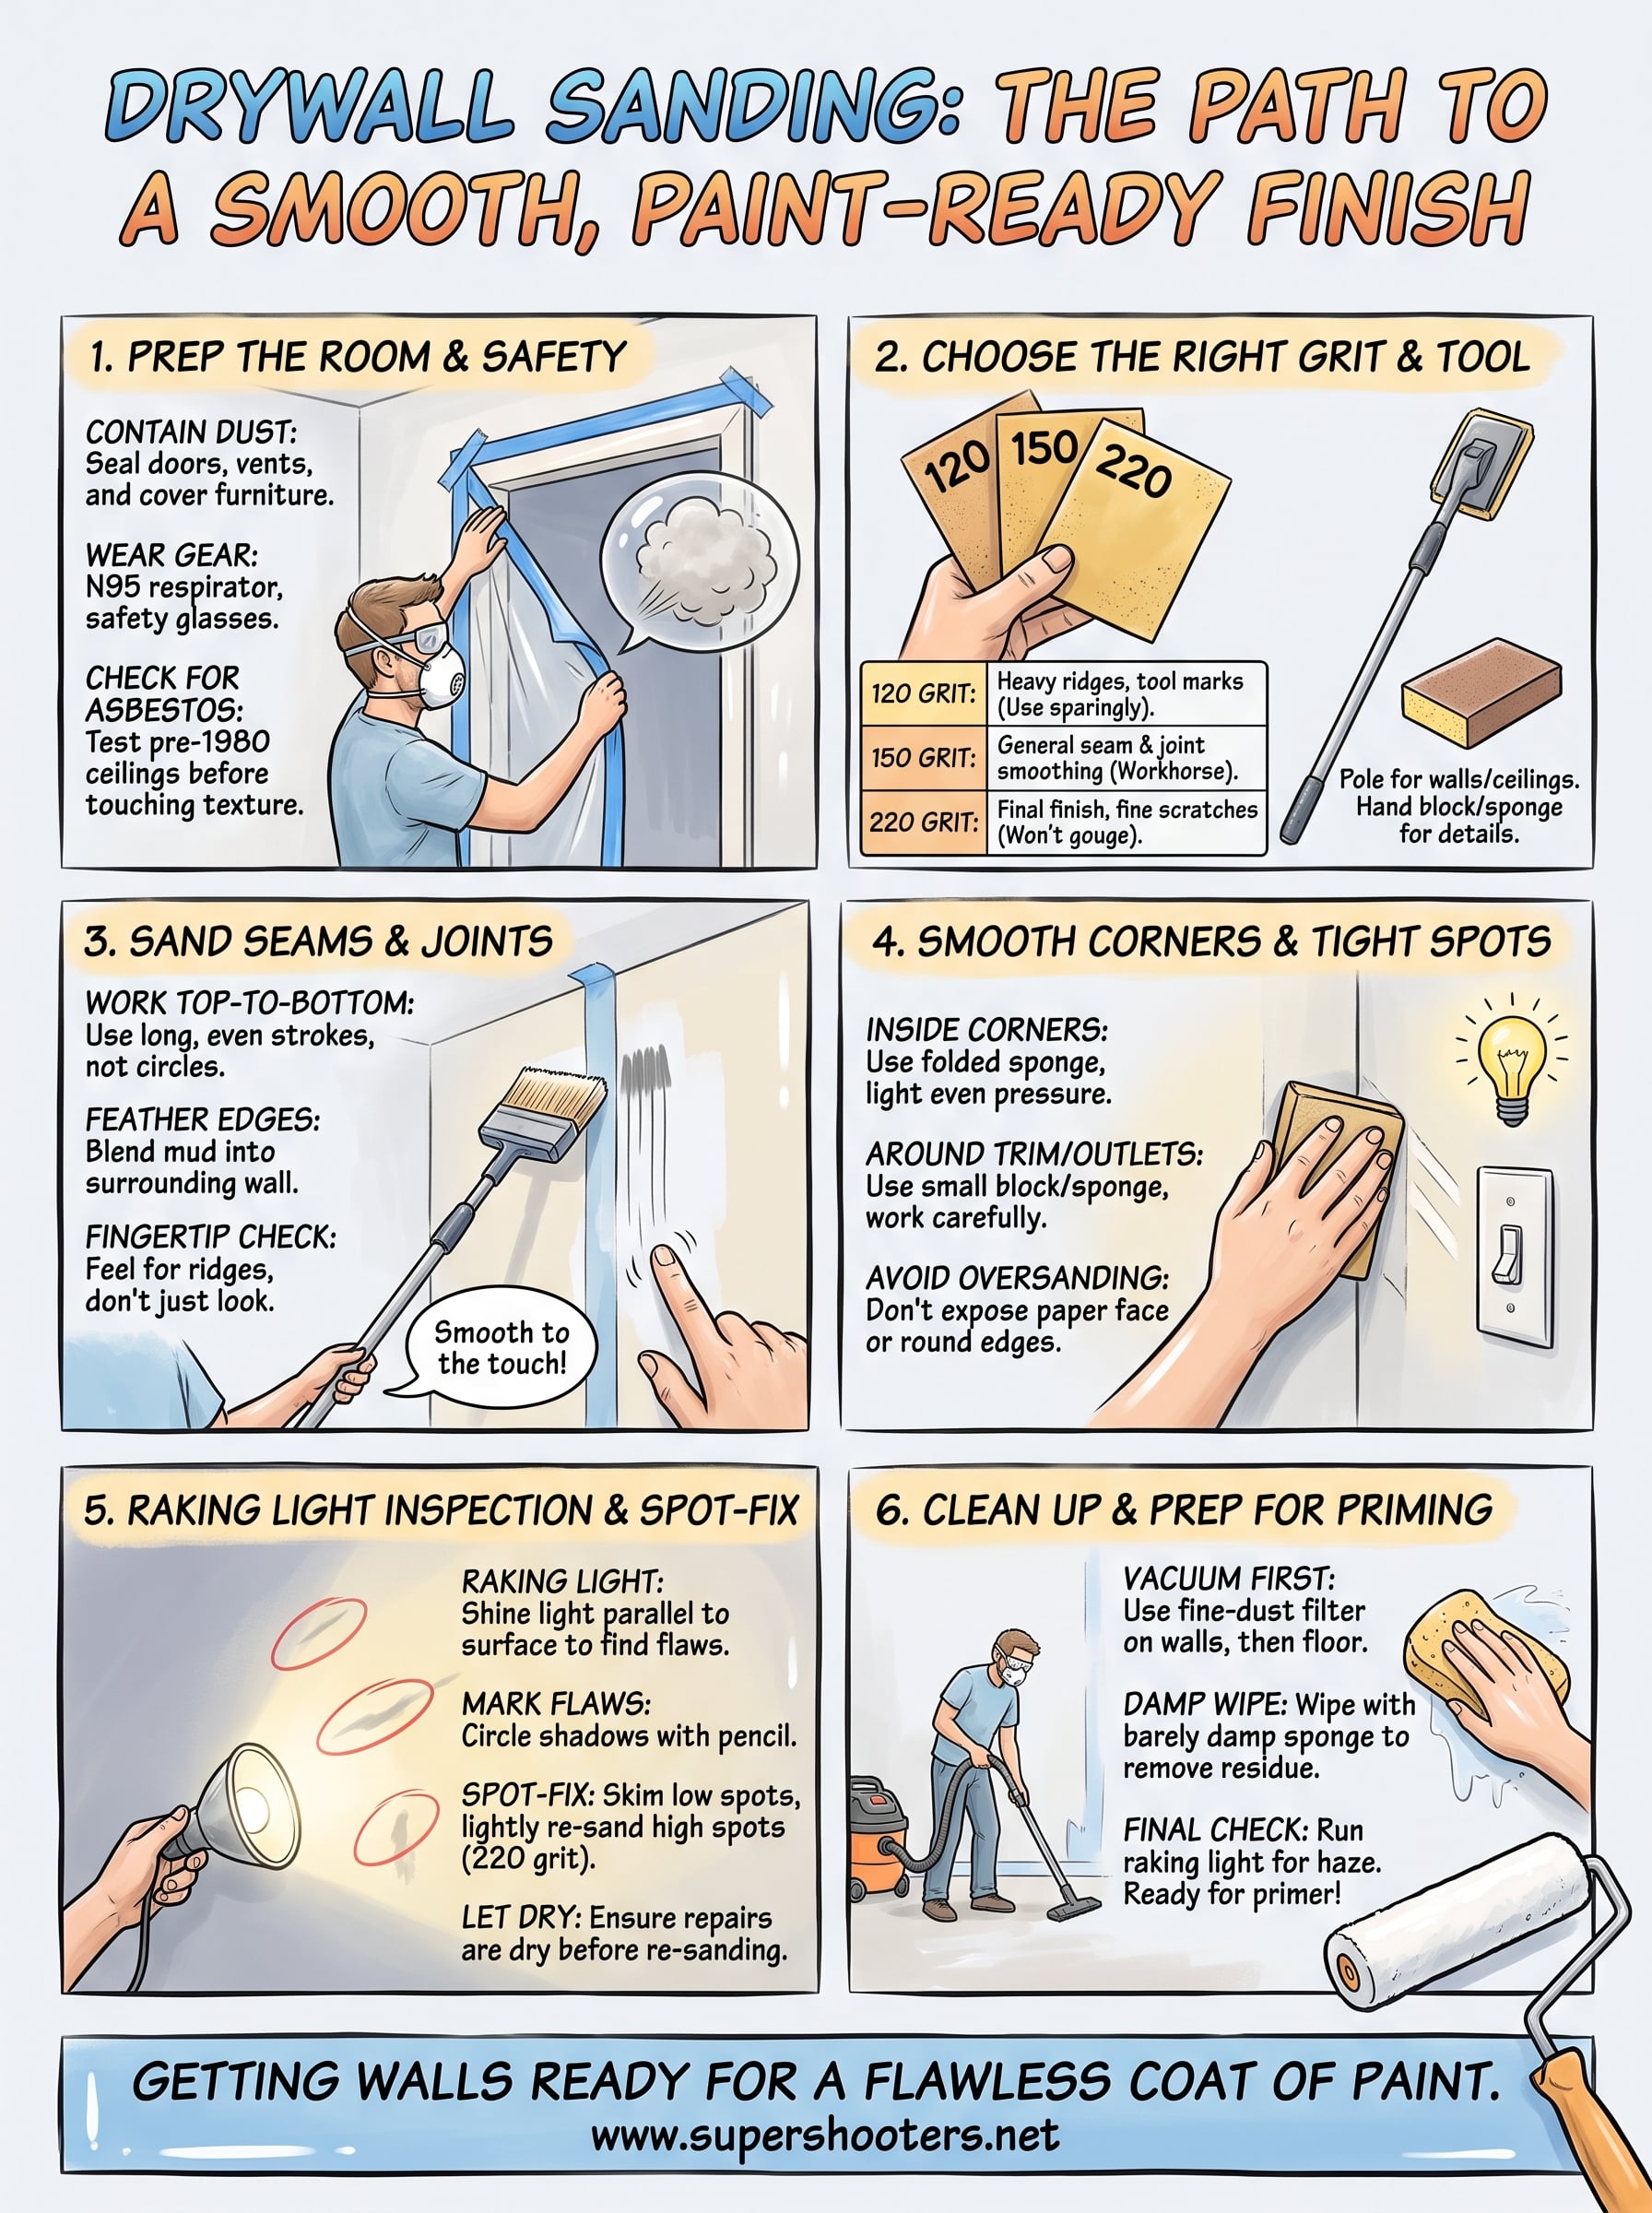
Getting your walls ready for a flawless coat of paint
Sanding drywall well comes down to patience and light, not brute force. Every step in this guide, from matching your grit to raking light checks, exists to catch flaws before paint makes them permanent. Working through each stage in order keeps you from chasing mistakes backward, which is where most DIY jobs lose hours they didn't budget for.
Getting a wall this smooth takes practice, and there's no shame in reaching for help once you hit a seam that just won't cooperate or a ceiling with texture you're not sure is safe to disturb. Older Sacramento Valley homes especially can hide surprises behind that popcorn finish. If your project involves a ceiling you're unsure about, or you'd rather hand off the work entirely, our team at Super Shooters offers professional drywall patching and finishing backed by 30 years of getting walls paint-ready the first time.
Recent Posts