Share this article

August 13, 2026

How to Use Plastic Sheeting for Popcorn Ceiling Removal

Scraping a popcorn ceiling turns a room into a mess fast. Wet debris drops onto floors, splatters up walls, and works its way into every outlet and vent if you don't plan ahead. Using plastic sheeting for popcorn ceiling removal is the single best way to contain that mess and protect the rest of your home before you make the first scrape.

This guide walks you through exactly how to hang plastic on walls, tape it along baseboards, and lay down floor protection so debris stays where you can sweep it up. You'll learn which type of sheeting holds up to wet scraping, how to seal doorways so dust doesn't spread to other rooms, and where people typically leave gaps that let water and texture through anyway.

We've spent over 30 years pulling down popcorn ceilings across the Sacramento Valley, and we've seen every shortcut that backfires. Before you rent a scraper or mix your first batch of water, get the containment setup right. It's the difference between a weekend project and weeks of cleaning ceiling debris out of carpet fibers and vents.

What you need before you start

Gather your supplies before you touch the ceiling, not after you've already knocked loose the first chunk of texture. Running to the hardware store mid-project with wet debris cooling on your tarp is how gaps happen, and gaps are how water and grit end up in your carpet padding. Buy everything in one trip and lay it out in the room so you can see exactly what's covered and what isn't.

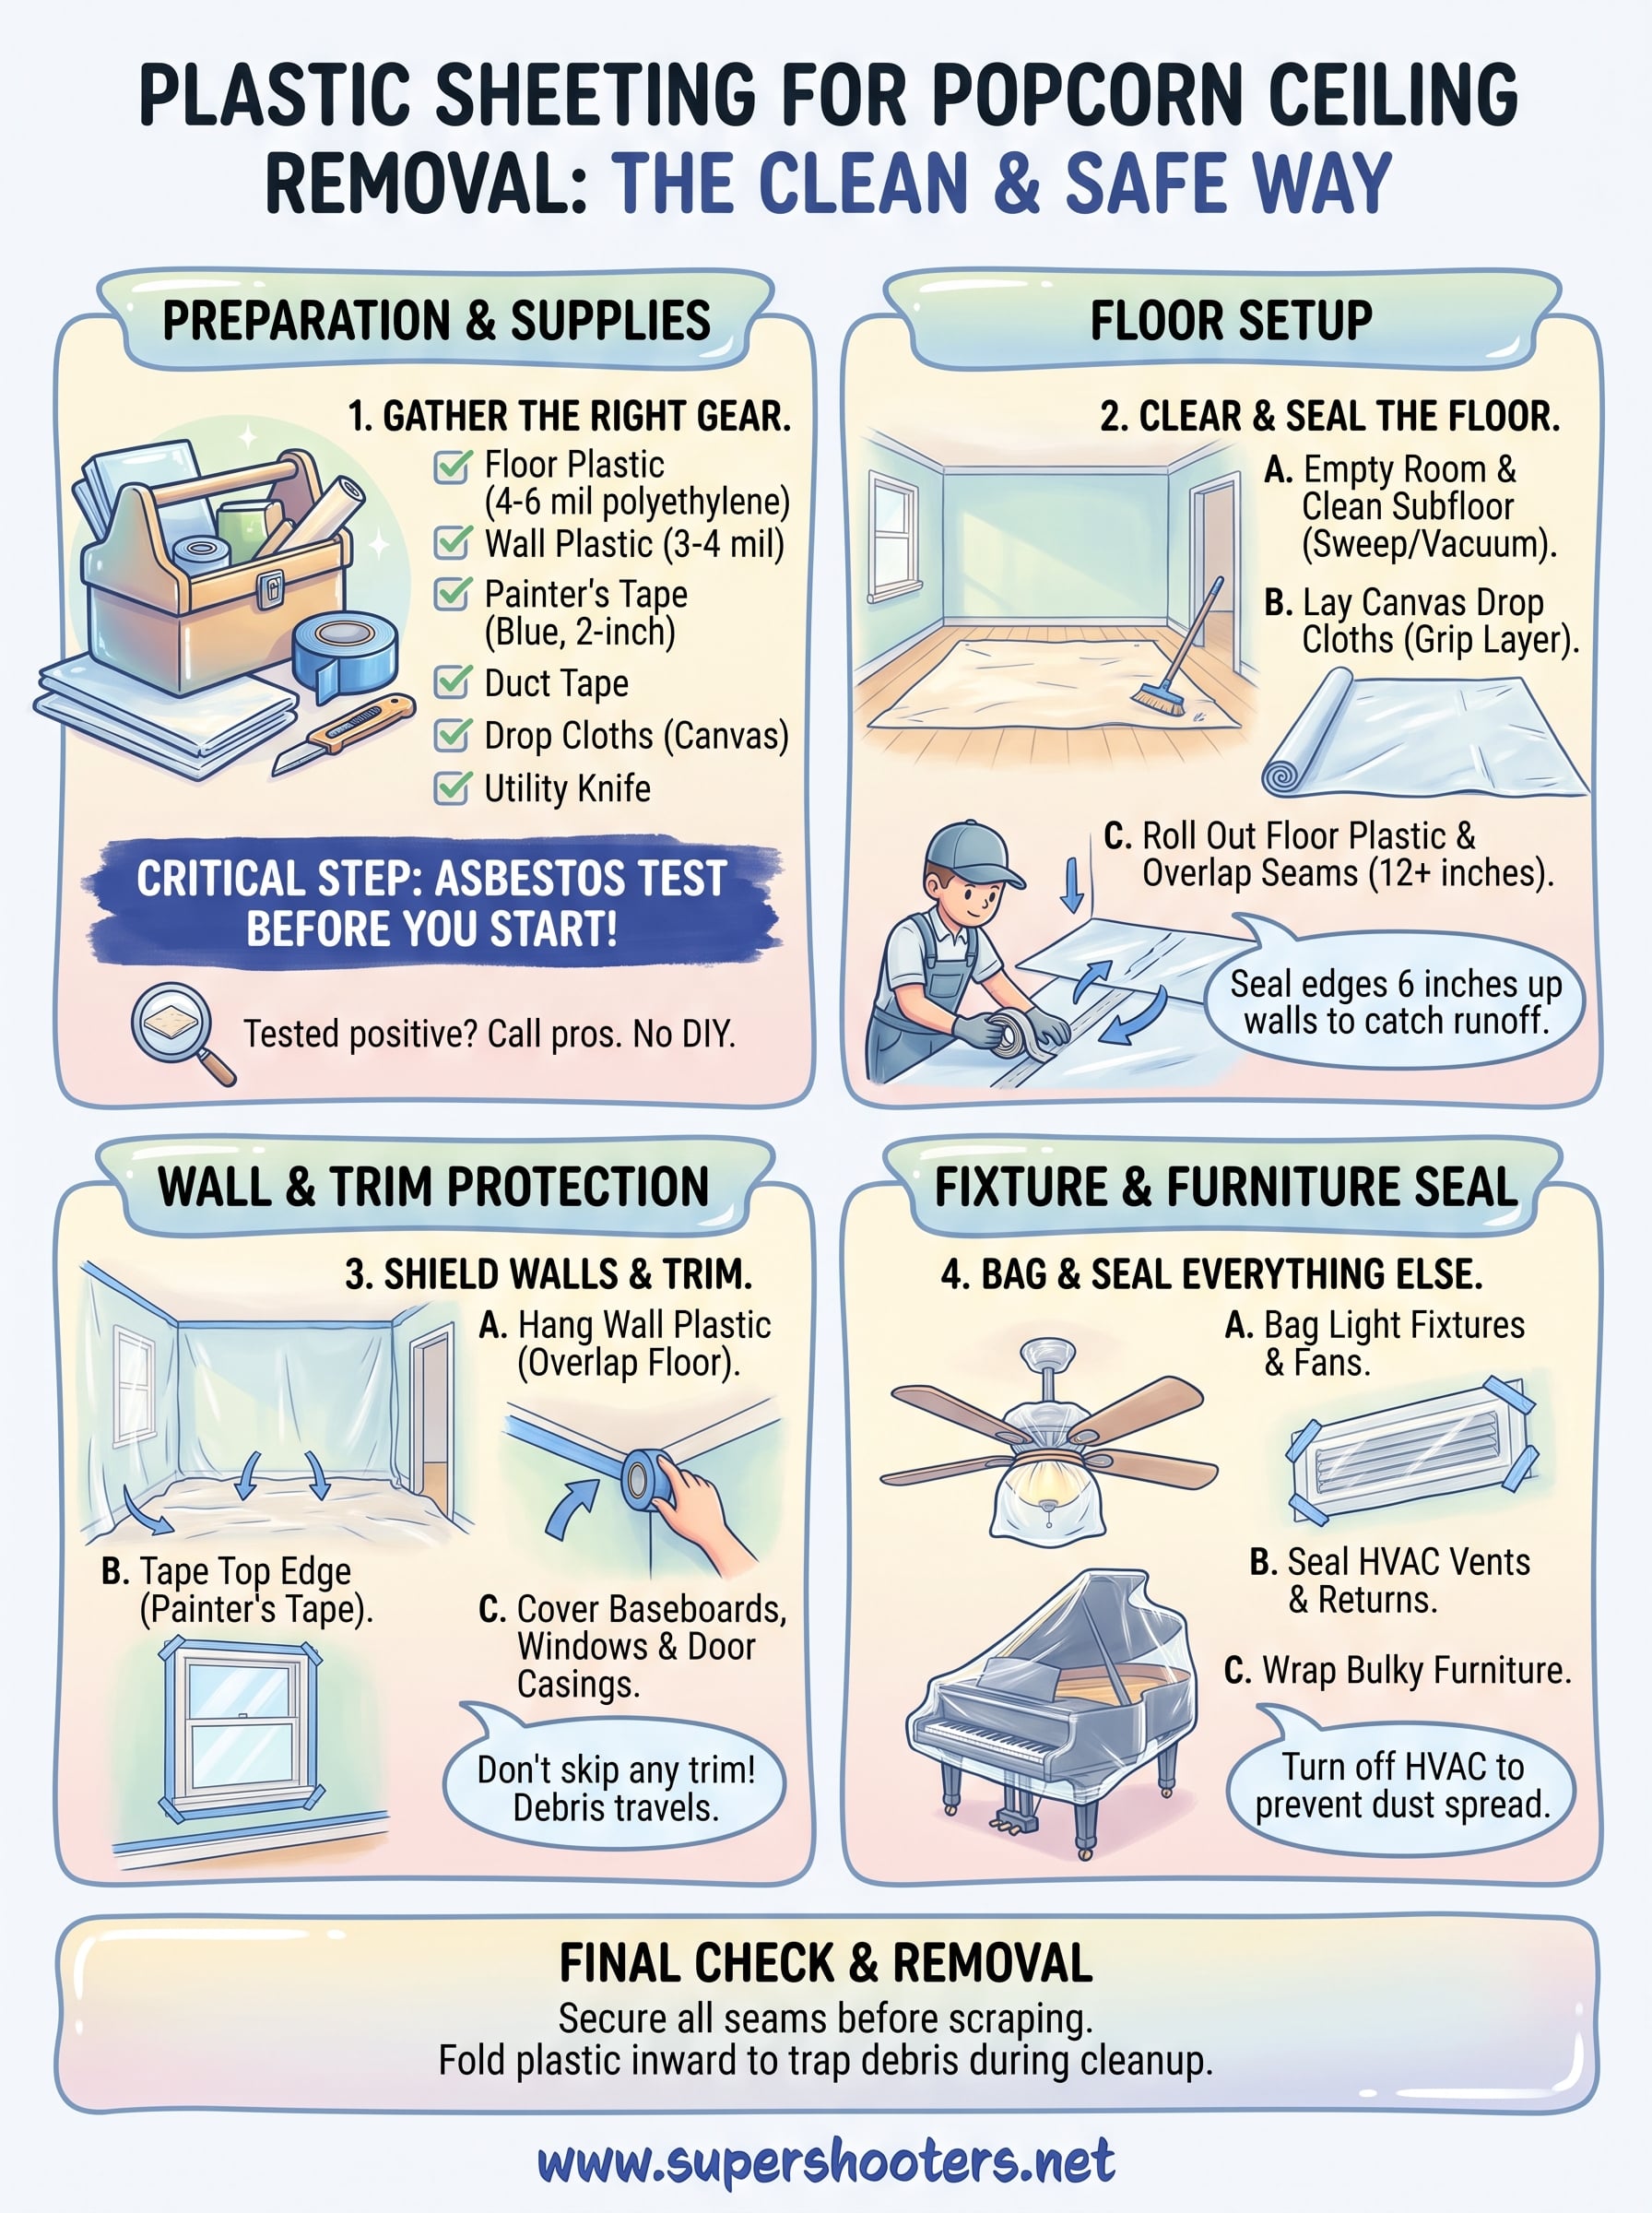
Popcorn ceiling removal always involves water, so your plastic has to survive repeated soaking without tearing. Thin painter's plastic from the paint aisle rips the moment a wet scraper drags across it. You want construction-grade polyethylene sheeting , at least 3 mil thick for floors and walls, ideally 4 to 6 mil if you're doing more than one room or plan to reuse it.

The thicker the plastic, the fewer trips you make to buy more when it tears mid-job.

Materials checklist

Item Recommended spec Why it matters
Floor plastic sheeting 4-6 mil polyethylene Holds up under wet scraping and foot traffic
Wall plastic sheeting 3-4 mil polyethylene Thinner is fine since walls take less abuse
Painter's tape Blue, 2-inch width Won't peel paint off trim when removed
Duct tape Standard 2-inch Seals seams between plastic sheets
Zip-up dust barrier or plastic door Standard doorway kit Keeps dust from spreading to hallways
Drop cloths (canvas) Medium weight Extra grip layer under plastic on floors
Utility knife Retractable blade Cuts sheeting to size without shredding it

Skip the temptation to substitute old bedsheets or tarps you have in the garage. Fabric soaks through, and once water reaches your subfloor or carpet, you're dealing with a second repair job on top of the ceiling.

Test before you tape anything up

Homes built before 1980, and many built into the early 1990s, sometimes have asbestos-containing popcorn texture . Before you cover a single wall in plastic, get a sample tested. Scraping asbestos texture without containment and proper protective equipment isn't a DIY job, and it's a legal issue in California if you disturb it without following abatement rules. If your ceiling tests positive, stop and call a licensed crew. Our team handles asbestos ceiling removal across the Sacramento Valley every week, and testing takes far less time than cleaning up a contamination problem afterward.

Set aside a full afternoon just for setup. Plastic sheeting for popcorn ceiling removal only works if it's actually sealed, not just draped, and rushing this step is where most DIY containment fails before the first scrape even happens.

Step 1. Clear the room and cover the floor

Start by emptying the room completely. Pull out furniture, rugs, lamps, anything that isn't nailed down. If you've got a bulky item you can't move, like a built-in bookshelf, wrap it fully in plastic and tape the seams shut rather than trying to work around it with debris flying everywhere.

Next, sweep the floor and vacuum it. Any grit or old debris left underneath your plastic will grind into the flooring once you're walking around on top of it, especially on hardwood or vinyl. A clean subfloor also lets tape stick to baseboards without dirt breaking the seal.

A clean floor under your plastic matters as much as the plastic itself.

Lay your canvas drop cloths down first if you're protecting hardwood, tile, or finished concrete. These add a grip layer that keeps the plastic from sliding around while you work, and they cushion the floor if a scraper or ladder leg lands harder than planned.

Lay the plastic sheeting

Roll out your 4-6 mil floor plastic sheeting wall to wall, overlapping edges by at least 12 inches. Tape every overlap with duct tape so debris and water can't slip through the seam. Run the sheeting up the wall about 6 inches and tape it there too, creating a shallow tray effect that catches runoff before it reaches your baseboards.

Work the plastic into corners and around door thresholds carefully. Rushed folds leave gaps exactly where wet debris tends to pool. Once the floor is sealed, you've got a stable base to build your wall and doorway containment on top of, which is what the next steps cover.

Step 2. Seal the walls and trim

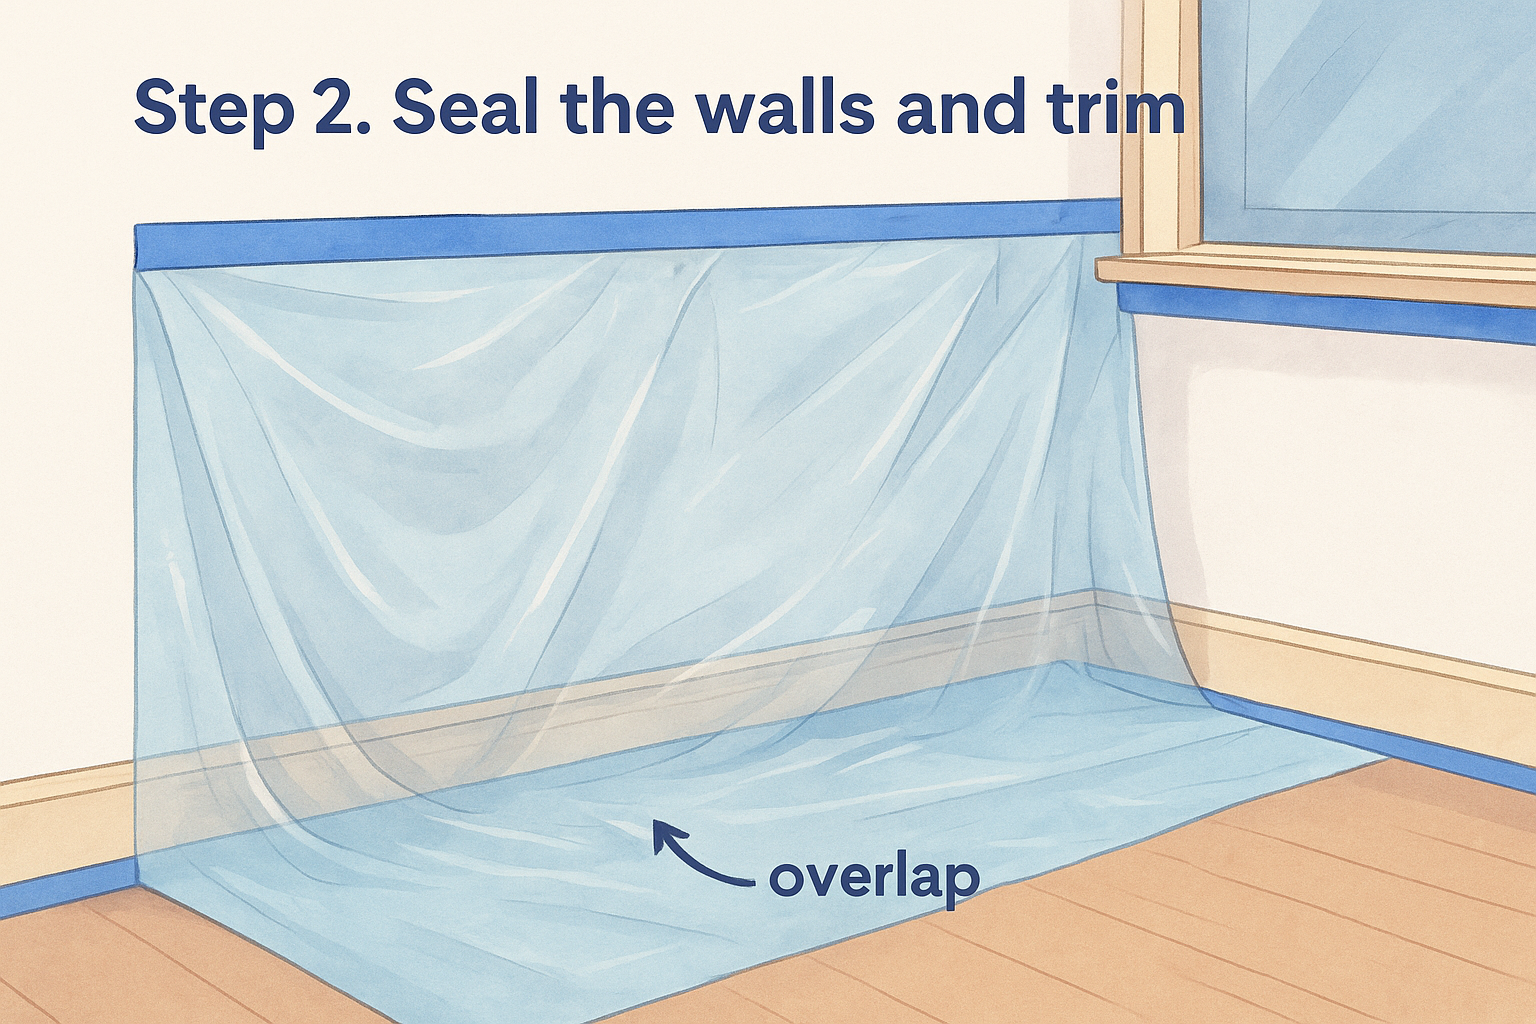
Walls take less punishment than floors, but they still need coverage anywhere within a few feet of your scraping zone. Wet texture splatters farther than most people expect, especially when you're working overhead with a pole scraper. Tape 3-4 mil wall plastic sheeting to the top of your baseboard, letting it drape up and overlap the floor plastic by a few inches. That overlap keeps runoff from finding a gap between the two layers.

Overlap your wall and floor plastic by a few inches, or water will find the seam.

Hang the wall sheeting from just below the ceiling line down to the floor overlap, working one wall at a time so you're not fighting loose plastic while you tape. Use painter's tape at the top edge near the ceiling, since you'll be scraping close to it and don't want adhesive pulling paint off when you peel it later. Duct tape works fine lower down where it won't touch finished surfaces.

Protect baseboards and window trim

Baseboards and window casings are where a lot of DIYers cut corners, and it shows up later as water stains or peeling paint. Cover every piece of trim in the work zone, not just the wall closest to your ladder.

  • Run painter's tape along the top edge of baseboards before laying plastic over them
  • Tape plastic directly to window casings, covering the sill and lower sash
  • Cover door casings the same way, even on doors you're not using during the job
  • Check corners and outside miters, where tape often lifts first

Don't skip trim in corners of the room you think you won't be scraping near. Debris travels farther than your work radius, and a single unprotected baseboard section can mean stripping and repainting trim after the ceiling's already done.

Step 3. Protect fixtures, vents, and furniture

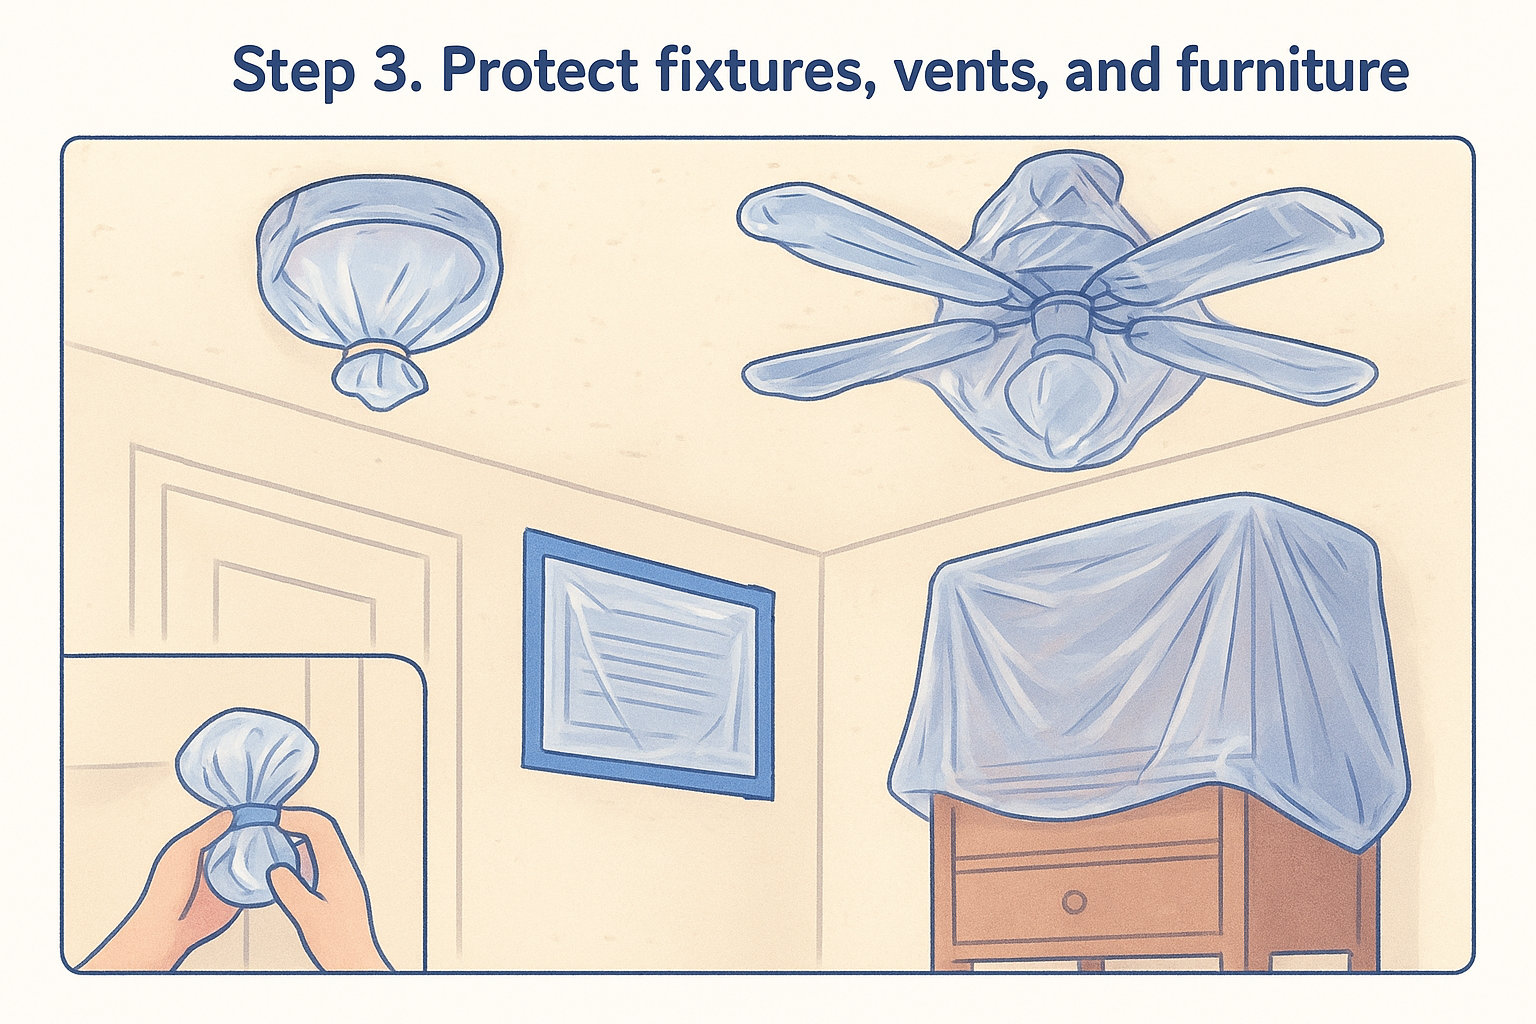
Every ceiling fixture, vent, and outlet in the room becomes a target for dust and wet debris once you start scraping overhead. Light fixtures and ceiling fans need bagging, not just draping, because loose plastic falls away right when a chunk of texture lands on it. Slide a plastic grocery bag or a cut piece of sheeting over each fixture and secure it with a rubber band or tape at the base, sealing tight against the ceiling.

Bag every fixture before you touch a scraper, because a single unprotected vent can spread dust through your whole HVAC system.

Seal HVAC vents and returns

Cover every supply vent and return grille in the room with plastic sheeting taped flush to the ceiling or wall. If your HVAC system runs during the project, dust pulled into a return can circulate through ductwork and settle in rooms you never touched. Turn the system off for the day if you can, then seal the vents anyway as a backup.

  • Tape plastic over ceiling and wall vents, sealing all four edges
  • Cover smoke detectors with a plastic bag, and remember to reinstall batteries when you're done
  • Wrap wall-mounted outlets and switches loosely, leaving the cover accessible if you need power for lights

Wrap remaining furniture and hardware

Anything too heavy to move, like a piano or a built-in cabinet, needs its own plastic wrap sealed at every seam. Slide sheeting under the base if possible so debris can't work underneath from the floor side. Handle door hardware the same way: tape a small plastic square over knobs and hinges so grime doesn't transfer to your hands every time you leave the room.

Step 4. Secure the seams and remove the sheeting

Before you make your first scrape, walk the entire room and check every seam you taped in the last three steps. Pull gently on each strip to make sure the tape seal is holding and hasn't lifted from humidity or from brushing against it while you worked. A seam that looks fine from three feet away can still have a gap wide enough for wet debris to slip through once you start working overhead.

Check every seam twice before you scrape once, because a missed gap undoes hours of setup.

Run a final strip of duct tape over any seam where the plastic has started to sag or pull away from the wall. Pay extra attention to corners, where two sheets meet at an angle and tape tends to lift first. If you're using a zip-up dust barrier at the doorway, test that the zipper runs smoothly and the frame is pressed flush against the wall on all sides.

Take the sheeting down without spreading debris

Once the ceiling's scraped and dry, resist the urge to rip everything down at once. Debris and dust settle into every fold, and yanking plastic loose sends it airborne right back into the room you just cleaned.

  1. Fold each wall panel inward on itself, debris side in, before pulling it off the tape
  2. Roll the folded panel into a tight bundle rather than dragging it across the floor
  3. Lift floor sheeting from the center outward, folding debris toward the middle as you go
  4. Bag rolled sheeting immediately in a heavy-duty contractor bag
  5. Vacuum the floor underneath before removing your canvas drop cloths

Tackle the ceiling plastic around fixtures last, since those bags hold the finest dust and tend to tear if handled roughly. Once everything's bagged, wipe down baseboards and window sills with a damp cloth before you pull the painter's tape, catching any fine residue that settled during teardown.

A cleaner, safer path to a smooth ceiling

Getting plastic sheeting for popcorn ceiling removal right comes down to patience during setup, not skill with a scraper. Seal every seam, bag every fixture, and take the sheeting down slowly, and you'll spend your weekend cleaning texture off a ceiling instead of scrubbing it out of your carpet.

But containment only solves half the problem. If your popcorn ceiling went up before the early 1990s, no amount of plastic sheeting makes scraping it safe until you've ruled out asbestos. That test result changes everything about how the job gets done, and it's not something to guess about.

If your ceiling tests positive, or you'd rather skip the tarps and ladder work altogether, our crew has handled this exact job across the Sacramento Valley for over 30 years. Get a free estimate on popcorn ceiling removal and let someone else deal with the mess.

Recent Posts

By cinchweb August 14, 2026
Learn how to repair ceiling cracks for good with mesh tape, setting compound, texture matching, and expert tips on when to call a pro.
By cinchweb August 13, 2026
Learn how to vet a drywall repair contractor: licensing, insurance, warranties, pricing, and reviews before hiring in Sacramento Valley.
By cinchweb August 12, 2026
Discover the 7 must-have drywall repair tools, prices, and tips for DIY patching—plus when to call Sacramento Valley pros instead.
By cinchweb August 11, 2026
Learn how to choose joint compound for drywall repair by hole size, humidity, and location, plus mixing, application, and sanding steps.
By cinchweb August 11, 2026
Learn safe DIY steps for asbestos testing popcorn ceiling surfaces, from sampling to lab results, plus when Sacramento homeowners need pro abatement.
By cinchweb August 9, 2026
Learn step-by-step drywall and ceiling repair, from diagnosing damage to texture matching, plus when to call Sacramento Valley pros instead.
By cinchweb August 9, 2026
Learn dust-free vacuum popcorn ceiling removal: test for asbestos, match suction to blades, and scrape safely. Super Shooters offers free estimates if it stalls.
By cinchweb August 8, 2026
Learn how drywall clips repair large holes without studs—square the hole, fit a patch, anchor clips, and feather compound for a seamless finish.
By cinchweb August 6, 2026
Learn how to remove a stucco ceiling safely: asbestos testing, containment setup, scraping technique, and repair tips from Sacramento Valley pros.
Show More