September 5, 2026
How to Patch Anchor Holes in Drywall
Pull a shelf bracket or curtain rod off the wall and you're left staring at a cluster of anchor holes that make the whole wall look tired. Maybe the anchor spun loose and left a bigger gap than you expected, or the plastic sleeve is still wedged in there and won't budge. Either way, you want it gone before you repaint or list the house for sale.
Learning how to patch anchor holes in drywall is faster than most homeowners assume, and you don't need a full drywall wall repair kit to do it right. For small holes, a dab of spackling compound and a putty knife handles the job in under 30 minutes. For anchors that ripped out chunks of drywall or left holes wider than a quarter, you'll want a slightly different approach involving mesh tape or a small patch before you sand and paint.
This guide walks through patching drywall anchor holes step by step, from picking the right filler to blending drywall patch texture for a seamless match so the repair disappears. We'll also cover what to do when an anchor cracks the surrounding drywall or leaves a hole too large for spackle alone, and when it's worth calling in a pro instead of risking a lumpy patch.
What you need before you start patching
Before you touch a putty knife, take thirty seconds to look at the hole. The size and shape of the damage determines which materials you actually need, and grabbing the wrong filler is the number one reason patches crack or shrink later. A pinhole from a plastic anchor needs almost nothing. A hole where the anchor spun and chewed up the surrounding paper needs a bit more muscle. Sort that out first and the rest of the job goes fast.
Tools and materials checklist
You probably already own most of what's needed for patching drywall anchor holes , and the six tools every DIYer needs for drywall repair cover nearly all of it. Here's what to gather before you start:
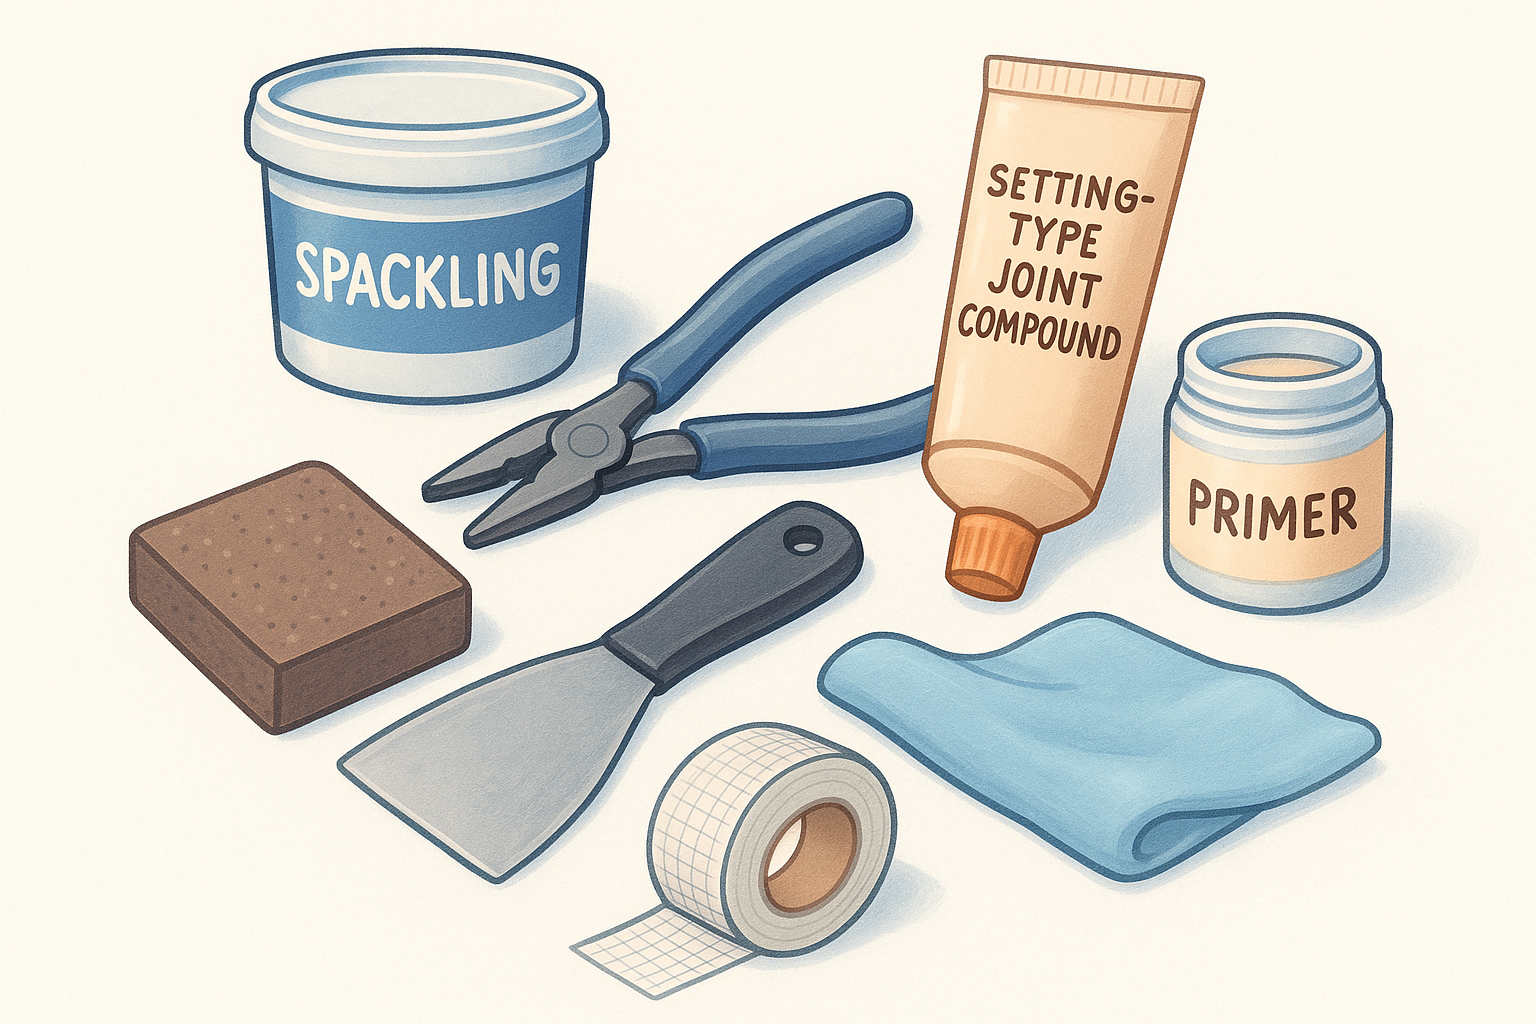
- Needle-nose pliers or a flathead screwdriver (to pull the old anchor)
- Lightweight spackling compound for holes under 1/4 inch
- Setting-type joint compound (like Durabond) for anything bigger
- A flexible putty knife, 3 to 6 inches wide
- 120 to 220-grit sanding sponge or sandpaper
- A damp microfiber cloth
- Self-adhesive mesh tape (only needed for holes wider than a quarter)
- Primer, ideally a stain-blocking type like Kilz
- Paint that matches your wall, plus a small foam roller or brush
A patch is only as good as the filler you picked for the hole size in front of you.
Matching the filler to the hole
Not every anchor hole calls for the same product, and using the wrong one is where most DIY patches go wrong. Lightweight spackling is forgiving, doesn't shrink much as it dries, and sands down easily, which makes it the right pick for small, clean holes. Setting-type compound , one of the types of drywall mud and how they differ from spackle, dries harder and bonds better, so it holds up when you're bridging a gap or filling a hole that lost some drywall paper around the edges.
| Hole Size | Best Filler | Dry Time | Sanding Difficulty |
|---|---|---|---|
| Under 1/4 inch (pinhole, small anchor) | Lightweight spackling | 30-60 minutes | Easy |
| 1/4 to 1/2 inch (spun or stripped anchor) | Two-way spackling paste | 2-4 hours | Moderate |
| 1/2 inch or wider, ragged edges | Setting-type joint compound with mesh tape | 20-90 minutes (setting type) | Moderate to firm |
If you're not sure which category your hole falls into, size up. A slightly stronger compound never hurts, but a weak filler in a big hole will crack within a few months.
A word on lighting and paint match
Once the filler's picked out, think ahead to the finish. Good lighting during the patching and sanding steps matters more than people expect, since flat overhead light hides ridges that show up the moment sunlight hits the wall at an angle. Work with a lamp positioned low and to the side, almost like you're checking for scratches on a car door, and you'll catch high spots before they become a problem.
Keep your paint can or a labeled swatch nearby too, even if you won't get to painting for a few steps. Matching the sheen, not just the color, is what makes a patch invisible. A flat wall patched with satin paint will show a faint halo every time, so confirm the finish before you buy or borrow paint. If you don't have leftover paint from the original job, take a chip of the wall (from inside a switch plate cover works well) to the hardware store for a color match rather than guessing from memory.
Step 1. Remove the old anchor
Before you can patch anything, that old anchor has to come out completely. Leaving a broken plastic sleeve or a bent screw anchor behind guarantees a lumpy patch, since compound won't sit flush over a buried obstruction. Knowing how to patch a drywall anchor hole starts here, and rushing this step is what causes most redo jobs.
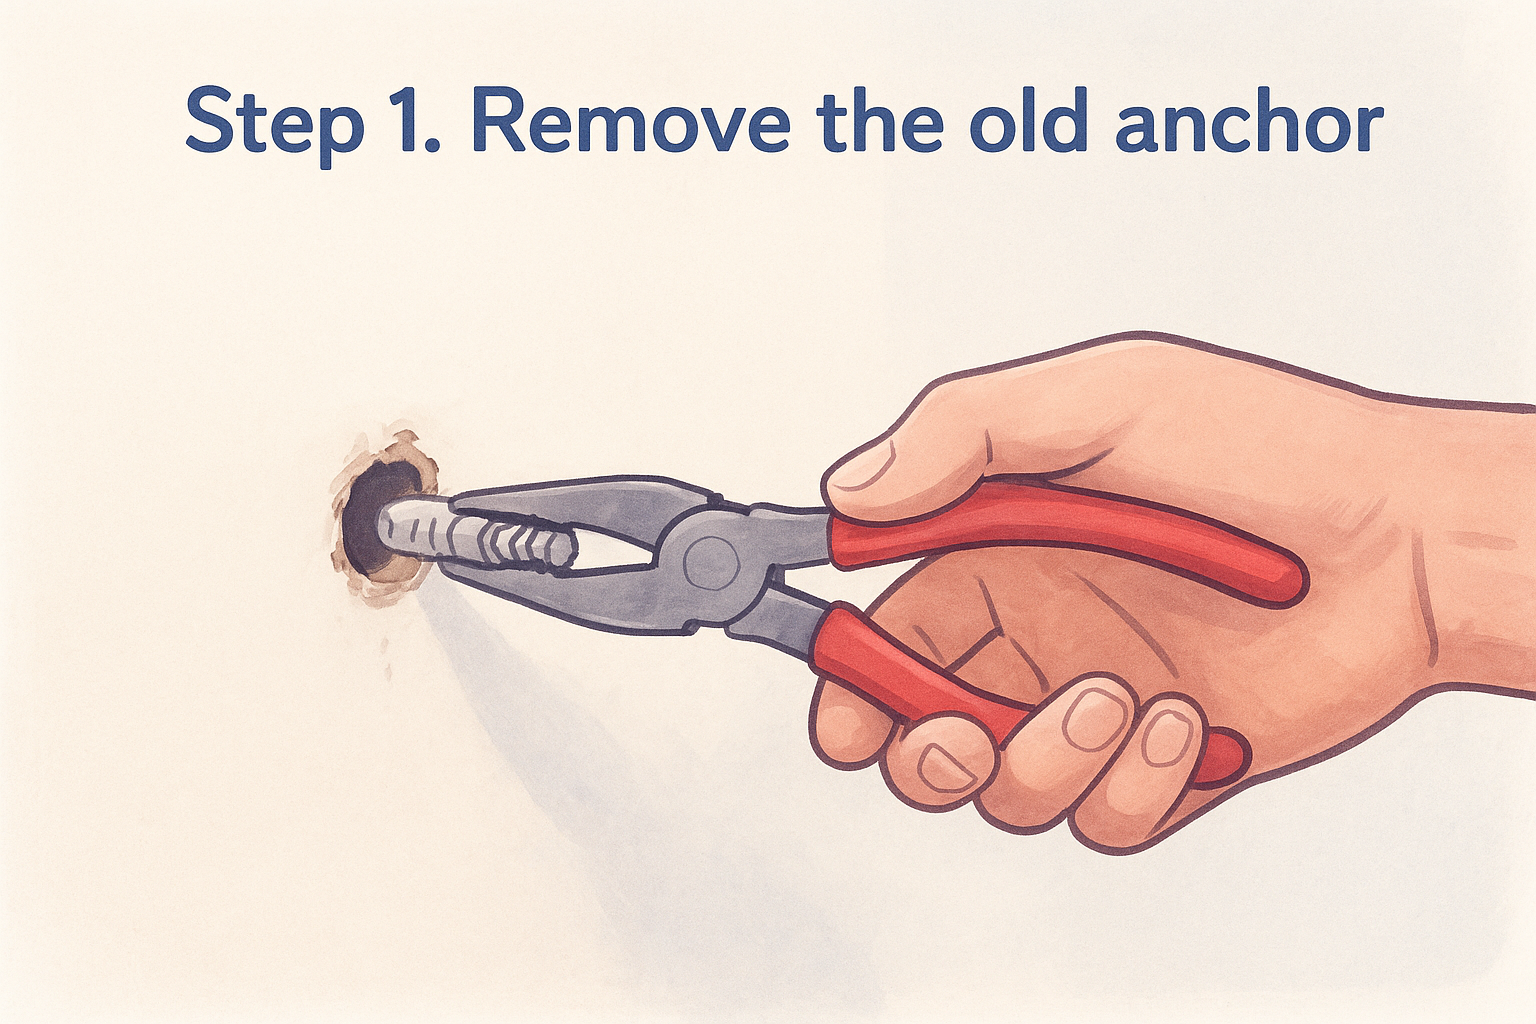
Grab your needle-nose pliers first. Most plastic and self-drilling anchors will grip the pliers' jaws if you twist gently while pulling straight out. Work slowly. Yanking hard at an angle tears more paper off the drywall face and turns a quarter-inch hole into a half-inch mess. If the anchor spins in place instead of backing out, switch to a flathead screwdriver, wedge the tip against the anchor's collar, and pry outward in small increments rather than one big motion.
Pulling the anchor out clean saves you twice the patching work later.
When the anchor won't budge
Some anchors, especially the heavier toggle-bolt or molly-bolt styles rated for shelves and TV mounts, resist simple pulling because they've spread open behind the drywall. For these:
- Push the anchor's wings flat by tapping gently with a hammer handle, then pull straight out with pliers.
- If it still won't move, use a utility knife to score around the anchor's rim, loosening the drywall's grip before pulling again.
- As a last resort, push the anchor into the wall cavity rather than fighting it out. This works fine for holes you're filling anyway, since nothing will be resting against that spot again.
Check for damage before moving on
Once the anchor's out, run a finger around the hole's edge. Crumbling drywall paper or a soft, spongy feel means the surrounding gypsum core got compromised, and you'll want to treat this as a larger repair with mesh tape rather than a simple fill, which we'll cover further down. A clean, firm-edged hole is the ideal outcome and means you're ready for patching drywall holes for anchors the straightforward way.
Don't skip inspecting the back side of the hole either, if you can see through it. A hole that goes clean through to open wall cavity behind insulation or a stud bay needs backing material before you fill it, otherwise the compound just falls through and you're patching the same spot twice.
Step 2. Clean and prep the hole
Once the anchor's out, resist the urge to grab the putty knife right away. A hole full of dust and loose paper won't hold filler properly, and compound applied over debris tends to bubble or pop loose within days. Give the area a quick once-over first, and the patch you apply in the next step will actually stick.
Clear out loose material
Start by brushing away any crumbs of gypsum or drywall paper hanging around the hole's edge. A dry paintbrush works well here, or you can use a vacuum with a brush attachment if the mess is bigger than expected. Check the inside of the hole too, not just the surface, since anchor holes often have a little collar of crushed gypsum just inside the opening that needs to come out before you fill anything.
A patch only bonds as well as the surface underneath it is clean.
Wipe it down
After brushing, wipe the hole and the surrounding few inches with a damp microfiber cloth . This pulls out fine dust that a brush leaves behind and gives the compound a clean surface to grip. Let the spot air dry for five to ten minutes before moving forward. Painted walls hold moisture longer than raw drywall, so don't rush this if the room's humid or poorly ventilated.
Knock down rough edges
Run your fingers around the rim of the hole one more time. If you feel any raised paper edges or torn bits sticking up, press them flat with the edge of your putty knife or trim them with a utility knife. Leaving raised edges means your filler will sit higher than the wall around it, and that's extra sanding you don't need to do later.
For patching drywall holes for anchors that came out messy, a quick prep checklist keeps you from missing a step:
- Brush loose debris from inside and around the hole
- Wipe with a damp cloth, then let dry fully
- Flatten or trim any raised paper edges
- Confirm the hole is dry to the touch before filling
- Set out your filler and putty knife within reach
Skipping prep is the most common reason a patch looks fine on day one and then shows a hairline crack a month later. Five extra minutes here saves you from redoing the whole spot.
Step 3. Fill the hole with compound
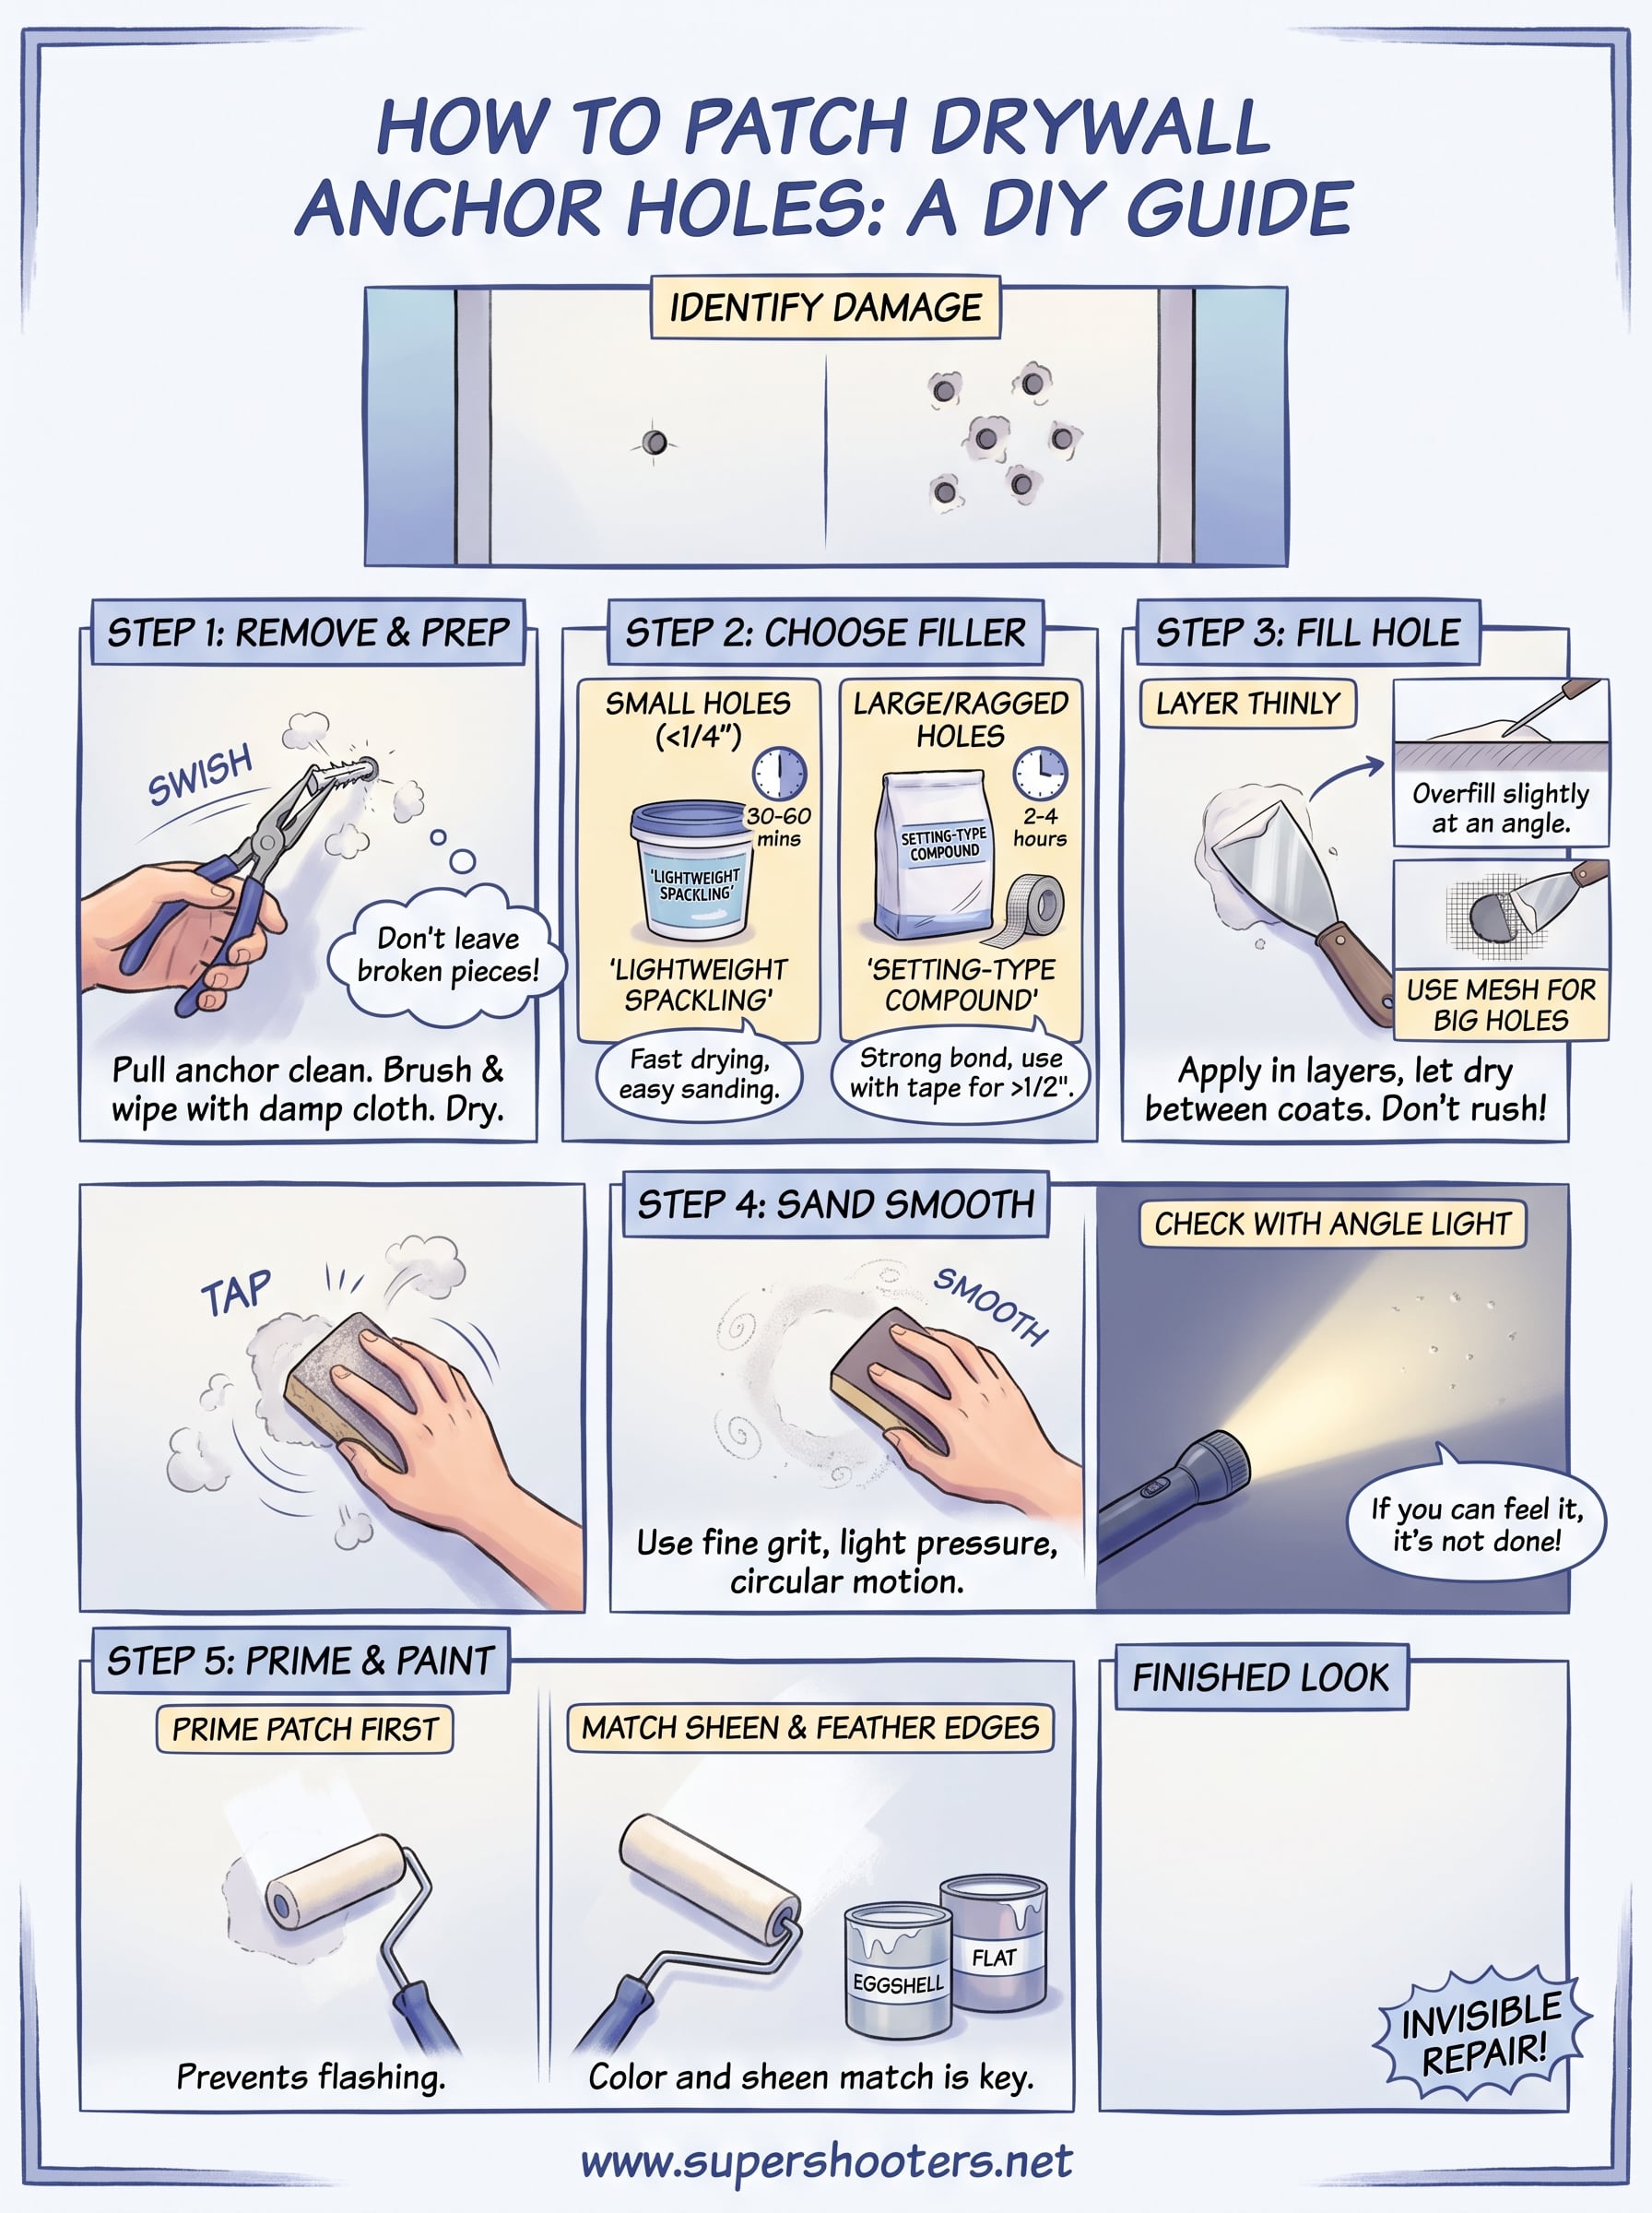
Grab the filler you matched to your hole size back in the prep stage, since matching joint compound to the hole is where that choice pays off. Load a small amount onto your putty knife, about the size of a dime for a pinhole and a bit more for anything wider, then press it into the hole at a slight angle so the compound packs into the cavity rather than just smearing across the surface. Overfilling slightly is better than underfilling, since a proud patch sands down easily but a sunken one means mixing another batch and waiting again.
A patch applied in one thin layer over a packed hole beats a thick blob every time.
Work in thin layers, not one thick pass
Drag the knife across the hole in one smooth motion, holding the blade at roughly a 30-degree angle to the wall. This scrapes off excess and leaves a thin, even layer instead of a mound. For anything past a quarter inch, don't try to fill it flush on the first pass. Let the first layer set, then come back with a second thin coat that extends an inch or so past the edges of the first, since most patches need two or three coats rather than one. Feathering the edges of the mud this way is what keeps the repair from showing a ridge once it's painted.
If you're bridging with mesh tape
Holes that needed mesh tape from the damage check in Step 1 get one extra move here. Press the tape over the hole first, then apply compound directly over it with the same thin-layer approach used when patching a hole with mesh tape, making sure the mesh disappears completely under the first coat. Two coats is usually the minimum for a taped repair since the mesh has texture that needs burying.
Give it time to dry fully
Check the drying window on your container rather than guessing, and if you're unsure, see how long a patch needs to cure before paint. Lightweight spackling for small anchor holes is often ready to sand in under an hour, while setting-type compound used for larger repairs can need anywhere from 20 minutes to a couple hours depending on the product. Rushing this part is the second most common reason patches fail, right behind skipping prep work. If the surface still feels cool or slightly soft to the touch, give it another 15 minutes before moving to sanding, since figuring out how to patch hole from drywall anchor repairs correctly means respecting dry times, not just technique.
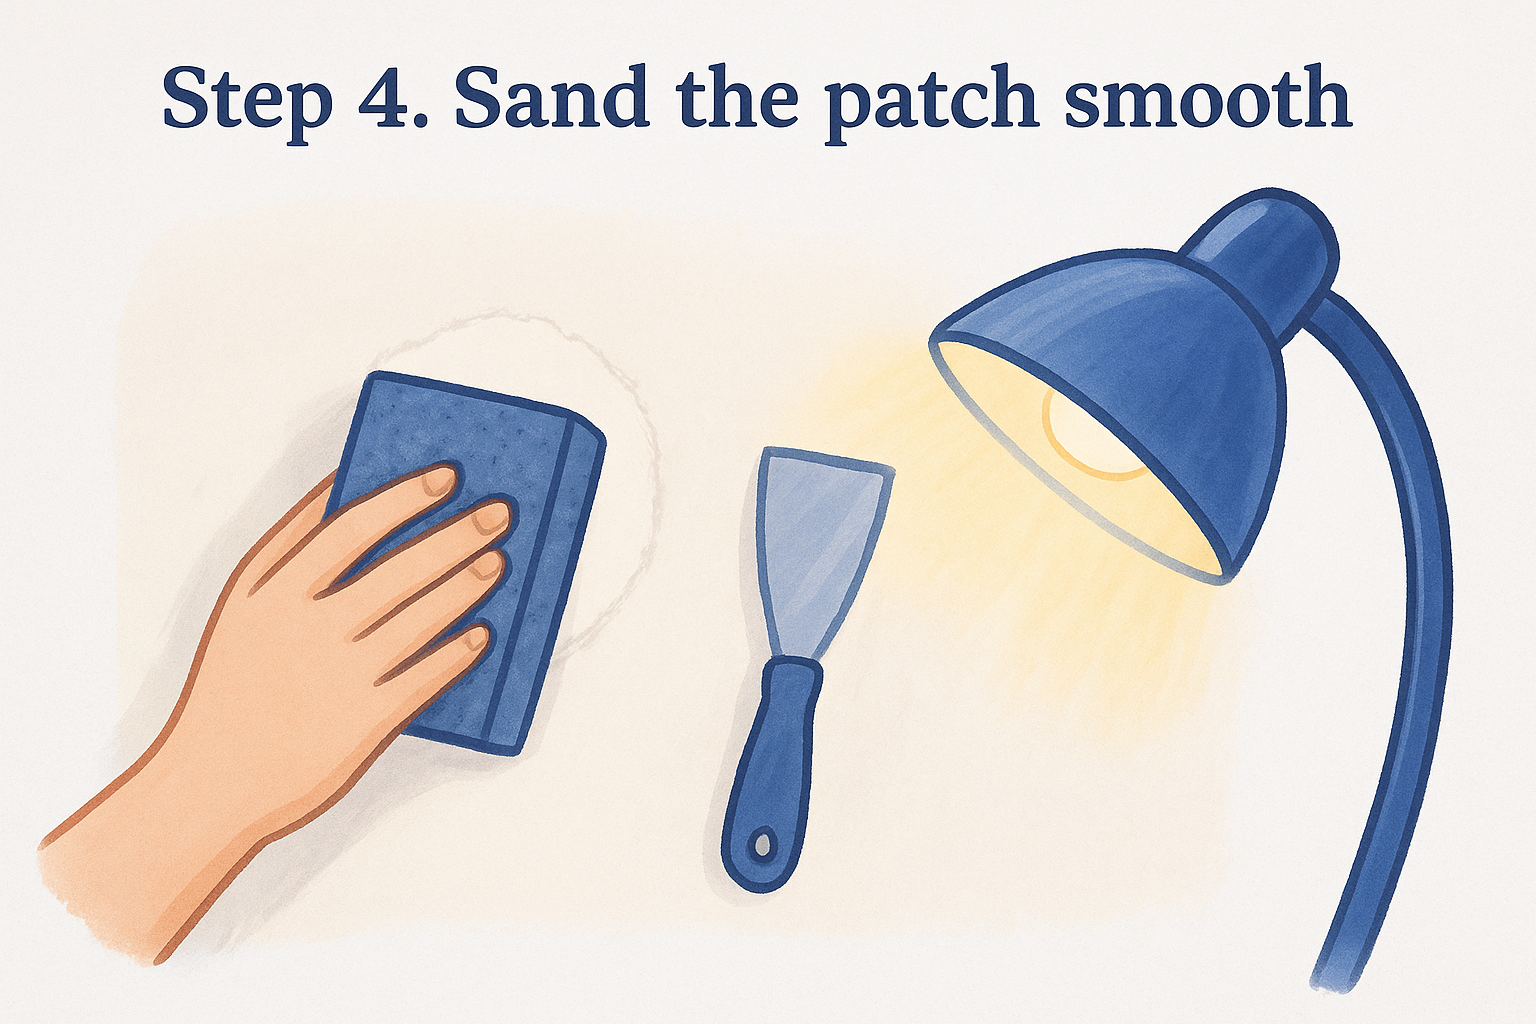
Step 4. Sand the patch smooth
Once your patch has cured fully, the sanding step is what separates an invisible repair from one you can spot from across the room. Sanding drywall compound too early or too aggressively is a common mistake, since wet compound clogs sandpaper and dry compound sanded too hard leaves a shallow dip where the patch used to be. Take it slow here and you'll save yourself from mixing another batch of filler.
Confirm the patch is fully dry
Before you touch sandpaper to the wall, press a fingernail lightly into the center of the patch. If it leaves a mark or feels the slightest bit tacky, give it another 15 to 20 minutes. Sanding too soon tears up the surface instead of smoothing it, and you'll end up reapplying compound anyway. Setting-type compounds change color slightly as they cure, going from pink or dark gray to a uniform white, which is a quick visual check if you're unsure.
Use a fine grit and light pressure
Grab a 120 to 220-grit sanding sponge and work in small circular motions rather than long, hard strokes. Circular motion blends the edges of the patch into the surrounding wall instead of leaving a flat ring you can feel with your palm. Check your progress every 10 to 15 seconds by running a hand flat across the spot with your eyes closed. Your fingers pick up ridges long before your eyes do.
If you can feel the patch with your eyes closed, it's not done yet.
Wipe down and check under angled light
Once the surface feels level, wipe away the sanding dust with a slightly damp cloth so you can actually see what you're working with. Grab a lamp or flashlight and hold it low against the wall, almost skimming the surface. This raking light shows every high spot and shallow dip that flat overhead lighting hides completely. If you spot a low area, mix a thin skim coat, let it dry, and sand again rather than pushing forward with an uneven patch.
Getting this step right matters more than people expect once paint goes on, since paint sheen exaggerates texture instead of hiding it. A patch that feels smooth under raking light is ready for primer.
Step 5. Prime and paint to match your wall
Skipping primer is the fastest way to end up with a visible patch after all that sanding work. Drywall compound absorbs paint differently than the surrounding wall, and painted-over compound almost always shows up as a dull, flat spot even when the color matches perfectly. This effect is called flashing, and it's the number one reason patches that felt invisible under raking light suddenly stand out once the top coat goes on.
Skip the primer and even a perfect patch will flash under the paint.
Prime the patch first
Dab a small amount of stain-blocking primer , something like Kilz or a comparable product, directly over the patched area with a foam brush or small roller. Cover about an inch past the edges of the repair so the primer blends into the existing paint rather than stopping in a hard line. Let it dry fully, usually 30 minutes to an hour depending on humidity, before moving to paint. If you're patching a bathroom or kitchen wall, check that your primer is rated for high-moisture rooms, since standard primer can peel faster in those spaces.
Match your paint sheen, not just the color
Color gets most of the attention, but sheen is what actually gives a patch away. A wall painted in eggshell or satin reflects light differently than flat paint, so even a dead-on color match will show a faint outline if the sheens don't line up. Check your paint can label or the store receipt if you kept it, and if you're buying new paint, ask the counter to match both the color code and the finish type.
Feather the paint outward
Use a small foam roller for the patch itself, then feather the edges outward with a slightly drier roller so the new paint blends into the old rather than creating a visible square. Painting corner to corner across the entire wall isn't always necessary for a single small patch, but for multiple anchor holes clustered together, or a wall under strong window light, rolling the full wall gives a more even result. Let the first coat dry completely, then apply a second thin coat if the patch still reads slightly duller than the rest of the wall.
Handling larger holes or anchors you plan to reuse
Sometimes a single anchor hole isn't the real problem. A shelf bracket that ripped loose can leave a hole an inch or two wide, or you might be pulling four anchors from a curtain rod bracket and staring at a cluster of damage that spackle alone won't fix. Larger holes need a different approach than the quick fills covered above, and trying to force spackling paste into a two-inch gap just wastes material and guarantees a sunken patch.
The California patch method
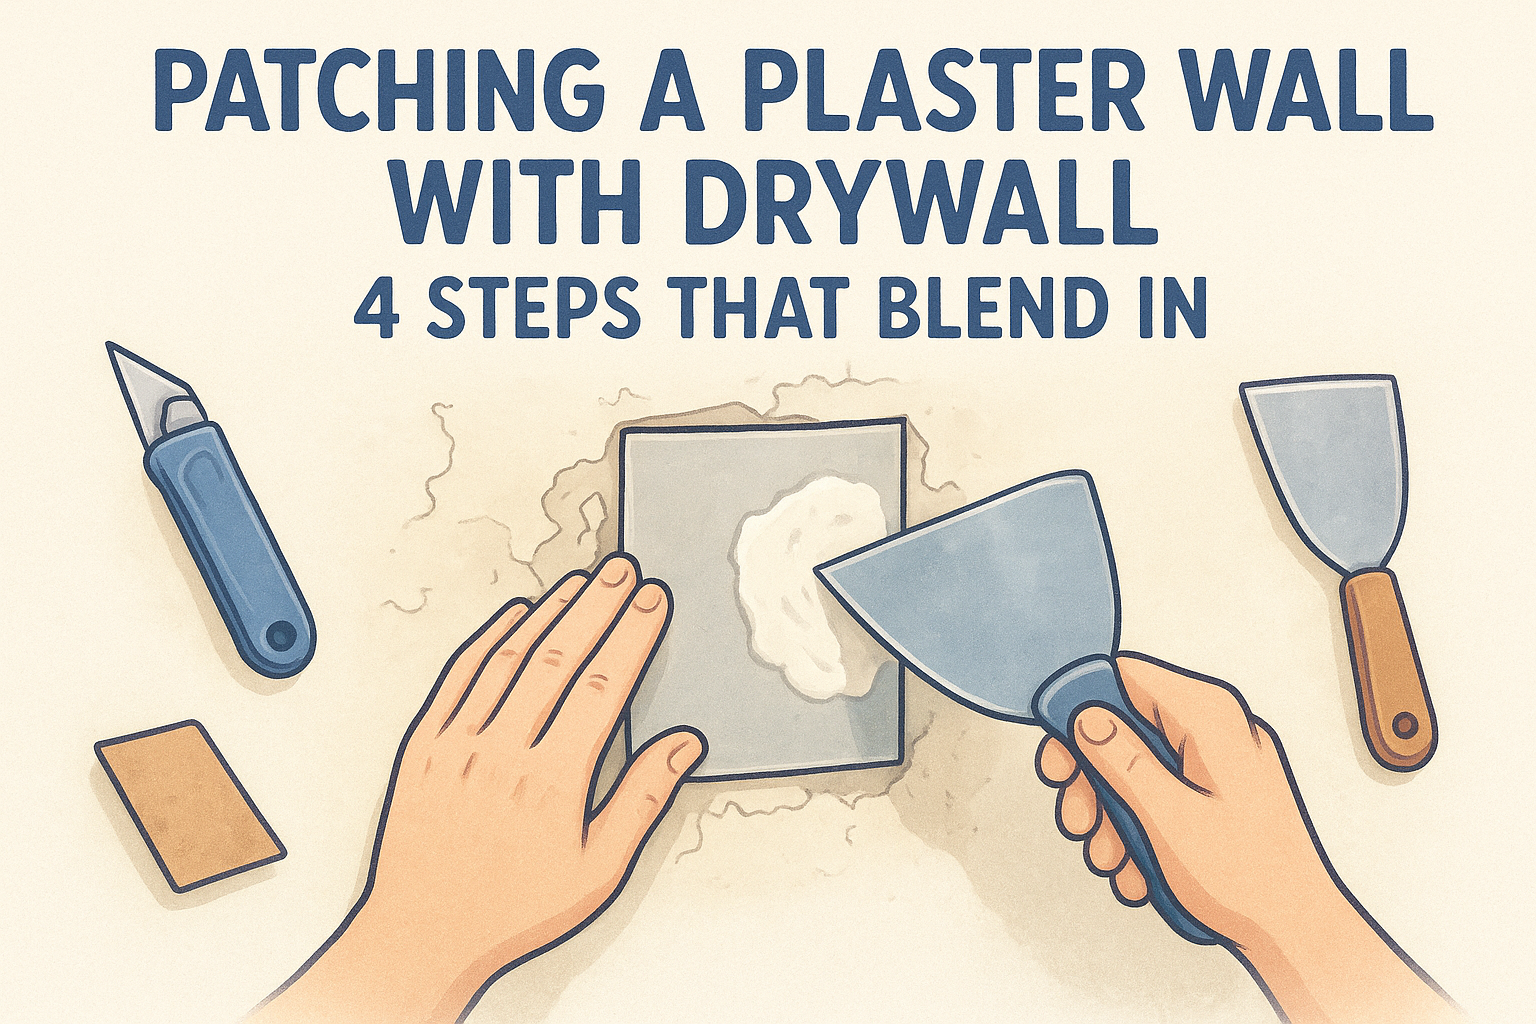
For holes wider than about an inch, cut a piece of scrap drywall slightly larger than the hole, then trace and cut a matching opening in the wall so the patch sits flush. Secure the patch with setting-type compound and mesh tape around all four edges, then build up two or three thin coats the same way you would for a smaller repair. This is often called a California patch, and it holds up far better than compound alone because it's actually structural, not just cosmetic.
A hole bigger than a silver dollar needs a real patch, not just more spackle.
If you're planning to reuse the same spot
Homeowners often want to hang the same shelf or mirror back in roughly the same location, which changes the math a little. Rather than filling completely and drilling fresh, consider these options:
- Move the new anchor an inch to either side of the old hole, so you're drilling into solid drywall instead of a patched area.
- Upgrade to a toggle bolt or a self-drilling anchor rated for more weight, which spreads the load and reduces the odds of another blowout.
- If the item must hang in the exact same spot, patch the hole fully, let it cure for at least 24 hours, then drill through the cured compound like you would fresh drywall.
When it's bigger than a DIY fix
Occasionally an anchor pulls out a chunk of drywall large enough to expose the stud bay, or the surrounding wall shows cracking that suggests more than surface damage. At that point, patching becomes a repair job rather than a touch-up. If you're dealing with multiple large holes , cracked drywall around the damage, or an older home where you're not sure what's behind the wall, it's worth knowing how to find the right drywall repair pro and having someone take a look. Super Shooters handles drywall repair across the Sacramento Valley and can match texture on repairs too extensive for a weekend fix.
Getting a wall that looks like new
Patching an anchor hole isn't complicated once you know the sequence: pull the anchor clean, prep the surface, fill in thin layers, sand under raking light, then prime before you paint. Skip any one of those steps and you'll see it later, usually right when sunlight hits the wall at an angle. Follow them in order and most anchor holes disappear completely, whether it's one pinhole from a picture frame or a cluster left behind by a curtain rod bracket.
The same patience that makes a small patch invisible is what separates a lasting repair from one you're redoing in six months. If you've worked through this guide and you're staring at a hole that's bigger than a silver dollar, cracked drywall around the damage, or a wall you're just not confident tackling yourself, don't force it. Reach out to Super Shooters for professional drywall patching and repair and get it handled right the first time.
Recent Posts