June 14, 2026
How To Repair Walls After Wallpaper Removal (Step-By-Step)
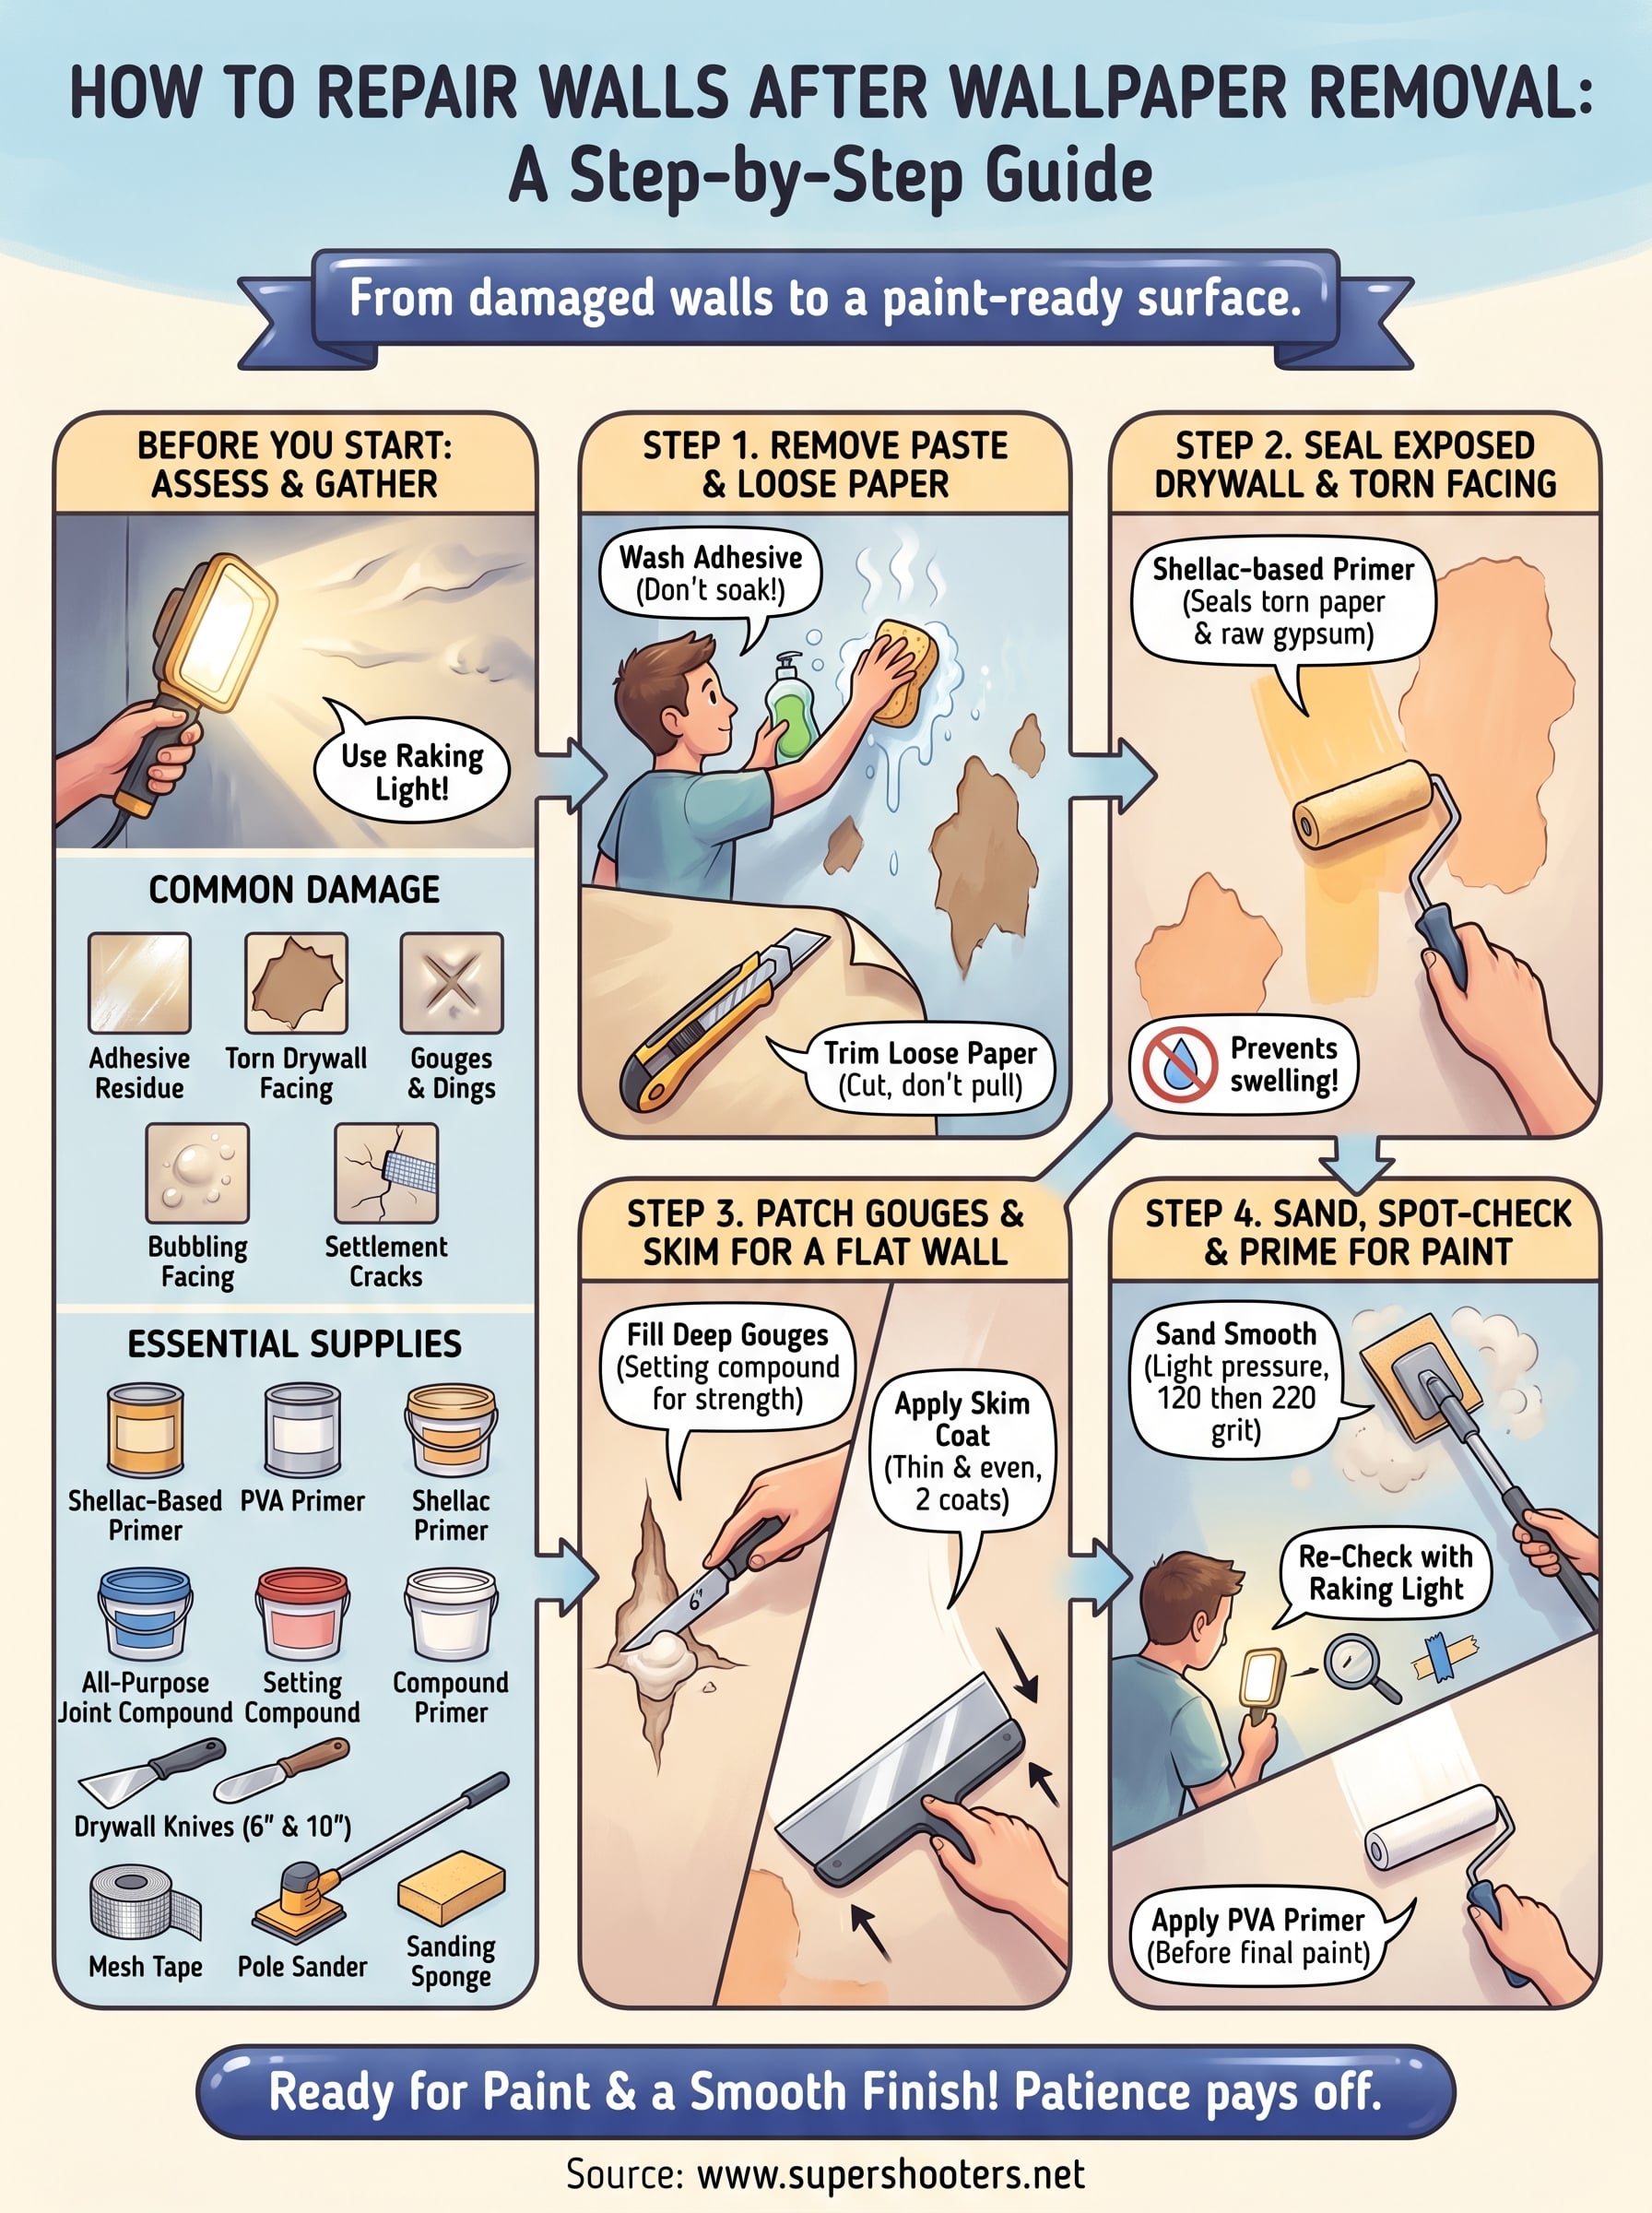
You pulled the wallpaper down, and now the walls look worse than before you started. Torn drywall paper, sticky adhesive residue, gouges, and rough patches, it's a common situation that catches homeowners off guard. The good news: knowing how to repair walls after wallpaper removal doesn't require years of experience, but it does require the right approach. Skip a step or rush the process, and you'll see every flaw through your fresh coat of paint .
At Super Shooters, we've handled wallpaper removal and wall repair across the Sacramento Valley for over 30 years, completing more than 10,000 projects for homeowners dealing with exactly this kind of damage. We've seen walls in every condition imaginable, from minor adhesive residue to drywall that's been torn down to the gypsum core . That hands-on experience is what this guide is built on.
Below, we'll walk you through each step, from cleaning off old glue and sealing torn paper to skim coating and sanding your walls smooth. Whether you're planning to tackle the repair yourself or you want to understand what the job involves before calling a pro, this guide gives you a clear path from damaged walls to a paint-ready surface .
Before you start: assess damage and gather supplies
Before you mix a single batch of joint compound, take 15 to 20 minutes to walk every wall carefully and map out what you're actually dealing with. Knowing the full extent of the damage before you start determines which products you buy, how many coats you'll need, and whether the repair is a weekend project or something bigger. Skipping this step is one of the most common reasons homeowners end up repainting and still seeing bumps and uneven patches through the finish coat.
How to read your wall damage
Different types of damage need different fixes, and mixing them up wastes both time and materials. Run your hand across the surface and use a bright work light held at a low angle (called "raking light") to catch imperfections that look invisible under normal room lighting. Low-angle light causes every ridge, bubble, and gouge to cast a clear shadow , making it far easier to mark problem spots with painter's tape before you start any repairs.
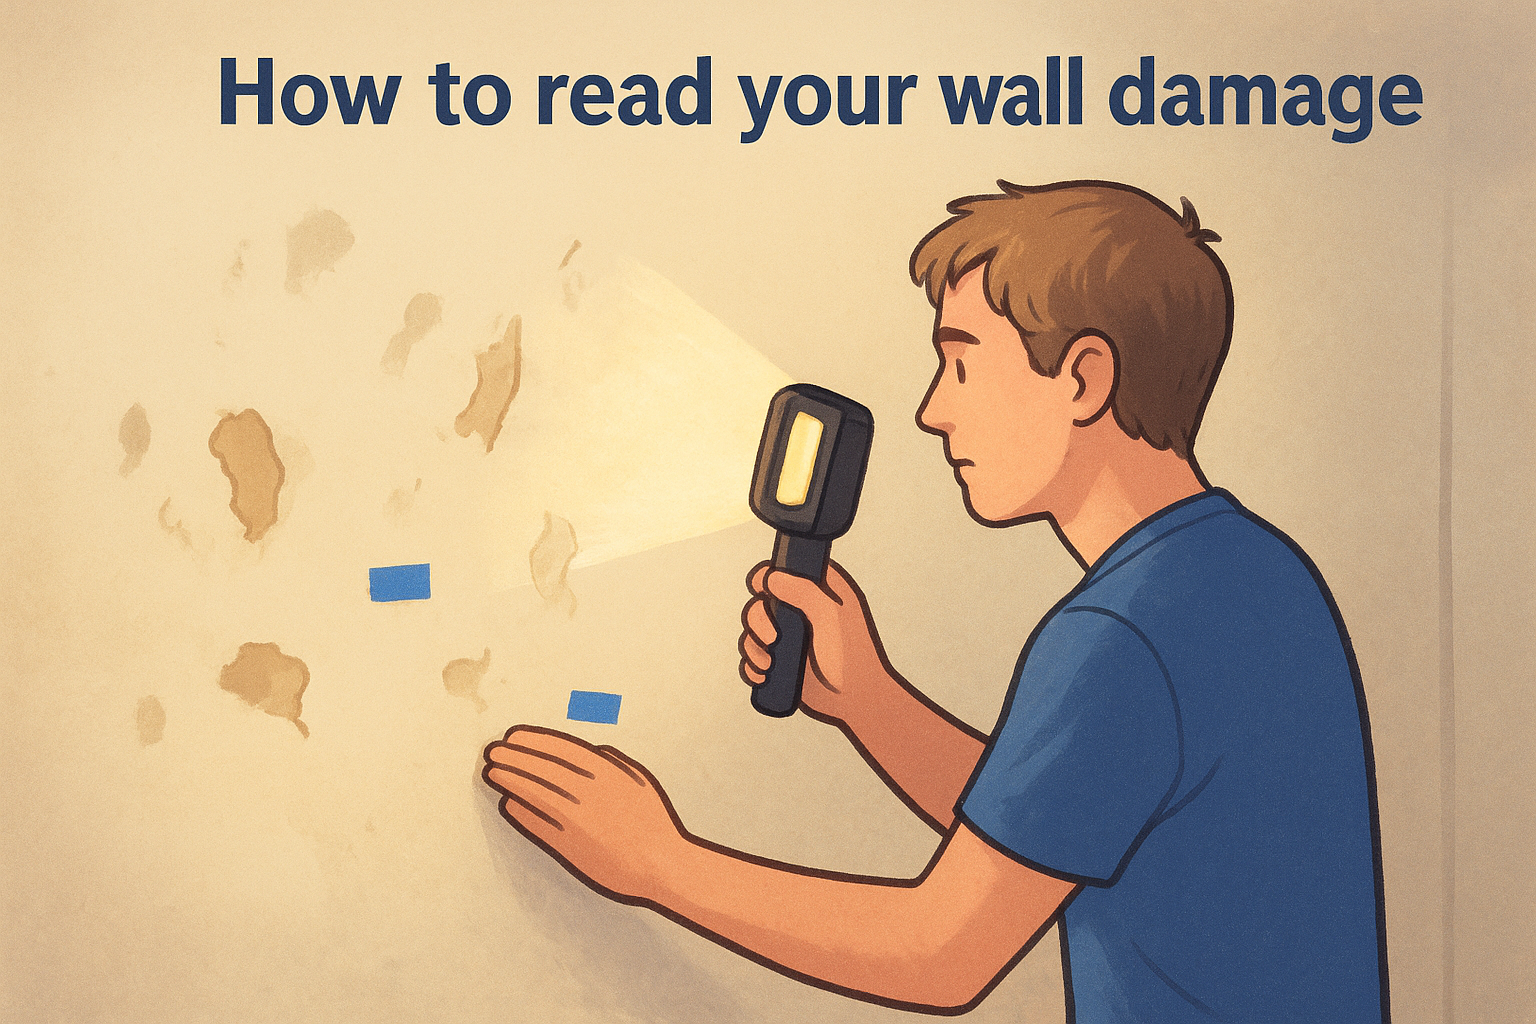
Raking light is the single most reliable way to find surface flaws you would otherwise miss entirely until after you've painted.
Here's what you'll commonly find and how to classify each type:
| Damage Type | What It Looks Like | Repair Needed |
|---|---|---|
| Adhesive residue | Shiny or tacky patches on the surface | Washing + sizing |
| Torn drywall facing | Brown paper or fuzzy gypsum exposed | Shellac primer + skim coat |
| Gouges or dings | Indentations from tools or wallpaper seams | Joint compound patch |
| Bubbling facing paper | Paper lifting away from the gypsum core | Glue down or cut and skim |
| Settlement cracks | Hairline to wider gaps in the wall | Mesh tape + compound |
Mark each problem area with a small piece of painter's tape so you don't have to re-inspect mid-repair. A quick room sketch on paper noting which walls have torn paper versus just residue helps you prioritize and keeps the job moving without second-guessing yourself.
What supplies you'll need
Gathering everything before you start means you won't stop halfway through a coat of compound because you're missing a tool. Most of these items are available at any hardware or home improvement store. This is the complete supply list for how to repair walls after wallpaper removal:
- Shellac-based primer for sealing torn drywall paper before any compound goes on
- PVA drywall primer for overall wall prep before final painting
- All-purpose joint compound (pre-mixed) for skim coating and filling gouges
- Lightweight setting compound (such as Durabond 20 or 45) for deeper patches that need structural strength
- 6-inch and 10-inch drywall knives for applying and feathering compound
- Mesh drywall tape for cracks and larger holes
- 120-grit and 220-grit sandpaper or a sanding sponge
- Pole sander for reaching higher wall sections efficiently
- TSP substitute cleaner or dish soap and warm water for washing adhesive residue
- Drop cloths , painter's tape , and safety glasses
Buy slightly more joint compound than you think you need . Running short mid-skim and mixing in a second bucket partway through can cause inconsistencies in drying time and texture that show up under paint. Starting with enough product on hand keeps the process clean and consistent from the first wall to the last.
Step 1. Remove paste and loose paper
Starting with clean walls is not optional. Any adhesive residue left on the surface will bleed through primer and paint , and any loose paper you skim over will eventually bubble away from the wall, taking your new finish with it. This is the foundation step for how to repair walls after wallpaper removal, and it's worth doing slowly.
Wash the adhesive residue off the wall
Mix TSP substitute or a few drops of dish soap into a bucket of warm water. Using a large sponge or soft cloth, work in small sections from the top of the wall down. Apply the solution, let it sit for about 30 seconds to loosen the glue, then wipe it clean. Rinse the sponge often so you're not just spreading sticky residue in a thin layer across the surface.
Don't soak the wall. Too much water on drywall causes the paper facing to lift further and the gypsum core to soften, which makes your repair job significantly harder.
Some areas may need two or three passes before they stop feeling tacky. Run the back of your hand across each section after it dries. If it still grabs at your skin, wash it again. Trying to skim over residue causes the compound to slide or pull instead of spread flat , and you'll end up chasing an uneven coat across the whole wall.
Handle loose and torn paper before anything else
Once the adhesive is gone and the wall has dried completely (give it at least two to four hours ), go back with your raking light and look for paper that's lifted, torn, or barely attached. Press any bubbled sections firmly with your palm to see if they stick back down. If they do, score them lightly with a utility knife, apply a small amount of PVA glue or drywall adhesive , press flat, and let dry.
Paper that won't re-adhere needs to come off cleanly. Use a wide drywall knife held at a low angle to lift and trim the loose section back to a stable edge. Don't pull or tear, cut. Ragged edges underneath skim coat will telegraph through the finished surface and show up clearly once the paint is on. Get to solid material, then stop.
Step 2. Seal exposed drywall and torn facing
Once your walls are clean and dry, sealing exposed drywall is the step most DIYers skip, and it's the main reason painted walls end up with raised, fuzzy patches showing through the finish. When wallpaper pulls away and takes the paper facing of the drywall with it , it leaves the gypsum core bare and highly absorbent. Any compound you apply directly over that raw surface will soak in unevenly, dry too fast in spots, and either crack or peel away before you ever pick up a paintbrush.
Why bare drywall needs primer before compound
Raw gypsum is extremely porous. When joint compound hits an unsealed surface , it loses moisture too quickly to bond properly and will crack or shrink as it cures. This sealing step is a critical part of how to repair walls after wallpaper removal that directly affects the final outcome. Standard latex primer won't solve the problem here because it still allows moisture from the compound to cause the torn facing paper to swell and lift further , creating ridges you'll sand down only to see reappear once the paint goes on.
Shellac-based primer is the only product that reliably seals torn drywall paper and raw gypsum in one coat without raising the surface further.
How to apply shellac-based primer correctly
Use a small foam roller or brush to apply shellac primer only to the damaged areas, not the entire wall at this stage. Coat every spot where brown paper backing is visible, every section of raw gypsum, and every fuzzy or trimmed edge you cut back during Step 1. Extend each coat slightly beyond the visible damage to avoid leaving unsealed edges where compound could later lift or crack.
Shellac primer dries fast, typically within 30 to 45 minutes under normal indoor conditions. Once it's dry, run your fingers across each treated area. The surface should feel firm and no longer absorbent. If any section still feels soft or spongy, apply a second coat before moving forward. Skipping that check and putting compound down too soon is one of the most consistent reasons repairs fail on walls that previously had wallpaper, and catching it here takes far less time than fixing it after the fact.
Step 3. Patch gouges and skim for a flat wall
With sealing done and your walls fully dry, you're ready to address the surface damage directly. This step handles individual gouges and deep spots first, then ties everything together with a thin skim coat that levels the entire wall. Tackling them in sequence, patches first and skim second, gives the compound the best chance to bond cleanly and dry flat.
Fill gouges and deep damage first
Deep gouges need setting-type compound such as Durabond 20 or 45, not pre-mixed all-purpose compound. Setting compound cures chemically rather than simply drying out, so it won't shrink inside a deep hole the way pre-mixed product does. Load a small amount onto your 6-inch drywall knife , press it firmly into the damage, slightly overfilling the area, and then draw the blade flat across the surface to scrape off the excess. You want a slightly raised patch, not a smooth flush fill, because a small amount of sanding brings it level once cured.
For any gouge deeper than a quarter inch, build the fill in two layers instead of one. A thick single application generates heat as it cures and can crack through the center before it fully hardens.
Use this quick reference to match compound type to damage depth:
| Gouge Depth | Compound Type | Coats Needed |
|---|---|---|
| Under ¼ inch | Pre-mixed all-purpose | 1 to 2 |
| ¼ to ½ inch | Setting compound (Durabond 20) | 2 |
| Over ½ inch | Setting compound + mesh tape | 2 to 3 |
Apply a skim coat across the wall
Once your individual patches are dry and firm , load pre-mixed all-purpose compound onto your 10-inch knife and apply a thin coat across the full wall surface. Hold the knife at a low 15 to 20 degree angle and pull it in long, overlapping strokes. You're not trying to fill anything at this stage; you're creating an even layer, roughly the thickness of a credit card, that ties your patches into the rest of the wall.
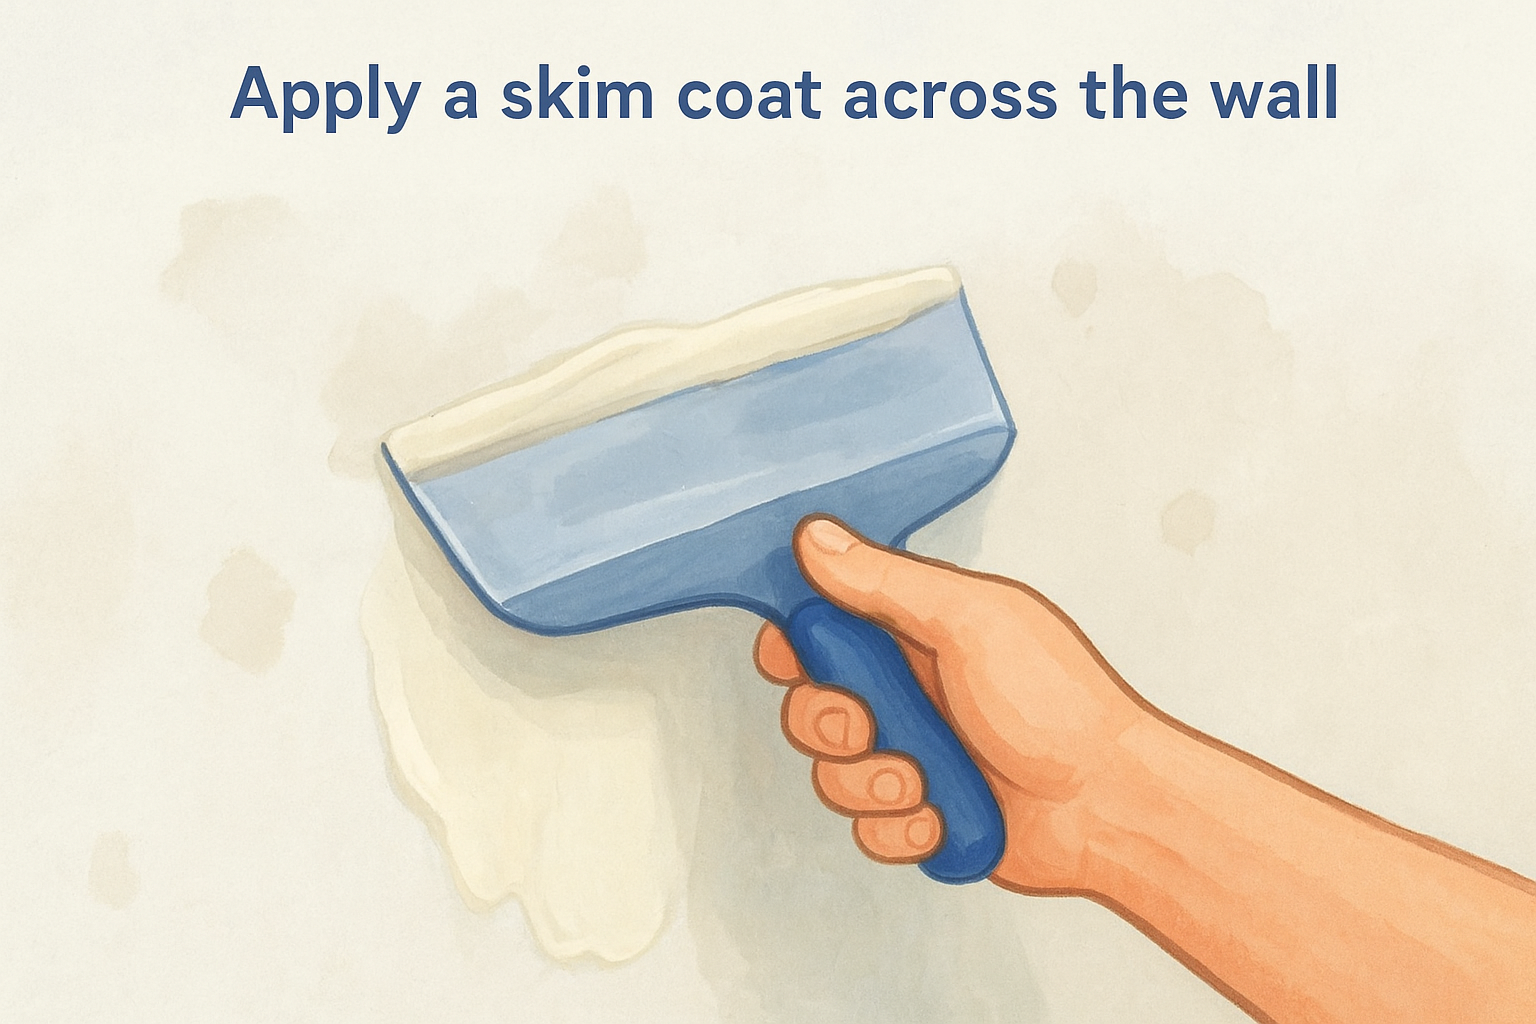
Correcting the uneven absorbency left by torn paper and adhesive residue is one of the most important parts of how to repair walls after wallpaper removal, and the skim coat is what makes that happen. Plan on two thin coats rather than one thick one . Let the first coat dry completely, usually 24 hours at normal indoor temperature, before applying the second. Forcing a second coat onto a coat that isn't fully dry traps moisture and causes the surface to crack or bubble later.
Step 4. Sand, spot-check, and prime for paint
Your skim coats are dry, and the wall surface feels solid. Now you need to sand the compound smooth , verify there are no missed flaws, and apply the right primer to lock everything in before paint goes on. This final prep stage is what separates a wall that looks professionally finished from one that shows every repair under the first coat of paint. Rushing through sanding or skipping the spot-check is how most DIY repairs fail at the last step.
Sand the skim coat smooth
Start with 120-grit sandpaper on a pole sander and work from the top of the wall down in overlapping passes. Keep your pressure light and consistent. You're knocking down ridges and high spots in the compound, not removing material in bulk. Heavy pressure cuts through the skim coat and back into the drywall facing, which means more primer and more compound before you can paint.
Sand dry, never wet-sand joint compound on a freshly skimmed wall unless you're working with finish coat compound specifically designed for it.
Switch to 220-grit paper for a final pass once the major high spots are gone. This finer grit smooths out the scratch marks left by 120-grit and gives the surface the right texture for primer to grip properly.
Spot-check with raking light before primer
Before you open the primer can, repeat the raking light check from Step 1 . Hold a bright work light at a low angle along each wall and look for any ridges, low spots, or areas where the compound feathered unevenly. Mark anything you find with painter's tape.
Apply a thin touch-up coat of pre-mixed all-purpose compound to any flagged spots, let it dry fully, and sand again. One extra pass at this stage takes far less time than repainting a wall that still shows imperfections. This is a critical checkpoint in how to repair walls after wallpaper removal because what you see here under raking light is exactly what you'll see under a glossy or satin finish paint.
Apply PVA primer before painting
Roll PVA drywall primer across the entire wall surface in an even coat. PVA primer seals the joint compound uniformly and prevents the paint from absorbing at different rates across repaired and unrepaired sections, which causes flashing , a dull, patchy appearance in the dried paint film. Let the primer dry completely, at least two hours , before applying any paint.
Ready for paint and a smooth finish
Following these steps gives you walls that are genuinely ready for paint , not walls that look okay until the light hits them at the wrong angle. The process of how to repair walls after wallpaper removal takes patience, but every stage builds directly on the last. Clean adhesive, seal torn paper, patch the damage, skim flat, sand smooth, and prime before you ever open a paint can. Cut any of those steps short and you'll see the results once the sheen dries.
If your walls took serious damage during removal, or if you're working with older drywall that's torn deeply in multiple areas , the repair scope can grow fast. Our team at Super Shooters handles exactly this kind of work across the Sacramento Valley. Get in touch through our drywall repair and patching service page to schedule a free in-home estimate and get your walls back to a clean, paint-ready surface.
Recent Posts