Share this article

July 29, 2026

How to Tape Drywall Seams for a Smooth, Seamless Wall

Every drywall job lives or dies at the seams. Get the tape and mud wrong, and you'll see ridges, bubbles, or cracks pushing through your paint job within a year. If you're wondering how to tape drywall seams so they disappear instead of announcing themselves, you're not alone. It's the step most DIYers rush, and it's the one that separates a patch job from a wall that actually looks finished.

This guide walks you through the real process, from loading your mud pan correctly to applying tape without air bubbles and building up coats without leaving ridges. We'll cover paper tape versus mesh tape, how much mud is too much, and why your knife angle matters more than your brand of compound. These are the same fundamentals our crews rely on after 30 years of drywall work across the Sacramento Valley.

We'll also flag the mistakes that trip up beginners most often, like feathering edges too thin or sanding before the mud fully cures. By the end, you'll know exactly how to get smooth, seamless walls ready for texture or paint, whether you're patching a small repair or finishing a full room.

What you'll need before taping drywall seams

Good taping work starts before you ever open a mud bucket. Gathering the right tools first saves you from stopping mid-coat with wet compound drying on your knife while you dig through the garage. Quality tools make a bigger difference in your final result than most beginners expect, especially the taping knife and mud pan you'll be using for every single seam in the room.

Here's what to have on hand before you start:

  • Joint compound : all-purpose for most coats, quick-setting ("hot mud") if you need to speed up a repair
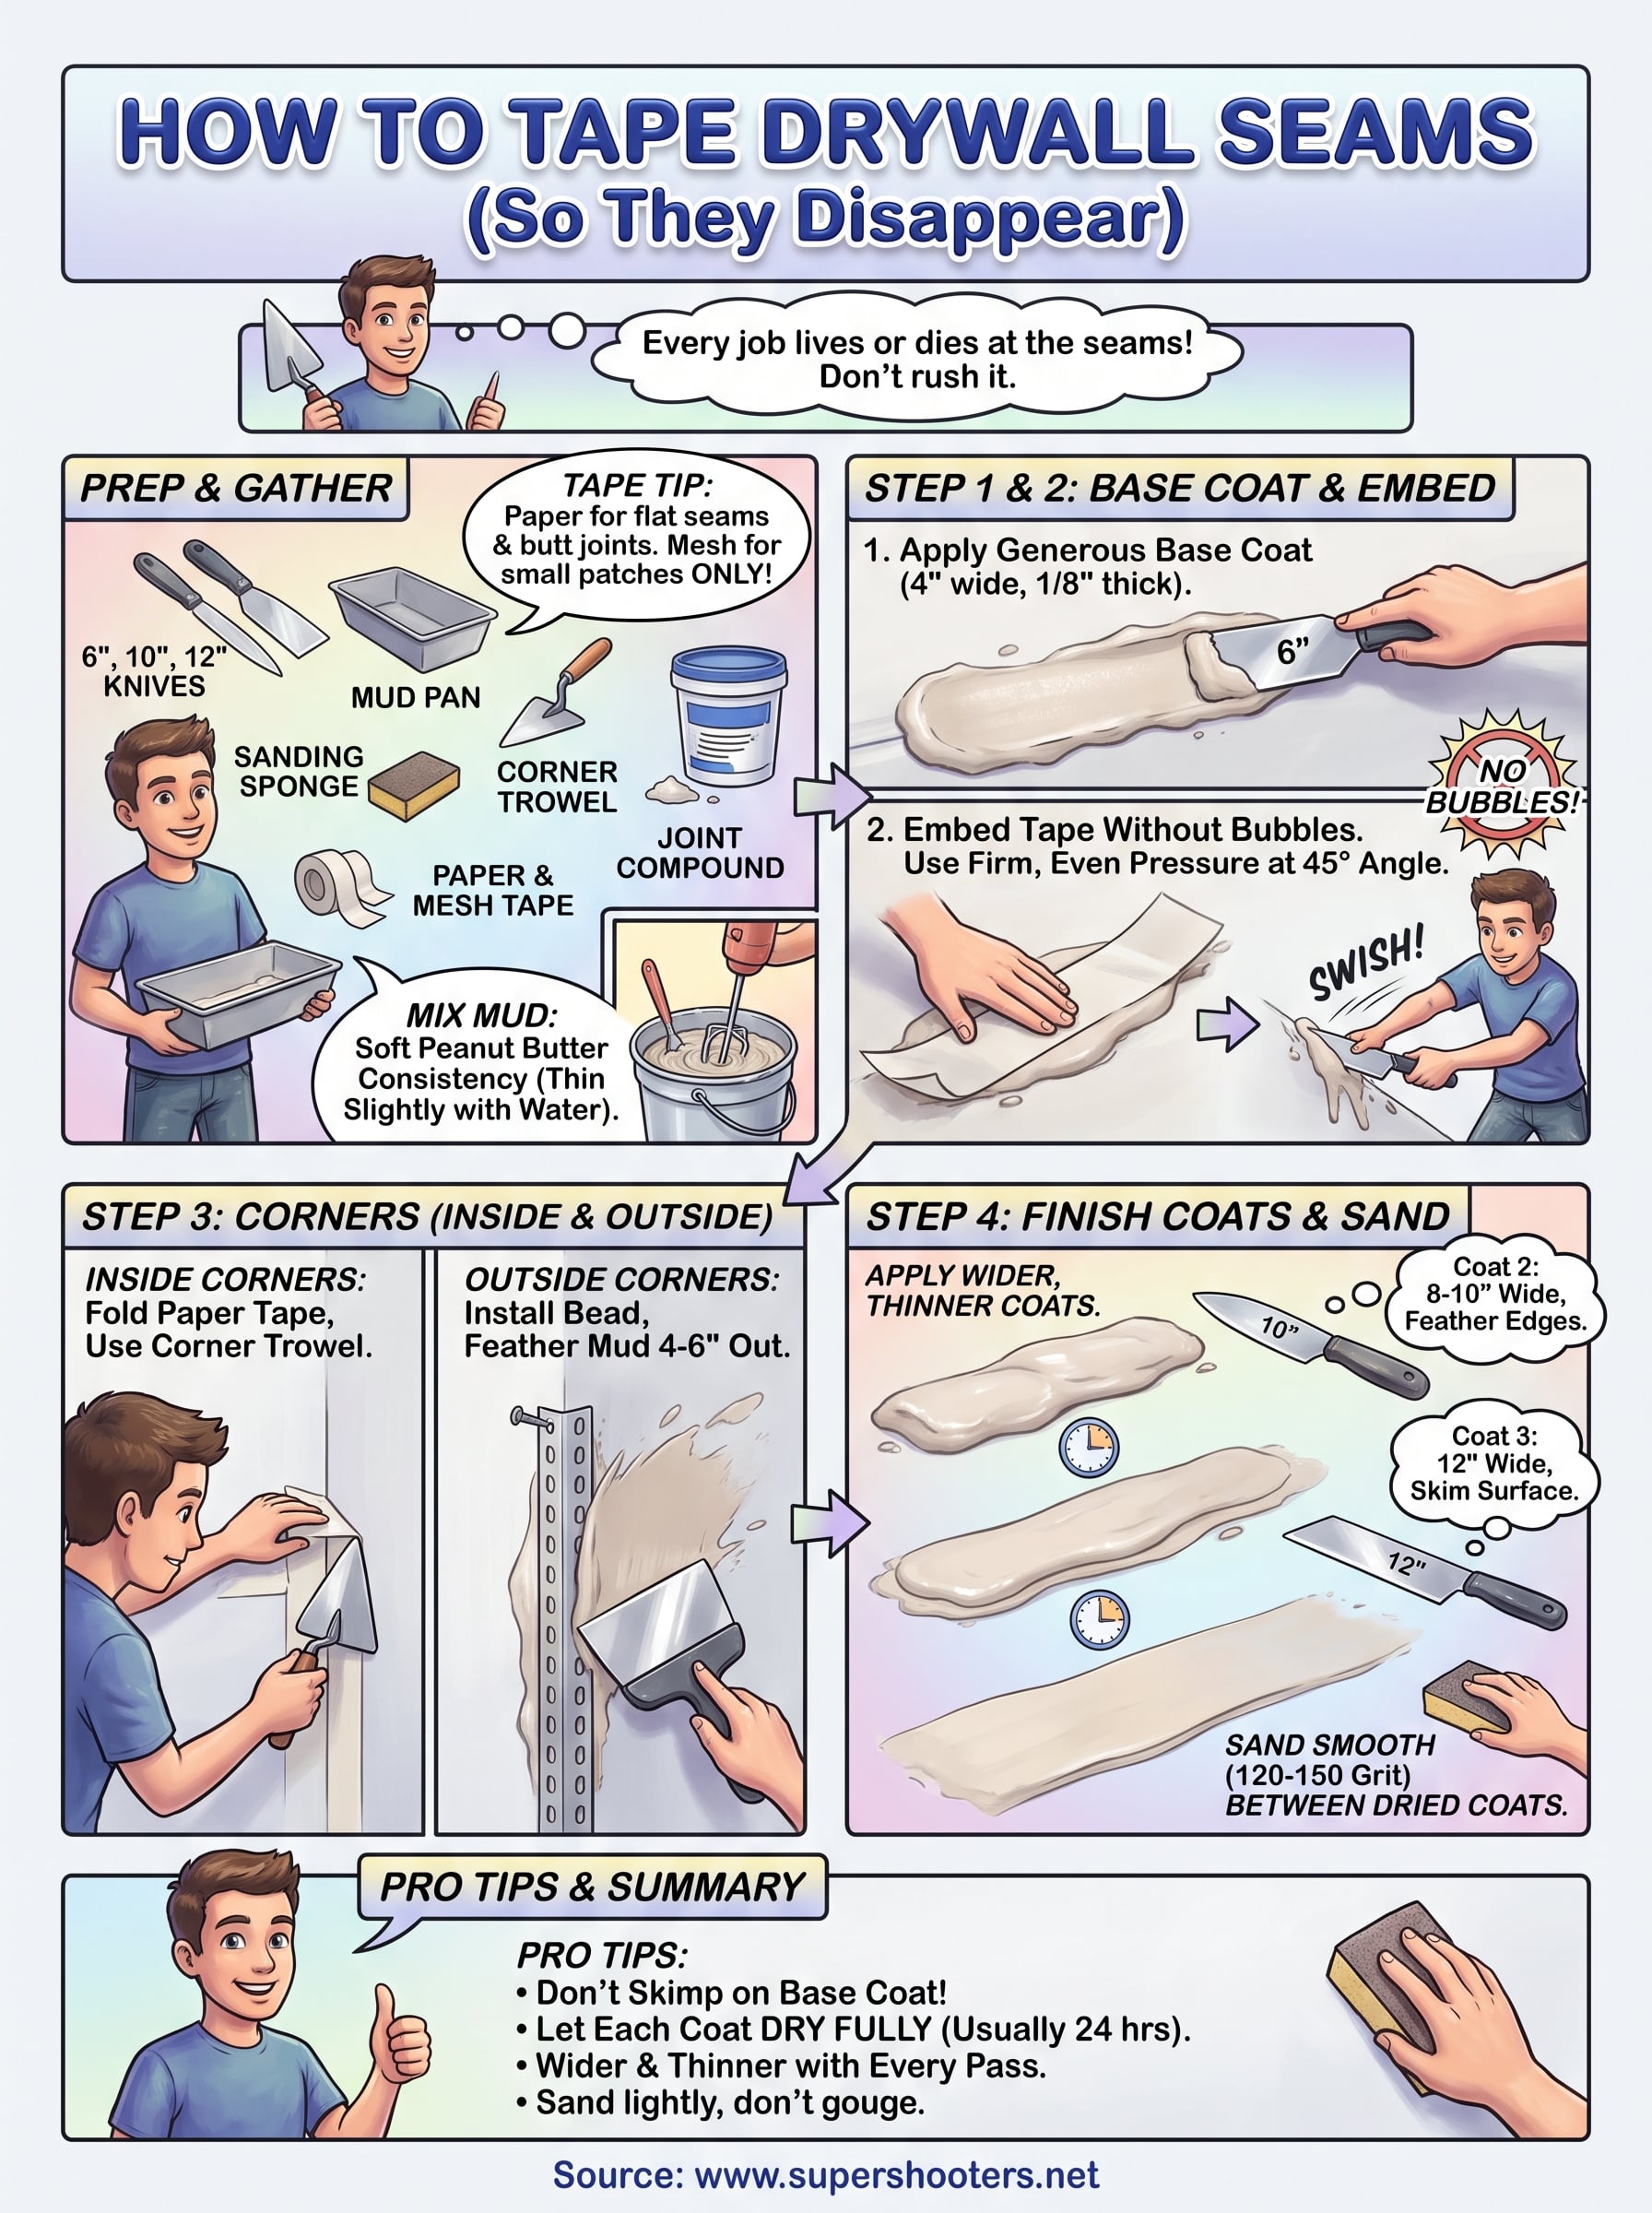
  • Drywall tape : paper tape for flat seams and butt joints, mesh tape for smaller patches and repairs
  • Taping knife : a 6-inch knife for embedding tape, plus 10-inch and 12-inch knives for finish coats
  • Mud pan : holds compound at a workable consistency while you work
  • Corner trowel : makes inside corners far easier to get flat and even
  • Sanding sponge or pole sander : 120-150 grit for smoothing between and after coats
  • Utility knife : for trimming tape and cutting away damaged drywall edges
  • Drop cloths and painter's tape : protects flooring and trim from mud splatter

Paper tape vs. mesh tape

Most professionals reach for paper tape on flat seams because it creates a stronger, flatter bond when embedded correctly in wet mud. It resists cracking better over time, which matters a lot in Sacramento Valley homes where seasonal temperature swings cause houses to expand and contract. Mesh tape is self-adhesive and easier to place, which makes it tempting for beginners, but it doesn't hold up as well on butt joints or long seams under stress.

Paper tape embedded in wet mud outperforms mesh tape on almost every seam that matters for a smooth wall.

Save mesh tape for small drywall patches and repairs where you're not dealing with a full seam length. If you're repairing a hole from a doorknob or a small water-damaged section, mesh works fine and saves you a step.

Mixing your mud to the right consistency

Compound straight from the bucket is often too thick for embedding tape. Thin it slightly with water, a few tablespoons at a time, until it spreads like soft peanut butter and holds a ridge without slumping. Overthinned mud won't hold tape in place, and overly thick mud drags and tears the paper. Test it on a scrap piece of drywall before you commit to a full seam.

Step 1. Prep the seams and apply the base coat

Before any mud touches the wall, run your hand along every seam and check for loose paper edges or protruding screws . Drywall panels shift slightly during installation, and a screw sitting a hair too high will telegraph through every coat you apply after it, no matter how careful your technique gets later.

Clean and set the panels first

Sweep away drywall dust and knock down any obvious high spots with a utility knife before you load your mud pan. Check that every screw is seated flush or slightly below the surface, since a raised fastener will crack your tape the moment the wall flexes.

  • Vacuum or brush loose dust off the seam and 6 inches on either side
  • Re-drive any screw heads sitting above the drywall surface
  • Trim torn paper facing back to solid board with a utility knife
  • Wipe down greasy or dusty seams with a damp rag and let them dry fully

Load your knife and spread the base coat

Scoop mud onto your 6-inch knife and run a generous first layer directly over the seam, about 4 inches wide and roughly 1/8 inch thick. This base coat is what the tape will sit in, so don't skimp here thinking you'll make up for it in later coats.

A thin, stingy base coat is the number one reason tape bubbles and lifts later.

Work in sections no longer than 3 feet at a time. Longer stretches let the mud start setting up before you've embedded the tape, which leaves you fighting dry edges instead of a smooth, workable surface.

Step 2. Embed the tape without bubbles

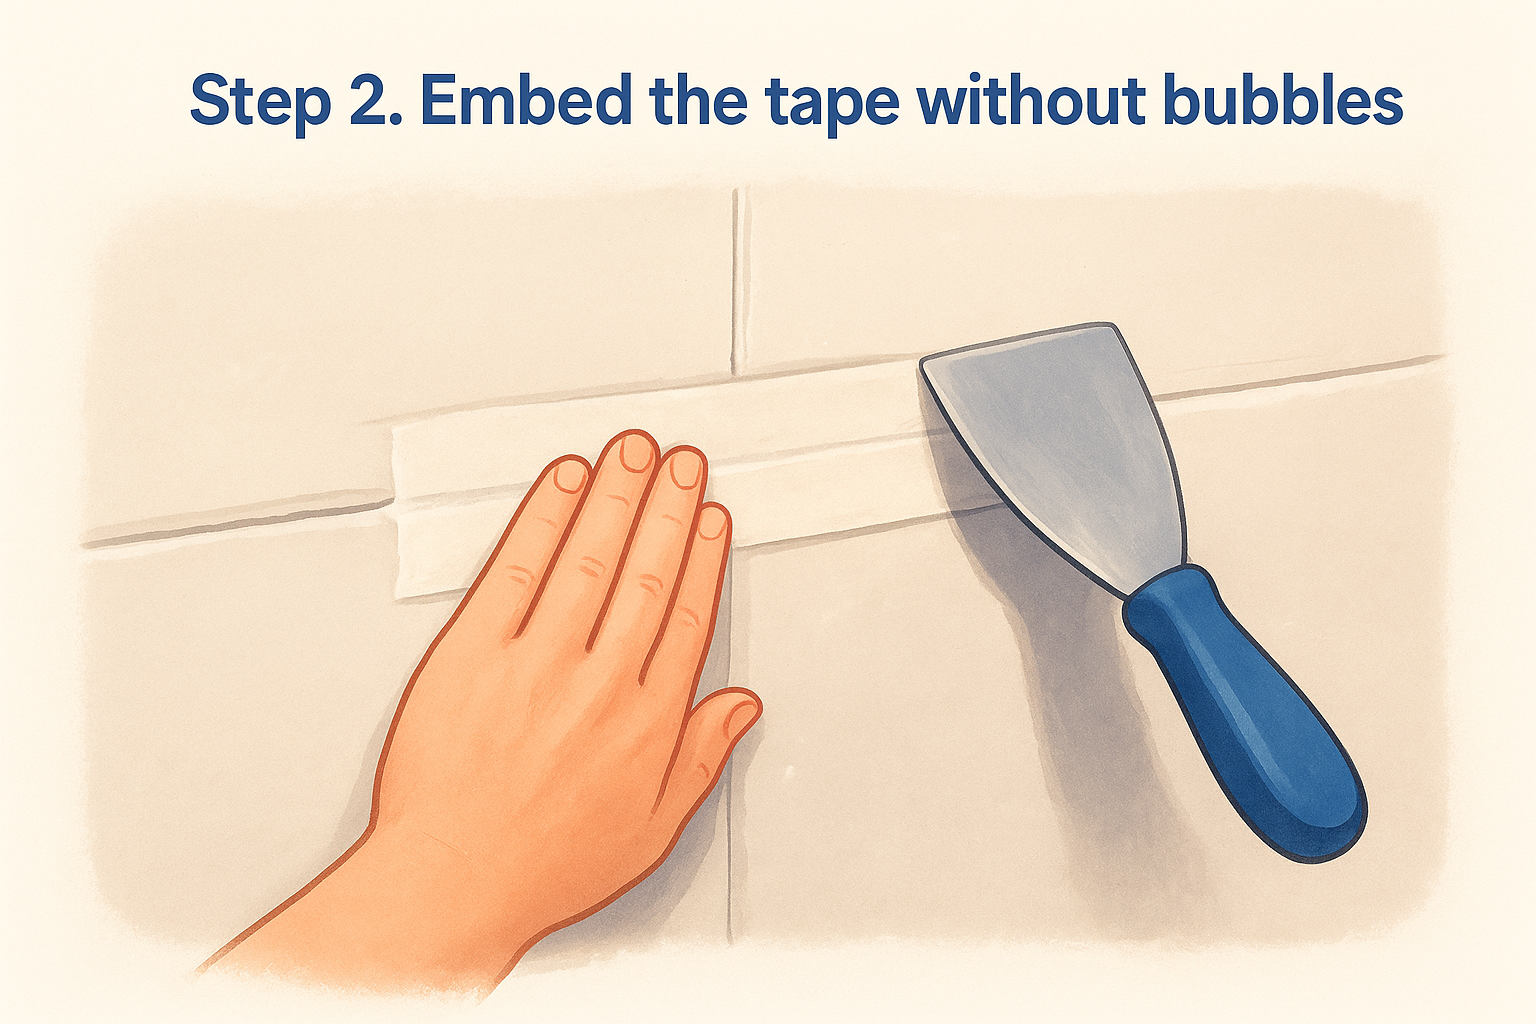
With your base coat still wet, press the tape into the mud starting at one end of the seam. Center it directly over the joint and unroll a few feet at a time, pressing it flat with your fingers before you touch it with a knife. Air bubbles form when tape sits on top of the mud instead of pressed into it, so this first press by hand matters more than most people think.

Draw the knife down the seam

Hold your 6-inch knife at roughly a 45-degree angle and pull it down the length of the tape in one smooth stroke, applying firm, even pressure. This squeezes excess mud out from under the tape and forces the paper down into full contact with the wall. Watch for mud oozing out both edges of the tape as you go. If nothing comes out, you didn't load enough compound in your base coat.

Firm, even pressure with the knife is what pushes air out from under the tape, not how much mud you slather on top.

Check your work before moving on

Run your fingers lightly over the embedded tape once you've pulled the knife through. You're feeling for raised bumps or soft spots that indicate trapped air or a dry patch underneath.

  • Press down gently on any bubble you find and smooth it flat before it sets
  • Scrape away mud that's built up too thick at the edges of the tape
  • Leave a thin, even layer of mud visible through the paper tape, not a bare strip
  • Wipe your knife clean between passes so dried mud doesn't scratch the surface

Let this coat dry fully, usually 24 hours, before you move on to corners or a second coat.

Step 3. Mud and tape inside and outside corners

Corners trip up more DIYers than flat seams because you're working two planes at once instead of one. Inside corners need a fold, outside corners need metal protection, and both demand a different touch than the technique you just used on the flat seams. Getting corner bead installation right on outside corners matters just as much as your tape work on the flats, since a crooked bead shows in every light angle once the wall's painted.

Fold and set inside corners

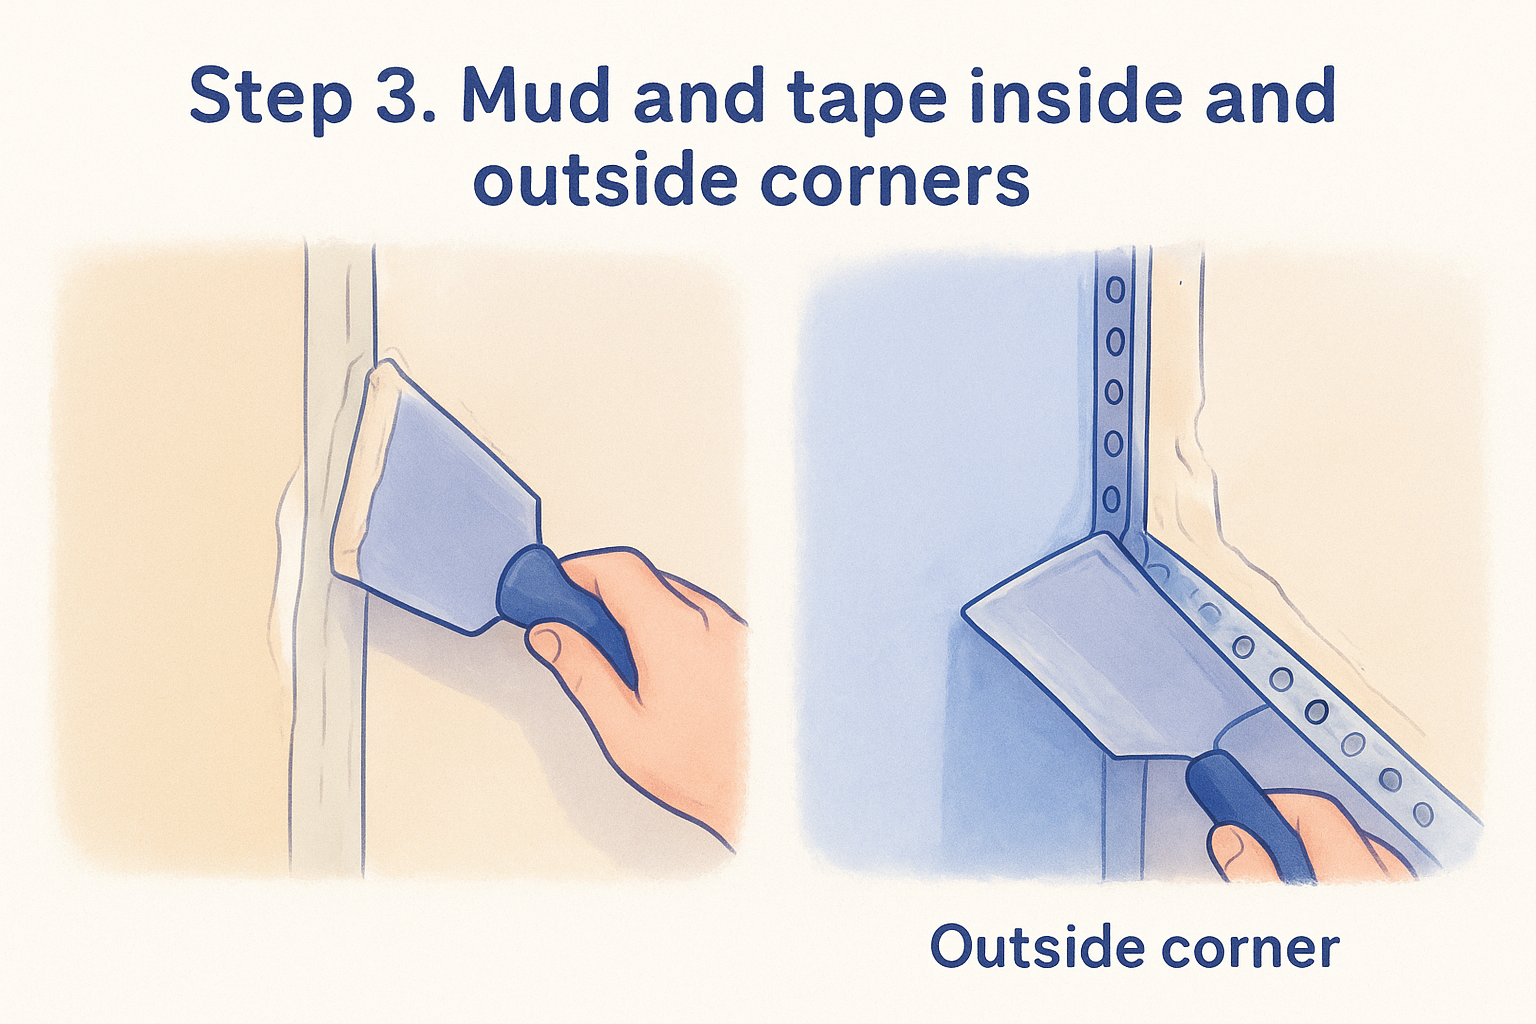
Apply mud to both sides of the inside corner with your 6-inch knife, then fold your paper tape lengthwise along its center crease. Press the folded tape into the corner so each side lays flat against its wall, using a corner trowel to set both sides at once without disturbing the fold.

A crisp, centered fold is what keeps inside corners from looking wavy under paint.

Draw your knife down one side at a time, not both simultaneously, to avoid dragging mud unevenly across the fold.

Attach and mud outside corners

Outside corners need metal or vinyl corner bead nailed or mudded into place before you tape anything. Check the bead sits straight with a level before the mud sets.

  • Fasten corner bead every 8-10 inches with drywall nails or crimp it on with a corner crimper
  • Apply mud over the bead with a 10-inch knife, feathering it 4-6 inches out from the edge on both sides
  • Wipe excess mud off the bead's edge so the corner stays sharp
  • Let corners dry a full 24 hours before sanding or recoating

Rushing corner work almost always shows up later as a visible seam line down the edge of the wall.

Step 4. Apply finish coats and sand smooth

Once your embedding coat and corners have dried fully, switch to your 10-inch knife for the second coat. Spread mud 8-10 inches wide over the seam, extending well past the edges of the tape, and feather the edges thin so they blend into the surrounding drywall instead of leaving a raised ridge you'll fight later with sandpaper.

Widen and thin with each pass

Each coat you apply should be wider and thinner than the one before it. Your base coat covered maybe 4 inches, your second coat 8-10 inches, and your third and final coat should stretch to 12 inches with your widest knife, barely skimming the surface. This progression is what makes the seam disappear into the wall rather than sitting on top of it as a visible band.

Every coat should get wider and thinner than the last, or you'll build a hump instead of a flat seam.

Let each coat dry completely, usually overnight, before adding the next. Rushing this step is the fastest way to trap moisture under fresh mud and end up with cracking or bubbling months later.

Sand between and after coats

Use a sanding sponge or pole sander with 120-150 grit paper to knock down ridges between coats, and finish with a light pass over the whole seam once the last coat cures.

  • Sand in small circular motions, not straight lines, to avoid gouging the paper
  • Run your hand over the seam in raking light to spot high or low areas
  • Feather any remaining ridge with a dry knife before sanding further
  • Wipe down dust fully before priming or texturing

A properly sanded seam should feel invisible when you close your eyes and run your palm across it.

When it's worth calling in a pro

Taping a couple of small patches is a weekend project. Taping an entire room, matching texture, or working around cracked seams caused by foundation settling is a different job entirely, and it's where a lot of DIY attempts fall apart halfway through. If you're staring at a wall with widespread cracking, water stains, or seams that keep failing no matter how many times you recoat them, that's usually a sign of a bigger issue than bad tape work.

It's also worth pausing if your home still has original popcorn ceilings from before the 1980s. Disturbing those without testing can expose you to asbestos, and that's not a corner to cut. Our crews have handled drywall seams, repairs, and full installations across the Sacramento Valley for over 30 years, and we'd rather you call before a project turns into a bigger repair. If your walls need more than a patch, get in touch through our drywall repair and patching service and we'll take it from there.

Recent Posts

By cinchweb July 28, 2026
Learn how to test popcorn ceiling for asbestos safely with a step-by-step DIY sampling guide, plus when to call Sacramento Valley abatement pros.
By cinchweb July 27, 2026
Learn a lasting crack wall repair method: tools, V-groove prep, mesh tape, setting compound, and when to call a Sacramento Valley pro.
By cinchweb July 26, 2026
Learn how to use joint compound to repair drywall with step-by-step prep, taping, sanding, and priming tips for a seamless, professional finish.
By cinchweb July 25, 2026
Learn step-by-step ceiling drywall repair: prep, patch, tape, texture & paint—plus when to call Super Shooters for Sacramento Valley jobs.
By cinchweb July 25, 2026
Find cheap drywall repair near me without overpaying: get real Sacramento Valley price ranges, quote tips, and vetting steps from Super Shooters.
By cinchweb July 24, 2026
Learn how to feather drywall mud step by step—thin, widening coats, sanding tips, and raking-light checks for a seamless, ridge-free repair.
By cinchweb July 22, 2026
Learn how to repair wall texture step-by-step, from matching patterns to blending patches, plus when to call Super Shooters in Sacramento Valley.
By cinchweb July 22, 2026
Learn how to cover ceiling water stains for good: fix the leak, prime with shellac, and repaint to stop bleed-through permanently.
Man painting over a water stain on ceiling drywall, with tools and the title “How to Fix Water Damaged Ceiling Drywall”
By cinchweb July 20, 2026
Learn how to fix water damaged ceiling drywall: find the leak source, cut and patch drywall, match texture, and know when to call Super Shooters.
Show More