
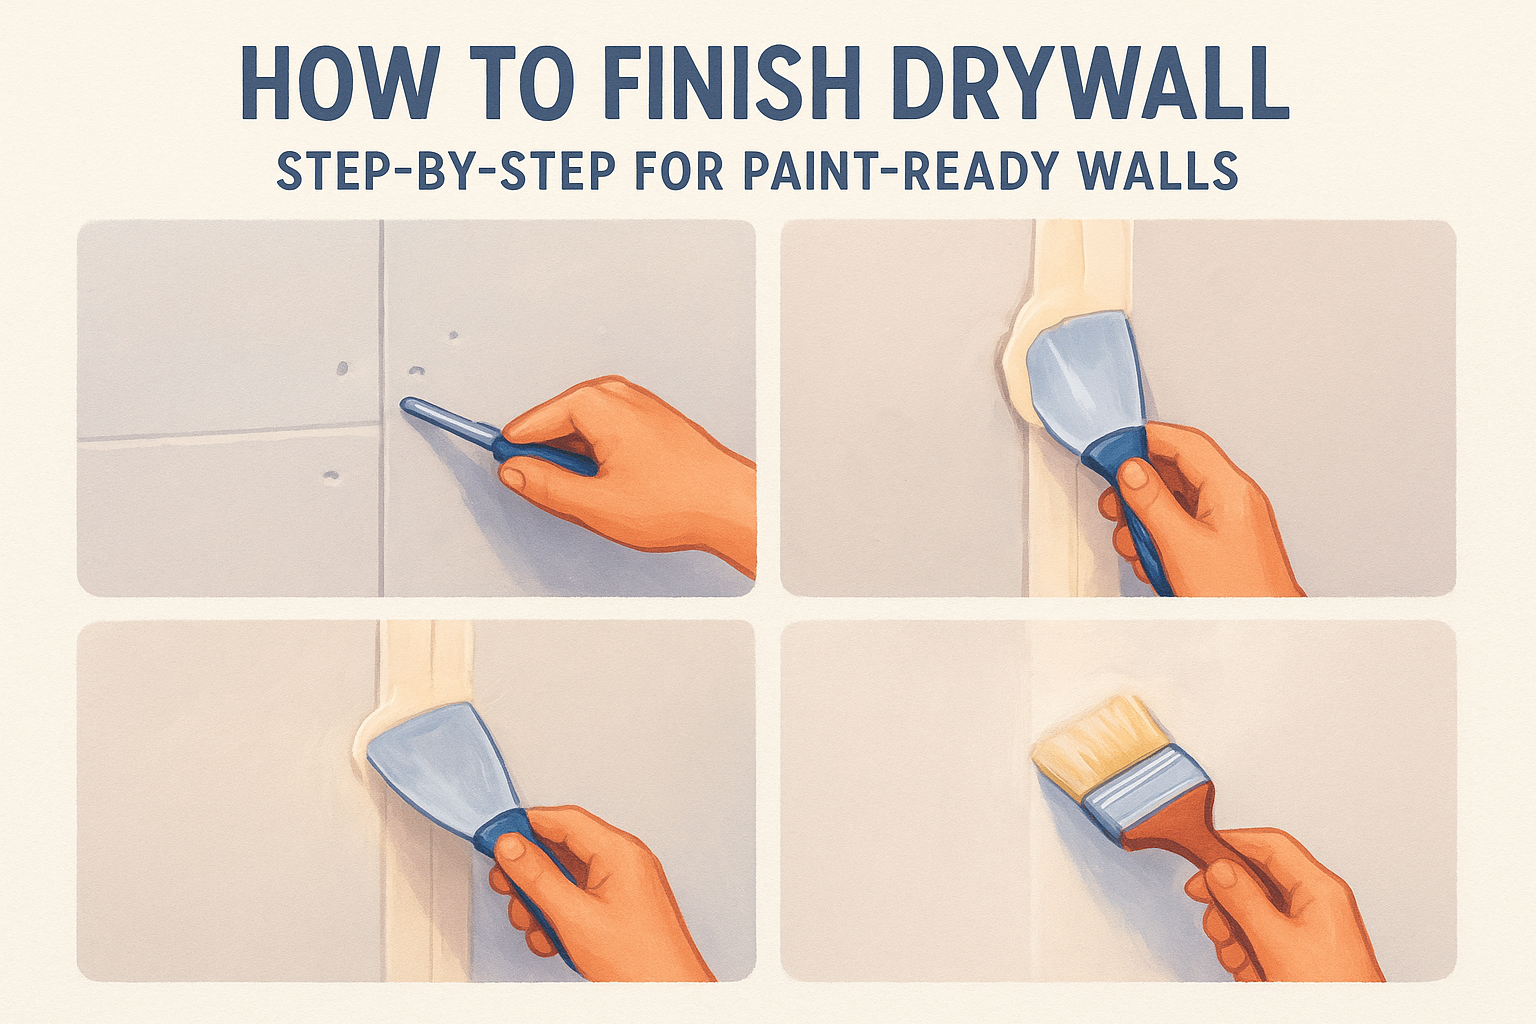
Learn how to finish drywall with this step-by-step guide. Master professional techniques for taping, mudding, and sanding to get smooth, paint-ready walls.
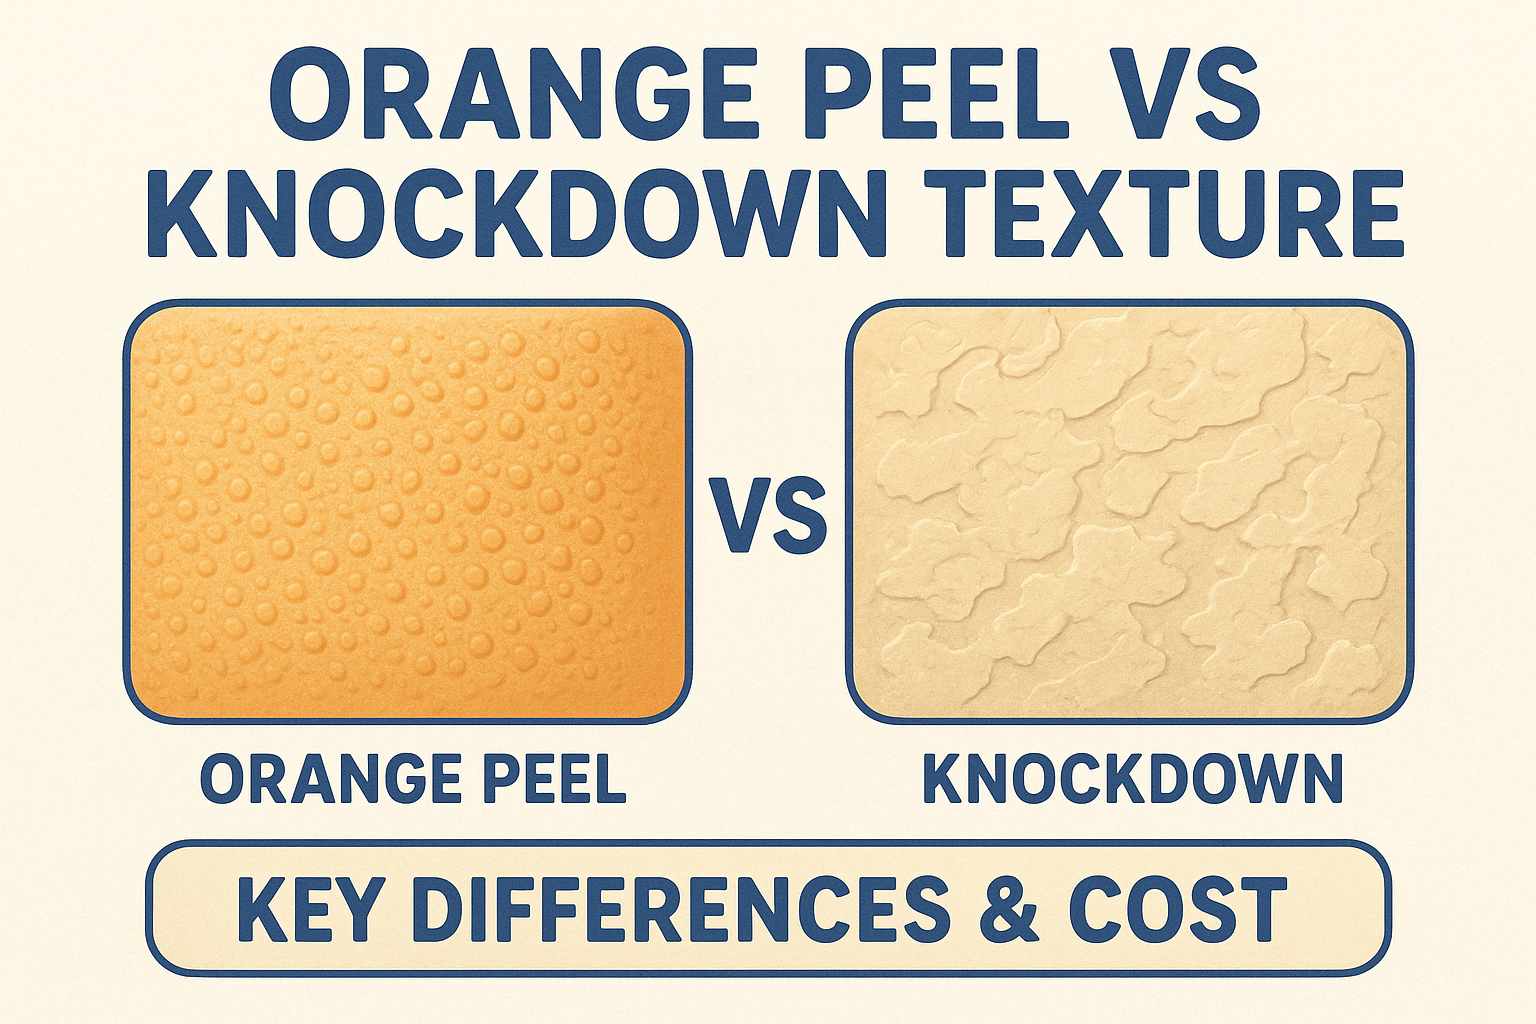
Compare orange peel vs knockdown texture to find the best finish for your home. We break down the costs, cleaning ease, and repair tips for each style.

Learn how to patch a hole in the ceiling with our guide for every size. Fix dings, use mesh patches, or replace drywall for a seamless, professional finish.

Learn how to smooth textured walls to get a flat, modern finish. Our guide covers asbestos safety, skim coating, and tools for professional results.

Compare 10 types of interior wall finishes, including drywall, plaster, and wood. Learn the pros, cons, and costs to find the best look for your home.

Learn how to hang drywall on ceiling like a pro. Our guide covers joist marking, panel lift techniques, and screw patterns for a smooth, crack-free finish.

Find out does popcorn ceiling contain asbestos by checking construction dates and testing guides. Learn how to safely test, remove, or cover old textures.
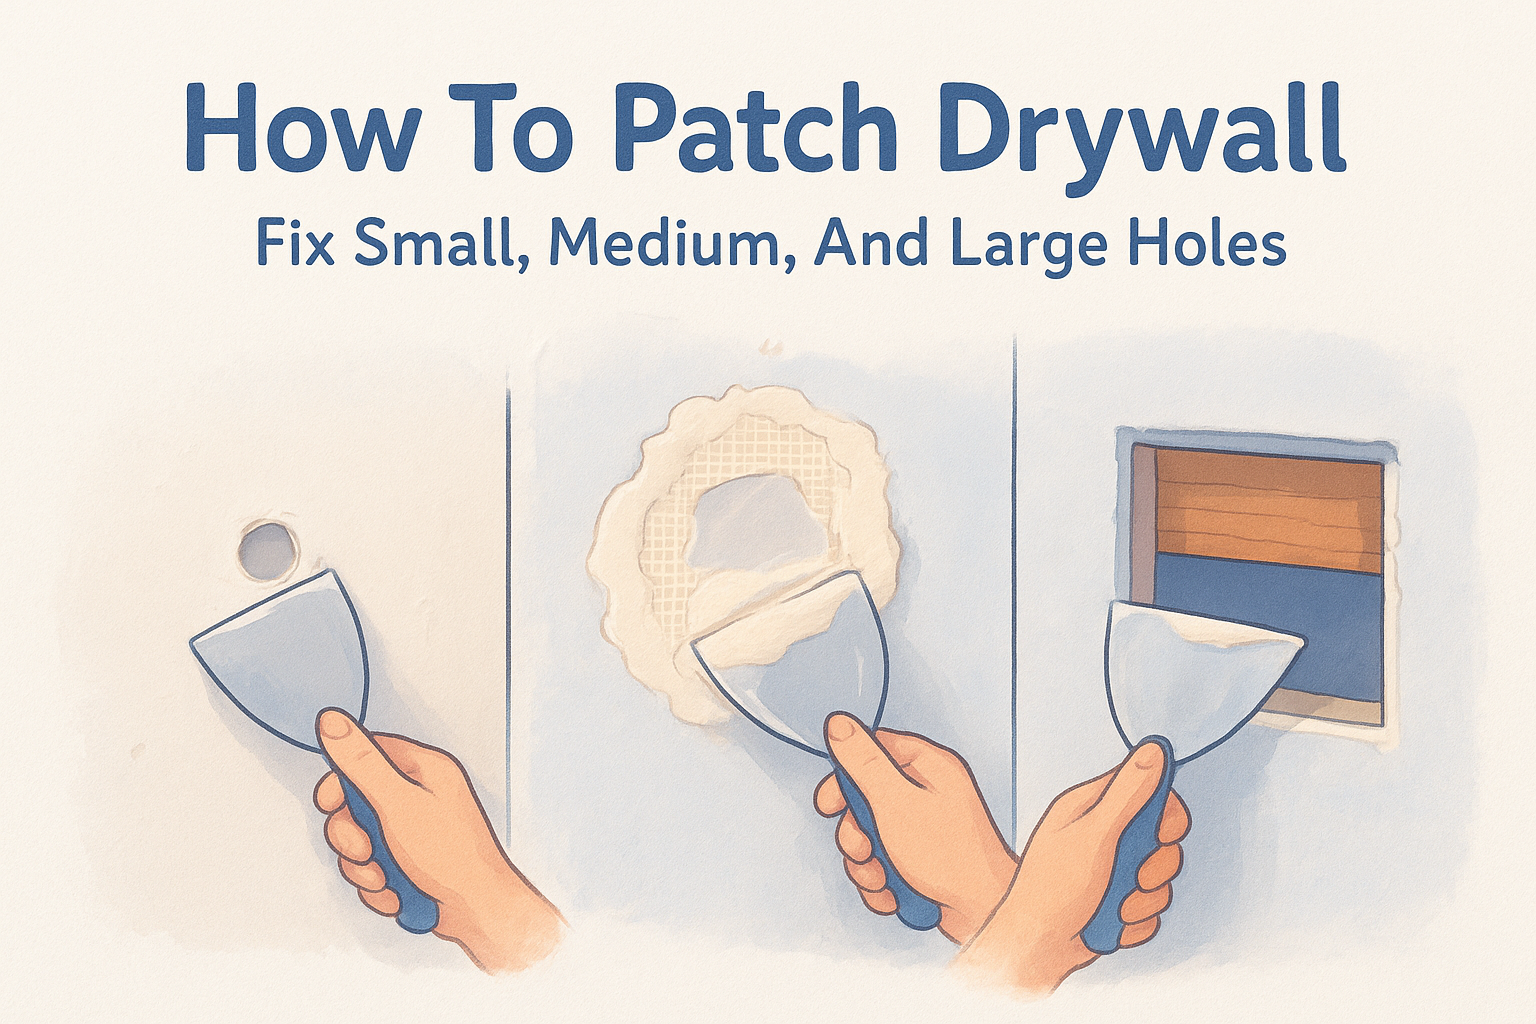
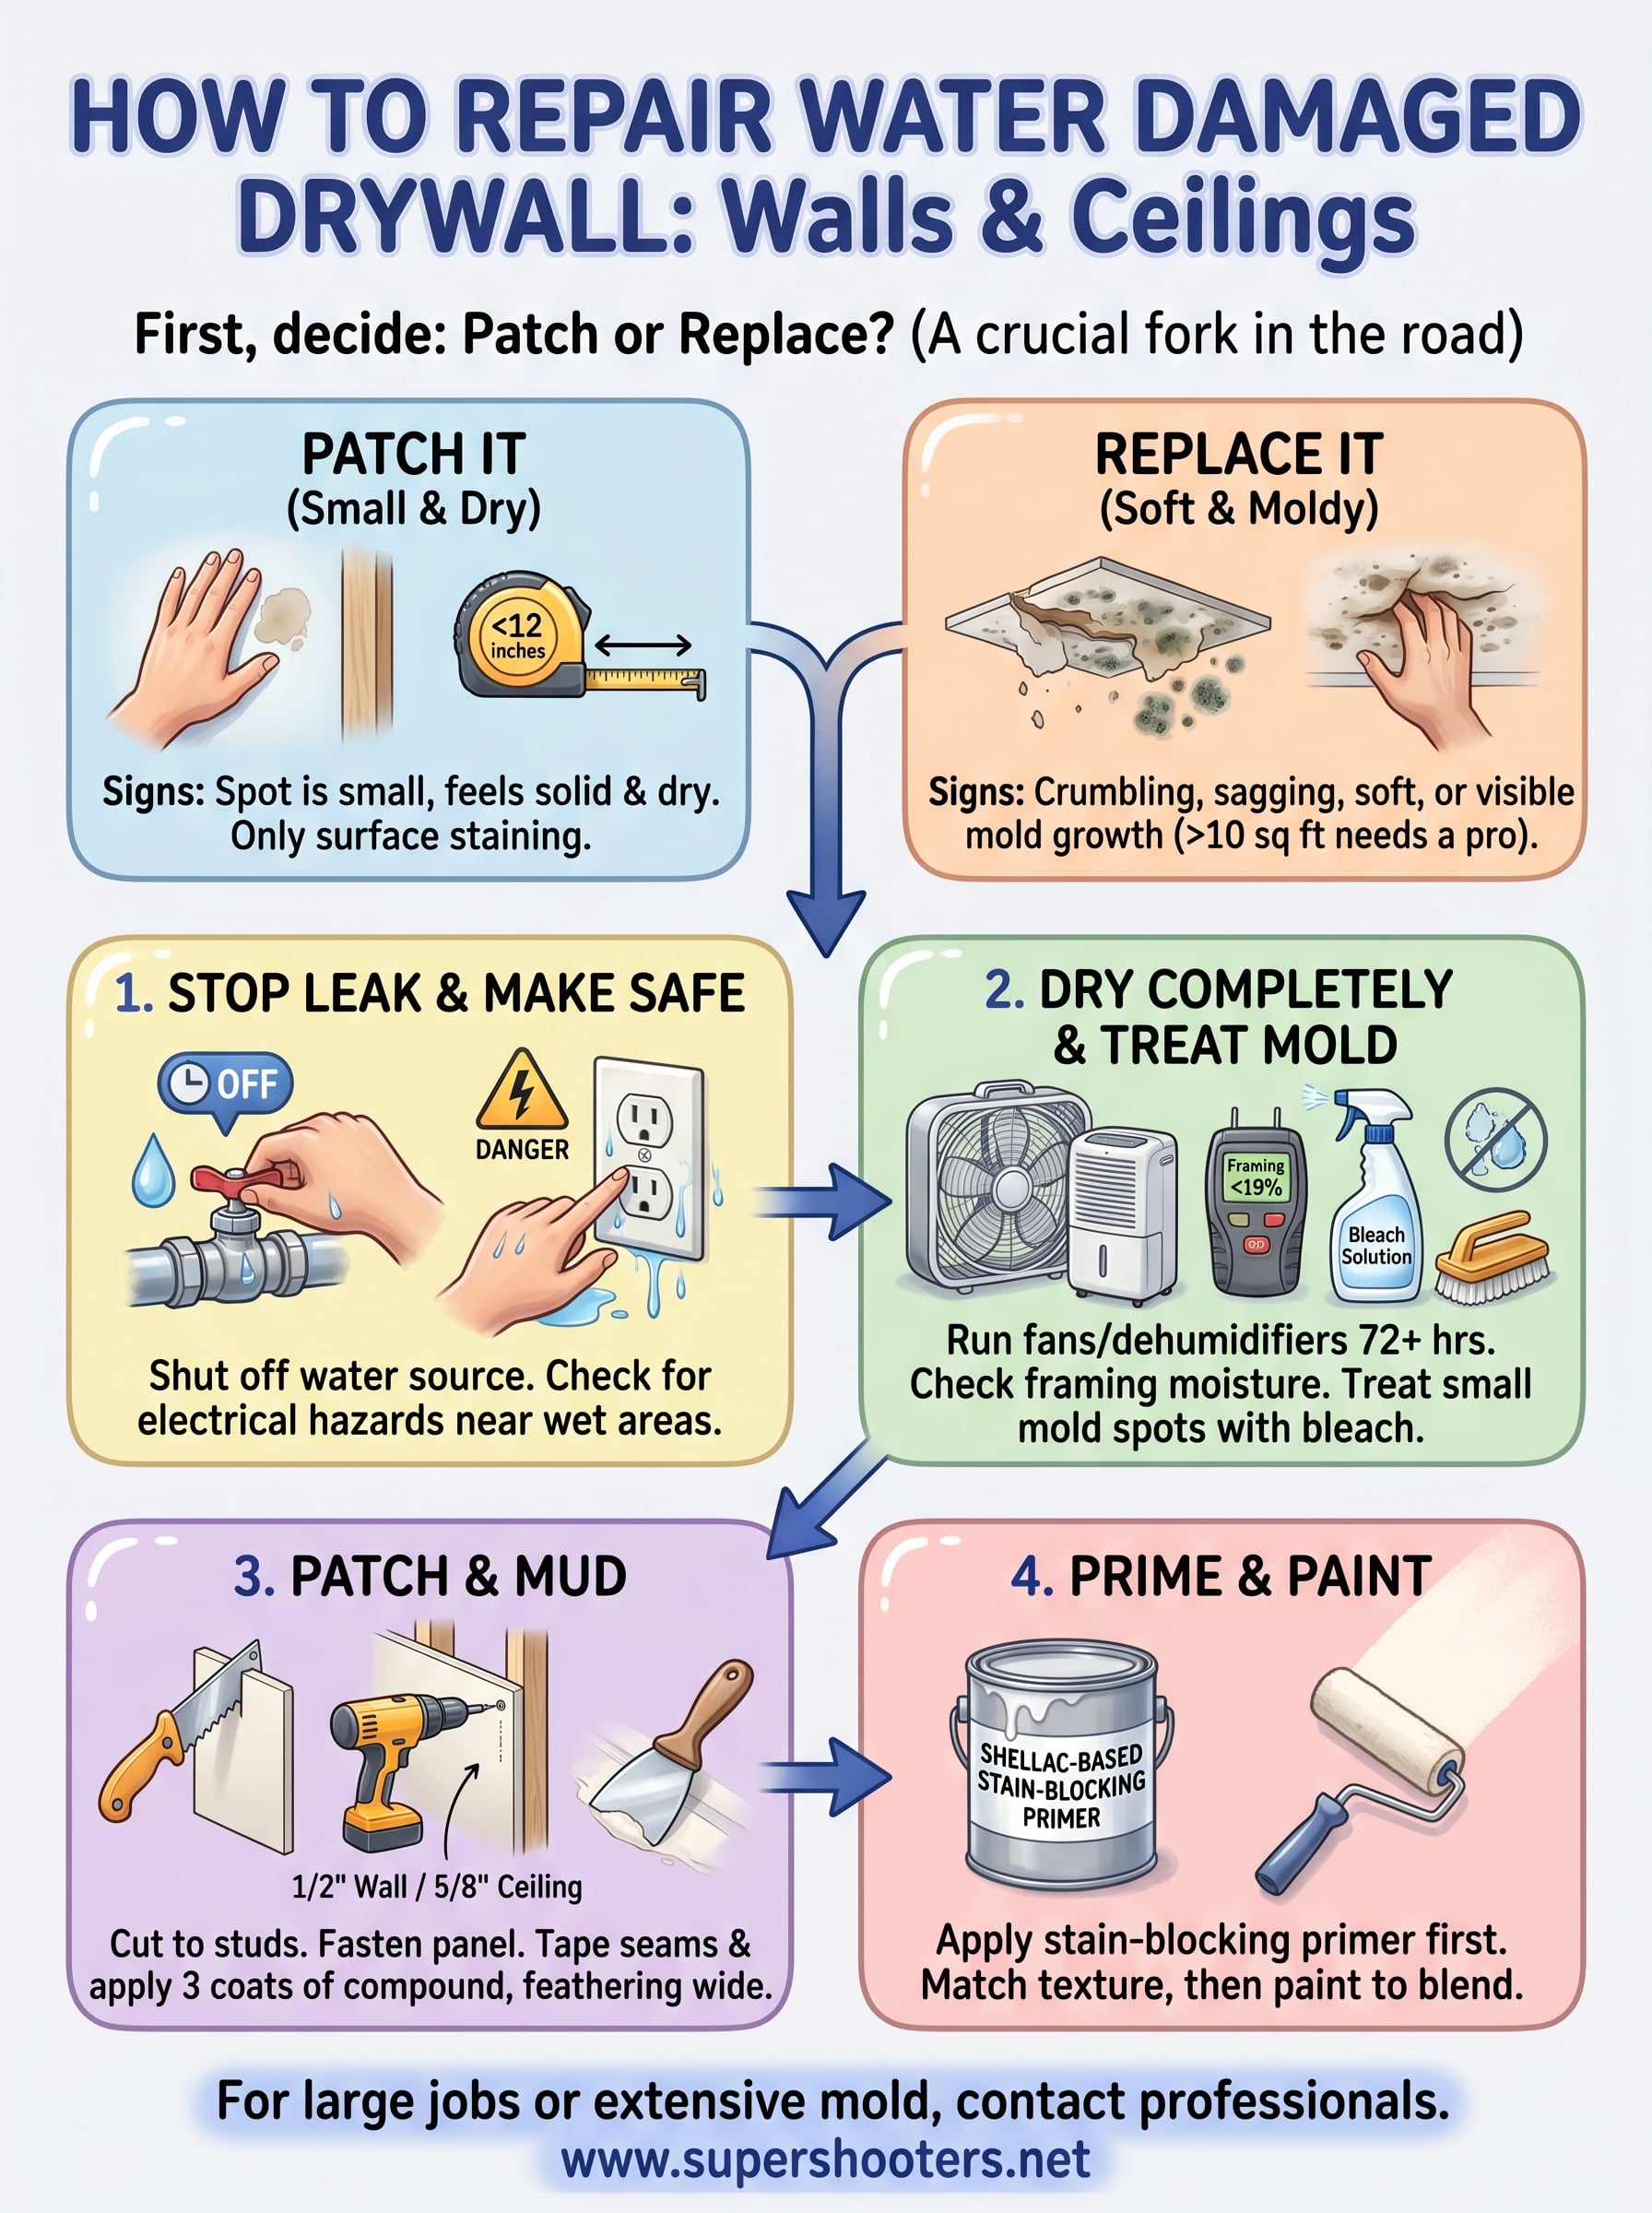
Master how to patch drywall with our step-by-step guide. Learn to fix small nail holes, medium cracks, and large damage for a seamless, professional finish.
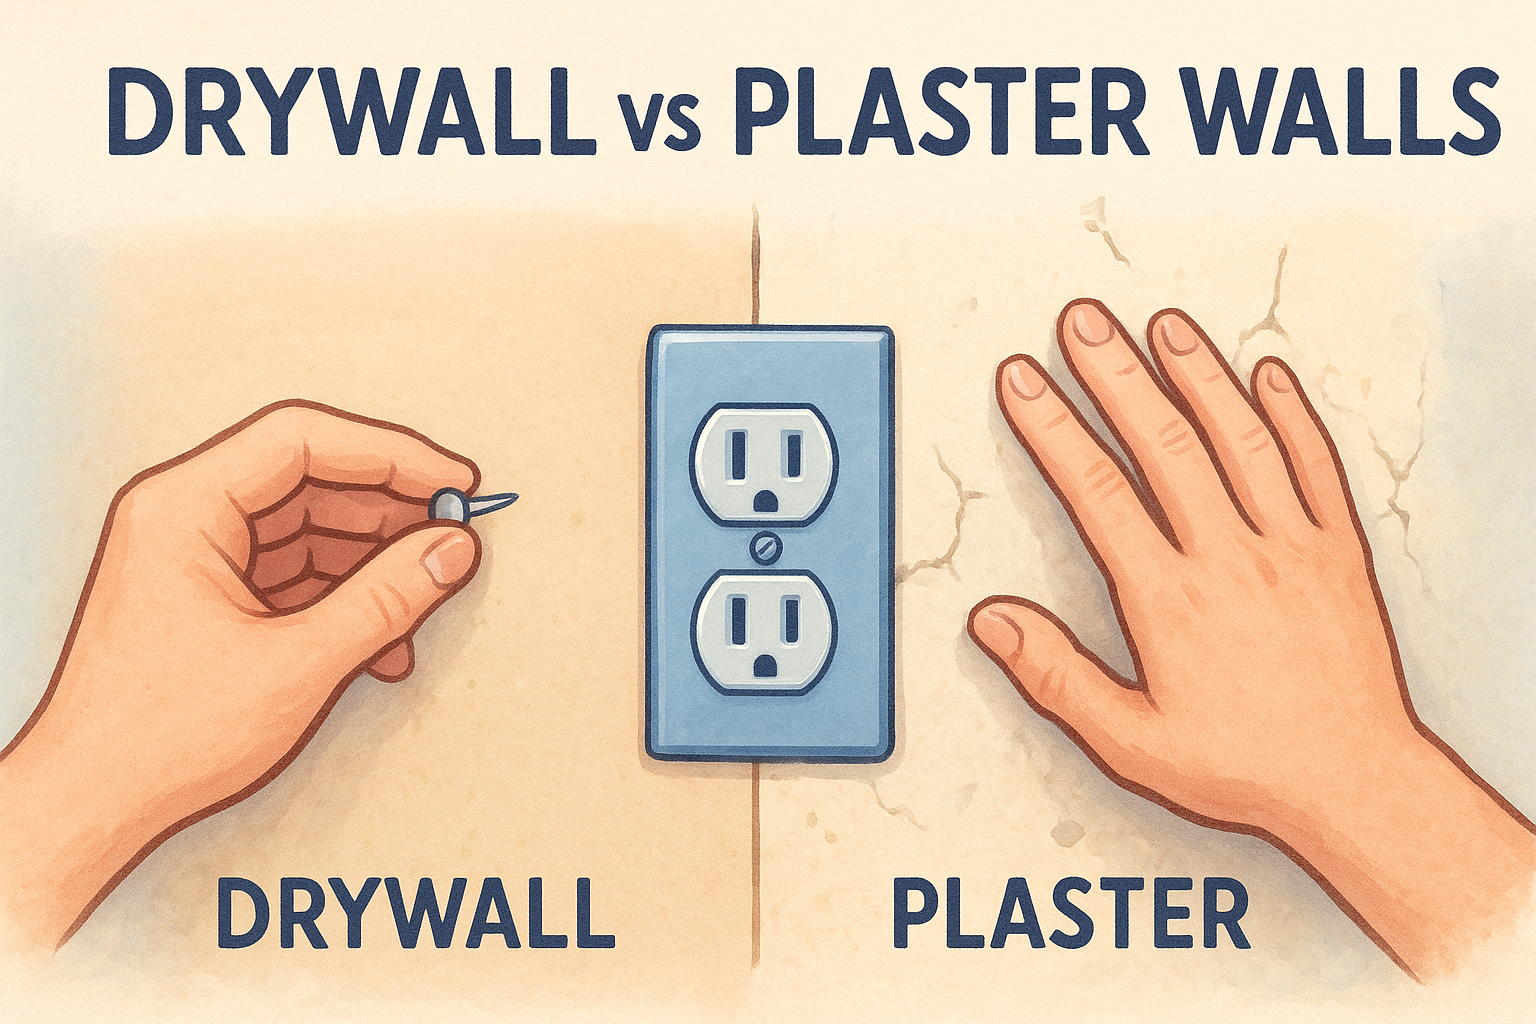
Decide between drywall vs plaster walls. Learn how to tell them apart, compare repair costs, and find the best solution for your home renovation project.
