Share this article

September 4, 2026

Corner Bead Drywall Installation: A Step-by-Step Guide

Every drywall corner takes a beating. Doorways, hallways, garage walls, they all get bumped, kicked, and scraped, and if the corner underneath isn't reinforced, you'll see cracks and dents within a year. That's what corner bead is for, and getting corner bead drywall installation right the first time saves you from patching the same edge over and over.

If you're wondering how to install drywall corner bead without it looking wavy or pulling away from the wall, the process comes down to picking the right bead type, cutting it to length, and fastening or taping it so the corner stays straight under a coat of mud. Skip a step and you'll spend more time sanding out bumps than you would have spent doing it correctly.

We've installed and repaired thousands of drywall corners across Sacramento Valley homes over 30 years, from new construction to ADU builds, so we know where DIYers usually go wrong. This guide walks through the tools you need , the attachment methods that hold up over time, and the finishing tips that make your corners look factory straight.

We also offer this as a professional service.

Before you start: tools, materials, and bead types

Grabbing the wrong bead or missing a tool halfway through the job is how a two-hour corner turns into an all-afternoon project. Before you cut anything, lay out everything you'll need so the installation runs in one continuous motion instead of stopping every few minutes.

Tools you'll need

Most of these are already in a basic drywall toolkit, but a few are specific to corner work.

  • Tin snips or aviation shears for cutting metal bead
  • Drywall knives in 6-inch and 10-inch widths for mudding
  • A stapler or drywall screws with a screw gun, depending on your attachment method
  • A level or straightedge to check the corner before you commit
  • A mud pan and joint compound
  • Sandpaper or a sanding sponge (120 to 150 grit)

Choosing the right corner bead type

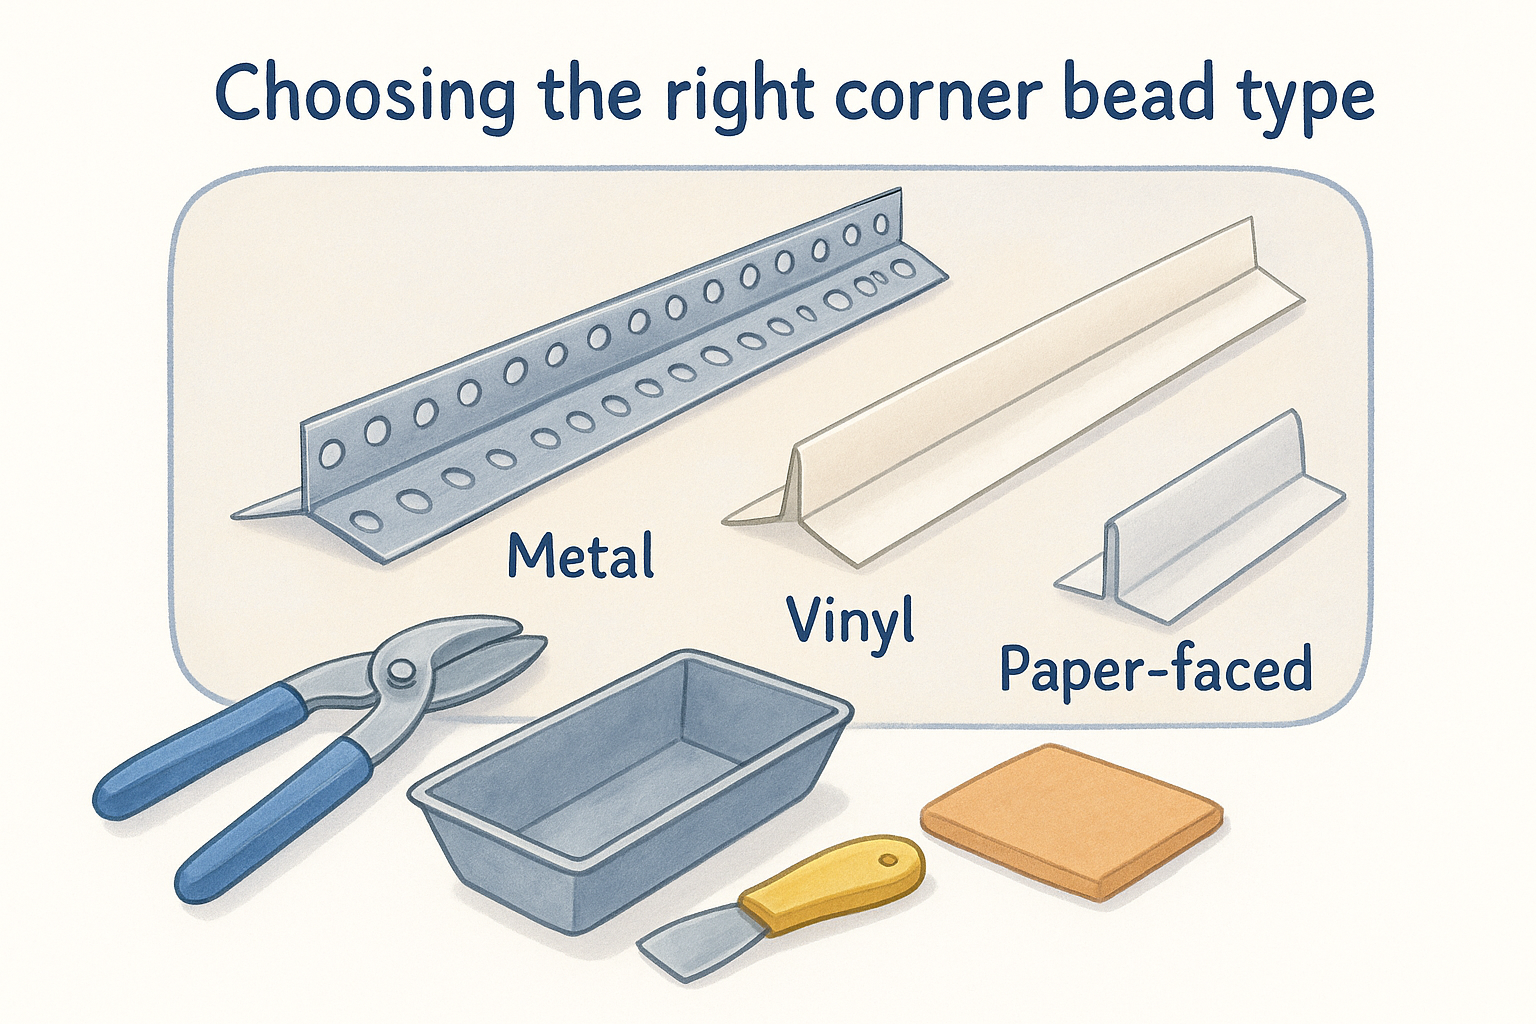
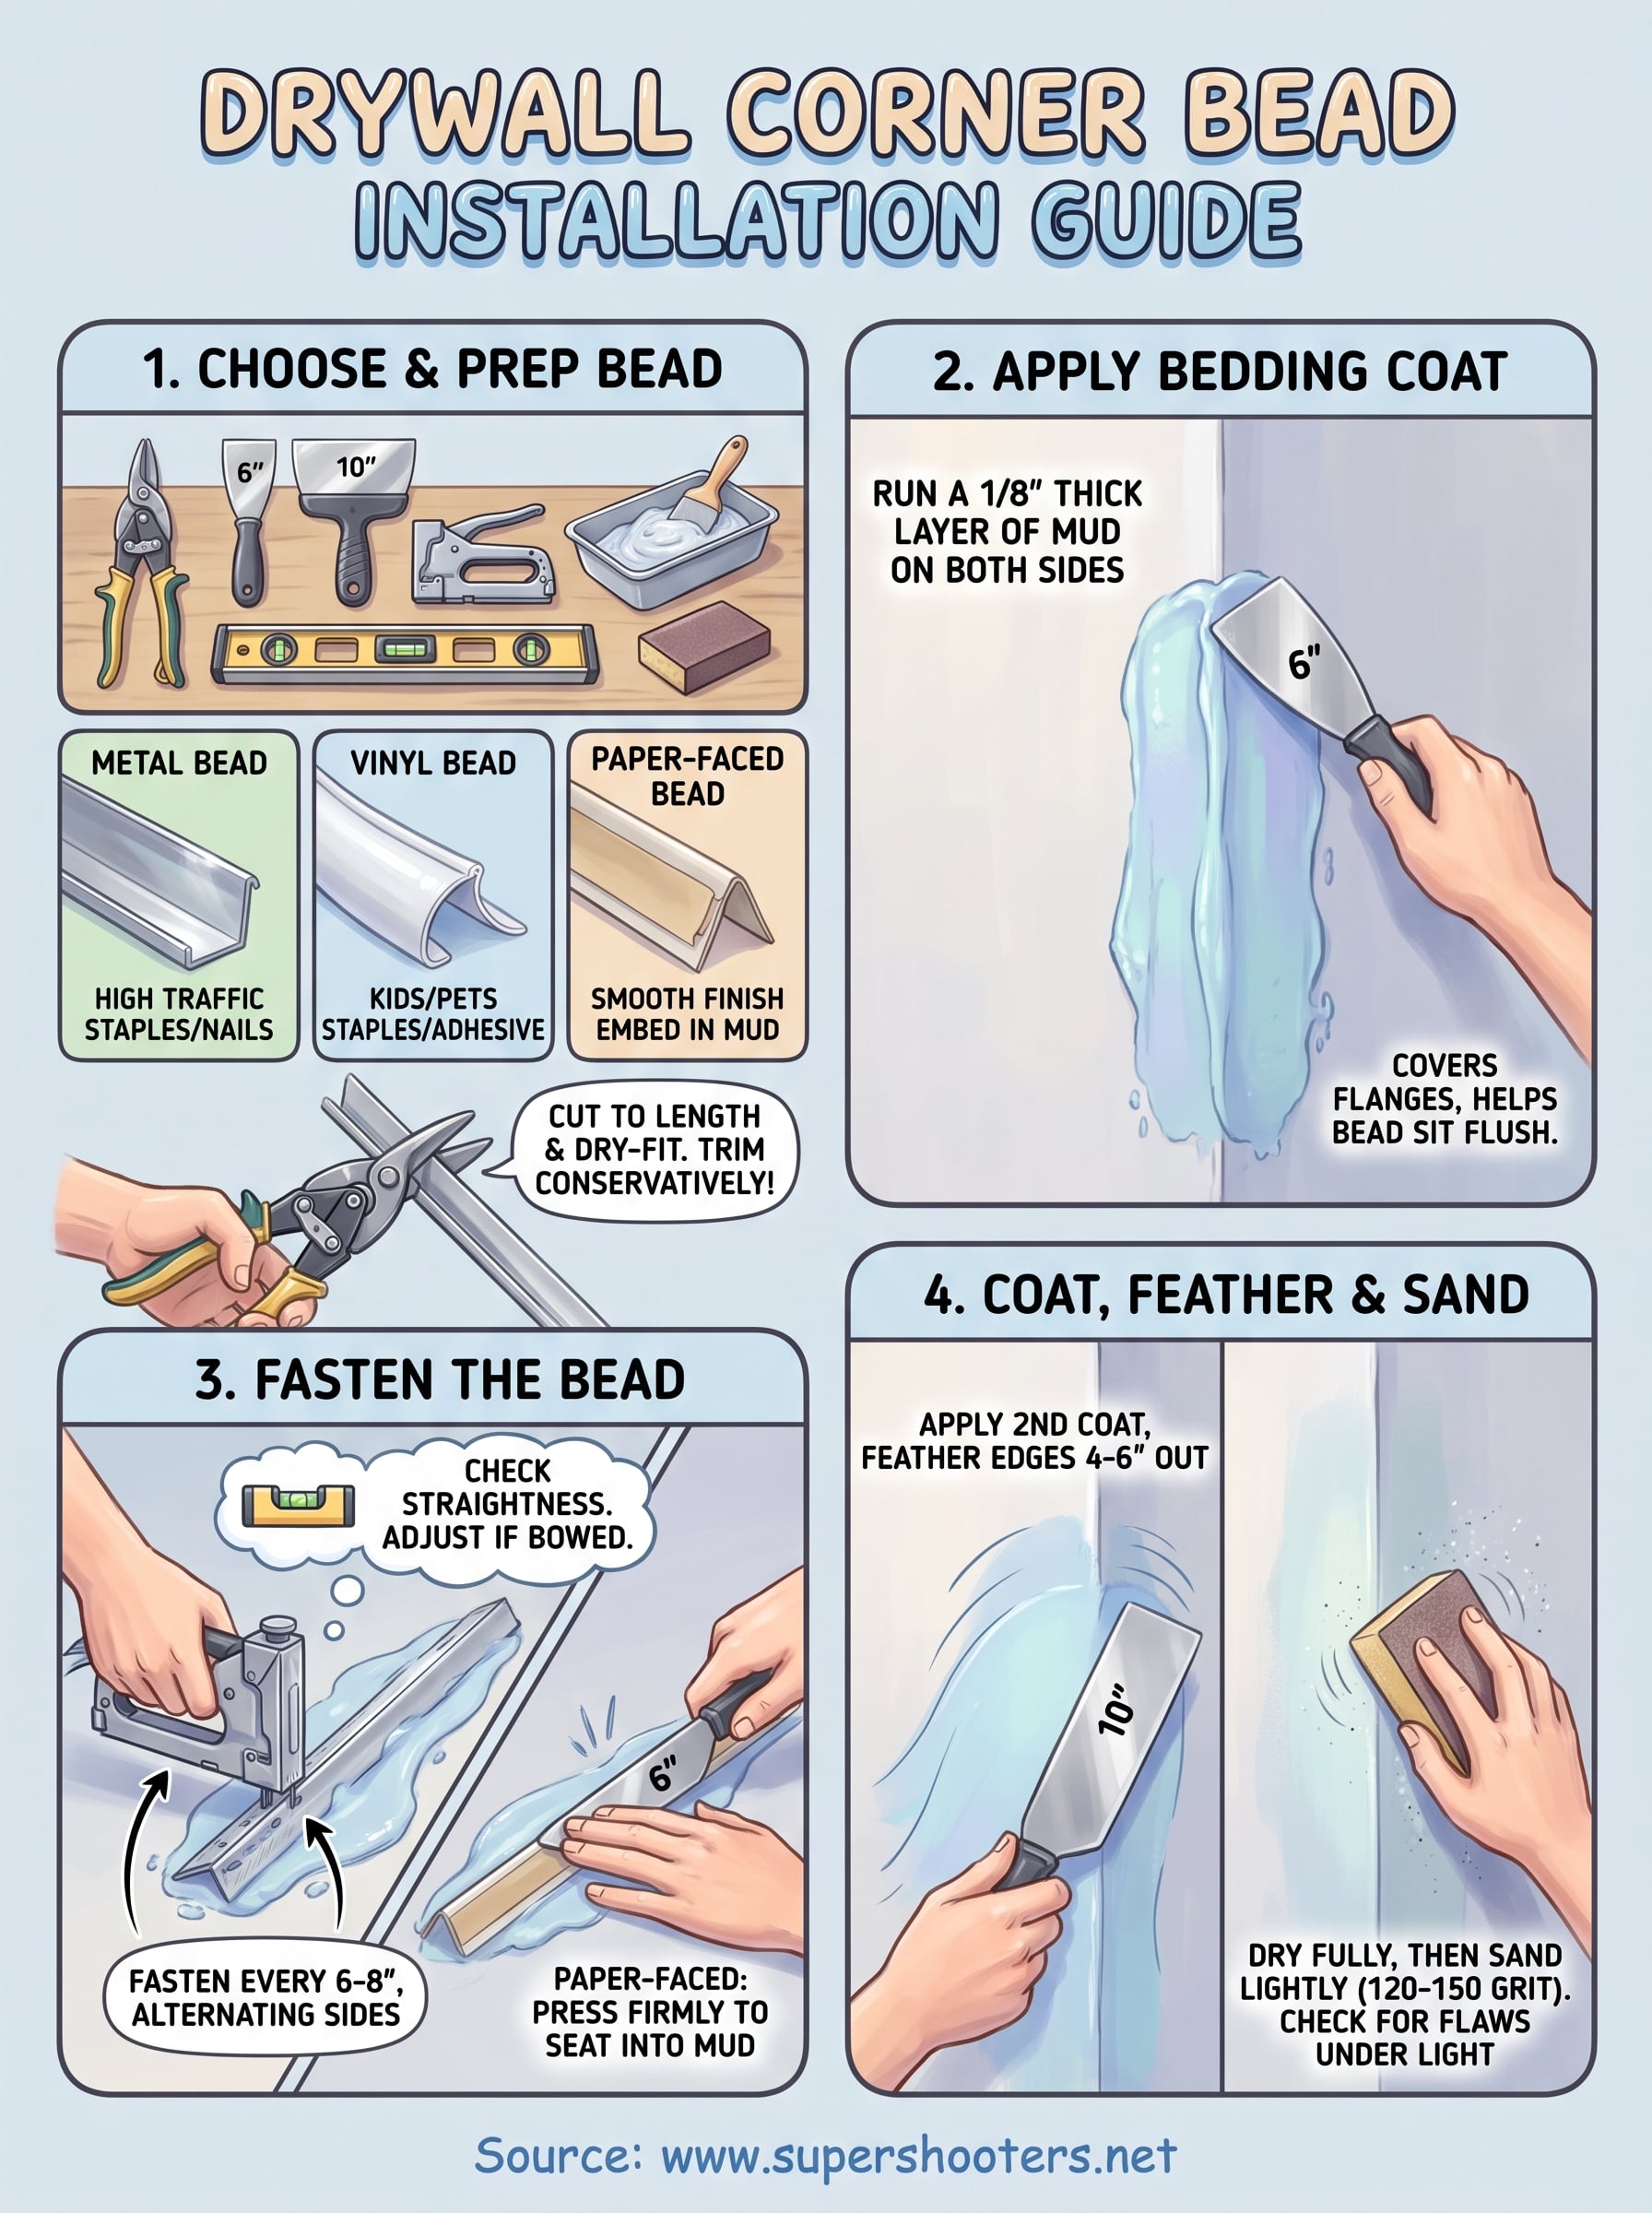
Not every corner bead works the same way, and picking the wrong one is one of the most common reasons DIY corners fail early. Metal corner bead is the traditional choice and holds up best in high-traffic areas like hallways and garage entries. Vinyl corner bead flexes slightly and resists denting better than metal, which makes it a good pick for homes with young kids or pets. Paper-faced bead skips fasteners entirely and embeds directly in joint compound the same way you'd tape drywall corners like a pro, which is faster for pros but less forgiving for first-timers.

Bead type Best for Attachment method Durability
Metal High-traffic corners, garages Staples or nails High, but dents
Vinyl Homes with kids/pets Staples or adhesive High, flexes without cracking
Paper-faced Smooth interior corners Embedded in mud Moderate, needs careful application

The bead you choose should match how much abuse that specific corner takes, not just what's cheapest at the store.

Buy a few extra feet of bead beyond your measurements. Corners rarely run perfectly square, and having slack to trim gives you room to get a clean fit.

Step 1. Measure and cut the corner bead

Start by measuring the full length of the corner, floor to ceiling or wherever the drywall edge ends, and add nothing extra since bead gets trimmed to fit exactly, not overlapped. Corner bead drywall installation goes smoother when you measure twice, since a piece cut short leaves a gap that's nearly impossible to patch cleanly later.

Once you have your number, mark the bead with a pencil and cut it with tin snips for metal or vinyl bead, or scissors for paper-faced bead. Cut at a slight angle if the corner meets an angled ceiling or a doorway header, so the bead sits flush instead of poking out.

A corner bead cut a quarter-inch too long will bow the whole piece away from the wall, so trim conservatively and test-fit before fastening.

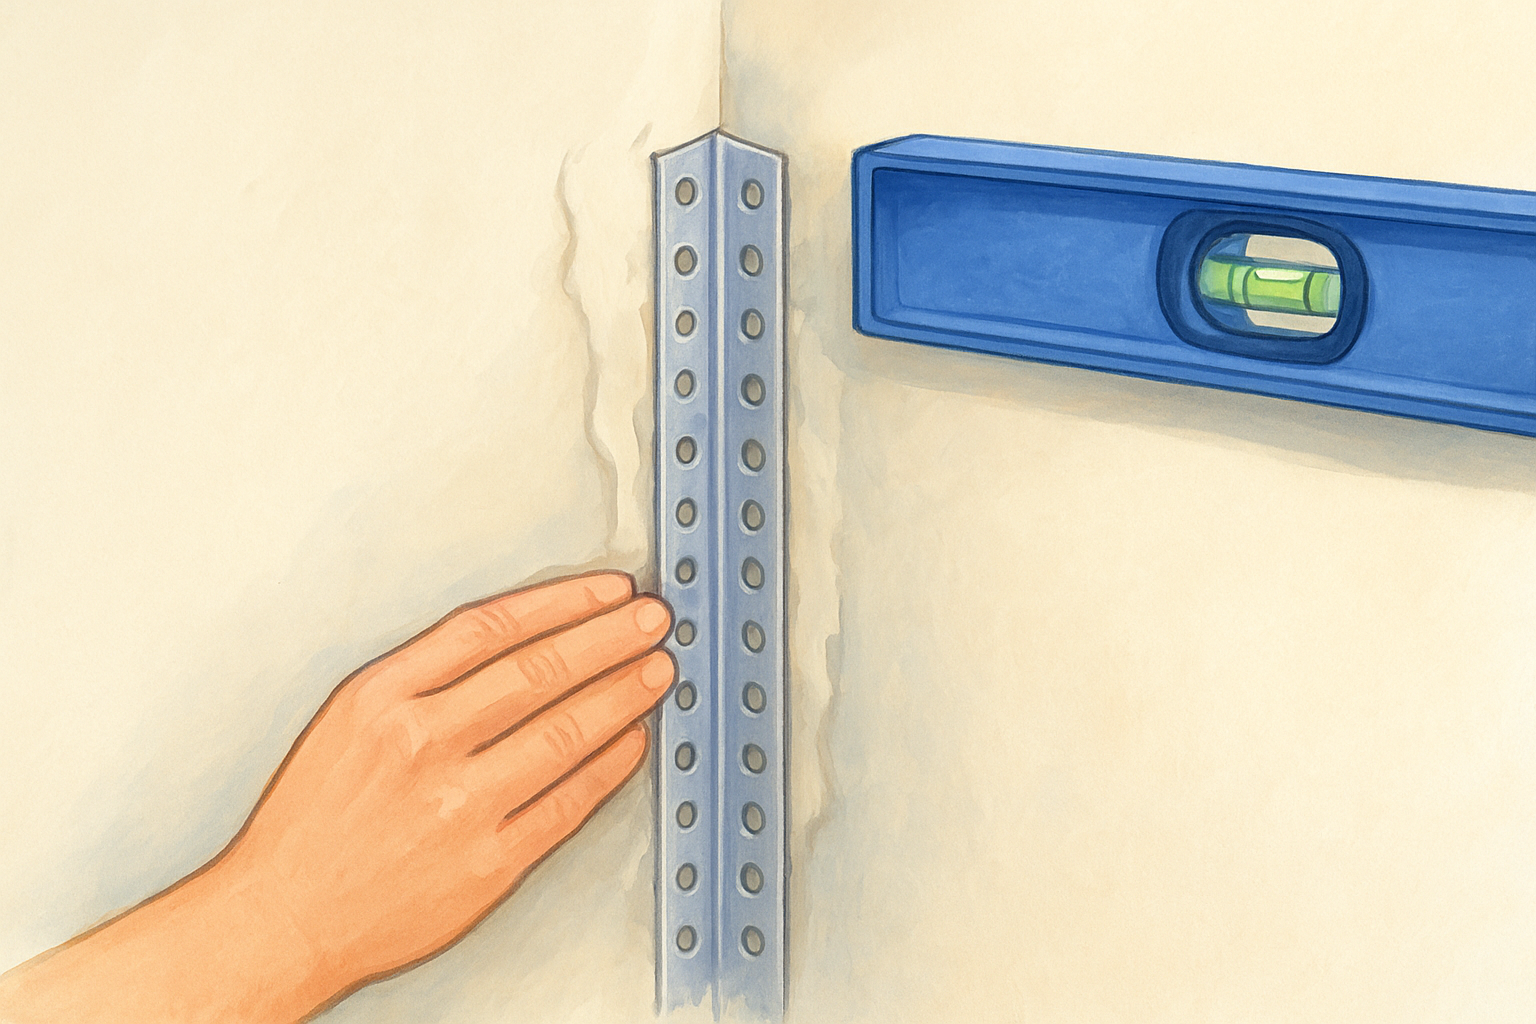
Dry-fit the piece before mudding or fastening anything. Press it into the corner and check that both flanges sit flat against the drywall with no rocking. If it rocks, the corner itself may not be square, and you'll need to shim or sand the drywall edge before moving forward.

Step 2. Apply joint compound to the corner

Before any bead touches the wall, run a layer of joint compound along both sides of the corner using your 6-inch knife, and if you're unsure which joint compound to use, match it to the size and location of the job. Load the pan, then spread a bed roughly 1/8 inch thick, wide enough to cover the flanges once the bead sits down. This bedding coat is what locks a paper-faced bead in place, and it also helps metal or vinyl bead sit flush by filling small gaps between the drywall edges.

Work in sections rather than mudding the whole corner at once, since compound skins over fast and gets hard to embed bead into after ten or fifteen minutes. Keep the coat even on both sides of the corner so the bead doesn't tilt toward whichever side has more mud.

A lopsided bed of compound is the fastest way to end up with a corner that leans instead of running true.

Scrape away any compound that's squeezed past where the bead will land, since excess mud outside the flange area just means more sanding once the corner dries.

Step 3. Attach the corner bead to the wall

Press the bead into the wet compound and center it over the corner so both flanges land evenly on each side. For metal or vinyl bead , drive staples or 1-1/4 inch drywall nails every 6 to 8 inches down the length, alternating sides as you go so the bead doesn't twist while you fasten it. Sink each fastener flush with the flange, not deep enough to dimple the metal, since a crushed flange creates a low spot that shows through paint later.

A bead fastened crooked at the start stays crooked no matter how much mud you add later.

Check straightness with your level every foot or two as you fasten. If the bead bows outward, back out the nearest fastener, press the bead flat, and refasten before moving further down the corner. Paper-faced bead skips nails entirely. Instead, run a 6-inch knife down the length, pressing firmly to seat the paper into the compound and squeeze out air bubbles.

Once the whole piece is fastened or embedded, run your hand along both flanges to feel for any spots still lifting off the wall, and address those before the mud sets.

Step 4. Coat, feather, and sand the corner

Once the bead is fastened and the first bedding coat has dried, apply a second coat of joint compound that extends 4 to 6 inches out from the corner on both sides. Use your 10-inch knife for this pass, and feather the edges by lightening pressure as you pull outward, so the compound tapers down to nearly nothing at the far edge instead of leaving a hard ridge, which is the same how to feather drywall mud technique used on flat seams.

Let that coat dry fully, usually overnight, since how long drywall mud takes to dry depends on humidity and thickness, then check the corner under a raking light for high spots or ridges. Apply a third, wider coat if needed, extending another few inches past the second, to smooth out any transition lines before sanding, and remember that how many coats of joint compound a corner needs depends on how flat the first two passes came out.

The final coat should disappear into the wall, not sit on top of it like a stripe.

Sand with a 120 to 150 grit sanding sponge, working in light circular motions and checking often with your hand rather than just your eyes. Corners hide flaws under sidelight, so run a level flat against the finished corner to confirm it's straight before priming and painting.

When to call in a drywall pro

Corner bead installation rewards patience, but some jobs go beyond a weekend project. Multiple corners throughout a room , high ceilings that need scaffolding, or corners tied into a larger drywall installation are all situations where a crooked bead costs you real money in wasted material and redo time. If your walls have water damage, old cracks from settling, or texture that needs to match existing surfaces, those issues compound the difficulty fast, and it's worth knowing what hiring a drywall installation contractor actually costs before you commit.

Working through this guide gives you what you need for a single corner or two, but a whole room of crooked corners under bad lighting is a different animal. Sacramento Valley homeowners tackling bigger renovations, ADU builds, or rooms with multiple problem corners get better results faster with a crew that's done this thousands of times. If your project has grown beyond one corner, get in touch about our drywall installation services and let us handle the corners while you focus on the rest of the remodel.

Recent Posts

By cinchweb September 4, 2026
Compare popcorn ceiling removal contractors by cost, asbestos testing, and expertise to pick the right fit for your Sacramento Valley home.
By cinchweb September 4, 2026
See real stucco ceiling removal cost breakdowns, a worked Elk Grove example, DIY vs pro pricing, and tips to save on your Sacramento Valley project.
By cinchweb September 2, 2026
See what drives ceiling drywall repair cost in 2026, from texture matching to asbestos risks, plus Sacramento Valley price ranges to check your quote.
By cinchweb September 1, 2026
Learn how to choose and apply spackling for drywall repair, plus prep, sanding, and painting tips, know when to call a Sacramento Valley pro.
By cinchweb September 1, 2026
Learn how to vet a contractor drywall repair pro: check licensing, texture skills, quotes, reviews, and timelines before hiring in Sacramento Valley.
By cinchweb August 31, 2026
Searching drywall repair near.me? Learn how to vet licensed pros, compare costs, and why Sacramento Valley trusts Super Shooters' 30+ years of experience.
By cinchweb August 30, 2026
Learn to pick and use a drywall wall repair kit correctly, from patch size to sanding, and know when Sacramento Valley homes need a pro instead.
By cinchweb August 29, 2026
Compare drywall installation contractors, from specialists to big-box crews, with 2024 costs, tips, and Sacramento Valley pricing insights.
By cinchweb August 28, 2026
Compare 5 DIY options for a ceiling popcorn removal tool, from budget scrapers to sanders, with costs, dust levels, and asbestos safety tips.
Show More