
September 30, 2026
Wall Plaster Crack Repair: A Step-by-Step DIY Guide
That hairline crack running across your living room wall didn't show up overnight, and it won't fix itself either. Wall plaster crack repair is one of those jobs homeowners in older Sacramento Valley homes deal with constantly, especially once a house settles or seasonal temperature swings start stressing the plaster. Left alone, small cracks widen, catch dust, and make an otherwise clean room look neglected.
The good news is that most crack in plaster wall repair work doesn't require a contractor visit. With the right materials, a few basic tools, and about an afternoon, you can get a smooth, paint-ready surface that holds up for years. This guide walks through exactly which products to buy, how to prep the crack so your patch actually sticks, and the application steps that keep the repair invisible once it's painted.
We'll cover how to tell a cosmetic settling crack from one signaling a bigger structural issue, plus the step-by-step repair process from cutting out loose material to final texture matching. If you get partway through and realize the damage is more extensive than a simple patch, or the crack keeps coming back, that's usually a sign to call in a licensed plaster and drywall crew instead of pushing a DIY fix further.
Before you start: crack types and supplies you'll need
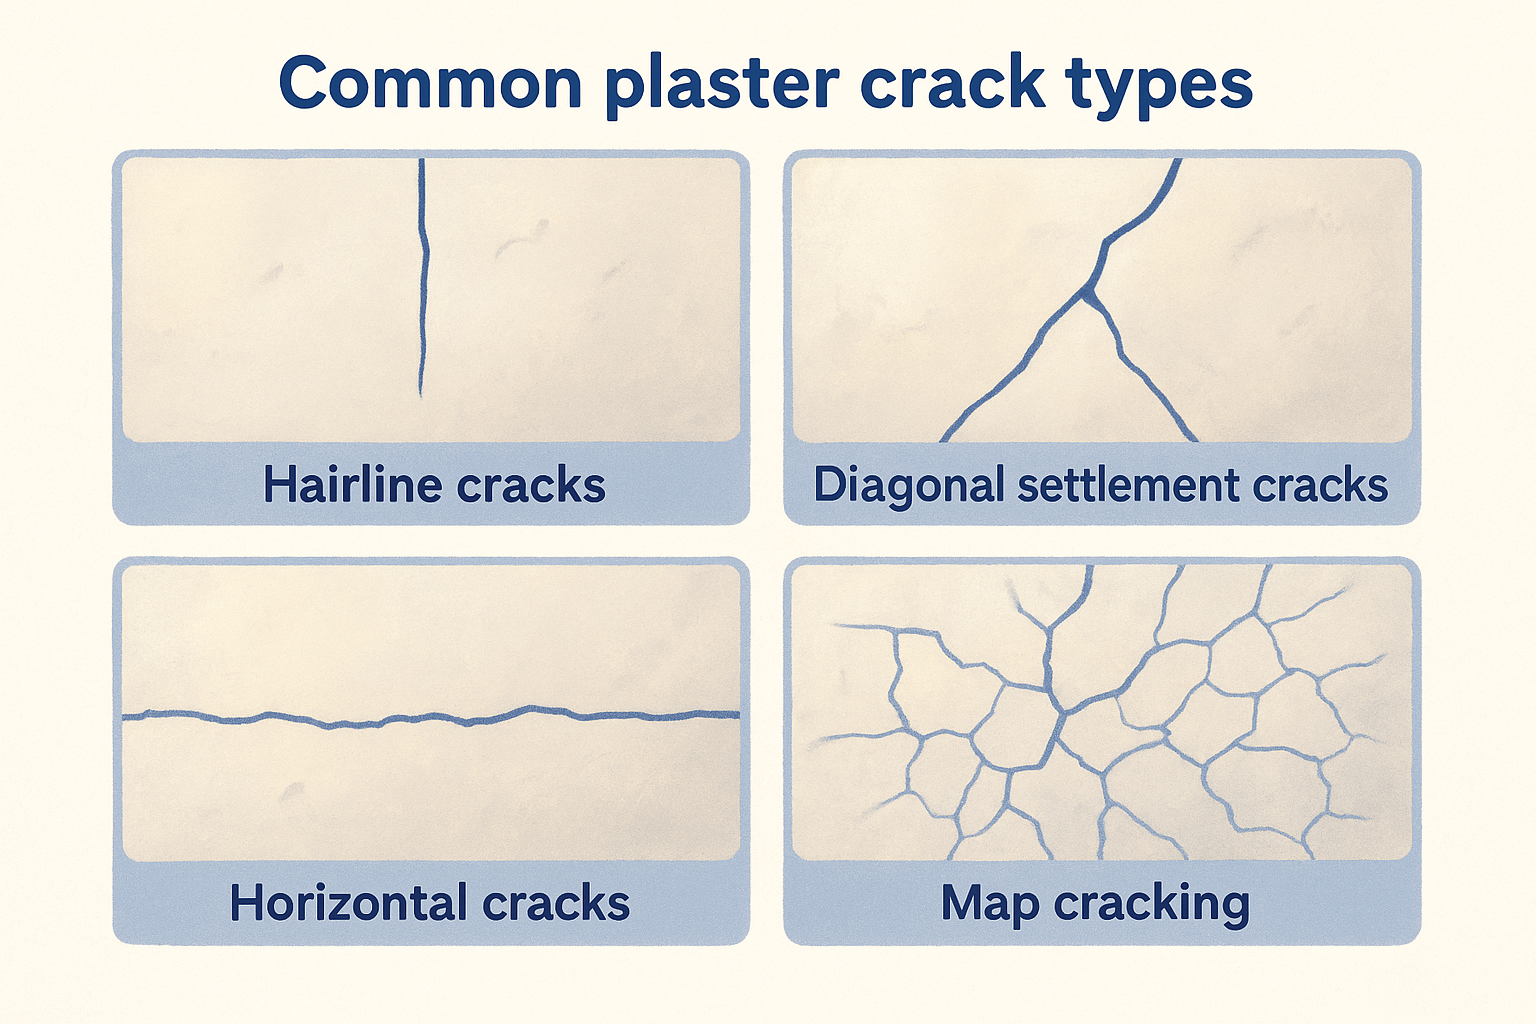
Plaster cracks fall into a handful of predictable categories, and figuring out which one you're dealing with saves you from buying the wrong materials or patching over a problem that'll just reopen. Hairline cracks under 1/16 inch usually come from normal humidity and temperature shifts. Settlement cracks run diagonally from corners of doors and windows and point to minor foundation movement. Wider cracks, especially ones that step or zigzag through a wall, deserve a closer look before you touch them with joint compound.
A crack repair only lasts as long as the prep work behind it.
Common plaster crack types
Understanding the pattern helps you match the right fix instead of guessing.
- Hairline cracks : thin, straight, often near ceiling lines or window frames
- Diagonal settlement cracks : run at 45 degrees from door and window corners
- Horizontal cracks : can indicate lath separation behind the plaster
- Map cracking : a web of small cracks across a large area, often from age or moisture
- Stepped cracks in stucco-adjacent walls : usually structural and worth a professional look
Tools and materials to gather
Getting everything on hand before you start keeps the job moving and avoids a mid-project trip to the hardware store, and it helps to know which drywall patching tools are worth buying once versus renting. Most of these items run under $15 each, and you likely already own the utility knife and drop cloths.
| Item | Purpose | Typical Cost |
|---|---|---|
| Utility knife or crack chaser tool | Widens and cleans out the crack | $8-$15 |
| Fiberglass mesh tape | Reinforces the crack against reopening | $5-$10 |
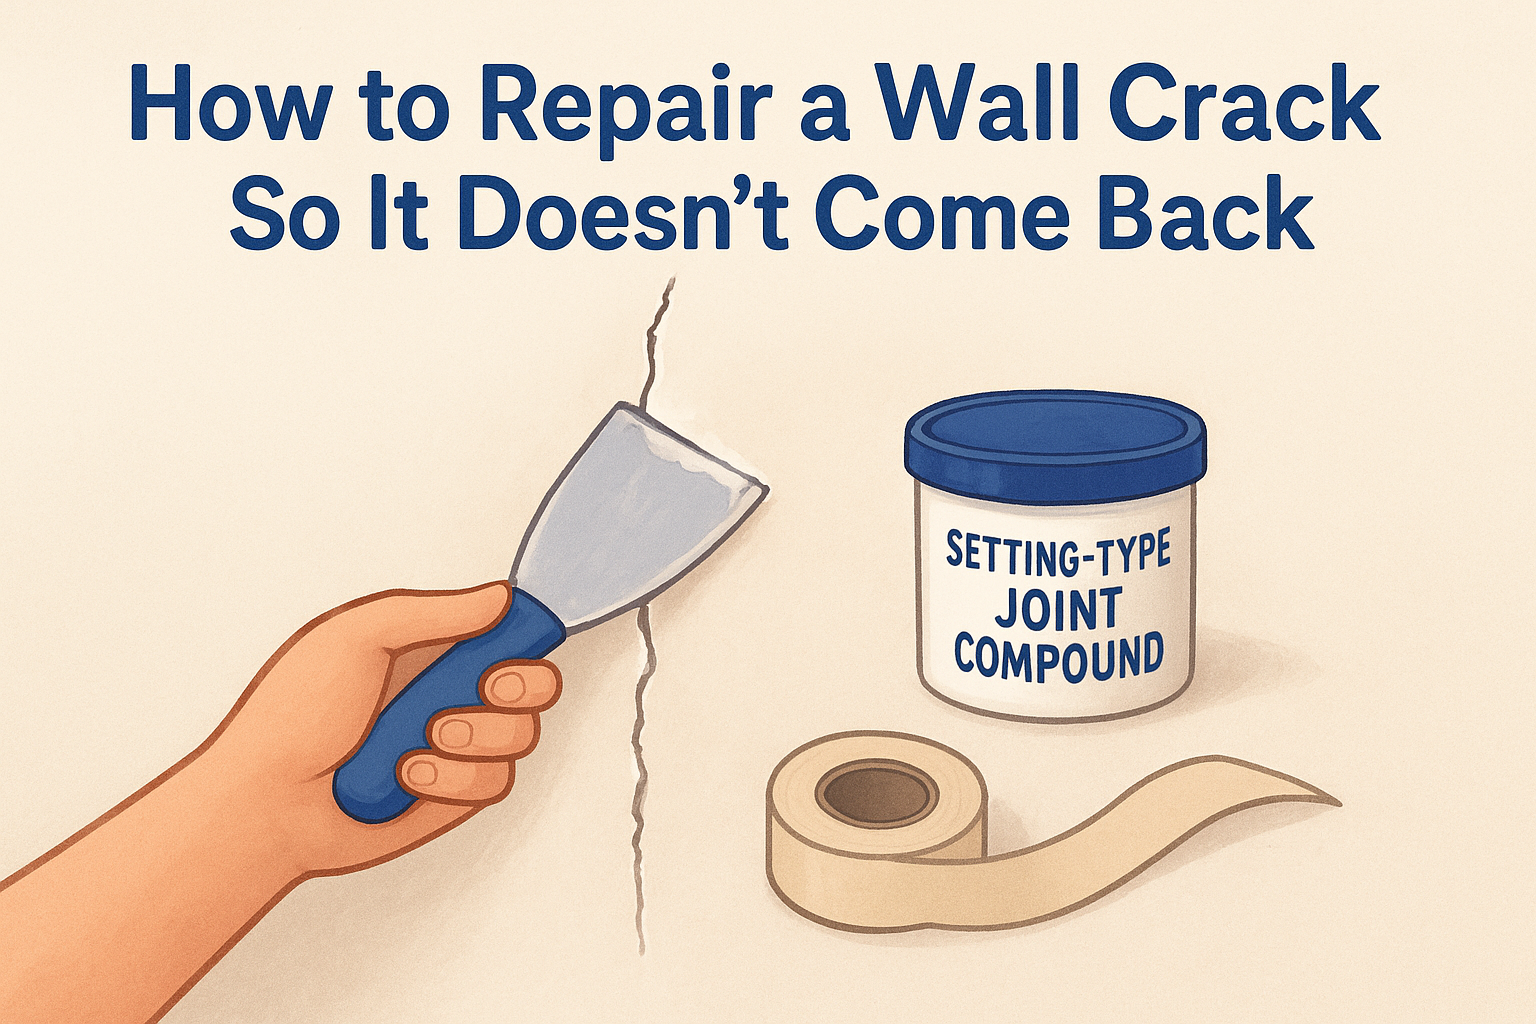
| Setting-type joint compound (90-minute) | Fills and bonds better than premixed mud | $12-$20 |
| Plaster bonding agent | Helps new compound adhere to old plaster | $10-$18 |
| 120-150 grit sanding sponge | Smooths the dried patch | $5 |
| 6-inch and 10-inch putty knives | Applies and feathers compound | $10-$15 |
| Primer-sealer | Prevents flashing under paint | $15-$25 |
Setting-type compound, sometimes labeled "Durabond," outperforms premixed mud for crack repair because it hardens chemically instead of drying out, which means less shrinkage and fewer callbacks a few months later. Skip the lightweight all-purpose mud for anything wider than a hairline, it just doesn't have the bite you need over old plaster and lath, and it's worth understanding how joint compound, spackle, and plaster differ before you buy.
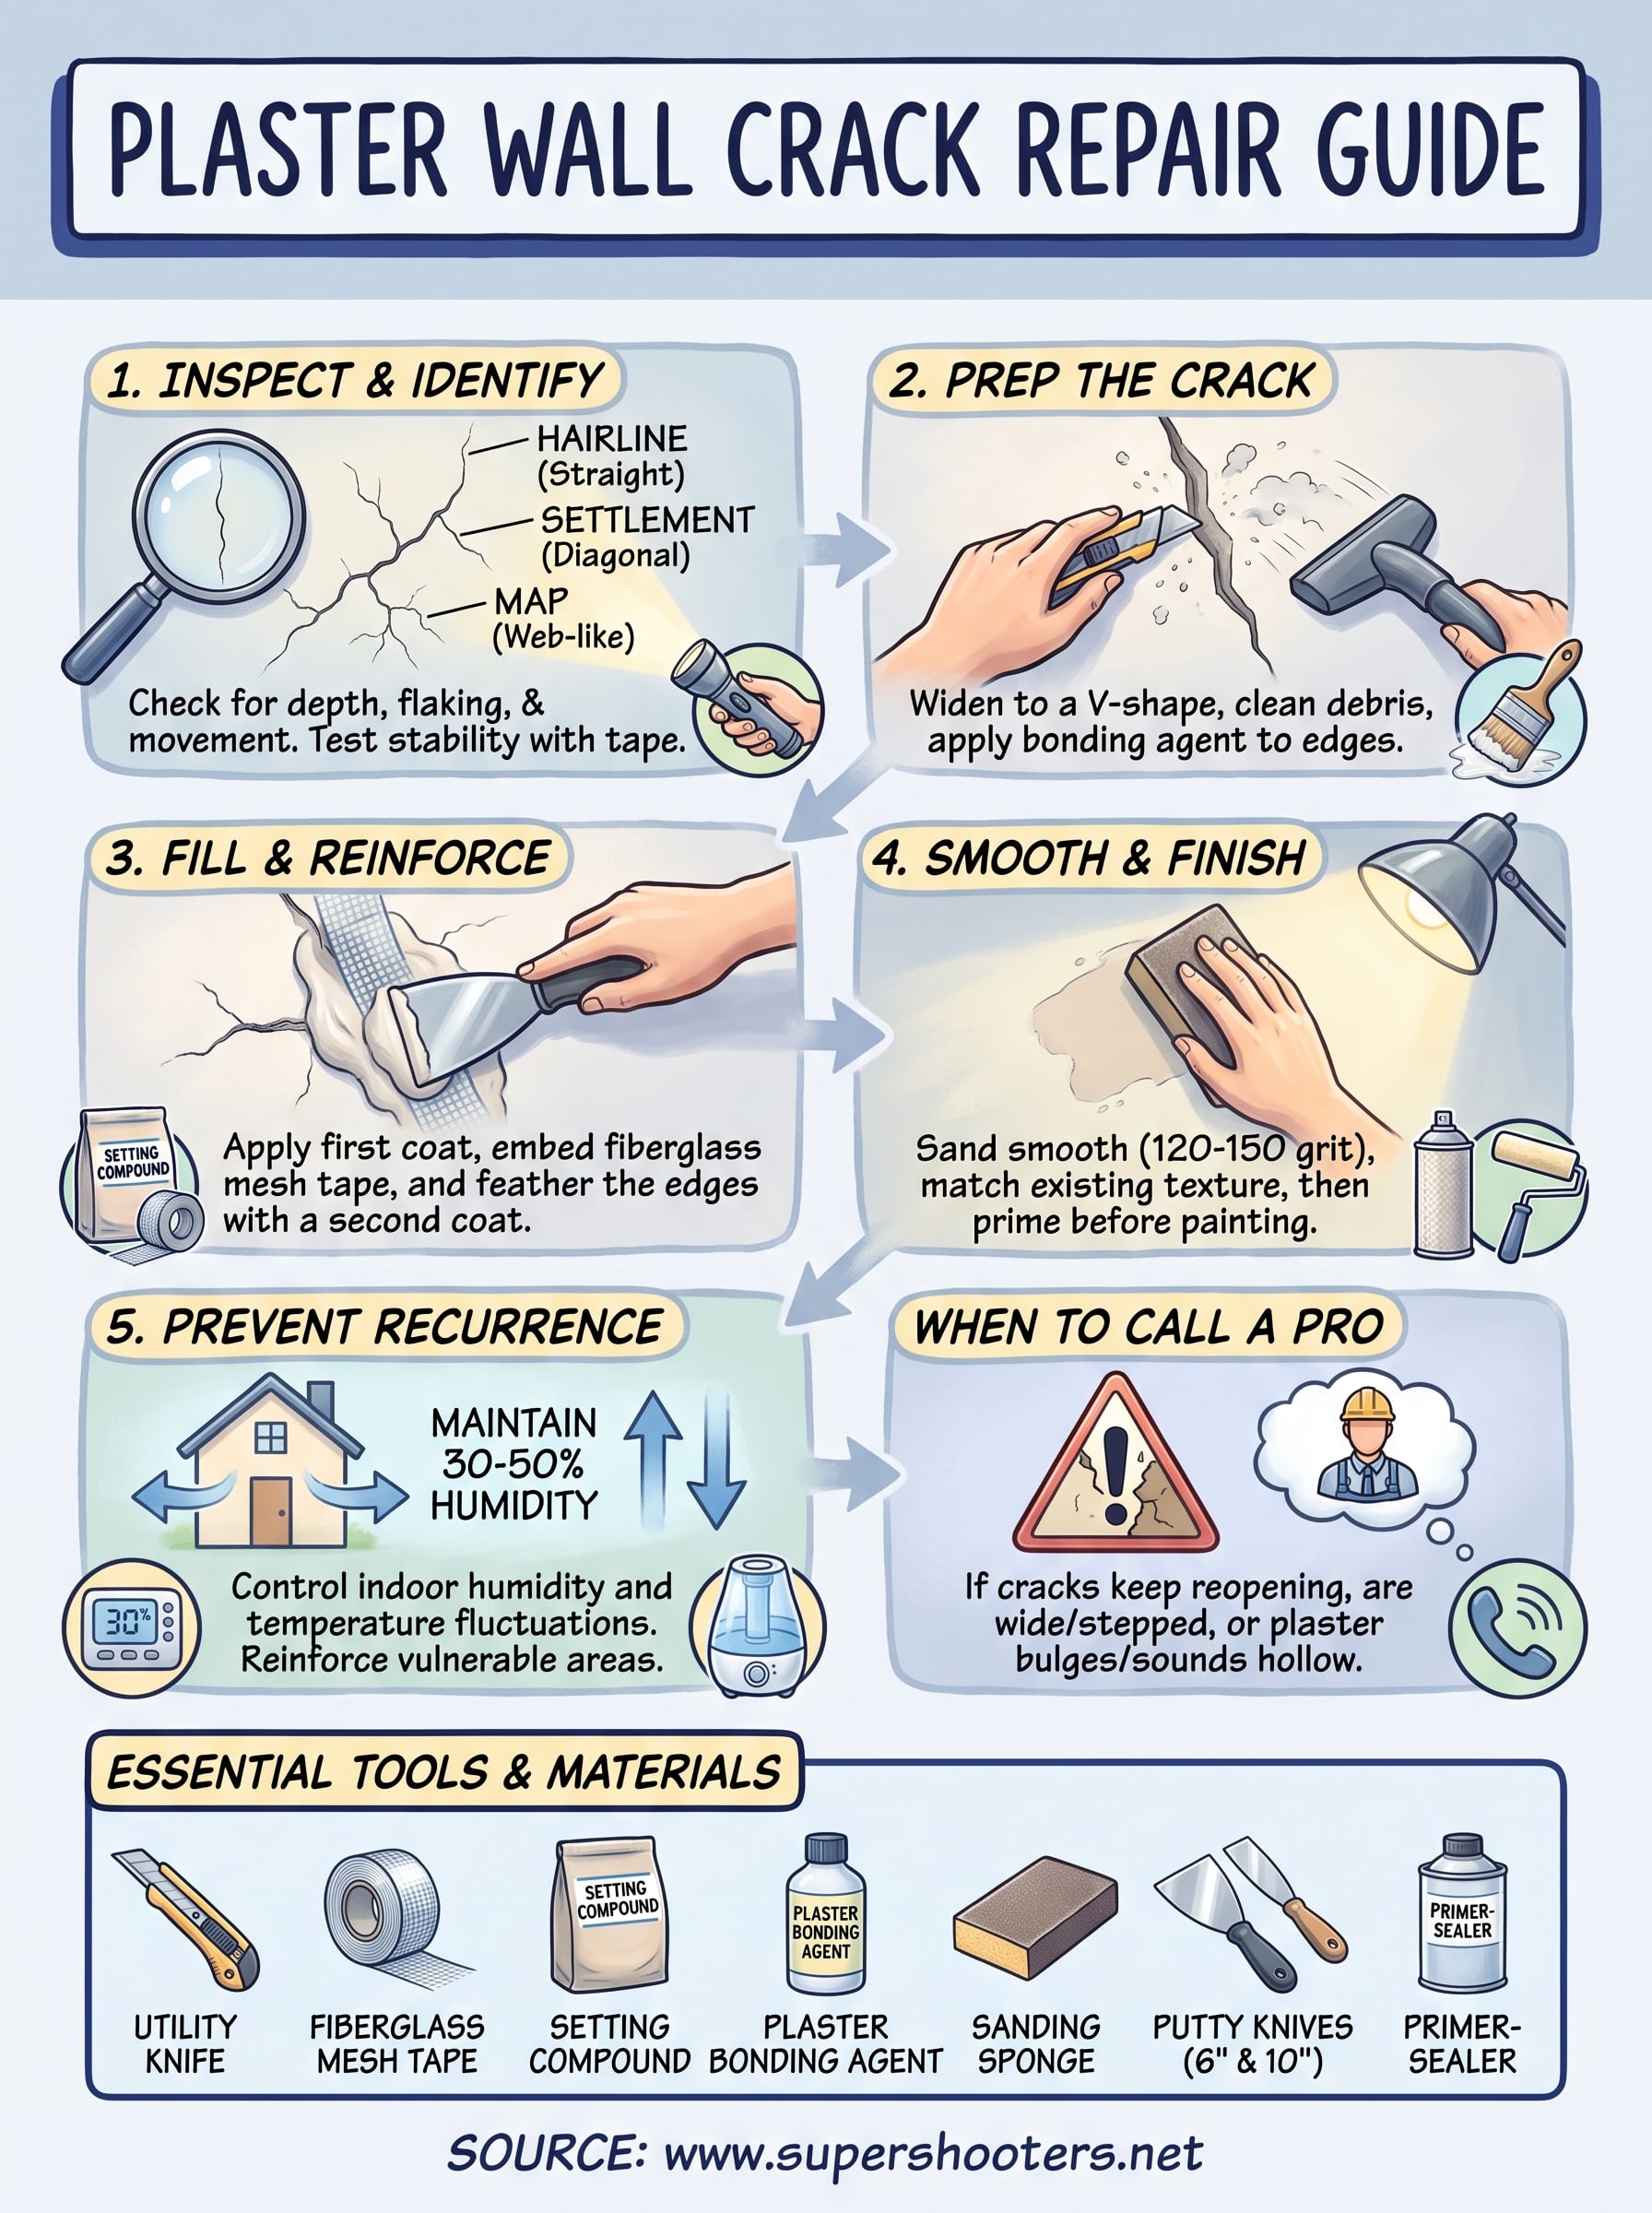
Step 1. Inspect and identify the crack type
Grab a flashlight and get close to the wall before you touch any tools. Wall plaster crack repair starts with a careful inspection, not a putty knife. Run your fingers along the crack length to feel for depth, flaking edges, or areas where the plaster has separated from the lath behind it. A crack that's tight and shallow behaves very differently than one you can slide a business card into.
Next, check whether the crack moves. Press a strip of masking tape across the widest point, date it, and leave it for a week or two if the timeline allows. If the tape stays intact, you're dealing with a stable cosmetic crack that's safe to patch. If it tears or the crack visibly widens, that's active movement, and no amount of joint compound will hold until the underlying cause gets addressed, so run through a checklist for spotting a structural wall crack first.
If a crack keeps reopening after you patch it, the wall is telling you something a putty knife can't fix.
Look at the surrounding area too. Bulging plaster, a hollow sound when you tap the wall, or crumbling texture around the edges usually means the plaster has separated from its lath backing, a job that calls for stabilizing loose plaster walls rather than a simple patch. Cracks near water stains or plumbing walls deserve extra scrutiny since moisture damage often masquerades as ordinary settling.
Document what you find with a quick photo and a note on crack width, direction, and location. That record helps you track whether the repair holds over the following months, and gives a contractor useful information if you end up needing one later.
Step 2. Prep the crack for repair
Before any compound goes on the wall, you need to open the crack up rather than skim over it. Use your utility knife or a crack chaser to widen the gap into a shallow V-shape, cutting back to solid plaster on both sides. This process, called keying the crack , gives the new compound something to grip instead of just sitting on a thin surface line that will pop loose within months, the same V-groove method behind a crack repair that lasts.
Skimming compound over a tight, unprepared crack is the number one reason patches fail within a year.
Clear out debris and loose material
Once you've widened the crack, vacuum out the dust and loose plaster chips with a shop vac or a soft brush attachment. Any leftover debris will keep your joint compound from bonding fully, leaving a weak spot right where you need the strongest hold. Wipe the area with a slightly damp sponge afterward to pull out fine dust the vacuum missed, then let it dry completely before moving forward.
Apply a bonding agent
Brush a plaster bonding agent along the exposed edges of the crack, following the label's dry time before applying compound. Old plaster is porous and pulls moisture out of fresh compound too fast without this step, which causes cracking and poor adhesion later. If you're working on a wider or repeat-offender crack, this is also the point where you'd cut a strip of fiberglass mesh tape to length, ready to bed into the compound in the next step.
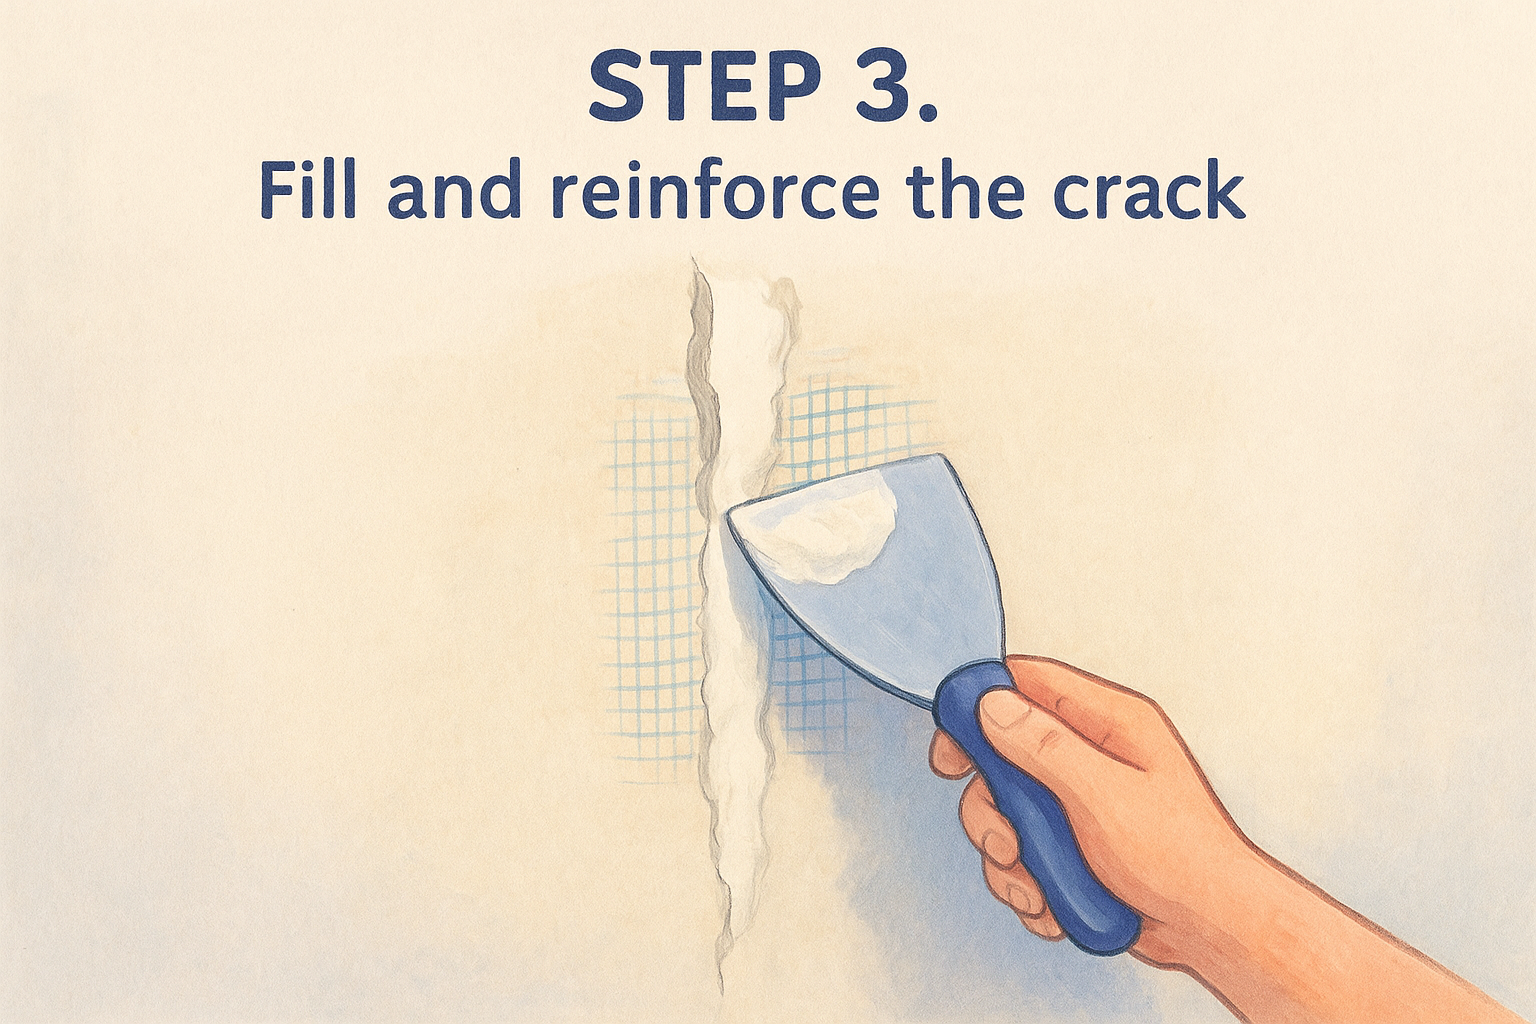
Step 3. Fill and reinforce the crack
Mix your setting-type joint compound to a slightly thicker consistency than you'd use for standard drywall taping, following the ratio on the bag. Repair crack wall plaster work needs a mix that holds its shape on the putty knife instead of sagging into the crack, so err on the thicker side rather than watering it down for easier spreading. Work in small batches since 90-minute compound starts setting the moment water hits the powder, and you don't want a bucket of unusable mud halfway through the job.
Press the first thin layer of compound directly into the crack, forcing it into the keyed groove you cut in Step 2. Immediately embed the fiberglass mesh tape into this wet layer, centering it over the crack and smoothing it flat with your 6-inch putty knife so no air bubbles sit underneath.
A crack repair without mesh reinforcement is just a temporary patch waiting to reopen.
Once the tape is bedded, apply a second coat over the top, feathering the edges out several inches beyond the tape on both sides. This is where fiberglass mesh tape earns its keep, it bridges the crack and spreads any future stress across a wider area instead of concentrating it back at one point, though it helps to know when mesh beats paper tape on a given repair.
Let this coat set fully, usually 90 minutes to a few hours depending on humidity, before touching it again. Rushing this stage is the fastest way to crack the patch before it's even dry, undoing everything you just did in Steps 1 and 2.
Step 4. Smooth, sand, and finish the surface
Once the second coat has cured completely, run your hand over the patch to check for ridges or high spots before you pick up any sandpaper. Smoothing the surface starts with a light pass of your 10-inch putty knife to knock down obvious bumps, which saves you a lot of sanding time later. Work under a raking light, a lamp held at an angle to the wall, since it reveals shadows and dips that overhead light hides completely.
Sanding to a smooth, paint-ready finish means working the dried compound with a 120-150 grit sanding sponge, moving in small circular motions and checking your progress often. Wall plaster crack repair patches should blend into the surrounding wall so the seam disappears once primer and paint go on, not just look flat under bright light. Wipe away sanding dust with a damp sponge before you move to texture matching.
A perfectly smoothed patch still fails the eye test if the texture doesn't match the wall around it.
Match the existing texture
Most Sacramento Valley homes built before the 1980s have some form of orange peel, knockdown, or hand-troweled texture, and a bare smooth patch stands out immediately once painted. Load a texture spray can or a stiff-bristled brush with a small amount of thinned compound and practice on scrap drywall first to match the pattern's size and spacing, following the same steps used to repair wall texture so a patch disappears.
Prime before painting
Apply a coat of primer-sealer over the entire patch area, extending a few inches past the repair. Skipping this step lets the new compound absorb paint unevenly, creating a visible flash spot known as paint flashing that gives away the repair long after the crack itself is gone.
Step 5. Prevent cracks from coming back
Patching a crack without addressing what causes cracks in walls in the first place is like repainting over rust. Wall plaster crack repair holds up longer when you tackle the humidity and temperature swings that stress plaster in the first place, especially in Sacramento Valley homes that swing from cool winters to triple-digit summers. Keep indoor humidity between 30 and 50 percent with a portable humidifier or dehumidifier depending on the season, since plaster and the wood lath behind it expand and contract with moisture more than most homeowners realize.
Most repeat cracks trace back to moisture swings, not bad patching work.
Control the building's movement
Quick temperature changes cause plaster to expand and contract faster than it can handle, so avoid blasting the AC or heater to extremes when a room's been sitting at a different temperature for hours. Watch for settlement cracks reappearing near the same door or window frame, since that pattern often means the foundation is still shifting slightly and the wall may need durable repairs built for a settling house rather than one more patch. If you notice a crack coming back in the exact same spot within a year, that's worth tracking with another taped test strip like the one from Step 1.
Reinforce vulnerable areas
Corners above doors and windows take the most stress in any plaster wall, so consider adding fiberglass mesh tape to these spots even before a crack shows up, as a preventive measure during any repaint or remodel. Keep gutters clear and grading sloped away from the foundation too, since water pooling near the house is one of the most common hidden causes of the settlement cracking that shows up inside months later.
When to call a plaster repair professional
Most hairline and settlement cracks are well within reach of a weekend DIYer with the right setting compound and mesh tape. But some jobs cross a line where patching becomes a band-aid on a bigger problem. If your tape test from Step 1 keeps tearing, if you're seeing bulging plaster or a hollow sound when you tap the wall, or if cracks keep reopening in the same spot after multiple repairs, that's your signal to stop and call a licensed crew.
Those signs usually mean the plaster has separated from its lath or the wall movement hasn't stabilized, and no amount of wall plaster crack repair on your end will hold for long. Large sections of damaged plaster often make more sense to replace outright than patch indefinitely, which is where Sacramento plastering contractors come in.
If you're at that point, schedule professional wall crack and patch repair with Super Shooters and get a free in-home estimate.