October 28, 2026
Drywall Corner Bead Installation: Metal, Paper, and Vinyl
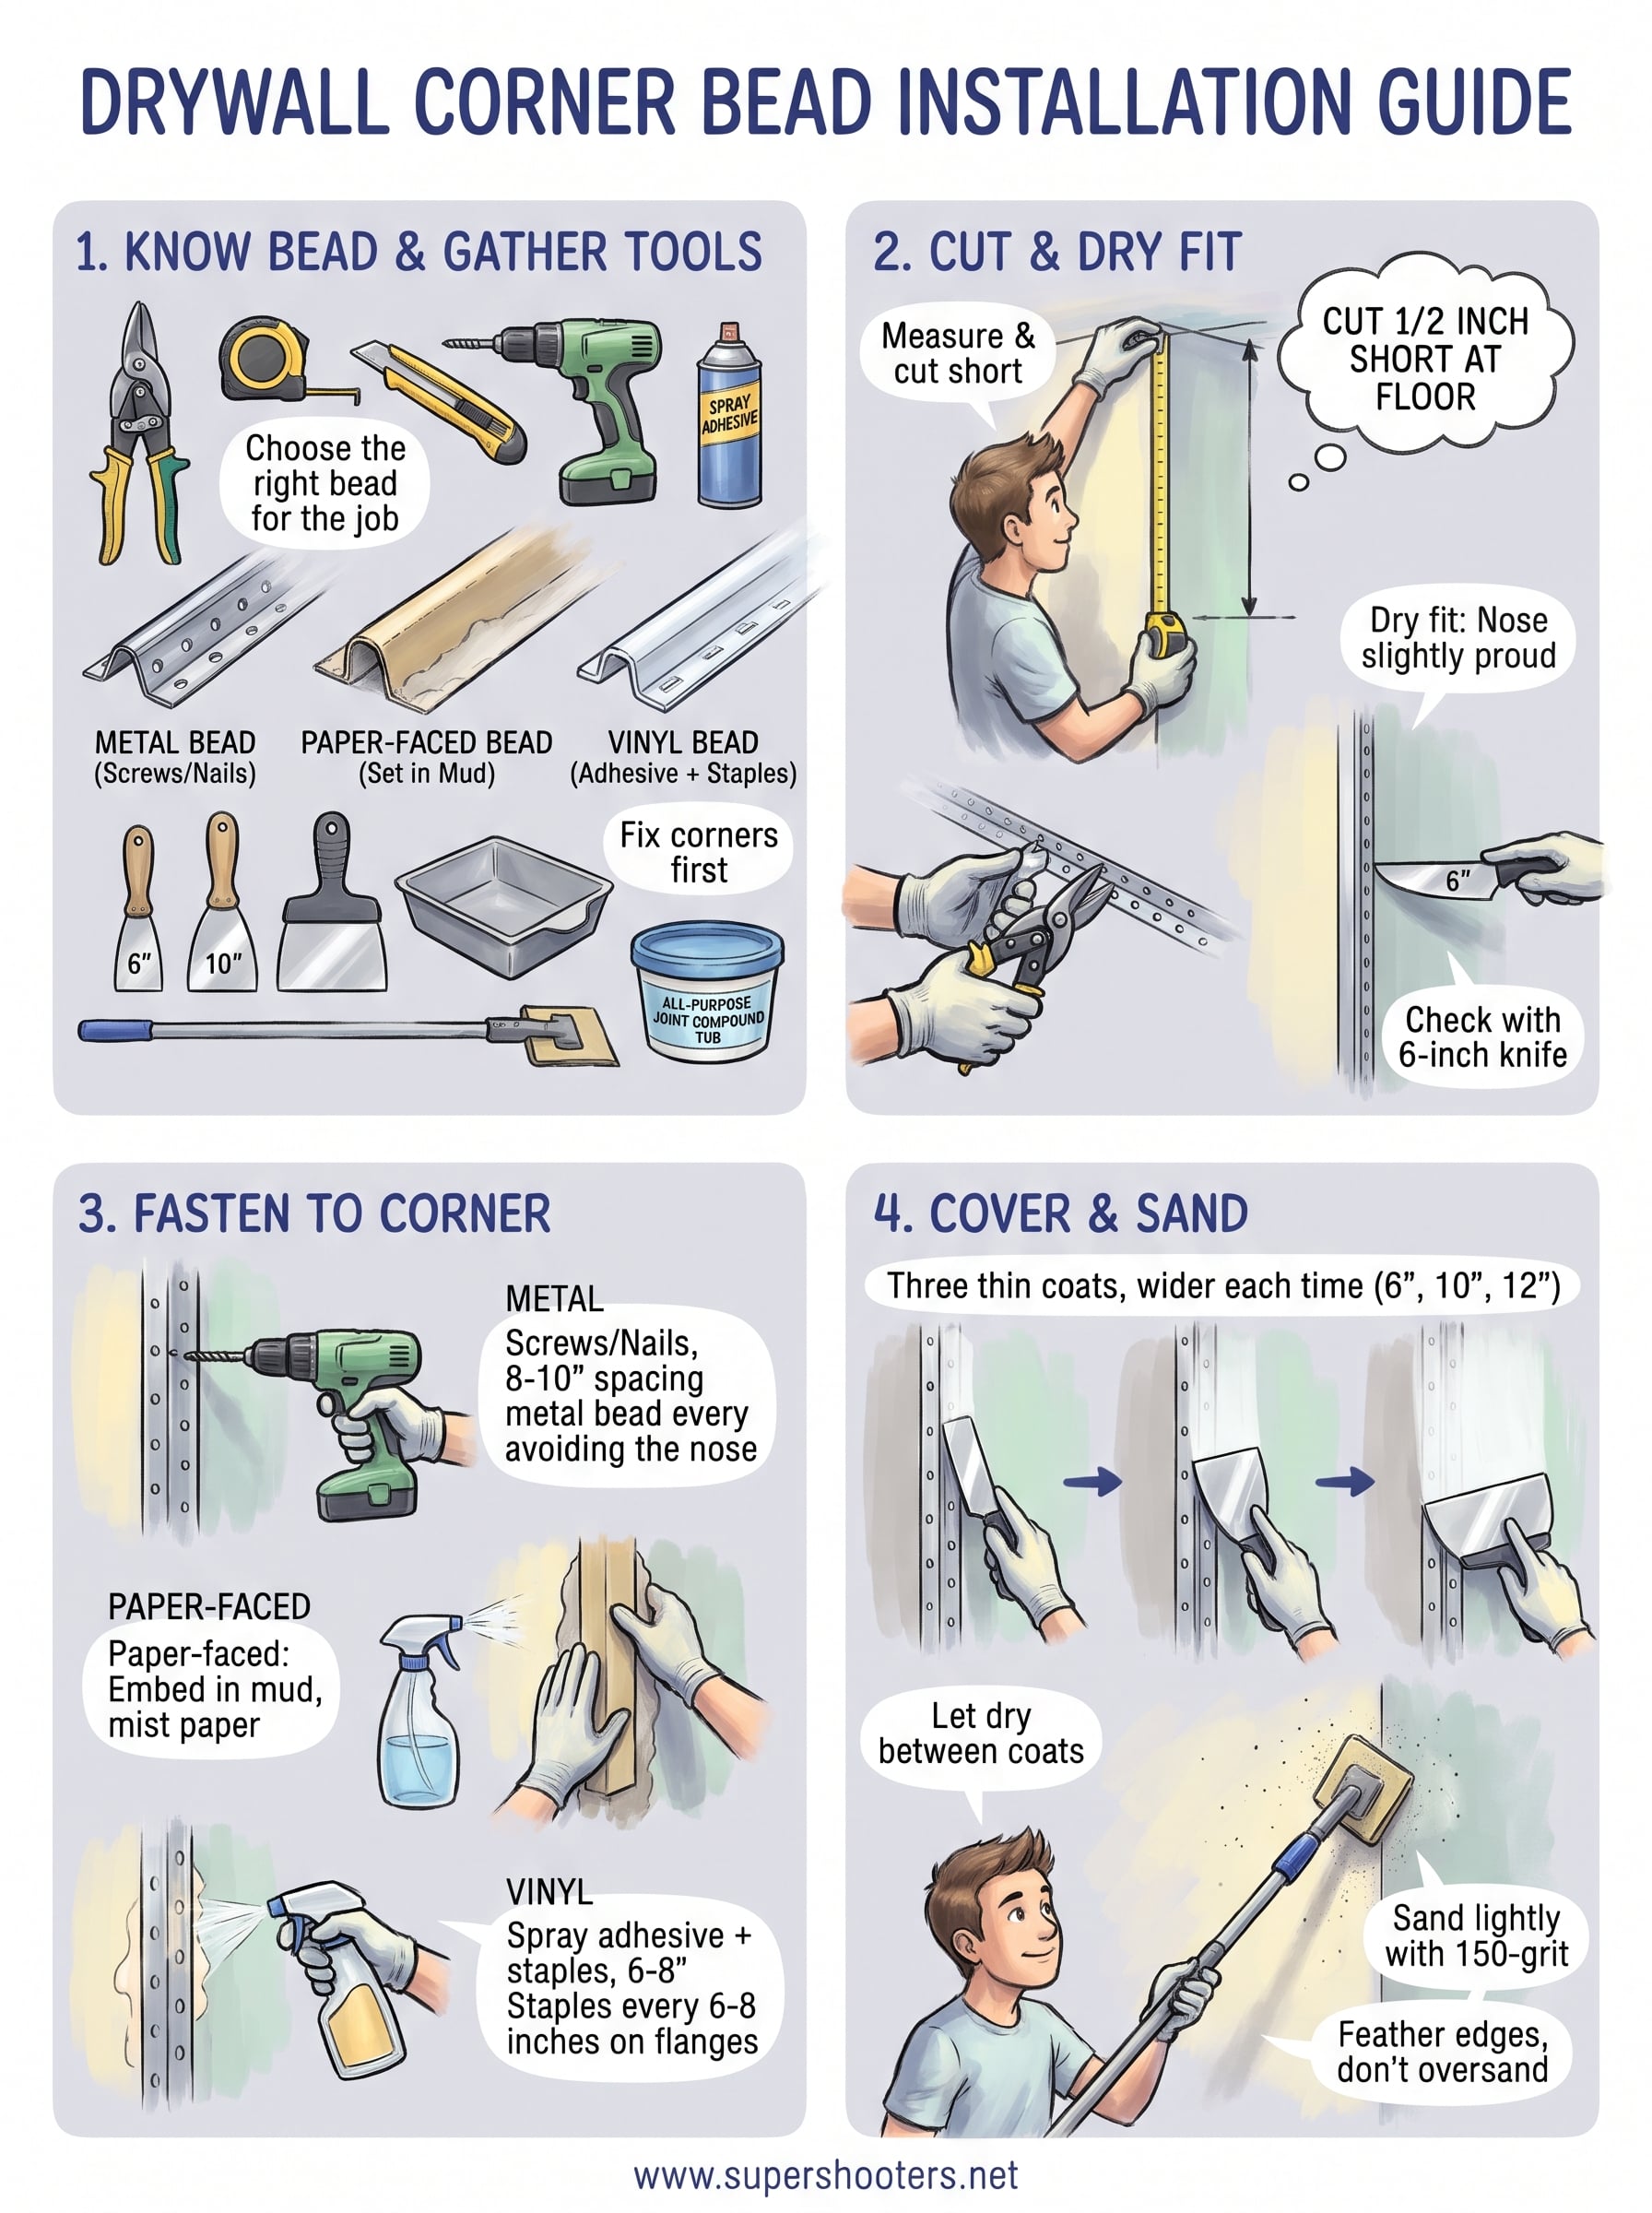
The best drywall corner bead installation method depends on the bead you buy. Cut the bead ½ inch short of the floor. Fasten metal bead with screws or nails every 8 to 10 inches, set paper-faced bead in a layer of all-purpose joint compound, and secure vinyl bead with spray adhesive plus staples every 6 to 8 inches. Then cover it with three thin coats of compound , each one wider than the last, and sand lightly.
Corners are where drywall work shows its flaws. A bead that sits crooked, has a fastener poking through, or is buried under one thick pass of mud will crack, chip, or show a wavy line once the wall is painted. Most of those failures come from a few skipped steps, not from a lack of skill.
This guide takes you through choosing the bead, cutting and fitting it, fastening it, applying compound, and fixing problems. Along the way it answers the usual questions: whether to nail or screw, whether you need tape over the bead, and whether to put mud behind it. We install and finish drywall in homes across the Sacramento Valley, so the steps below are the ones that hold up on real corners.
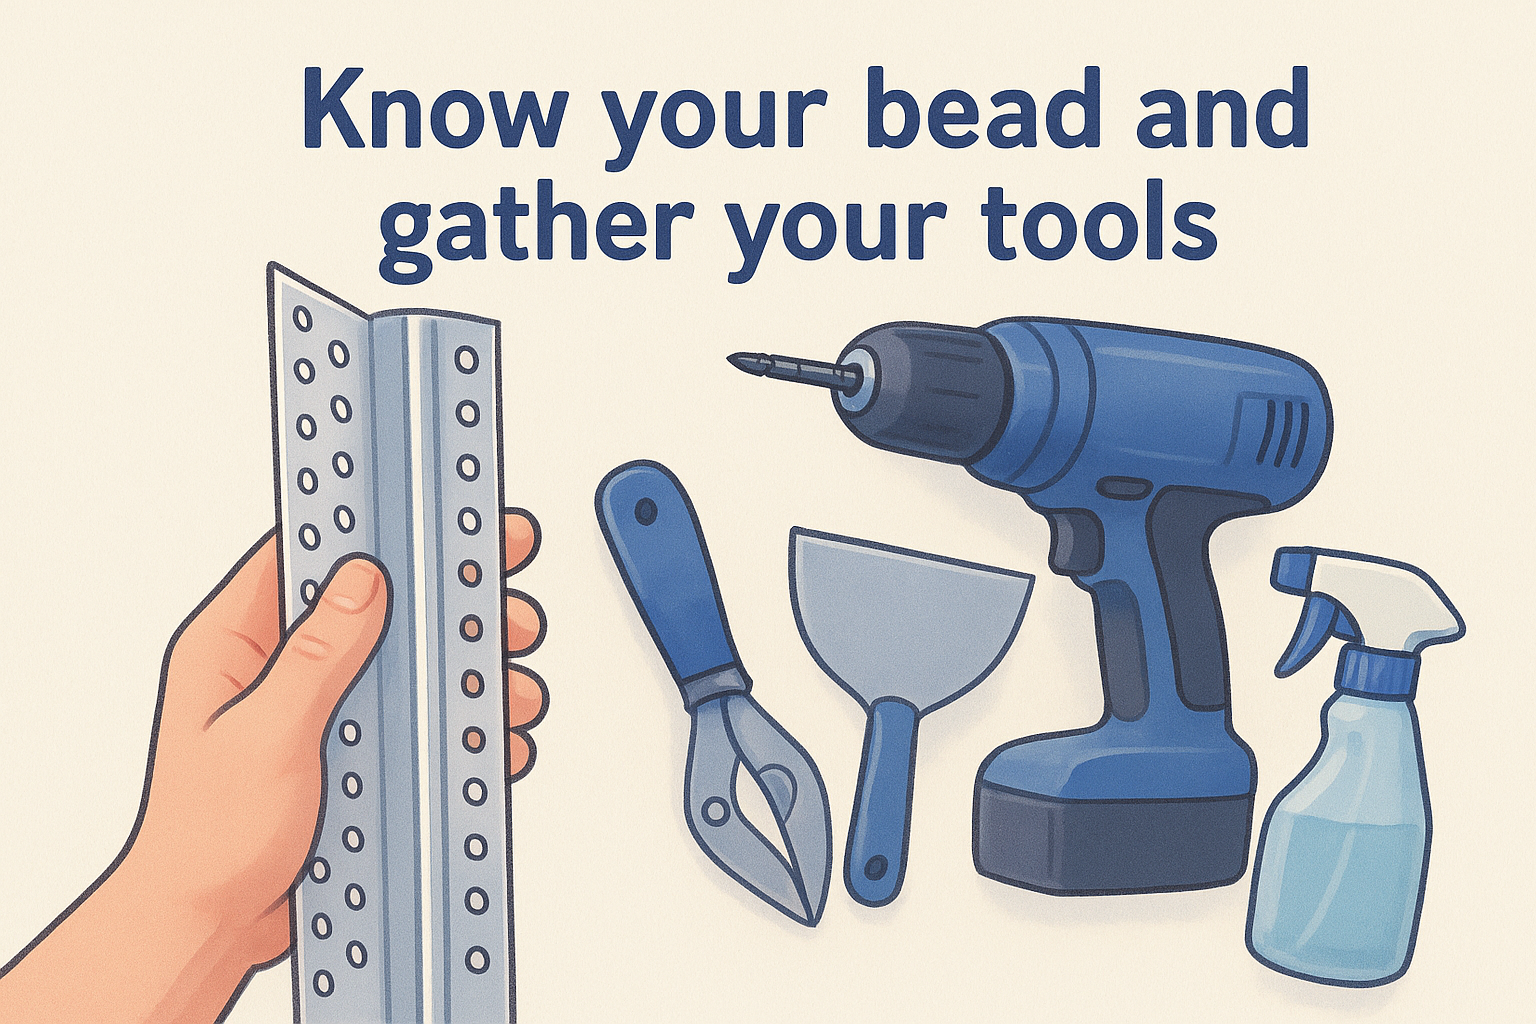
Know your bead and gather your tools
Corner bead protects outside corners , the ones that stick out into a room, and you choose between three types. The right one depends on the corner and how you want to attach it. Inside corners do not take bead. Those get paper tape and compound.
Which bead fits your job
| Bead type | How it attaches | Best for | Watch out for |
|---|---|---|---|
| Metal | Screws, nails, or staples through the flanges | Sharp, rigid corners and fast work | Fasteners can telegraph through thin coats, and unfeathered edges can crack |
| Paper-faced | Embedded in a layer of all-purpose compound | Crack-resistant corners with a smooth transition into the wall | Needs wet mud, and sanding through the paper ruins it |
| Vinyl | Spray adhesive plus staples | Flexible profiles, bullnose, and slightly uneven corners | It shifts and lifts if held by staples alone |
If you are a first-timer, paper-faced bead is the most forgiving . If you want the crisp look of metal and already own a screw gun, metal works well.
Tools and prep
Gather these before you start:
- Tape measure and a 4-foot level or straightedge
- Tin snips (a utility knife also cuts vinyl)
- Screw gun with drywall screws, or a stapler with ½-inch staples
- Spray adhesive (vinyl) or a spray bottle of water (paper-faced)
- 6-inch, 10-inch, and 12-inch taping knives and a mud pan
- All-purpose joint compound, 150-grit sandpaper, and a pole sander
Check the corner itself before you cut anything. Set any proud screws below the surface, trim loose paper, and make sure both sheets meet cleanly at the framing.
A bead can only be as straight as the corner underneath it, so fix the corner first.
Step 1. Cut and dry fit the bead
Measure each corner from ceiling to floor and cut the bead about ½ inch short at the floor. The baseboard will hide the gap. Cut metal and paper-faced bead with tin snips. Vinyl cuts cleanly with snips or a utility knife and a straightedge.
Dry fit every piece
Hold the bead against the corner without fasteners or mud. The nose should sit slightly proud of the drywall so there is room for compound. Slide a 6-inch knife flat against one side. You should see a small void between the blade and the nose. Check both sides in several spots. Sliding the bead in or out fixes most gaps.
Where two beads meet, such as at window returns, cut the ends square so they butt tightly. Mark the position with a pencil line so you can find it again once the glue or mud is down. A chalk line also helps keep long runs straight.
Dry fit first, because a bead is hard to move once it has set.
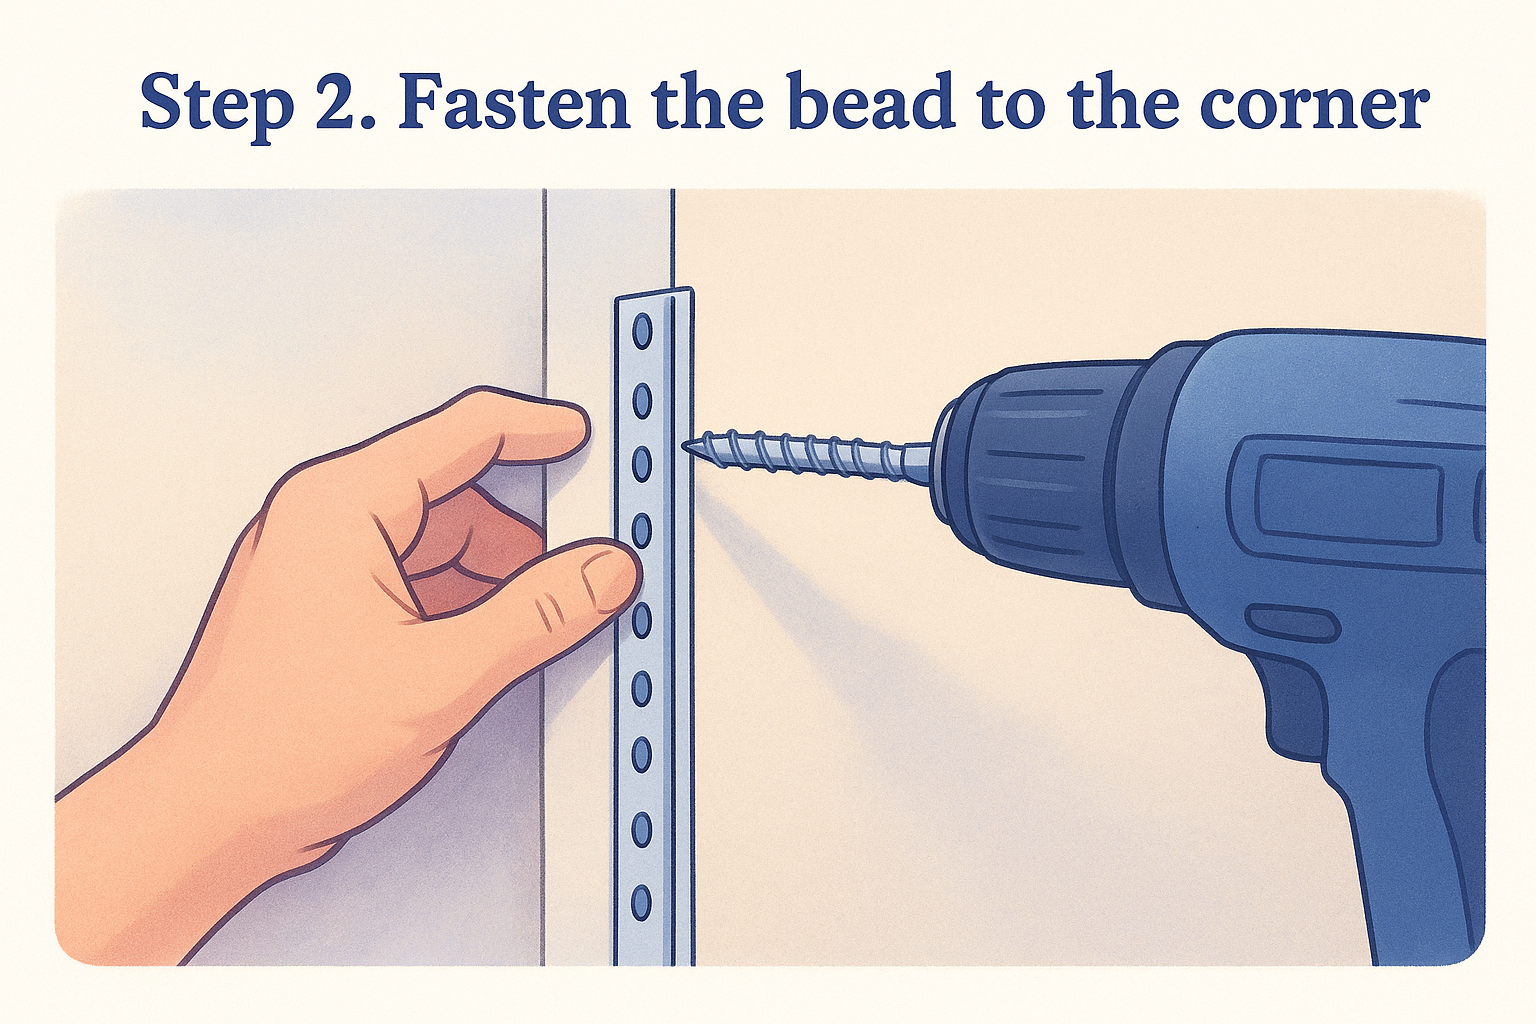
Step 2. Fasten the bead to the corner
Fasten the bead according to its type. Metal takes mechanical fasteners, paper-faced bead sets in compound, and vinyl needs adhesive backed by staples.
Metal bead: screws, nails, or staples
You can nail or screw it, and screws are the most common choice . Most installers use the same drywall screws they hung the board with, spaced every 8 to 10 inches along both flanges. Nails and staples also work. Drive each fastener just below the flange surface without bending the nose, or the corner will look wavy. Keep fasteners off the nose itself.
Paper-faced bead: set it in mud
Spread an even layer of all-purpose compound about ⅛ inch thick on both sides of the corner. Skip lightweight compound, which bonds poorly to the bead. Mist the paper lightly with water to improve adhesion and reduce wrinkles. Press the bead into the mud with your fingers, centering it. Then wipe off the excess with a 5- or 6-inch knife. Put a few staples where two beads meet so they do not slide apart.
Vinyl bead: adhesive plus staples
Spray adhesive on the bead flanges and the drywall, then press the bead into place with even pressure. Staple every 6 to 8 inches on both legs with ½-inch staples, and tap down any staple legs that stick up. Adhesive keeps the flange flat between staples, which stapling alone cannot do.
Match the method to the bead: screws for metal, mud for paper-faced, adhesive plus staples for vinyl.
Step 3. Cover the bead with joint compound
Apply three thin coats of joint compound , each one wider than the one before, letting each dry fully. Paper-faced bead already has its embedding coat, so it needs only two more.
Build up the coats
Ride the knife on the drywall surface and the bead nose to fill the flange. Do not overload the nose. Scrape off ridges before the next coat. Premixed all-purpose compound usually needs overnight to dry.
| Coat | Typical knife width | Goal |
|---|---|---|
| 1 (embed) | 6 inches | Fill the flanges and cover fasteners |
| 2 | 8 to 10 inches | Widen the repair and fill low spots |
| 3 | 10 to 12 inches | Feather the edges into the wall |
For paper-faced bead, scrape excess mud from the corner before it hardens . Scraping dried compound can tear the paper.
Tape and mud questions
You do not need drywall tape over a properly covered metal or vinyl bead. A paper-faced bead already has the tape built in. What prevents cracks is a wide, well-feathered finish. Mud behind the bead is required for paper-faced and composite beads, which are designed to be embedded. It is optional for metal. Vinyl uses adhesive instead.
Wide, thin, feathered coats prevent cracks better than one thick coat.
Step 4. Sand the corner and fix problems
Sand with 150-grit paper on a pole sander , just enough to blend the compound into the wall and knock down high spots. Run your hand down the corner, then look along it with a flashlight held flat to the wall. Shadows show what you missed. Prime before painting.
Common problems and fixes
| Problem | Likely cause | Fix |
|---|---|---|
| Fasteners showing | Not set below the surface | Set them deeper, then recoat |
| Hairline crack along the edge | Edges not feathered, or hollow spots under the flange | Scrape loose compound and recoat wider |
| Wavy corner | Bead not seated evenly or a bent nose | Tap or press it flat before the mud sets |
| Wrinkled paper | Bead not misted or mud too thin | Press it down and add a thin coat |
| Fuzzy paper | Sanded through the compound | Cover with a thin coat and resand |
If you sand through to paper, stop, cover the spot with a thin layer of compound , and resand once it dries.
Sand to blend the corner, not to shape it.
Finishing strong at the corners
Good corner bead work comes down to a straight dry fit, the fastening method that suits the bead, and thin, wide coats of compound sanded lightly. Skip any one of those and the corner tells on you after paint.
If you have a whole house of corners, a new addition, or a remodel where straight, clean lines matter more than a weekend of practice, our drywall installation service covers new construction and remodeling. We are a licensed contractor with over 30 years of experience, and we offer free quotes in Sacramento and surrounding areas.