Share this article

August 3, 2026

How to Repair a Hole in Drywall: Step-by-Step Guide

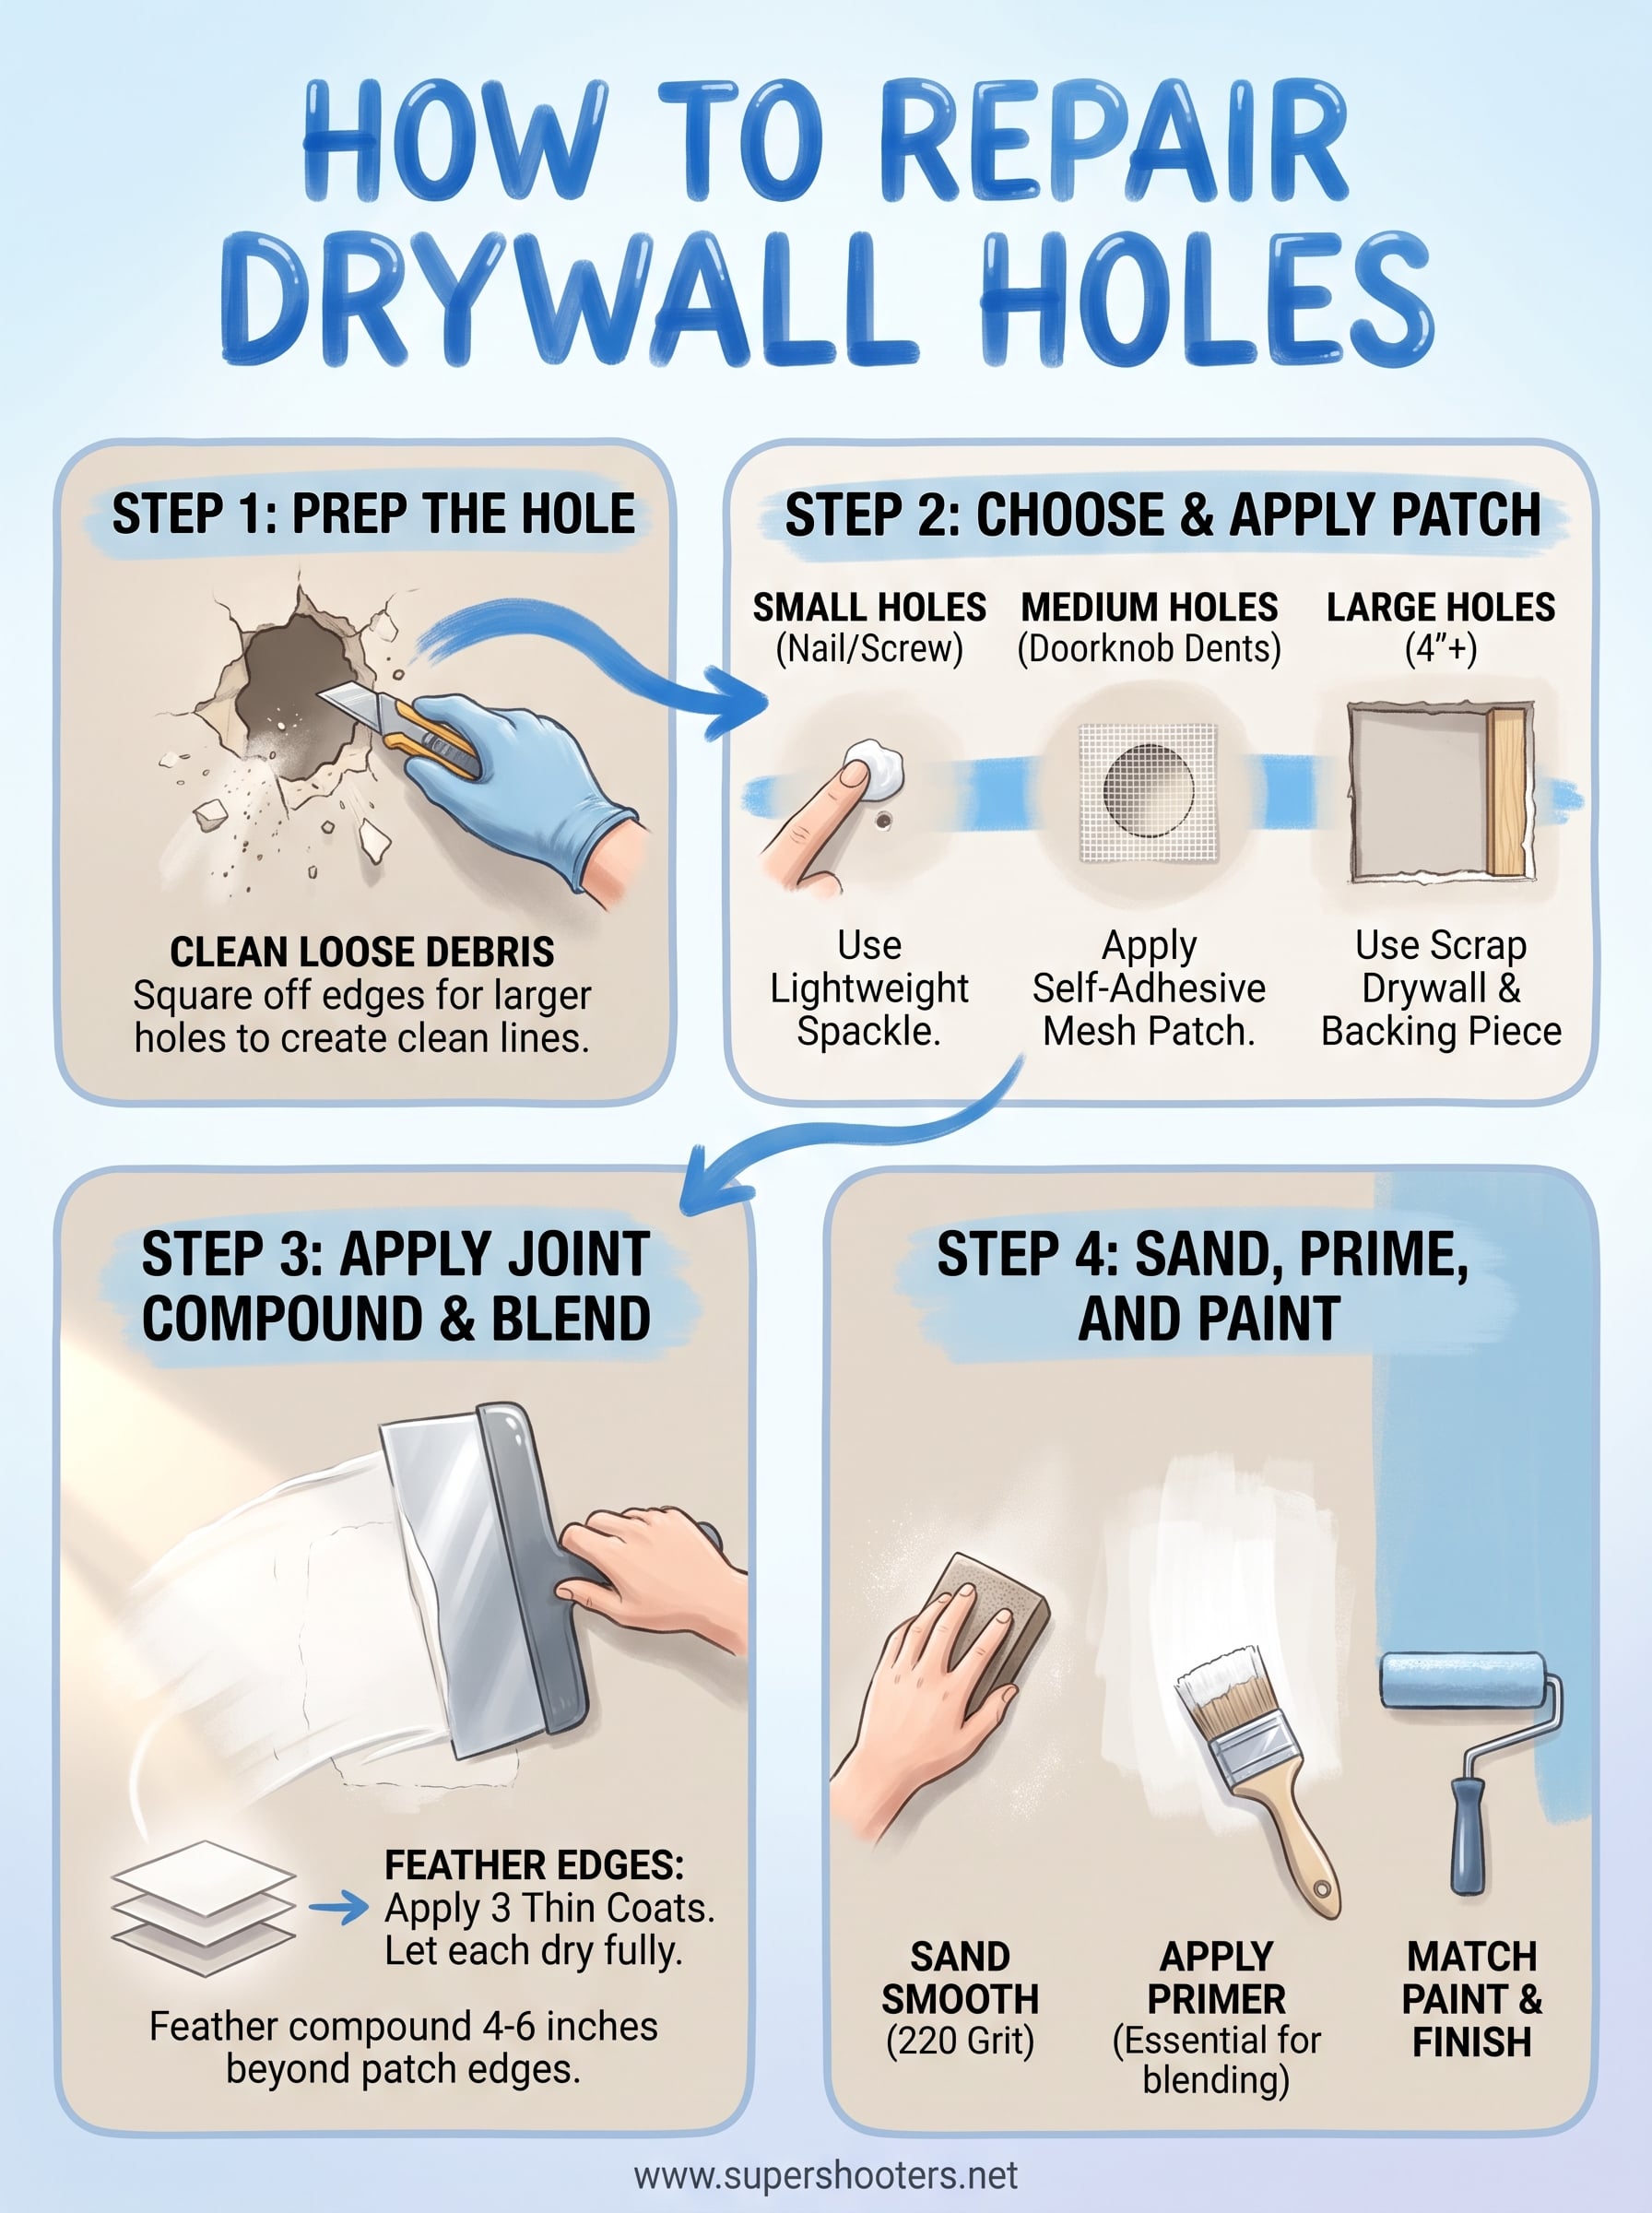
A doorknob dent, a moving mishap, a curious kid with a toy hammer. However it happened, you're now staring at a hole in your wall and wondering if you need to call a professional. Learning how to repair a hole in drywall is easier than most homeowners expect, and the method you use just depends on the size of the damage.

If you're asking how do I repair drywall myself, the short answer is: small nail holes need spackle, fist-sized dents need a self-adhesive patch, and larger holes need a drywall patch cut to fit and secured with joint compound. Each approach uses basic tools you likely already own, and none require ripping out the whole panel.

This guide walks you through every size of hole, from pinholes to holes big enough to fit your arm through, with the exact steps, materials, and drying times for each. And if you get partway through and decide the wall needs more than a patch job, or you're dealing with cracks from settling or water damage, our crew at Super Shooters has handled Sacramento Valley walls for over 30 years and is a call away.

Before you start: tools, materials, and hole types

Grabbing the right supplies before you start saves you a second trip to the hardware store halfway through the job. Every drywall repair, whether it's a nail hole or a doorknob-sized crater, calls for a utility knife , a putty knife or two (a 4-inch and a 6-inch cover most jobs), sandpaper in the 120 to 220 grit range, and a drop cloth to catch dust. Beyond that, what you buy depends entirely on the size of the hole you're patching.

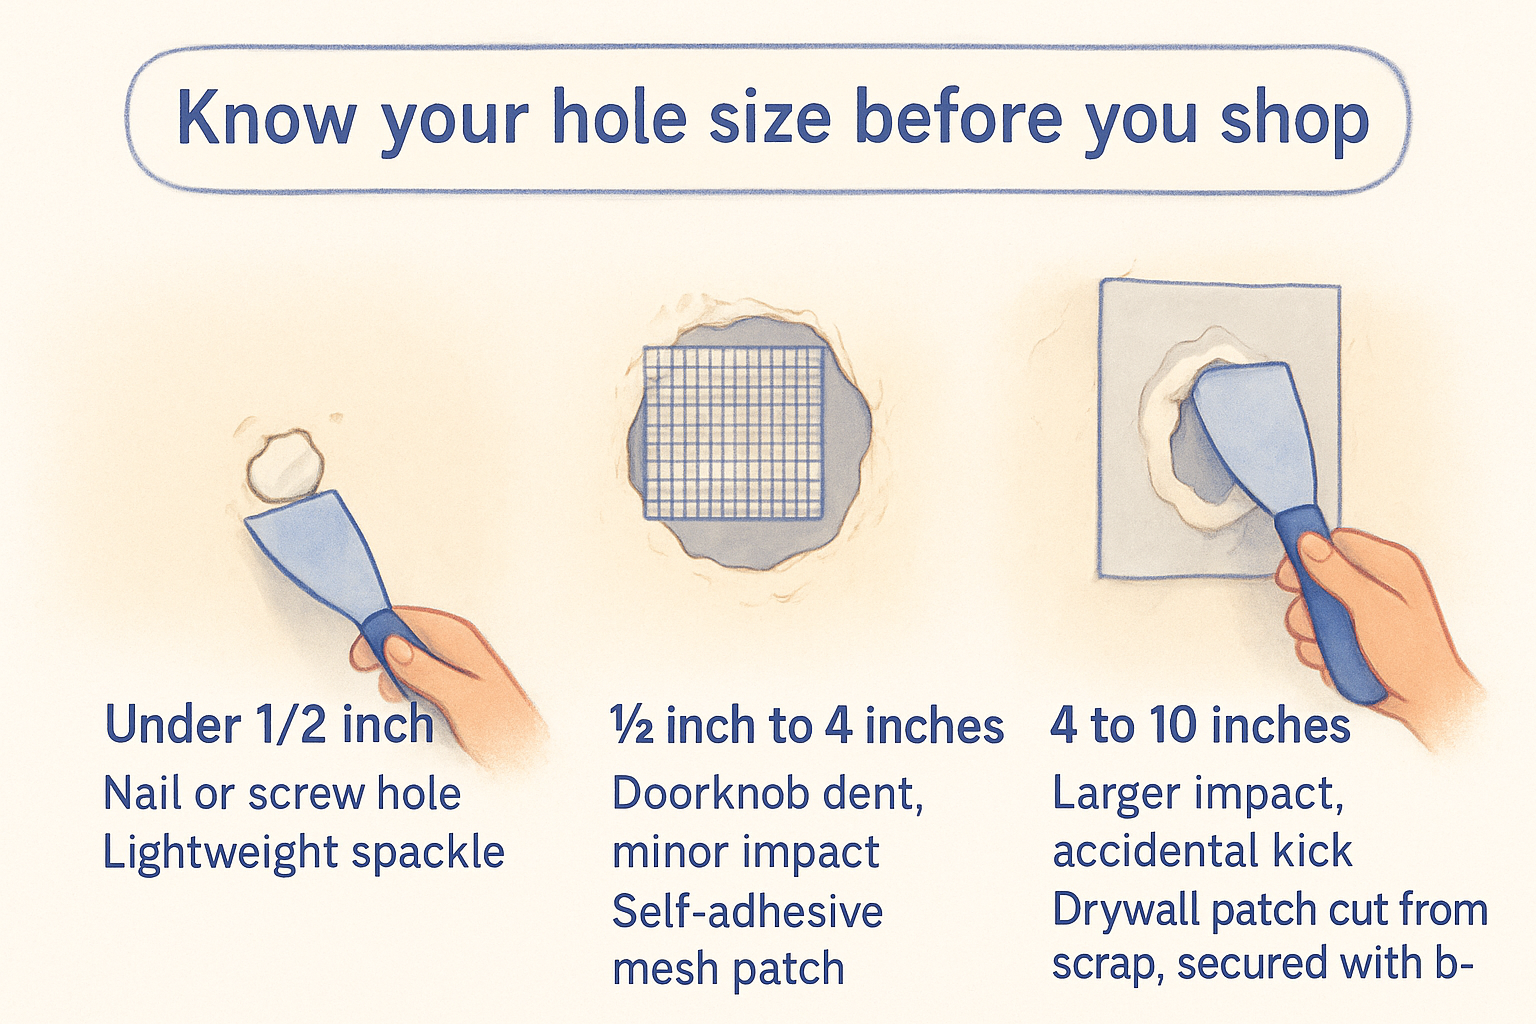
Know your hole size before you shop

Sorting the damage into a category is the single most useful thing you can do before buying anything. A pinhole from a picture hook needs nothing more than a dab of spackle, while a hole from a doorknob punching through drywall needs a patch with some rigidity behind it. Guessing wrong means buying a self-adhesive mesh patch for a hole too big to support it, and watching the repair crack within a month.

Match the patch to the hole size, not the other way around, or you'll be repairing the repair.

Hole Size Typical Cause Repair Method
Under 1/2 inch Nail or screw hole Lightweight spackle
1/2 inch to 4 inches Doorknob dent, minor impact Self-adhesive mesh patch
4 to 10 inches Larger impact, accidental kick Drywall patch cut from scrap, secured with backing
Over 10 inches Water damage, major structural hit Full section replacement, professional help recommended

Build your materials list

Stocking up correctly means fewer surprises once the compound is already drying on your wall. Here's what to have on hand depending on your repair size:

  • Lightweight spackle (small holes)
  • Self-adhesive mesh patch (medium holes)
  • Scrap drywall and wood or drywall backing strips (large holes)
  • Joint compound (all-purpose or lightweight)
  • Drywall tape (paper or mesh)
  • 150 and 220 grit sanding sponge
  • Primer and matching paint
  • Painter's tape and a sanding pole for ceiling work

Homes built before the 1980s sometimes have textured or acoustic ceilings that complicate repairs, and older walls can hide surprises once you cut into them. If your project turns up anything unexpected, like crumbling plaster or a musty smell suggesting water damage behind the drywall, it's worth pausing before you patch over a bigger problem.

Step 1. Prep the hole for repair

Good prep decides whether your patch lasts five years or five weeks. Before you touch any compound, you need a clean, stable edge to work with, because joint compound won't bond to loose paper facing or crumbling gypsum. Skip this step and you'll see cracks creeping back within a month, no matter how carefully you sanded later.

A patch is only as strong as the edge it's stuck to, so never skip the prep work to save five minutes.

Clear away loose debris

Start by knocking away any crumbling drywall around the hole with your utility knife, working outward until you hit solid material. Brush out dust and loose paper facing with a dry cloth, then vacuum the area so nothing interferes with adhesion. For nail holes, this step takes seconds. For larger impact damage, take your time here since leftover debris under a patch creates a bump you'll never sand flat.

Square off larger holes

Holes bigger than a few inches repair more cleanly when you square off the edges first. Use a drywall saw or utility knife to cut the opening into a neat rectangle or square, which gives you straight lines to match a cut patch against. This matters most once you move to Step 2 and need a scrap piece that fits snugly:

  • Trace a square or rectangle around the damaged area with a pencil
  • Cut along the lines with a drywall saw
  • Remove the cut piece and check the opening for loose paper edges
  • Sand rough cut edges smooth before fitting your patch

Step 2. Choose and apply the right patch

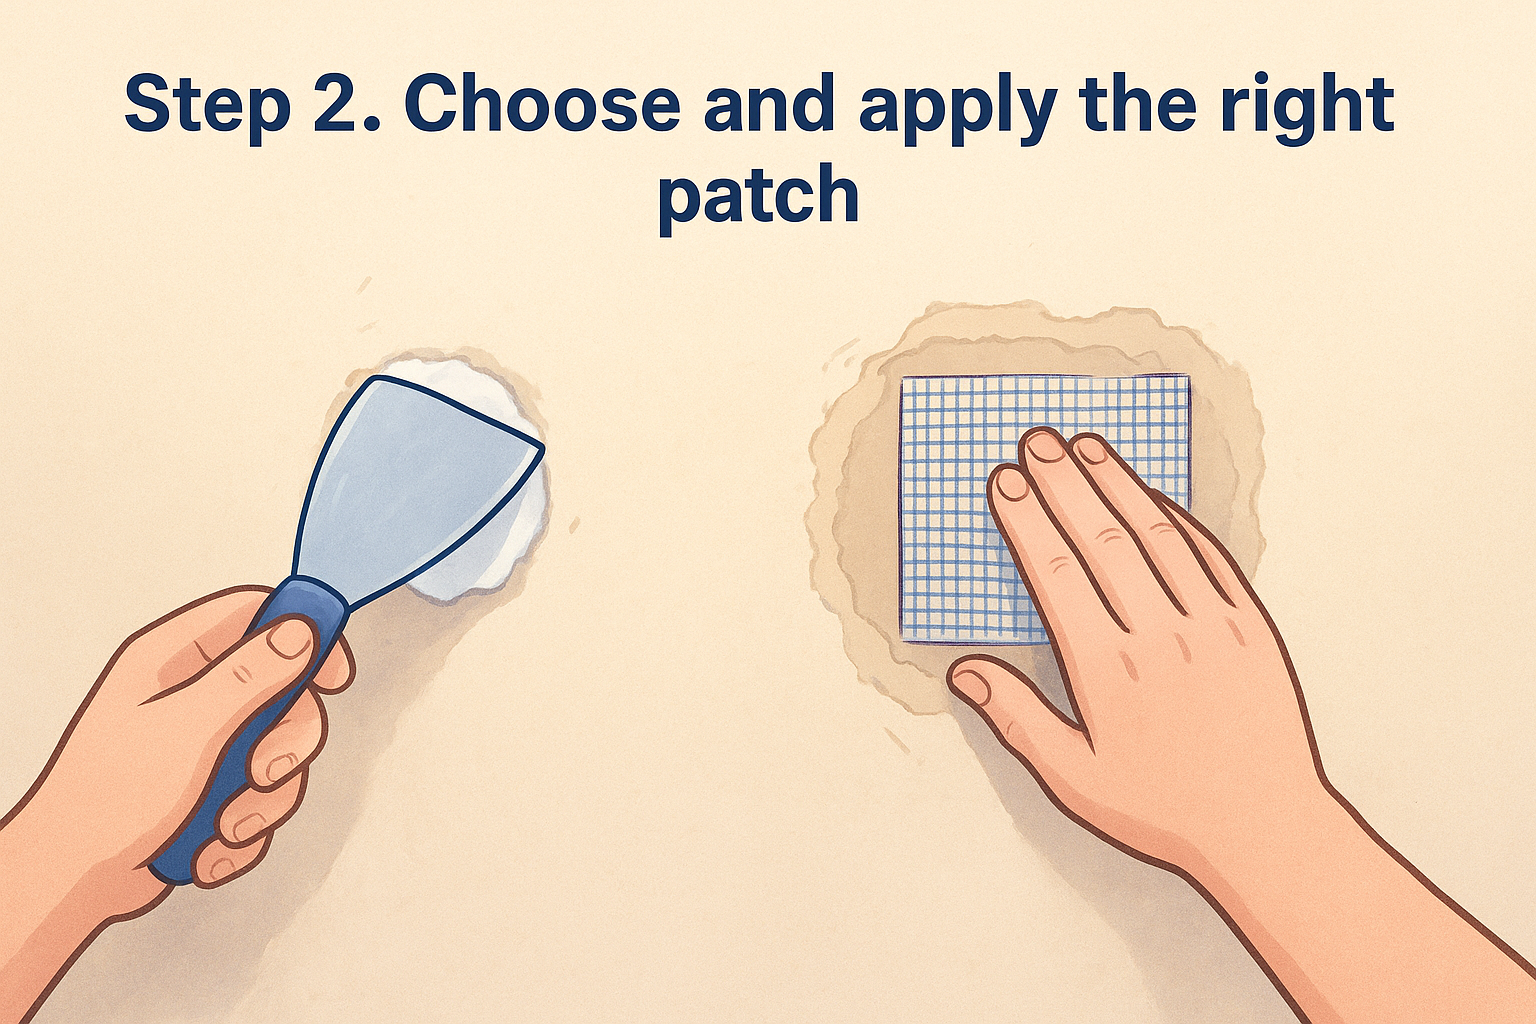
Now that the hole is squared off and cleaned out, it's time to match the patch type to the category you identified earlier. Small nail holes just need a dab of lightweight spackle pressed in with a putty knife and smoothed flush. Medium holes, from a doorknob dent up to about four inches, call for a self-adhesive mesh patch centered directly over the opening and pressed firmly so the adhesive grips the surrounding wall.

The patch material matters less than getting it flush and fully bonded to the wall around it.

Small and medium holes

Applying spackle or mesh patch takes only a few minutes once your prep work is done. Follow this order for a clean result:

  • Press the patch or spackle into the hole, working from the center outward
  • Smooth the edges flat with a 6-inch putty knife
  • Feather the compound past the patch edge by an inch or two
  • Let it dry fully before checking for gaps or air bubbles

Gaps left under a mesh patch will telegraph through paint later, so check now while it's easy to fix.

Large holes need a backing piece

Holes bigger than four inches need something solid behind the drywall to hold the patch in place. Cut a scrap drywall piece slightly larger than the squared opening, then attach a backing strip, either a thin wood furring strip or a commercial drywall clip, so it spans behind the hole and grabs the intact wall on both sides. Screw the backing through the existing wall first, then set your cut patch into the opening and screw it into the backing until it sits flush with the surrounding surface. This combination gives the joint compound something rigid to bond over in the next step.

Step 3. Apply joint compound and blend the edges

Once your patch or backing sits flush with the wall, joint compound is what turns a visible seam into invisible drywall. Load your 6-inch putty knife with joint compound and cover the patch completely, pressing firmly so the compound fills any gaps at the edges. This first coat doesn't need to look pretty, it just needs full coverage over the repair.

Tape the seams on larger patches

For patches with cut edges or backing strips, embed drywall tape into a thin layer of wet compound before it sets. Press the tape flat with your putty knife, working out air bubbles and excess compound as you go. Paper tape gives a slightly stronger bond, while mesh tape is easier to handle for beginners since it's self-adhesive and won't slide around while you work.

Feather in three thin coats

One thick coat of compound almost always cracks or shows a ridge once painted. Instead, apply compound in three thin layers, letting each dry fully (usually 24 hours) before sanding lightly and adding the next. Widen the coverage area with each pass, feathering the edges 4 to 6 inches beyond the patch so the transition from repair to wall disappears.

Three thin coats beat one thick coat every time, since thin layers dry flat and thick ones crack.

  • Coat 1: cover the patch and embed tape
  • Coat 2: feather 2 to 3 inches beyond coat 1
  • Coat 3: feather another 2 to 3 inches, focusing on smoothness

Check your work under a raking light (a work lamp held at an angle) between coats. Shadows reveal ridges or low spots your eyes miss under normal room lighting, and catching them now saves sanding headaches later.

Step 4. Sand, prime, and paint the patch

Once your final coat of joint compound has dried completely, usually overnight, it's time to turn that rough patch into an invisible one. Sanding, priming, and painting each play a specific role, and rushing any of them is how patches end up visible under certain lighting for years. Take your time here since this is the step everyone actually sees.

Sand in stages

Grab your 220 grit sanding sponge and work in circular motions, checking often with your hand rather than your eyes since fingertips catch ridges eyes miss. Wipe away dust with a damp cloth between passes so you can see your progress clearly. For ceiling repairs, a sanding pole saves your neck and shoulders and gives you better control over pressure.

Prime before you paint

Skipping primer is the most common mistake DIYers make on an otherwise perfect patch. Joint compound absorbs paint differently than the surrounding wall, and without primer , the repair shows up as a dull or shiny patch, sometimes called "flashing," even after two coats of paint. A single coat of drywall primer seals the compound and gives your paint an even surface to grip.

Skip the primer and even perfect sanding won't hide the patch once the paint goes on.

Match the paint and finish

Once primer is dry, apply your matching paint in the same sheen as the rest of the wall, since a satin patch on a flat wall reflects light differently and stands out immediately. Feather the paint beyond the primed area with a roller for the most seamless blend, and let it cure fully before judging the result under different lighting.

A wall you'd never know was damaged

Follow these four steps and that dent, ding, or fist-sized hole becomes a non-issue. Prep, patch, coat, and finish in that order, and you'll get a wall surface that hides the damage completely, not just from three feet away but under raking light too. Most homeowners can knock out a small or medium repair in an afternoon, including drying time between coats.

But some jobs go beyond a weekend patch. If you cut into the wall and found water staining, sagging drywall, or a musty smell, or if the hole is bigger than your arm can comfortably span, that's a sign to bring in help before the damage spreads further. Larger repairs and full section replacements are exactly where a professional crew earns its keep. When you'd rather hand it off than spend your Saturday sanding, reach out to Super Shooters for professional drywall repair and patching across the Sacramento Valley.

Recent Posts

By cinchweb August 3, 2026
Learn how to patch screw hole in drywall step-by-step—from filling and sanding to priming and painting for a seamless, professional finish.
By cinchweb August 1, 2026
Learn what causes cracks in walls, from Sacramento Valley soil shifts to foundation issues, plus how to spot cosmetic vs. structural damage.
By cinchweb July 31, 2026
Learn how to install drywall in a bathroom: pick moisture-resistant panels, hang and tape correctly, then finish with mold-resistant paint.
By cinchweb July 31, 2026
How common is asbestos in popcorn ceilings by build year? See risk timelines, testing steps, and safe Sacramento removal options.
Illustration of taping drywall seams with joint compound, tape, and knives for a smooth wall.
By cinchweb July 29, 2026
Learn how to tape drywall seams step-by-step, from mudding tools to feathering coats, plus when to call Sacramento Valley pros instead.
Illustration of a masked worker testing a popcorn ceiling for asbestos with a spray bottle and sample bags
By cinchweb July 28, 2026
Learn how to test popcorn ceiling for asbestos safely with a step-by-step DIY sampling guide, plus when to call Sacramento Valley abatement pros.
Crack wall repair illustration with hand applying compound to a wall crack, tools and supplies nearby.
By cinchweb July 27, 2026
Learn a lasting crack wall repair method: tools, V-groove prep, mesh tape, setting compound, and when to call a Sacramento Valley pro.
Illustration of a hand applying joint compound to a drywall crack with tape and a sanding block, titled “How to Use Joint Compound to Repair Drywall”
By cinchweb July 26, 2026
Learn how to use joint compound to repair drywall with step-by-step prep, taping, sanding, and priming tips for a seamless, professional finish.
Illustration of a person repairing ceiling drywall with tools and a bucket, titled “Ceiling Drywall Repair: A Step-by-Step Guide”
By cinchweb July 25, 2026
Learn step-by-step ceiling drywall repair: prep, patch, tape, texture & paint—plus when to call Super Shooters for Sacramento Valley jobs.
Show More