May 1, 2026
How To Patch Drywall: Fix Small, Medium, And Large Holes
A dent from a doorknob, a nail hole from a picture frame, or a fist-sized gap from a plumbing repair, drywall damage comes in all shapes and sizes. The good news: learning how to patch drywall is one of the more forgiving DIY skills you can pick up. With the right materials, a bit of patience, and a clear game plan, most homeowners can handle small to medium repairs without calling in a pro.
That said, not every hole is a weekend project. Larger damage, water-stained sections, or walls that need a seamless finish often require experience and proper technique to get right. At Super Shooters, we've completed over 10,000 drywall and ceiling projects across the Sacramento Valley in our 30+ years of business, so we know exactly where the line falls between a simple DIY fix and a job that benefits from professional hands .
This guide walks you through patching drywall step by step, covering everything from tiny nail holes to large openings. You'll learn which tools and materials you actually need, how to prep and finish each repair, and when it makes sense to call in a drywall contractor instead. Let's get into it.
What you need before you start
Before you pick up a putty knife or open a bucket of compound, gather everything you need first. Running out of sandpaper mid-repair or discovering you're short on joint compound can turn a clean afternoon job into a two-day ordeal. Setting up properly also means you won't be tracking dust through the house or scrambling to protect your floors after you've already started cutting.
Tools you'll use
The right tools make learning how to patch drywall much easier than it looks. Most of what you need is inexpensive and reusable , so this is a one-time investment that pays off across multiple repairs. You don't need a full contractor's toolkit, but skimping on the basics leads to uneven seams and patches that show through paint.
Here's what to have on hand before you start:
- 4-inch and 6-inch putty knives for applying and feathering joint compound
- Sanding sponge or sandpaper in 120-grit and 220-grit
- Drill or screwdriver for driving drywall screws flush or slightly below the surface
- Drywall saw or utility knife for cutting out damaged sections cleanly
- Drop cloth or painter's plastic to protect floors and furniture
- Primer and paint to match the existing wall finish
Using two knife sizes matters more than most beginners expect. A 4-inch knife builds the first layer, and the 6-inch feathers the edges so the patch blends into the surrounding wall.
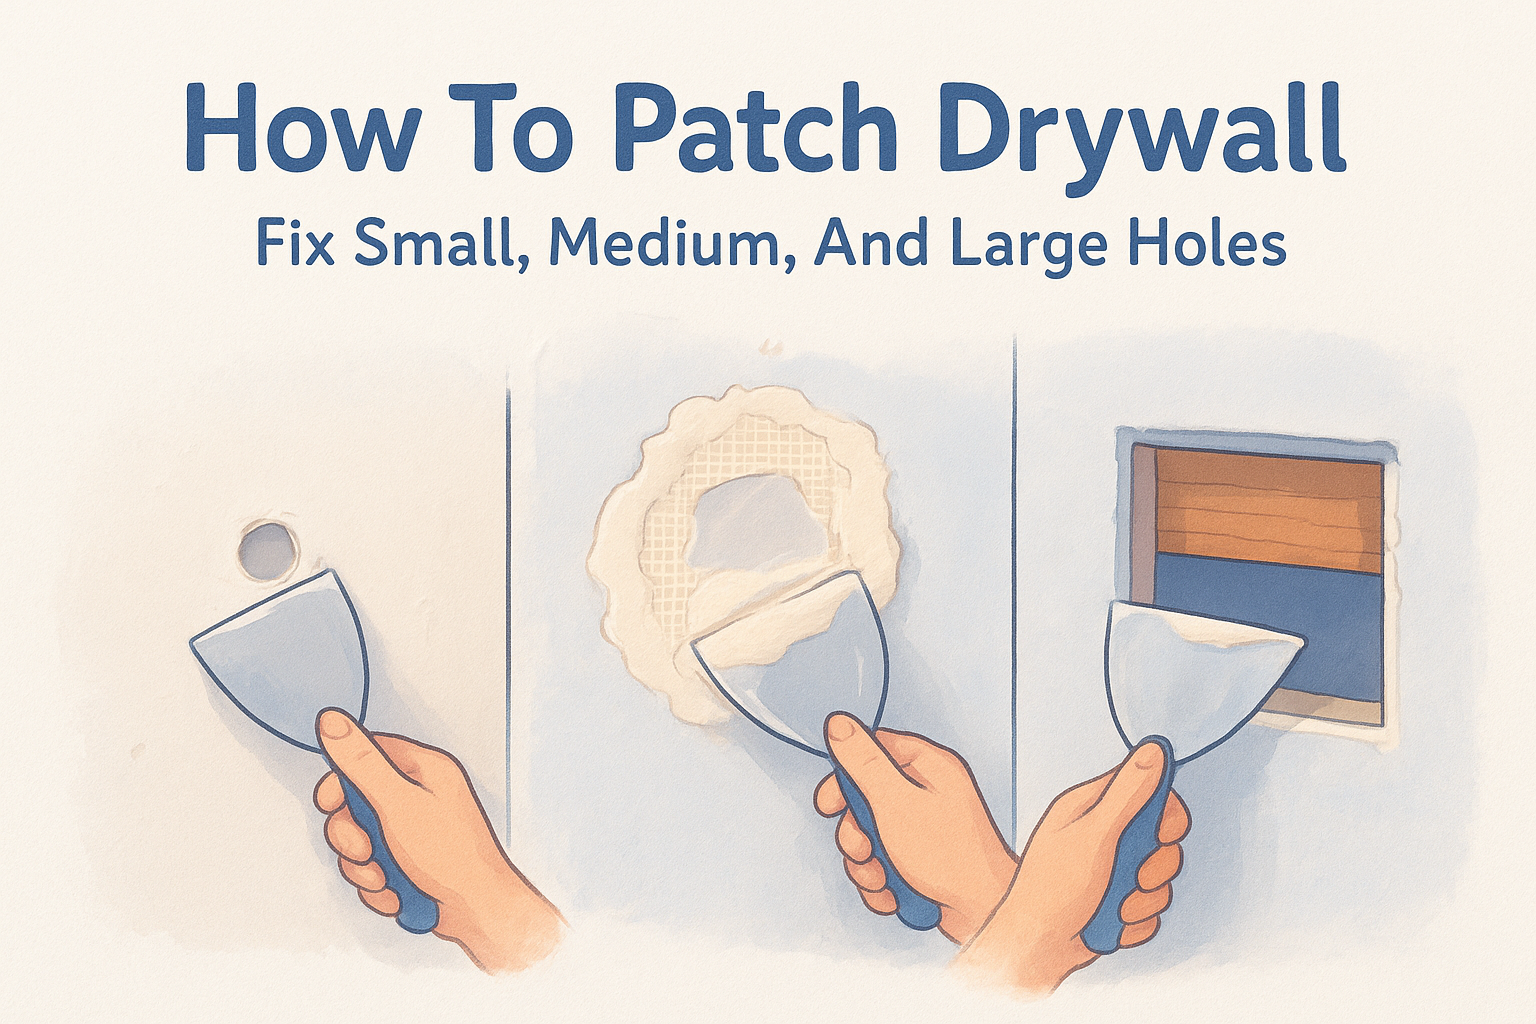
Materials by repair size
Not every repair calls for the same materials , and buying more than you need wastes money. Match your supplies to the scope and size of the damage before you head to the hardware store. A nail hole needs a small tub of lightweight spackling, while a large cutout needs drywall panels, screws, and backer support.
| Repair Size | Damage Type | Materials Needed |
|---|---|---|
| Small (under 1/2 inch) | Nail holes, dents | Lightweight spackling, putty knife |
| Medium (1/2 inch to 4 inches) | Cracks, small holes | Self-adhesive mesh tape, joint compound |
| Large (over 4 inches) | Impact holes, cutouts | Drywall panel or patch kit, backer board, drywall screws, mesh tape, joint compound |
For most repairs, pre-mixed all-purpose joint compound is your go-to material. It feathers well, dries overnight, and sands smooth without much effort. Pick up a small container unless you're tackling multiple large holes, since an opened tub dries out over time and loses its workability.
Step 1. Prep the area and inspect the wall
Good prep work separates a clean, invisible repair from one that bubbles or shows through paint six months later. Before you touch the damaged wall, take five minutes to assess the full scope of the problem. What looks like a small surface crack sometimes signals a deeper structural issue or water damage that needs attention before any patching begins.
Clear the space and protect surfaces
Move furniture at least three feet away from the wall you're working on. Drywall dust travels farther than most people expect, so cover nearby floors and any furniture you can't move with a drop cloth or painter's plastic . Tape the sheeting along the baseboard to keep cleanup manageable.
Before cutting or sanding, open a window or run a fan to ventilate the space. Keeping air moving prevents fine drywall dust from settling on furniture or other surfaces in the room.
Inspect the damage closely
Run your hand over the wall and press lightly around the damaged area to check for soft or spongy drywall. Soft spots mean moisture has gotten in , and patching over them without fixing the source will cause your repair to fail. If the surface feels solid, you're clear to continue with the how to patch drywall steps below .
If the wall feels soft or shows discoloration around the damage, find and fix the moisture source before you patch anything. Covering wet drywall traps moisture and leads to mold behind the wall.
Also look for loose or crumbling paper facing around the hole's edges. Trim any unstable material back with a utility knife so you're patching onto a firm, clean edge.
Step 2. Fix nail holes, dents, and popped screws
Small damage like nail holes, dents, and popped screws are the most common repairs homeowners tackle when figuring out how to patch drywall . These fixes take less than an hour and require minimal materials, but the finishing steps matter. Rushing the sanding or skipping primer will leave a visible patch under your paint, even if the compound looks smooth when it's wet.
Nail holes and surface dents
Apply a small amount of lightweight spackling directly into the hole using your 4-inch putty knife. Press the compound in firmly, then drag the blade flat across the surface to scrape off any excess. The goal is to fill the hole flush with the surrounding wall , not build it up above the surface.
Let the spackling dry completely before sanding. Most lightweight compounds turn bright white when ready, so if you still see gray or darker patches, wait another hour before touching it.
Once dry, sand the area lightly with 120-grit sandpaper using a circular motion, then finish with 220-grit for a smooth result. Wipe away dust with a damp cloth before priming.
Popped screws
A popped screw means the fastener has pushed outward through the drywall face. Drive a new drywall screw about two inches above and below the popped one to pull the panel back against the stud. Then drive the original screw back in so it sits just below the surface, creating a slight dimple.
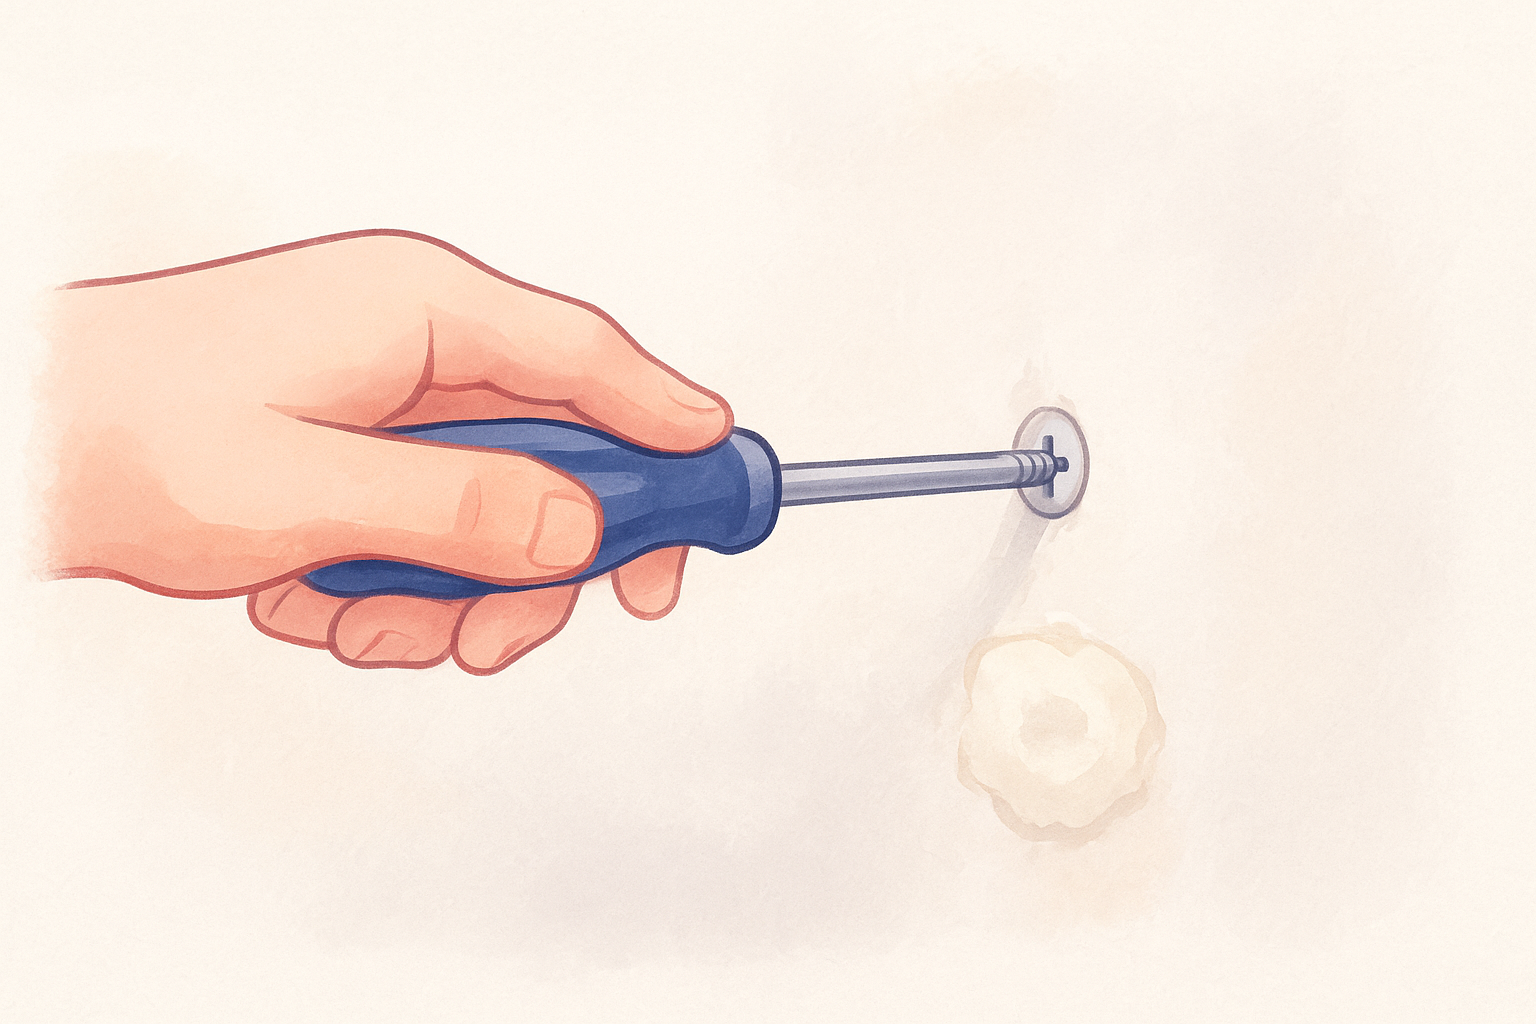
Cover each screw dimple with two thin coats of joint compound , letting the first coat dry fully before applying the second. Sand smooth and prime before painting.
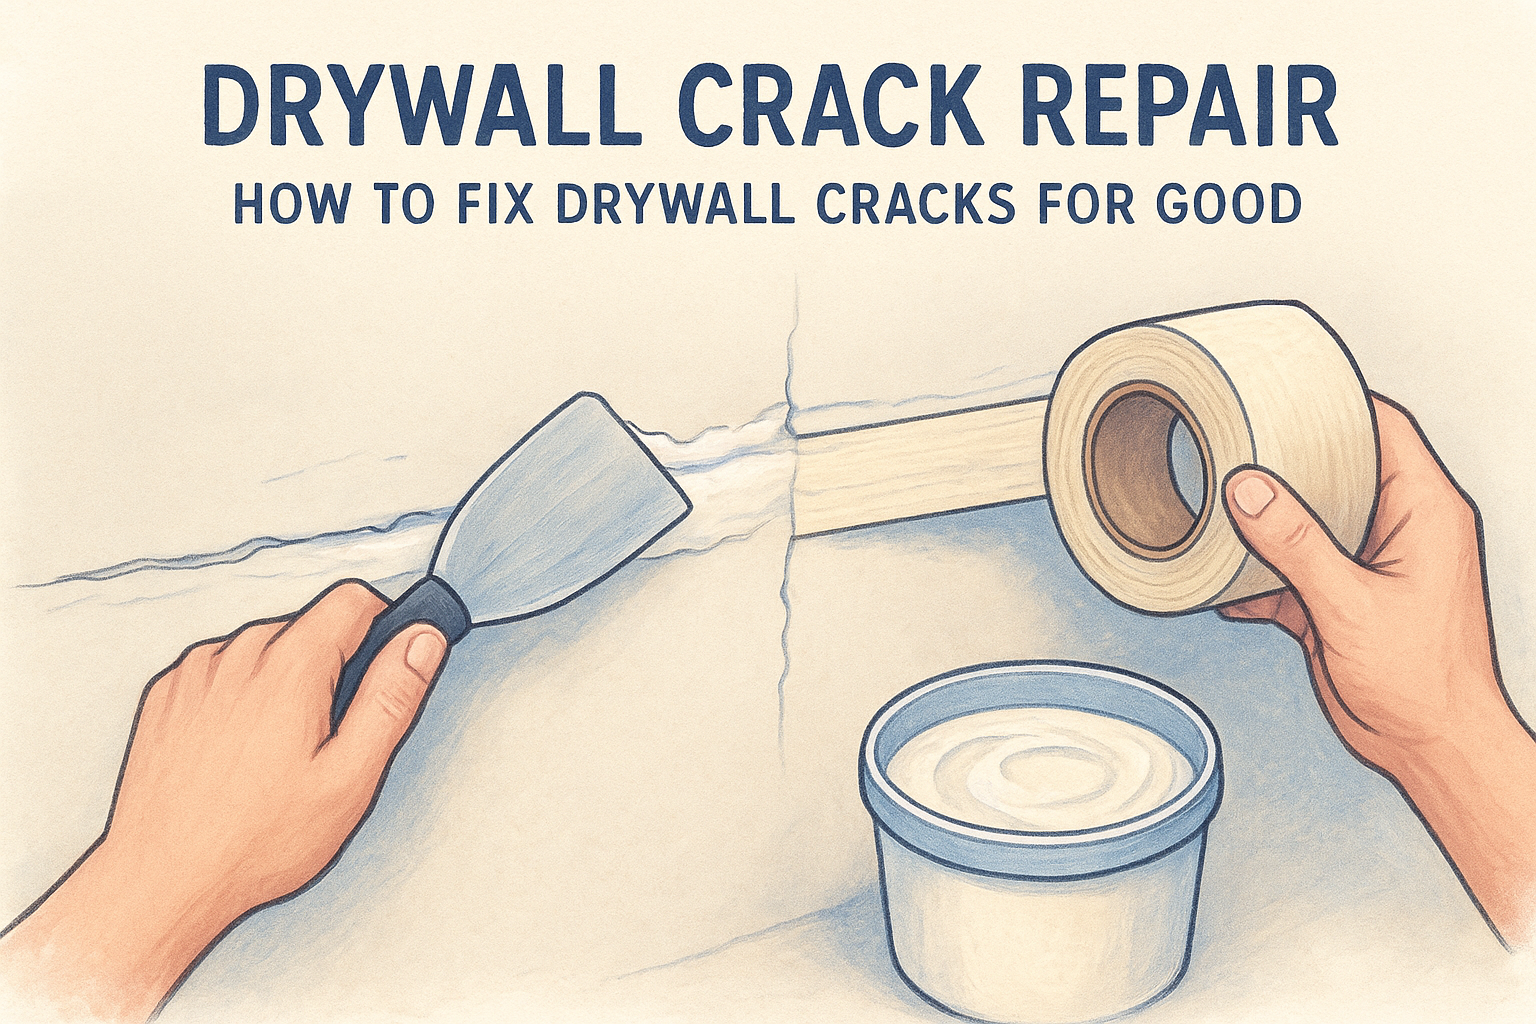
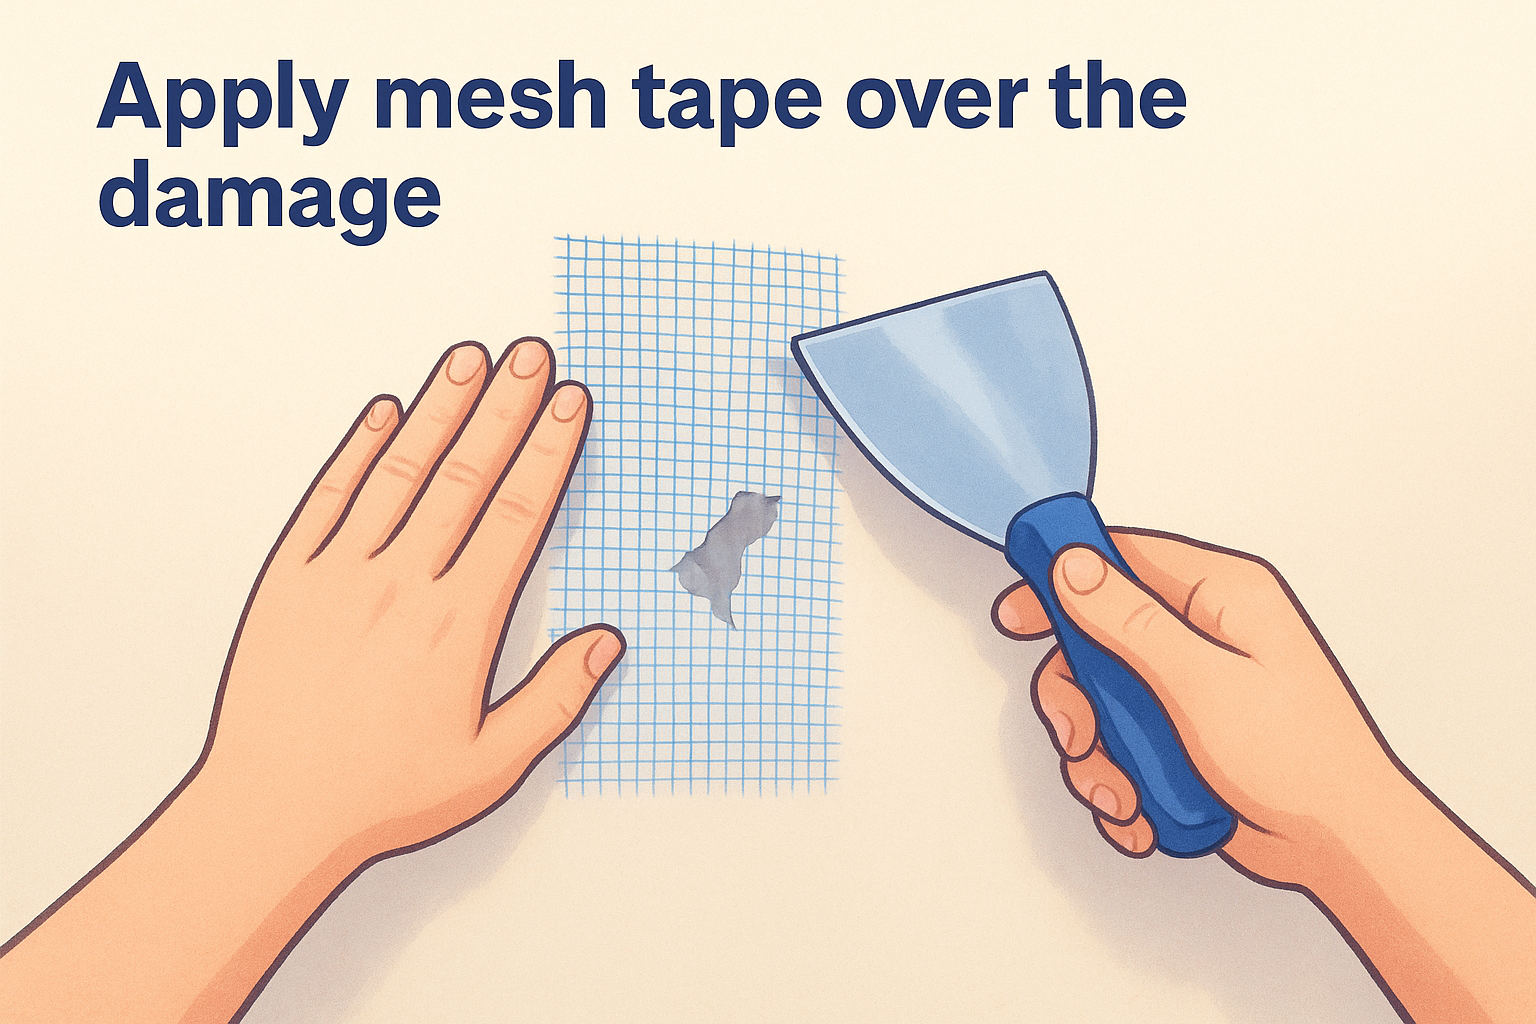
Step 3. Patch medium holes and cracks with tape
Medium-sized holes (roughly 1/2 inch to 4 inches) and cracks need more support than spackling alone can provide. Self-adhesive mesh tape bridges the gap and gives joint compound something solid to grip, preventing the patch from cracking or sinking as it dries. Skipping the tape on repairs this size is one of the most common mistakes people make when learning how to patch drywall .
Apply mesh tape over the damage
Cut a piece of self-adhesive mesh tape large enough to cover the hole or crack with at least 1/2 inch of overlap on all sides. Press it firmly onto the clean, dry wall surface so it lies completely flat with no bubbles or lifted edges. If you're covering a crack, run the tape along the full length of the crack, not just the widest point.
Mesh tape sticks best to a clean surface. If the wall face is dusty or greasy, wipe it down with a dry cloth before pressing the tape into place.
Layer joint compound in thin coats
Using your 6-inch putty knife , spread a thin, even layer of all-purpose joint compound over the mesh tape. Feather the edges outward several inches beyond the tape so the patch blends gradually into the surrounding wall rather than creating a visible raised border. This first coat will shrink as it dries, so don't try to build up the full thickness in a single pass.
Once the first coat dries completely (usually 8 to 12 hours ), apply a second coat with slightly wider feathering. Most medium repairs need two to three coats total before the surface is ready to sand. Knock down ridges between coats with 120-grit sandpaper, then finish with 220-grit on the final coat before you prime.
Step 4. Repair large holes and finish for paint
Large holes, anything over 4 inches , need a different approach than tape and compound alone. The drywall has no structural integrity left around the opening, so you need to create a solid backing before you can apply any patch material. Rushing past this step is why large repairs fail, so take the time to build the repair correctly from the start.
Cut a clean opening and add backing support
Use a drywall saw or utility knife to cut the damaged area into a clean rectangle or square. Straight, even edges make fitting your patch panel much easier and give the joint compound clean lines to follow.
Cut two pieces of 1x3 or 1x4 lumber slightly longer than the height of the opening. Slide each piece behind the wall so half of the wood sits behind the existing drywall on each side. Drive drywall screws through the existing wall into the wood on both sides to hold the backing in place. This gives you a firm surface to attach the patch panel to.
If your opening falls over a stud, you only need to add backing on one side since the stud itself supports the other edge of the patch.
Apply the patch panel and finish coats
Fit a drywall scrap or patch panel to the opening exactly, then screw it into the backing boards. Apply self-adhesive mesh tape over all four seams, then coat with three thin layers of all-purpose joint compound, feathering each coat wider than the last.
Once the final coat dries, sand with 120-grit then 220-grit sandpaper , prime the entire patched area, and you're ready to paint. This finishing sequence ties together everything you've learned about how to patch drywall , regardless of how large the original damage was.

A smooth wall is a weekend away
Most homeowners who learn how to patch drywall are surprised by how manageable the process actually is. Small holes take under an hour , medium repairs wrap up in a day with drying time, and even large cutouts follow a clear, repeatable process when you take it step by step. The biggest mistakes come from rushing the dry time between coats or skipping primer before paint, so build those steps into your plan and your results will look professional.
That said, some repairs go beyond what a Saturday afternoon can handle. Water damage, large sections of failing drywall, or a full room that needs fresh texture are jobs where experience and the right equipment make a real difference. If your project has grown past a few patches, the Sacramento Valley drywall experts at Super Shooters offer free in-home estimates with no upfront payment required until the work is done.
Recent Posts