May 14, 2026
How To Remove Wallpaper From Drywall Without Damaging It
If you've ever tried to peel back a corner of old wallpaper only to watch a chunk of drywall paper come with it, you already know why so many homeowners search for how to remove wallpaper from drywall the right way. It's one of those projects that looks simple until you're staring at a gouged, bubbled mess that costs more to fix than the wallpaper was worth. The good news: with the right approach, you can strip wallpaper cleanly and keep your drywall intact underneath.
At Super Shooters, we've handled wall repair, texturing, and drywall restoration across the Sacramento Valley for over 30 years and more than 10,000 completed projects . A significant number of those jobs started because a DIY wallpaper removal went sideways. We've seen every type of damage, torn face paper, soaked drywall, adhesive that won't quit, and we know exactly what causes it and how to prevent it .
This guide walks you through the full process step by step, from identifying your wallpaper type to prepping the wall for whatever finish comes next. Whether you plan to tackle the job yourself or want to know when it's time to call a pro , you'll have everything you need to make the right call and protect your walls along the way.
Before you start: identify wallpaper and drywall
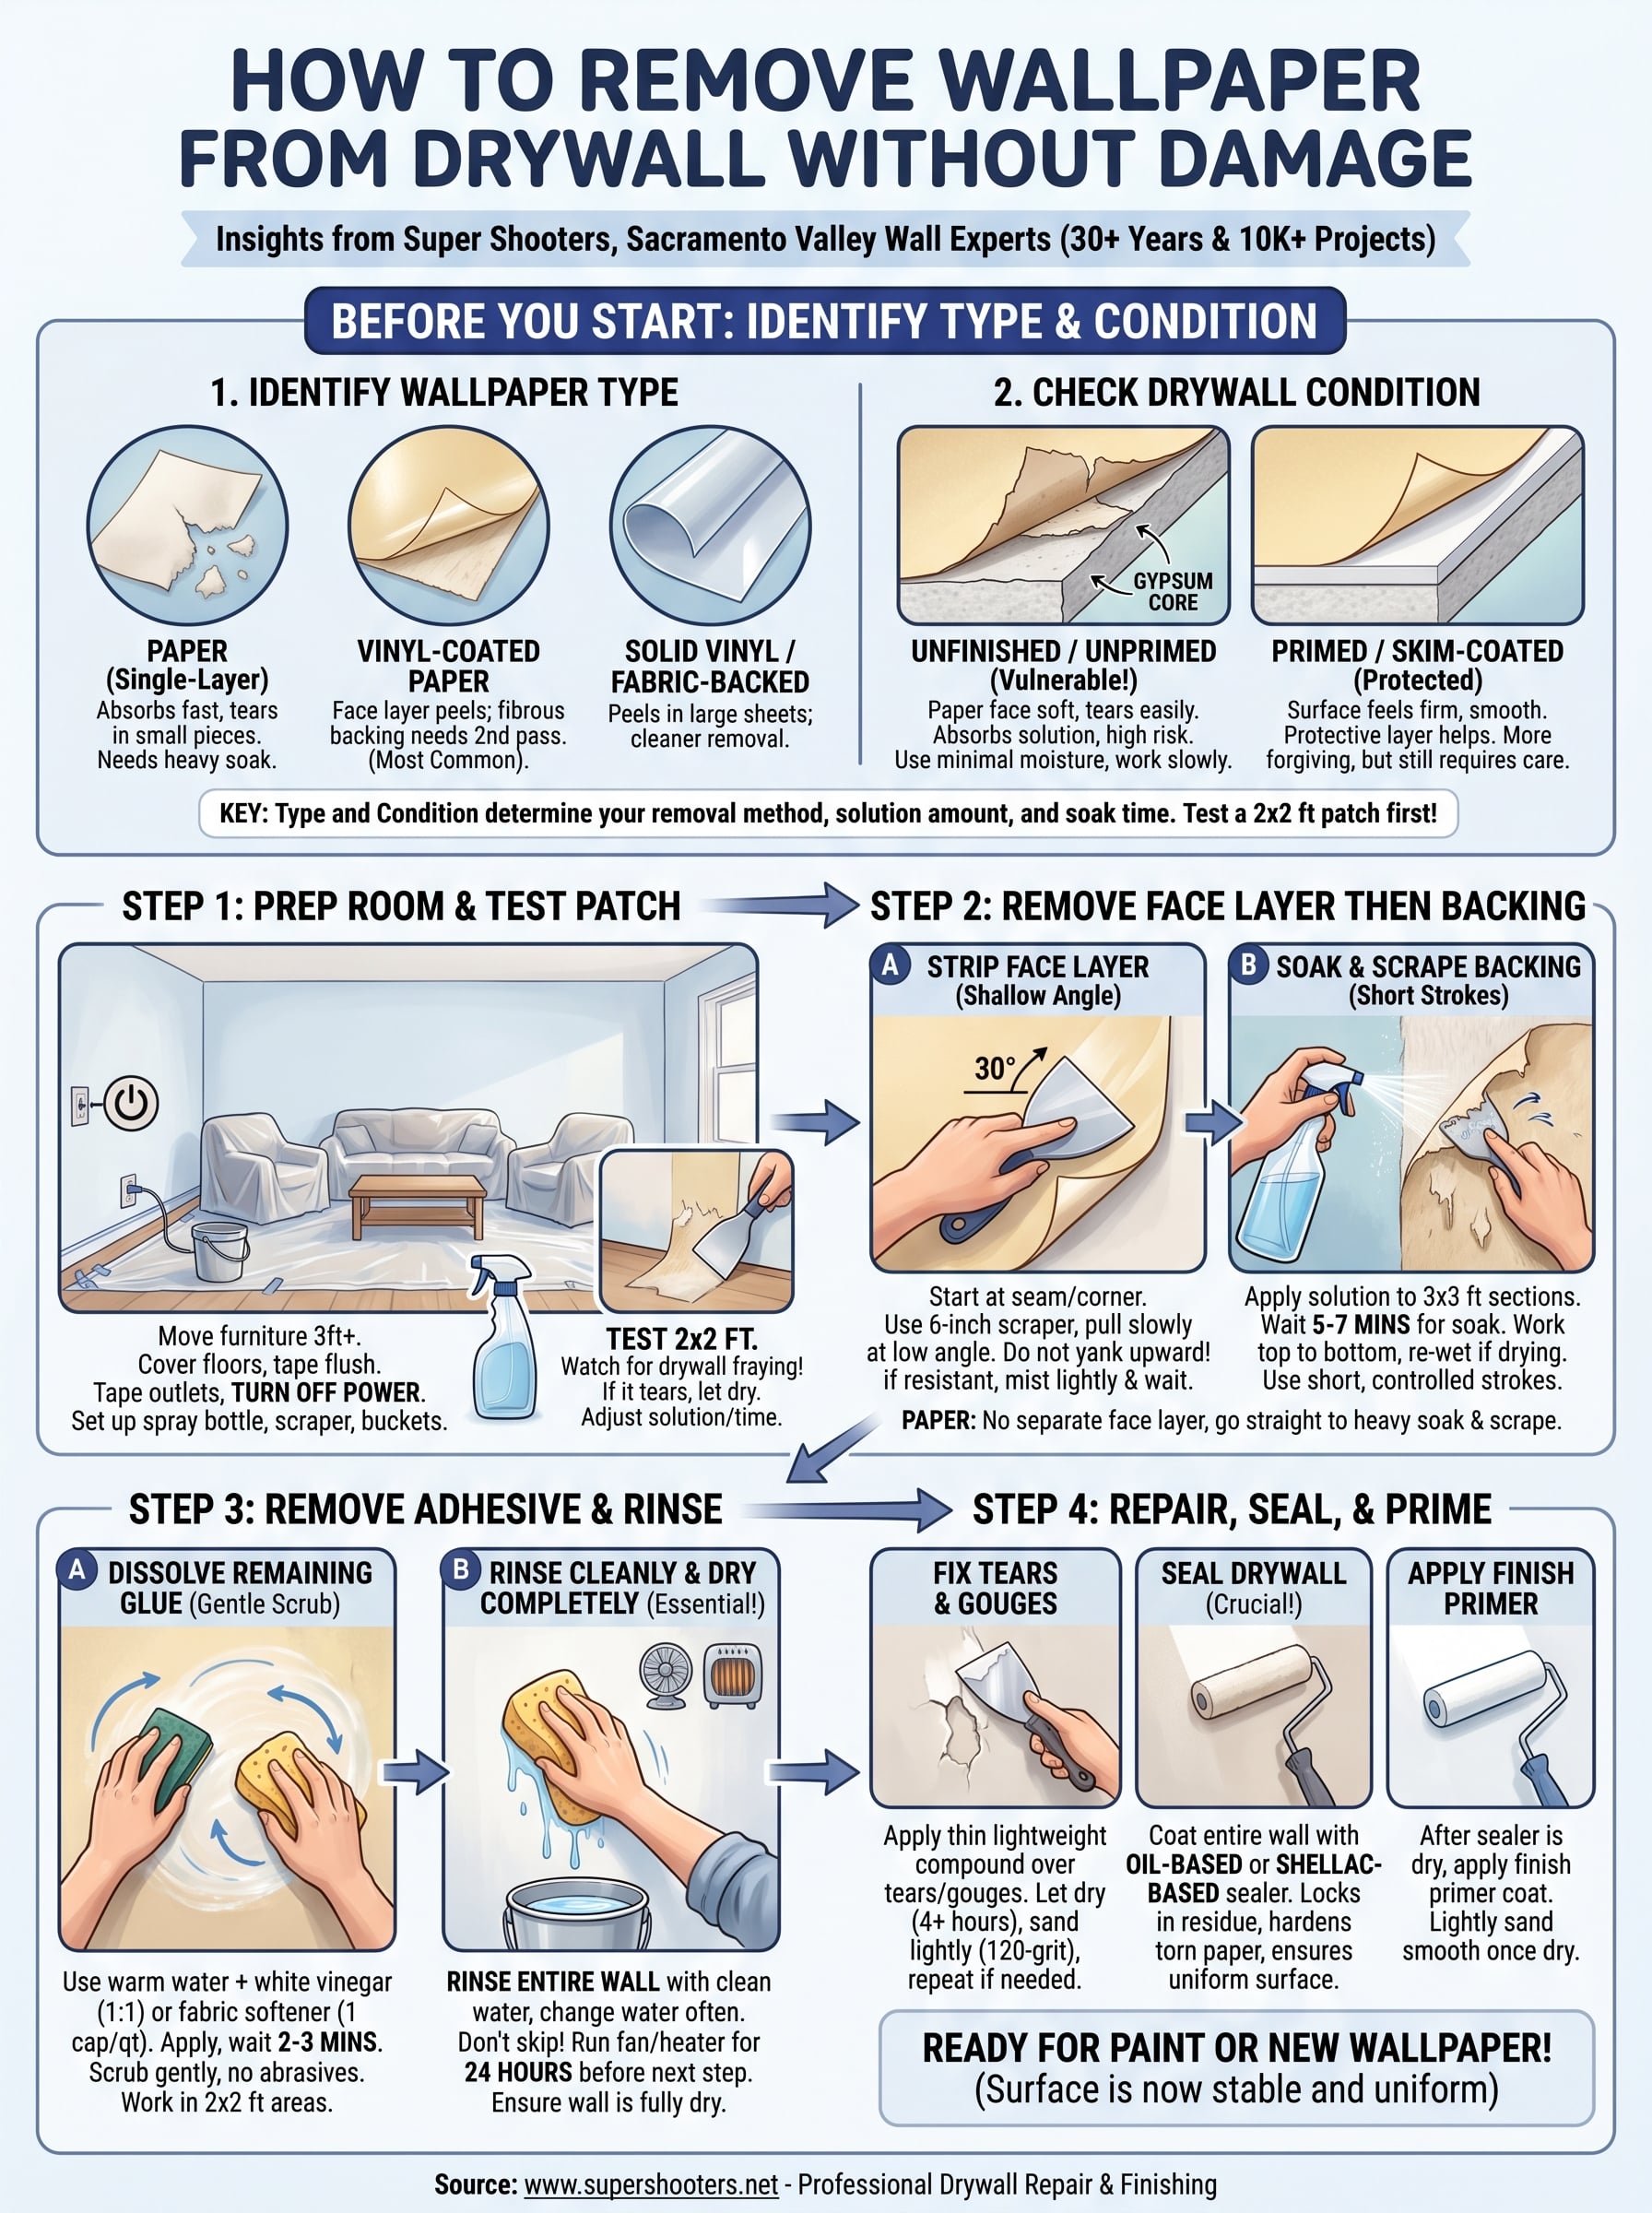
Jumping straight into removal without knowing what you're dealing with is the fastest way to damage your walls. Two variables determine everything about how this project will go: the type of wallpaper you're working with and the condition of the drywall underneath it . Spend 10 minutes figuring these out before you pick up a scraper, and you'll save yourself hours of repair work later.
What type of wallpaper do you have?
Most wallpaper installed in residential homes falls into one of three categories. Knowing your category tells you how much moisture you can safely apply and whether the face layer will strip away cleanly from the backing or come off as a single sheet.
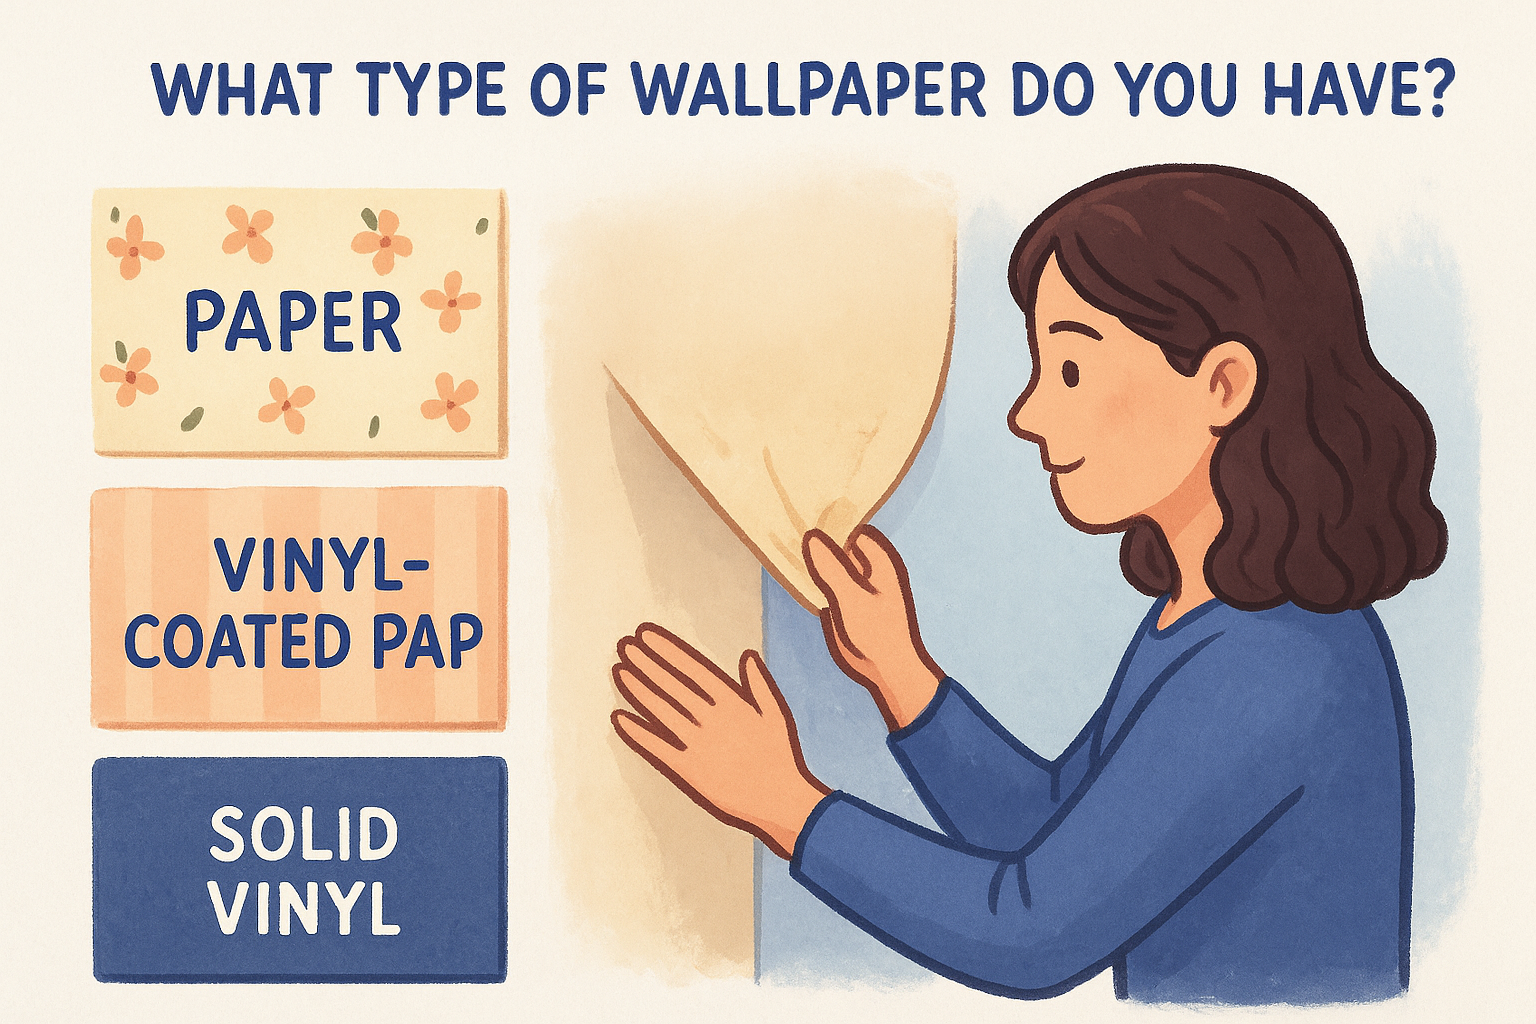
Here's a breakdown of the three most common types:
| Wallpaper Type | How to Identify | Removal Behavior |
|---|---|---|
| Paper (single-layer) | Tears easily, soaks up water fast | Absorbs remover solution well but tears in small pieces |
| Vinyl-coated paper | Slightly shiny or waxy surface | Face layer peels off; backing stays behind and needs a second pass |
| Solid vinyl or fabric-backed vinyl | Thick, flexible, almost plastic-like | Face layer strips off in large sheets; backing separates more cleanly |
To figure out what you have, peel back a small corner in an inconspicuous spot , like behind a door or inside a closet. If it feels like pulling thick plastic, you have solid vinyl. If it's thin and tears almost immediately, it's paper. If the surface feels slightly waxy but not as rigid as vinyl, you're looking at vinyl-coated paper , the most common type found in Sacramento Valley homes built between the 1970s and 1990s.
If you have vinyl-coated paper, expect a two-step removal process: the face layer comes off first, then the paper backing requires a separate soak and scrape session.
How to check your drywall condition
The drywall condition underneath is just as important as the wallpaper type. Unfinished or untreated drywall is the most vulnerable surface you can work on, because the paper face of the drywall will absorb water from your removal solution and tear away from the gypsum core beneath it. This single issue causes the majority of the wall damage we repair after DIY wallpaper removal jobs.
To check, find an area where the wallpaper is already lifting or loose at a seam. Carefully lift the edge and look at the exposed drywall. Run your fingernail lightly across the surface. If the drywall paper feels soft and separates easily, it was never primed or skim-coated before the wallpaper was hung. If it feels firm and slightly smooth, there's likely a protective layer of primer or skim coat between the drywall and the adhesive.
You can also check by pressing gently through the wallpaper to feel for screw dimples and seams. If every fastener and joint is easy to locate through the paper, the drywall was almost certainly hung without adequate preparation. That means you need to work more slowly, use less moisture overall, and give your solution time to penetrate without saturating the wall.
Why this matters before you do anything else
Knowing your wallpaper type and drywall condition isn't busywork. Your removal method, how much solution you apply, and how long you let it soak all depend directly on these two factors. A solid vinyl wallpaper on a well-primed wall is a relatively forgiving project. Single-layer paper on bare, unprimed drywall requires patience, minimal moisture, and a light touch with the scraper to avoid tearing the surface you're trying to protect.
Step 1. Prep the room and test a small area
Skipping room prep is one of the quickest ways to turn a manageable wallpaper project into a multi-day repair job. Removal solutions carry water or chemical solvents that damage flooring, corrode outlet covers, and soak baseboards if they drip unchecked. Before you start working through how to remove wallpaper from drywall the right way, spend 20 to 30 minutes setting up the room correctly so you're not dealing with unintended damage when you're done.
Protect the room before you apply anything
Clear the room as much as possible. Furniture, rugs, and anything stored against the walls should move to another room or at least toward the center of the space. Lay plastic sheeting or drop cloths across the entire floor and tape them flush to the baseboards so solution drips don't wick underneath. Cover every electrical outlet and switch plate on the walls you're working on with painter's tape, and turn off the circuit breaker for that room before applying any liquid near those outlets. Water and live electrical boxes are a serious safety risk.
Use this checklist before you pick up any tools:
- Move furniture at least 3 feet from every wall
- Cover floors with plastic sheeting, taped at the baseboards
- Remove outlet and switch plate covers, then tape over the junction boxes
- Turn off the electrical circuit for the room at the breaker panel
- Set up a spray bottle with your solution and keep a wide plastic scraper (6 inches) within reach
- Place a bucket of clean rinse water nearby
Test a small patch before working the whole wall
Pick a 2-foot by 2-foot section in a low-visibility spot, such as behind a door or in a corner near the floor. Spray your removal solution onto the surface, wait the full dwell time, then try lifting the wallpaper with your scraper at a shallow angle. Watch the drywall surface as you work. If the paper face of the drywall starts to fray, pill, or lift with the wallpaper, you are either applying too much solution or not giving it long enough to penetrate. Make those adjustments before you commit to the main wall.
If your test patch pulls drywall paper with it, let the wall dry completely before continuing. Wet drywall tears far more easily than dry drywall and makes every repair harder.
Step 2. Remove the face layer and backing
Once the room is prepped and your test patch confirms the drywall can handle moisture, you're ready to start the actual removal. Most wallpaper comes off in two separate passes , and treating them as distinct steps rather than trying to do both at once is what keeps the drywall surface underneath intact. Rushing this part of how to remove wallpaper from drywall is where most damage happens.
Strip the face layer first
Start at a seam or a corner where the wallpaper edge is visible. Use a stiff putty knife or wide plastic scraper held at a 30-degree angle and work the edge underneath the face layer. If you have vinyl-coated or solid vinyl wallpaper, the face layer should peel away from the paper backing in reasonably large sections once you get a corner started. Pull slowly and at a low angle, keeping tension steady rather than yanking. Pulling upward at a steep angle tears the backing and puts stress on the drywall face paper beneath it.
If the face layer resists peeling on its own, lightly mist the surface with your removal solution and wait two minutes before trying again. Do not saturate the wall at this stage. The goal is to loosen the bond between the face layer and the backing, not to soak the drywall behind it.
If you have single-layer paper wallpaper, skip this step and go straight to the backing removal process below, since there is no separate face layer.
Soak and scrape the backing
After the face layer is off, the paper backing will remain on the wall , typically looking like a thin, slightly fuzzy layer. This is the layer that sits directly against the drywall and holds the most residual adhesive. Spray your removal solution onto a 3-foot by 3-foot section and wait five to seven minutes for the adhesive behind the backing to soften before you scrape.
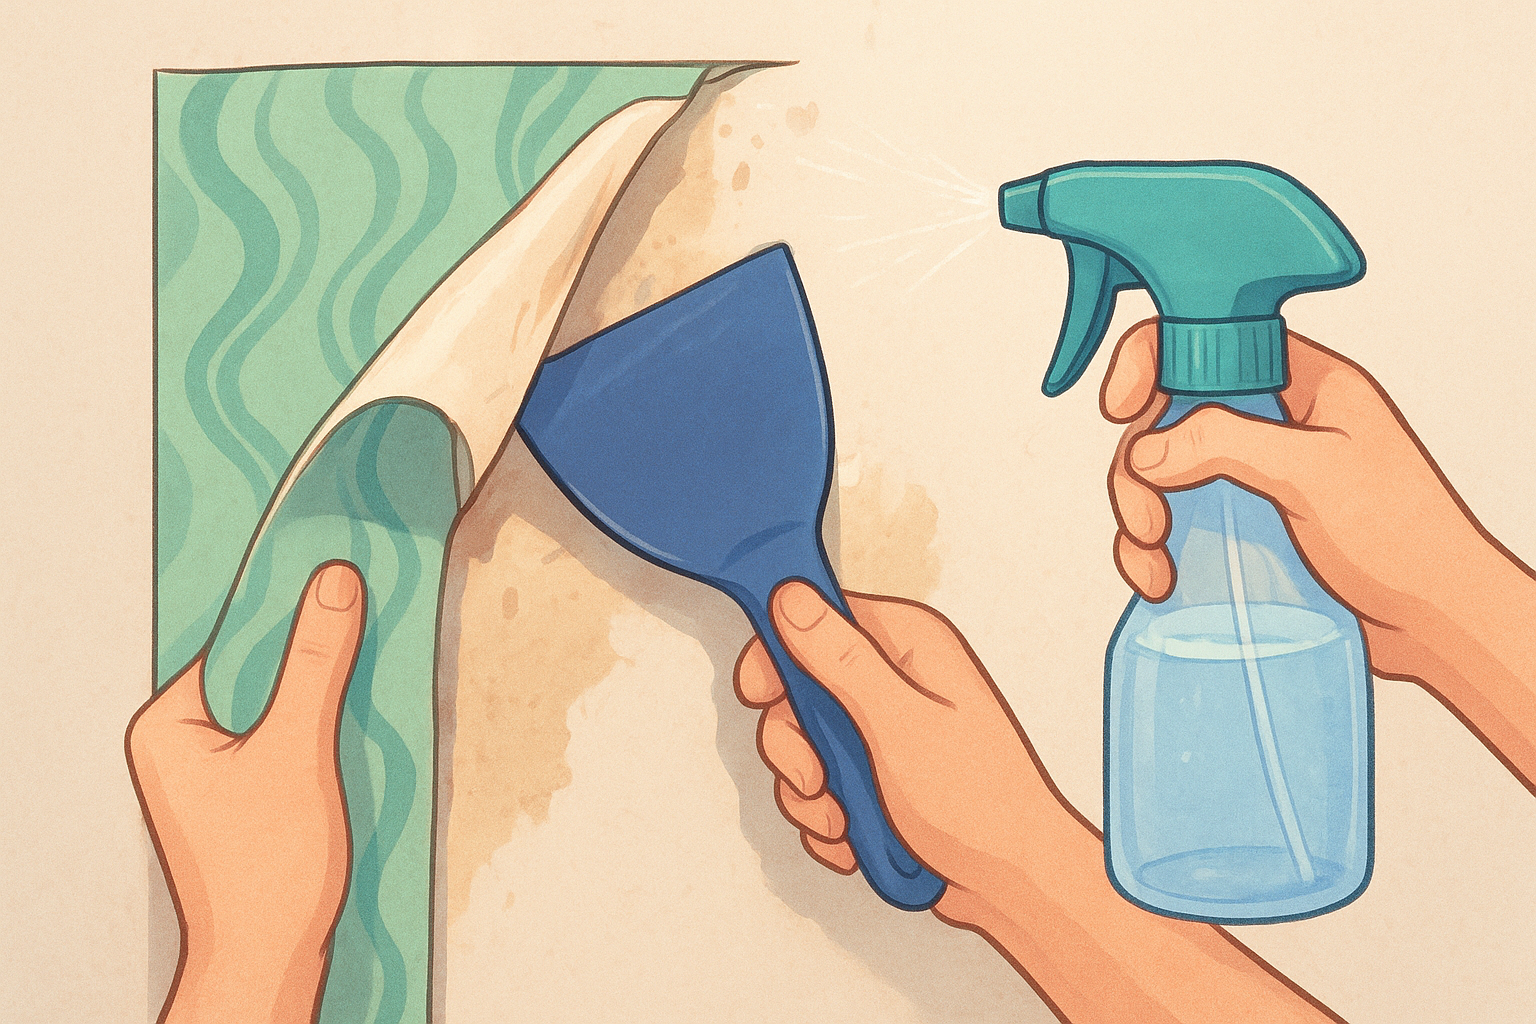
Use your wide plastic scraper at a shallow angle and work in short, controlled strokes. Avoid digging the corners of the scraper into the wall. If a section resists, spray it again and wait rather than forcing it. Work in manageable sections from top to bottom so loosened backing doesn't dry out before you reach it.
| Wallpaper Type | Face Layer Behavior | Backing Behavior |
|---|---|---|
| Single-layer paper | No separate face layer | Tears in small pieces; needs heavy solution soak |
| Vinyl-coated paper | Peels in medium sections | Thin, fibrous; absorbs solution quickly |
| Solid vinyl | Peels in large sheets | Cleaner removal; less residual adhesive |
Step 3. Remove leftover glue and rinse
After both wallpaper layers are off, adhesive residue will remain on the drywall surface in patches, streaks, or a thin film across the whole wall. This layer is easy to miss because it often dries to a near-invisible sheen, but if you paint or hang new wallpaper over it, the adhesive will cause bubbling, peeling, and uneven texture within months. Cleaning the glue completely is not optional if you want a flat, stable wall surface.
Dissolve the remaining adhesive
To loosen dried adhesive, mix a simple solution of warm water and white vinegar in equal parts, or use a fabric softener solution with one capful of fabric softener per quart of warm water. Both options break down wallpaper paste effectively without requiring harsh chemical strippers. Apply the solution with a sponge to one small section at a time , working in 2-foot by 2-foot areas so the liquid does not dry on the wall before you scrub.
Here's a quick comparison of the most practical adhesive removal solutions:
| Solution | Mix Ratio | Best For |
|---|---|---|
| White vinegar + warm water | 1:1 | Standard paste-based adhesives |
| Fabric softener + warm water | 1 cap per 1 quart | Stubborn or thicker residue |
| Commercial DIF wallpaper remover | Per label instructions | Heavy-duty or older adhesives |
Let the solution sit for two to three minutes , then scrub in small circular motions with a non-scratch scrub pad. Avoid steel wool or abrasive pads that will scratch the drywall face paper and create surface damage you'll need to fix later. Work from top to bottom so dissolved adhesive drips don't re-coat areas you've already cleaned.
Never let any adhesive removal solution soak the wall for more than five minutes at a stretch, because over-saturating the drywall will soften the gypsum core and create new structural repair problems.
Rinse and dry the wall correctly
Once the adhesive is scrubbed away, rinse the entire wall with clean warm water using a fresh sponge. Change your rinse water frequently so you are not spreading dissolved adhesive back onto the wall. This step is one of the most overlooked parts of how to remove wallpaper from drywall cleanly, and skipping it leaves a sticky film that primer cannot bond to properly .
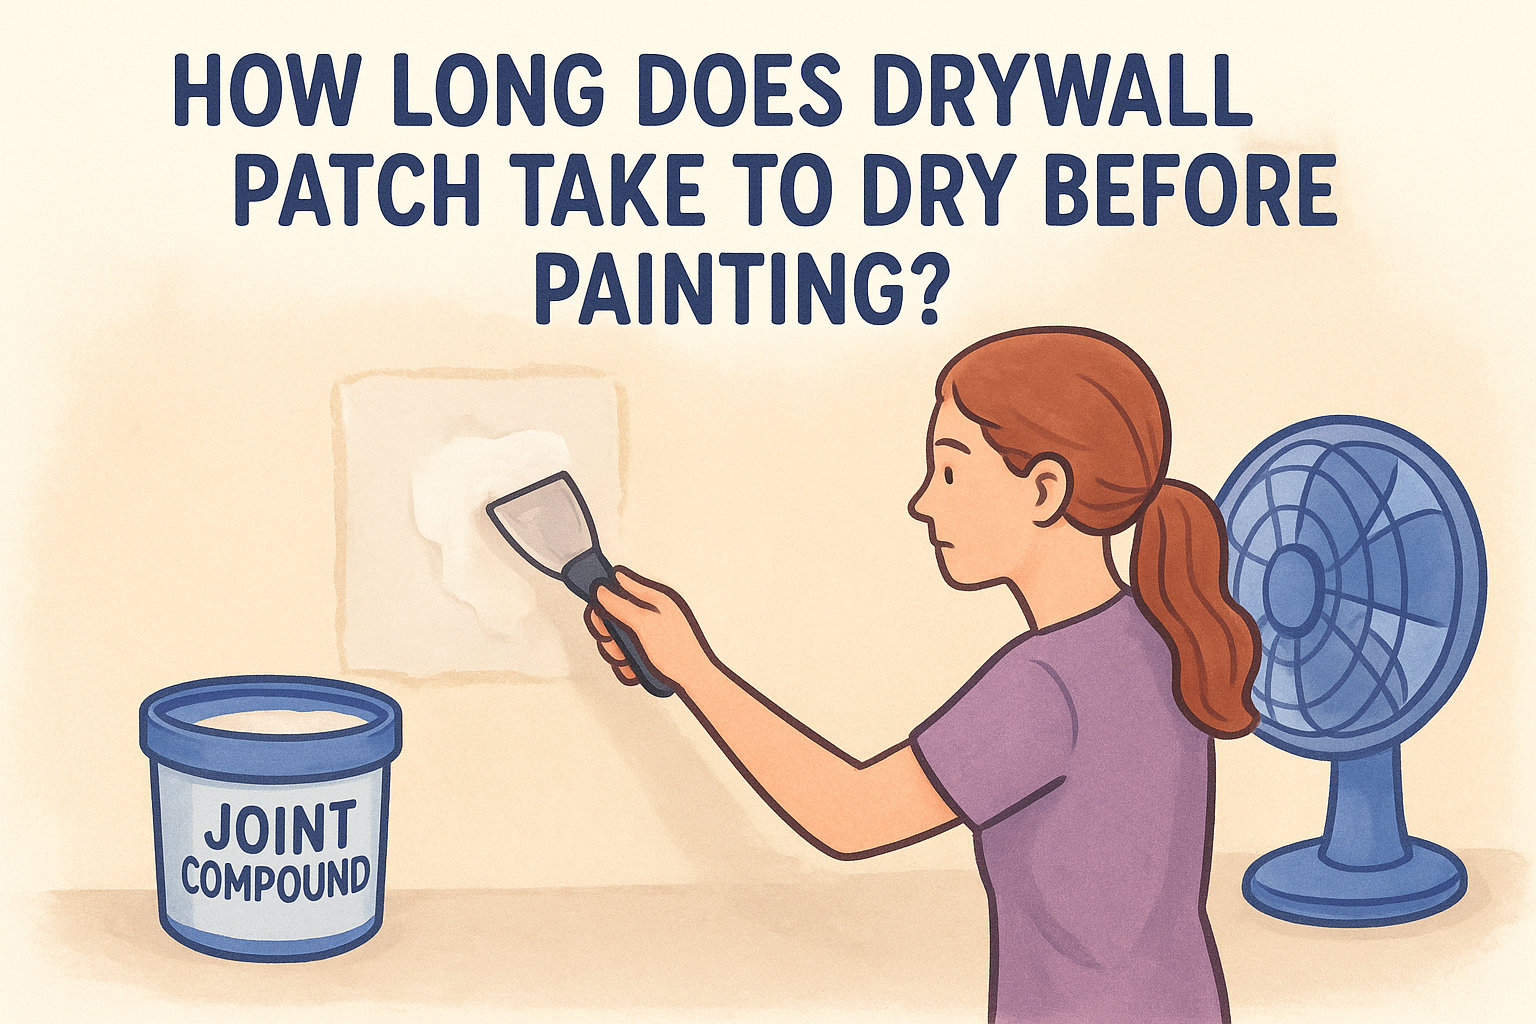
After rinsing, run a fan or heater in the room for at least 24 hours before moving on to any repair or priming work. Drywall that feels dry to the touch on the surface can still hold moisture inside the gypsum core. Moving forward too quickly traps that moisture under primer or joint compound, which leads to bubbling, cracking, and potential mold growth later on.
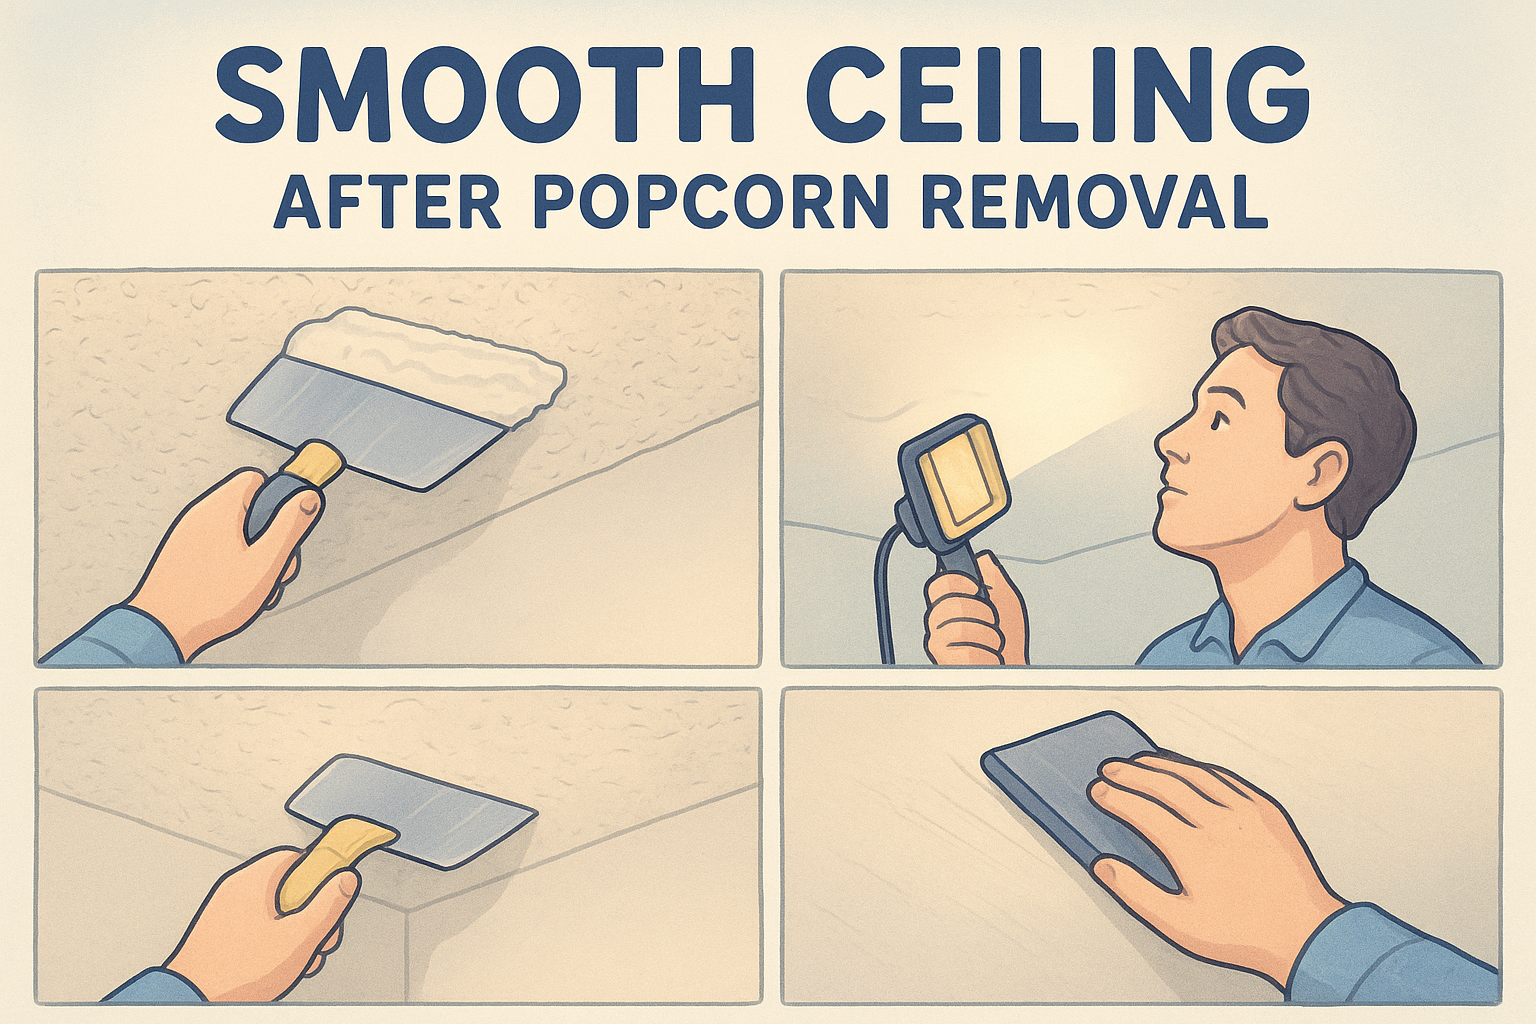
Step 4. Repair, seal, and prime the drywall
Once the wall is dry, you'll find it rarely looks perfect. Torn face paper , small gouges, screw holes, and shallow depressions are all common after wallpaper removal, and every one of them shows through paint if you skip straight to finishing. This final step is where the earlier work on how to remove wallpaper from drywall pays off, because a clean, dry wall repairs much faster and more predictably than one that got over-saturated during stripping.
Fix tears, gouges, and surface damage
Torn drywall face paper is the most common damage you'll find at this stage. Apply a thin coat of lightweight joint compound over any torn areas, feathering the edges outward with a 6-inch drywall knife so there's no visible ridge when the compound dries. For deeper gouges or holes larger than a half inch, press a small amount of compound into the recess first, let it dry fully, then apply a second skim coat over the surface.
Use this repair sequence for each damaged spot:
- Clear away any loose paper fibers or debris from the damaged area
- Apply a thin first coat of lightweight joint compound with a 6-inch knife
- Let dry completely (minimum 4 hours, overnight if the area is large)
- Sand lightly with 120-grit sandpaper once fully dry
- Apply a second skim coat if the area is still uneven, then sand again after drying
Do not try to speed up drying with a heat gun pointed directly at fresh compound, because rapid drying causes shrinkage cracks that require another repair pass.
Seal and prime before you paint
Bare or repaired drywall absorbs primer unevenly, which creates blotchy patches and soft spots that show through your finished paint . Before you apply your finish primer, coat the entire wall with an oil-based primer or a shellac-based sealer first. These products lock down any remaining adhesive residue, harden torn face paper fibers, and create a uniform surface that your topcoat bonds to reliably.
Apply the sealer with a roller using slow, overlapping passes to avoid thin spots, and let it dry fully according to the manufacturer's label before adding your finish primer coat. Once that primer layer is dry and lightly sanded smooth, your wall is stable and ready for whatever finish you choose next.
Ready for paint or new wallpaper
At this point, your wall is sealed, primed, and flat. Following the steps in this guide gives you a reliable surface whether you plan to paint directly or hang new wallpaper. The most common mistake homeowners make after learning how to remove wallpaper from drywall is skipping the sealer coat and going straight to paint, which shows every imperfection through the finish.
Your next step depends on your goals. Paint goes directly over a fully primed, lightly sanded wall with no additional prep required. New wallpaper requires the same clean surface plus a sizing coat to control how quickly the wall absorbs paste before you start hanging.
If your walls took significant damage during removal or the project feels bigger than expected, Super Shooters can handle drywall repair, texturing, and wall finishing across the Sacramento Valley. Free in-home estimates and no upfront payment required make it straightforward to get professional results without the guesswork.
Recent Posts