May 19, 2026
15 Popcorn Ceiling Removal Before and After Transformations
Nothing sells the value of a ceiling upgrade quite like seeing a popcorn ceiling removal before and after side by side. That bumpy, outdated texture, common in homes built from the 1950s through the 1980s, instantly ages an interior. But strip it away and apply a clean, smooth finish, and the same room looks like it belongs in a completely different house . If you've been on the fence about tackling your own popcorn ceilings, these transformations should settle the debate.
At Super Shooters, we've removed popcorn ceilings from over 10,000 homes across the Sacramento Valley in our 30+ years of business. We've seen every scenario, ceilings with layers of paint, ceilings hiding asbestos, ceilings so water-stained the texture was barely holding on. That hands-on experience gives us a clear picture of what to expect at every stage of the process, from demolition day to the final coat of paint.
In this article, we're sharing 15 real before and after transformations that show the full range of what popcorn ceiling removal can do for a home. You'll see dramatic changes in living rooms, kitchens, bedrooms, and more, along with practical details on finishing options, cost factors, and the steps involved in getting from rough texture to a polished result. Whether you're planning a DIY project or hiring a professional crew, these examples will give you a realistic idea of the outcome you can achieve.
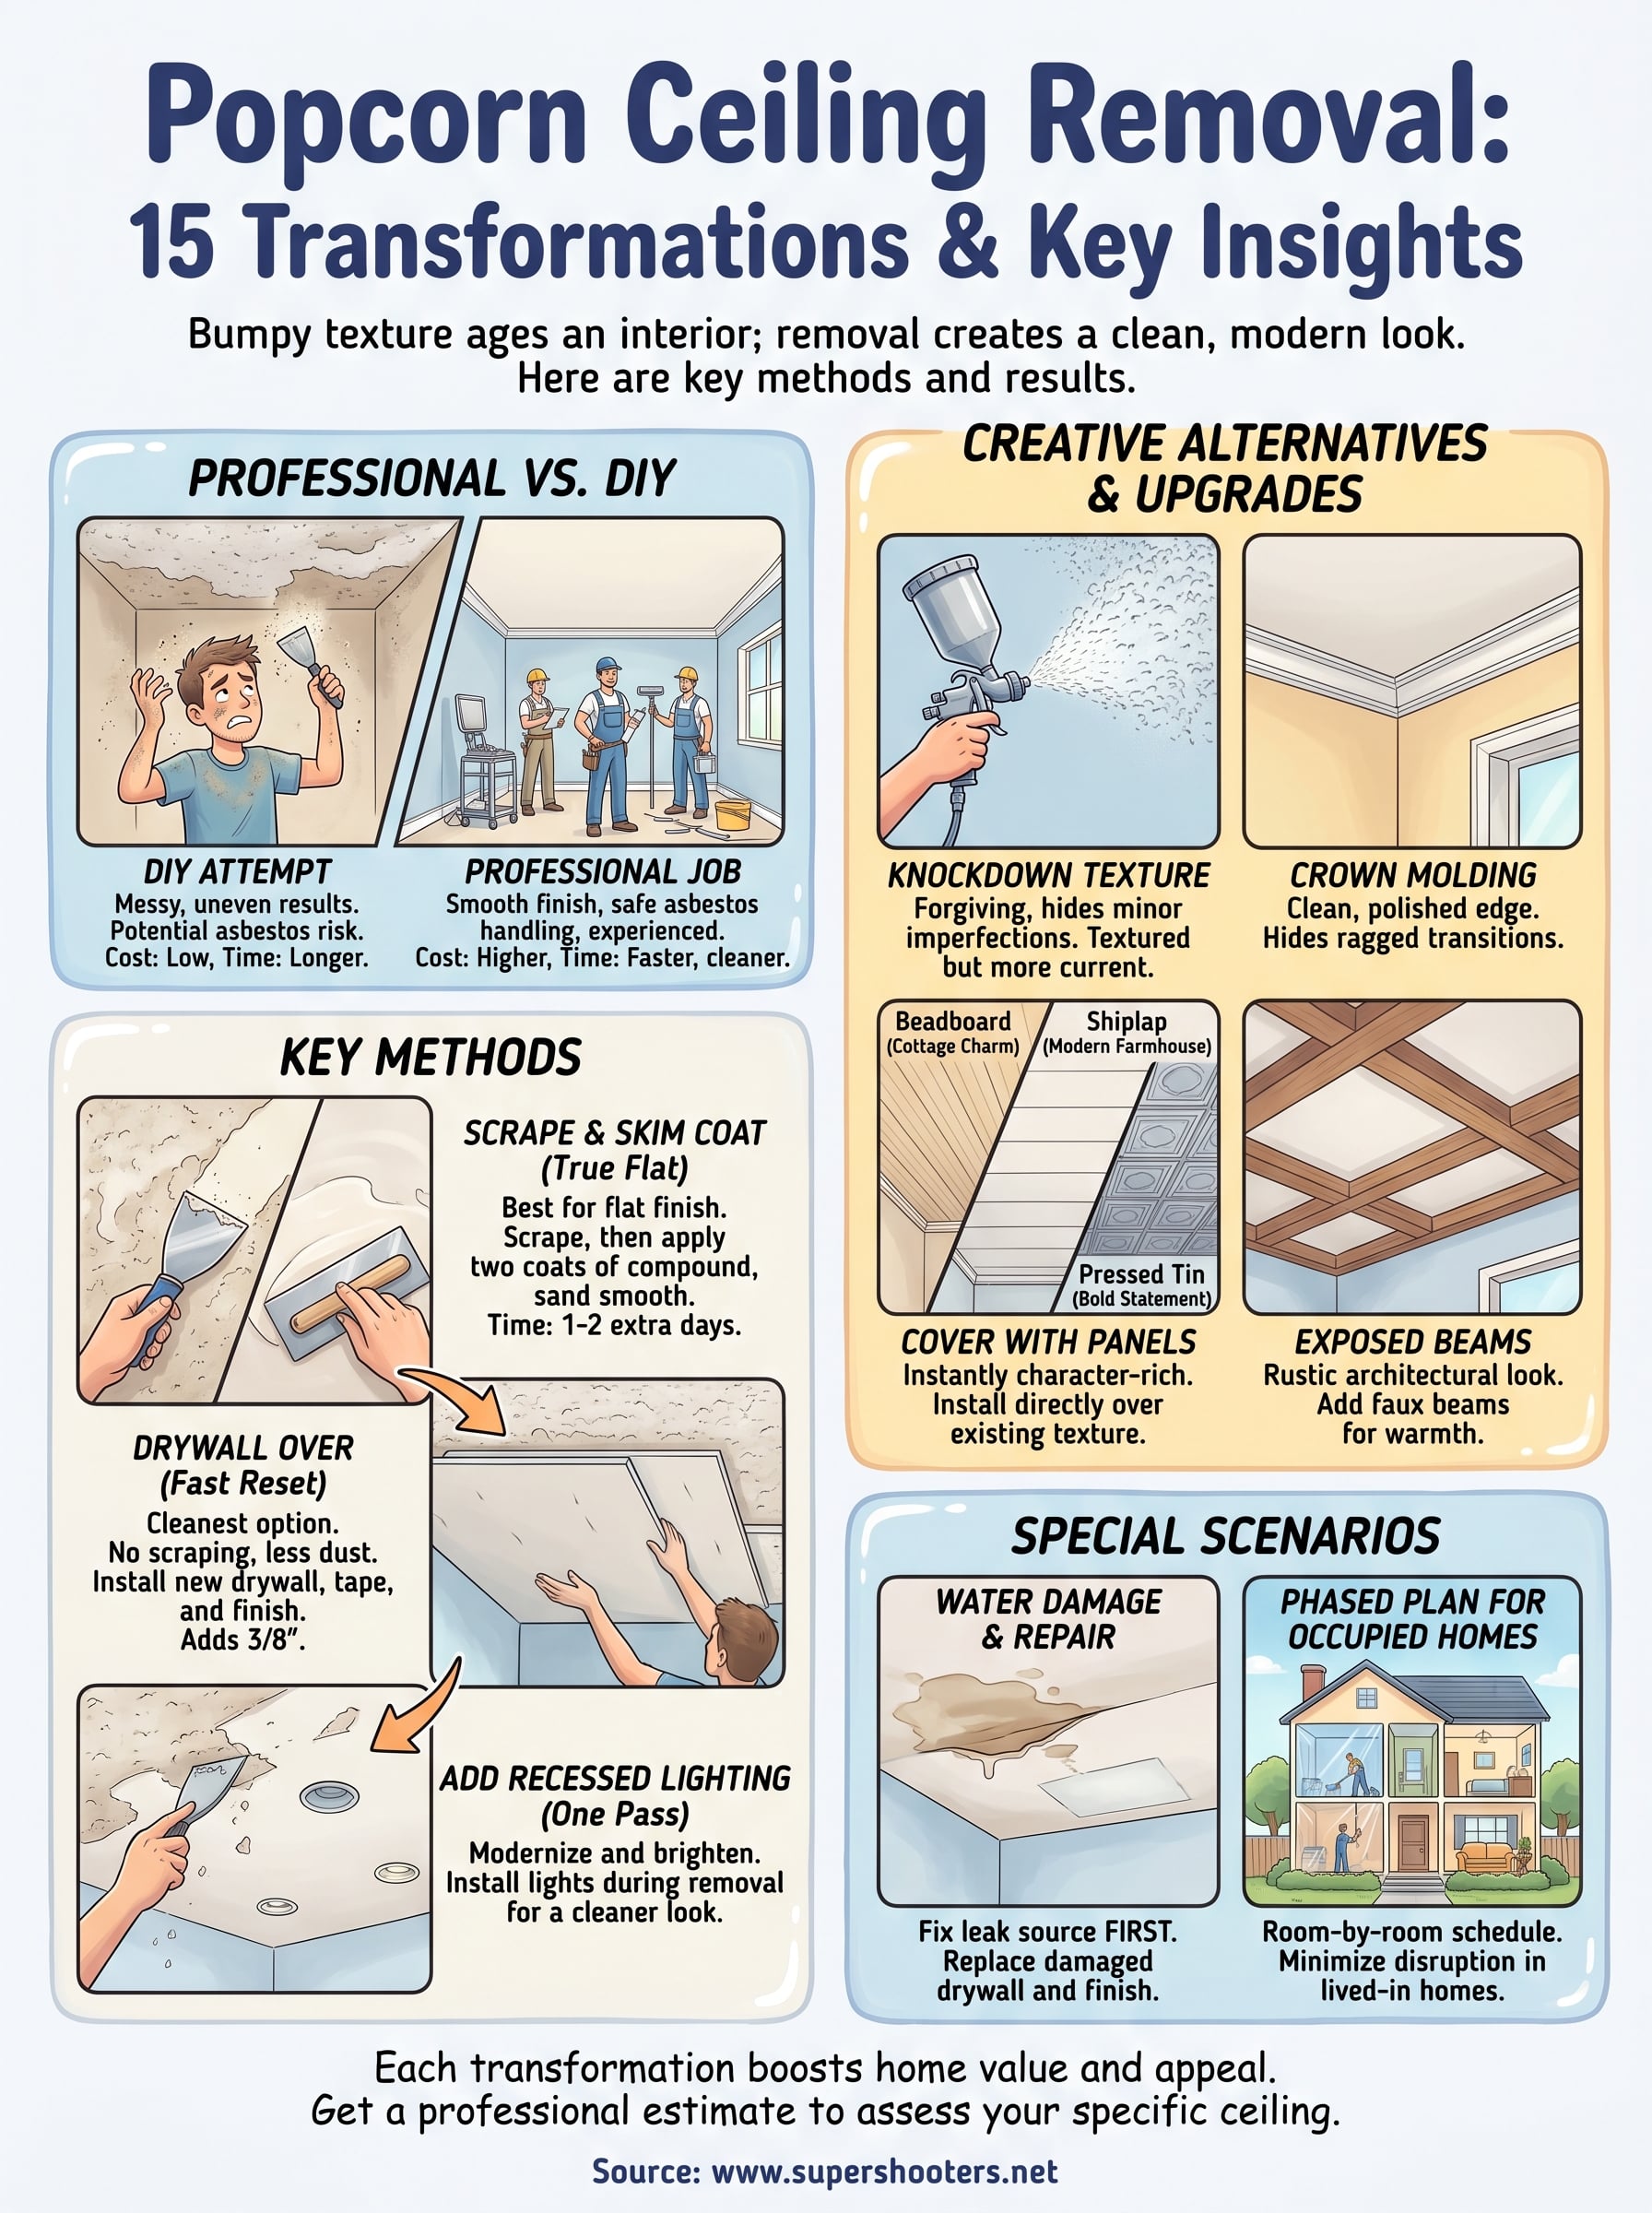
1. Hire a licensed pro for removal and smooth finish
When you hand this job to a licensed contractor , you're not just paying for labor. You're paying for experience, proper testing for asbestos, and a finished ceiling that looks right from every angle. This is the most common path homeowners take, and the result of a professional popcorn ceiling removal before and after is almost always more dramatic than what a solo DIY attempt delivers.
The before
The typical starting point is a textured acoustic ceiling that has seen better days. In many Sacramento Valley homes built before 1980, that texture may contain asbestos-bearing material, which is undetectable without lab testing. The ceiling may also carry multiple layers of paint , which seals the texture and makes scraping significantly harder and riskier.
The after
Once a licensed crew finishes, you're looking at a smooth, flat surface ready for primer and paint. The ceiling is consistent from wall to wall, with no gouges or thin patches left in the drywall paper. Painted a light neutral tone , the room feels taller, cleaner, and noticeably more current.
A smooth ceiling reflects light more evenly than textured surfaces, which brightens the entire room without adding a single new fixture.
What makes this approach work
Licensed contractors use moisture-controlled scraping techniques that limit drywall damage during removal. They also carry proper insurance, which protects you if something goes wrong. If asbestos is present, a licensed abatement team handles safe removal in compliance with California regulations before any drywall finishing begins.
Cost and time range
For a professional removal with a smooth finish, here's what you can generally expect:
- Per square foot cost: $1.50 to $3.50 depending on paint layers and ceiling height
- Average room (400 sq ft): $600 to $1,400 total
- Single room timeline: one to two days
- Whole-house project: three to five days
- Asbestos testing add-on: $25 to $75 per sample
What can go wrong
The most common issue is undisclosed asbestos in older homes that wasn't tested before work started. Discovering it mid-project stops everything and adds both time and cost. Some homeowners also find water-damaged drywall or deteriorating paper once the texture comes off, which requires patching or full board replacement before the finish coat can go on.
2. DIY spray and scrape in a small room
A small bedroom or laundry room is the right place to start if you want to handle your own popcorn ceiling removal before and after comparison. The limited square footage keeps the mess manageable, and a beginner can realistically finish the scraping in a single day without professional equipment.
The before
Your starting point is a dry, unoccupied room with a ceiling under 200 square feet. The popcorn texture is ideally unpainted, which makes the water-spray method far more effective. Painted popcorn adds a sealed layer that blocks moisture absorption and turns a simple scrape into a grinding battle.
The after
Once the texture is off and the ceiling dries completely , sand down any raised drywall paper, apply a coat of primer, and finish with ceiling paint. The result won't match a professional skim coat, but a well-executed DIY scrape in a small room can look clean and acceptable, especially in low-visibility spaces.
If the texture scrapes off in dry chunks rather than wet strips, you added too little water and risk tearing the drywall paper beneath.
What makes this approach work
Spraying the ceiling with a pump garden sprayer and letting the water soak for 15 minutes is the key step. Work in small two-foot sections so the texture stays damp and slides off rather than crumbling into dry debris.
Cost and time range
Keeping the project small holds the budget low. Here's a realistic breakdown:
- Materials: $50 to $150 (sprayer, plastic sheeting, scrapers, primer, paint)
- Time: four to eight hours for a 150 sq ft ceiling
What can go wrong
Oversaturating the ceiling pushes water into the drywall and loosens the paper from the gypsum core. You may also cut visible gouges into the drywall if you angle the scraper too aggressively, which adds a patching and sanding step before any paint can go on.
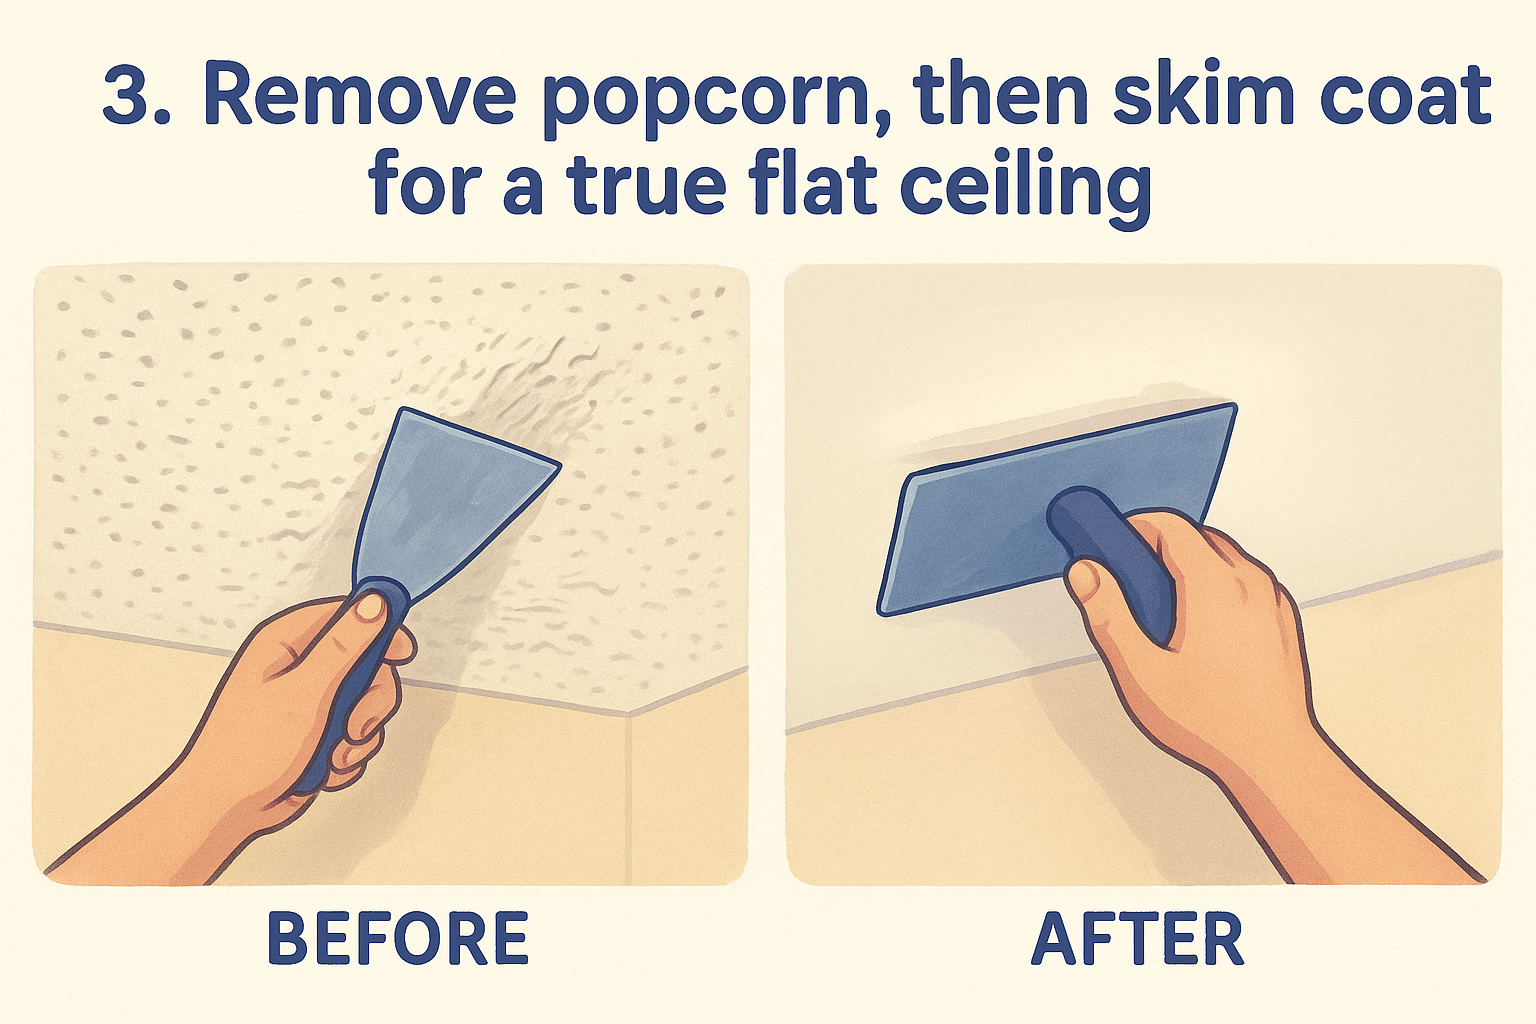
3. Remove popcorn, then skim coat for a true flat ceiling
Scraping off texture leaves the drywall surface uneven, with ridges, torn paper, and shallow gouges that plain paint will not hide. A skim coat , which is a thin layer of joint compound spread across the entire ceiling, fills those imperfections and creates the flattest possible result. This approach produces the most complete popcorn ceiling removal before and after difference you can achieve without replacing the drywall entirely.
The before
The ceiling starts with bumpy acoustic texture sitting directly on the drywall face. Once the scraping finishes, what remains looks rough and inconsistent, with exposed paper fibers and surface irregularities that no amount of sanding alone will fully level.
The after
After the skim coat dries and a finisher sands it smooth, the ceiling looks completely flat , with no visible imperfections from corner to corner. Paint adheres evenly across the surface, and raking light from a nearby window reveals no ridges, no patches, and no texture remnants .
A skim coat adds one to two days to the project, but the visual difference over a bare-scraped and painted ceiling is immediately obvious.
What makes this approach work
A skilled finisher applies two thin passes of joint compound , letting each coat fully dry before sanding. This process builds a uniform surface that sits flush with the surrounding walls and accepts primer without bleed-through from any damaged drywall paper underneath.
Cost and time range
- Skim coat add-on: $0.75 to $1.50 per square foot beyond removal costs
- Additional time: one to two days for drying and sanding
What can go wrong
Rushing the drying time between coats causes the compound to crack as it cures. Sanding too aggressively cuts through the thin layer and re-exposes the damaged drywall paper , which means the finisher has to run another full pass before anything looks acceptable.
4. Drywall over popcorn for a fast, clean reset
Installing new drywall directly over your existing ceiling skips the scraping phase entirely. Instead of removing the texture, you cover it with a fresh layer of 3/8-inch drywall, tape the seams, finish the surface, and paint. For homeowners who want a clean popcorn ceiling removal before and after result without the mess of wet scraping, this method delivers fast results with minimal debris.
The before
Your starting point is a popcorn ceiling that is structurally sound but visually dated. The texture may be painted or unpainted, it doesn't matter with this approach. The existing ceiling joists need to be capable of supporting the added weight of new drywall, which is why this method works well in standard residential framing.
The after
Once the new drywall is taped, mudded, and painted , the ceiling looks completely smooth and modern. There are no scraping marks, no torn paper sections, and no bleed-through spots. The finished surface is tight and consistent , and most homeowners say the room feels noticeably larger after the swap.
This approach adds roughly 3/8 inch of height loss to your ceiling, which is imperceptible in most standard rooms.
What makes this approach work
The key is locating and fastening into every joist with the correct screw length so the new panels don't sag over time. A skilled drywall crew uses a joist finder and proper fastener spacing to keep the new layer tight against the old ceiling without any flex.
Cost and time range
- Material and labor cost: $2.00 to $4.00 per square foot
- Single room timeline: one to two days
What can go wrong
If your crew misses joists or uses fasteners that are too short , the new panels shift slightly and cause visible seam cracks within a few months. Trim and crown molding profiles may also need replacement since the new ceiling surface sits lower than the original.
5. Remove popcorn and add recessed lighting in one pass
Combining popcorn ceiling removal with a recessed lighting installation in a single project saves you from hiring two separate crews and opening the ceiling twice. If your contractor is already up there scraping and finishing, adding can lights at the same time is a natural extension of the same work.
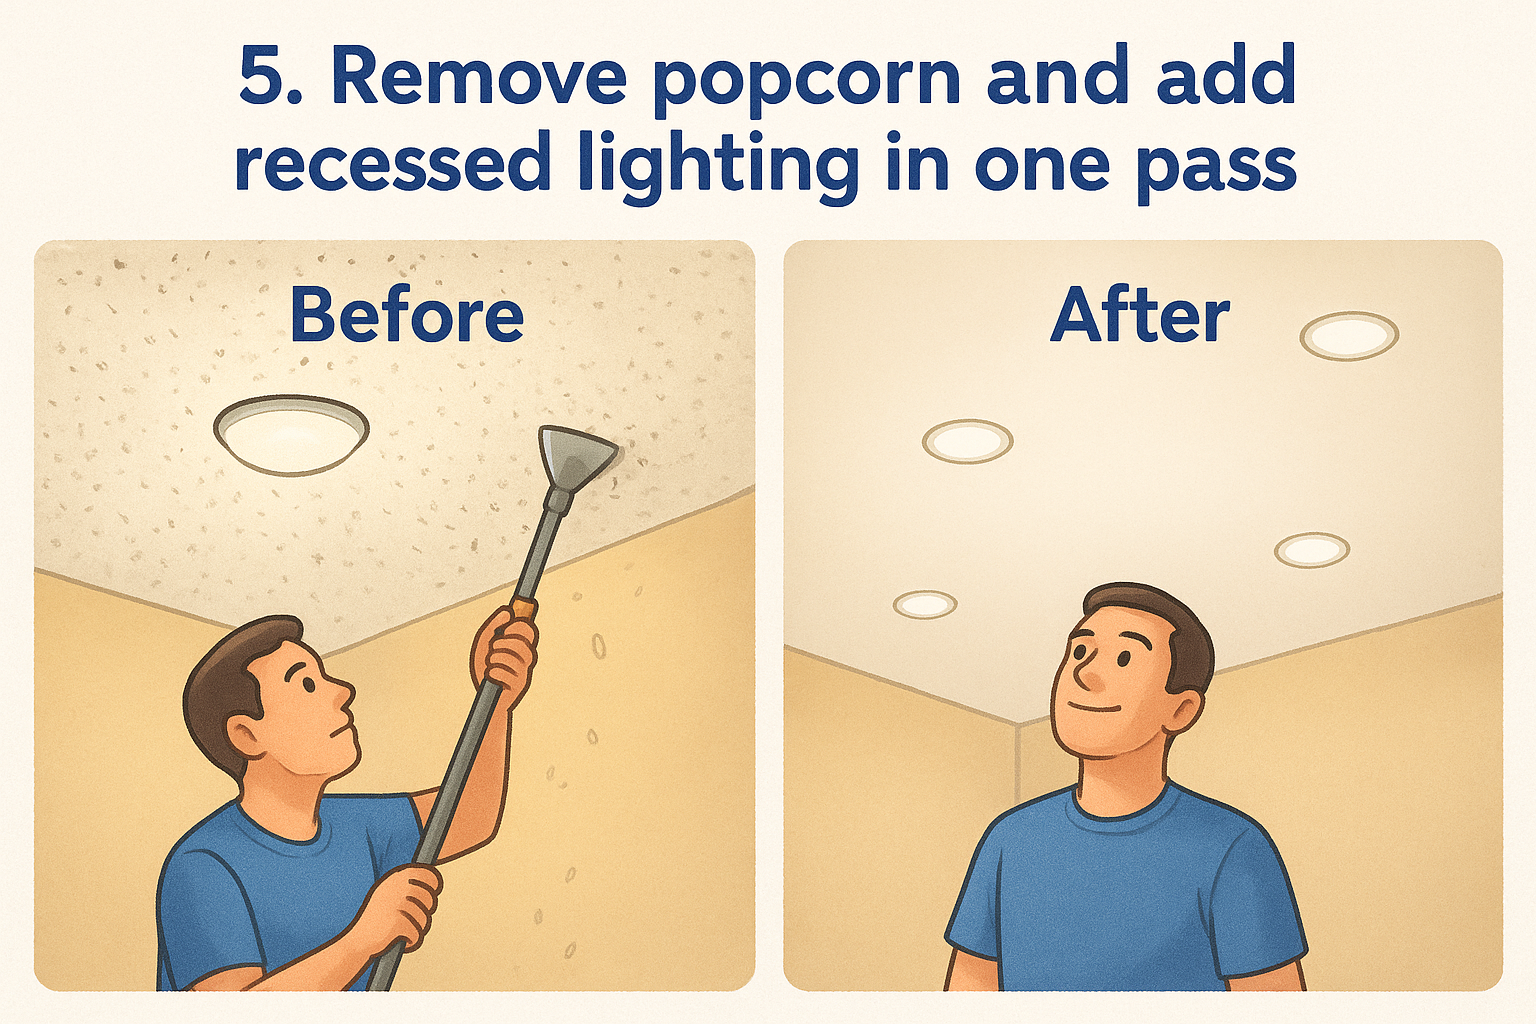
The before
Most older homes that still carry acoustic ceiling texture also rely on a single central fixture for light. The combination of bumpy texture and one dim overhead light makes the room feel closed off and dated. Low, uneven light distribution is one of the most common complaints homeowners have about rooms that haven't been updated since the 1970s or 1980s.
The after
The popcorn ceiling removal before and after difference becomes even more dramatic when four to six recessed lights replace that single fixture. The smooth ceiling reflects the distributed light evenly across the room, and the overall effect looks intentional and modern. Clean trim rings sit flush against a flat surface rather than disappearing into bumpy texture.
Recessed lighting paired with a smooth ceiling is one of the highest-return upgrades you can make in a living room or kitchen without a full renovation.
What makes this approach work
Scheduling the electrical rough-in and ceiling scraping on the same day lets both crews work in sequence without duplicating setup or cleanup. Your drywall finisher can then patch around the new can light cutouts as part of the normal skim coat pass.
Cost and time range
- Lighting addition cost: $200 to $600 per fixture installed
- Combined project timeline: two to three days
What can go wrong
Cutting into joists or existing wiring during the lighting installation creates costly repairs. Your electrician needs to map the ceiling framing before any cuts happen, especially in older homes where wiring routes are unpredictable .
6. Tackle a vaulted ceiling with the right method
A vaulted ceiling raises the stakes on popcorn removal in every way. The angle makes scaffolding necessary, the greater surface area adds cost, and any finishing work has to account for the slope of the ceiling plane rather than a flat horizontal surface. This is not a job for a step ladder and a weekend.
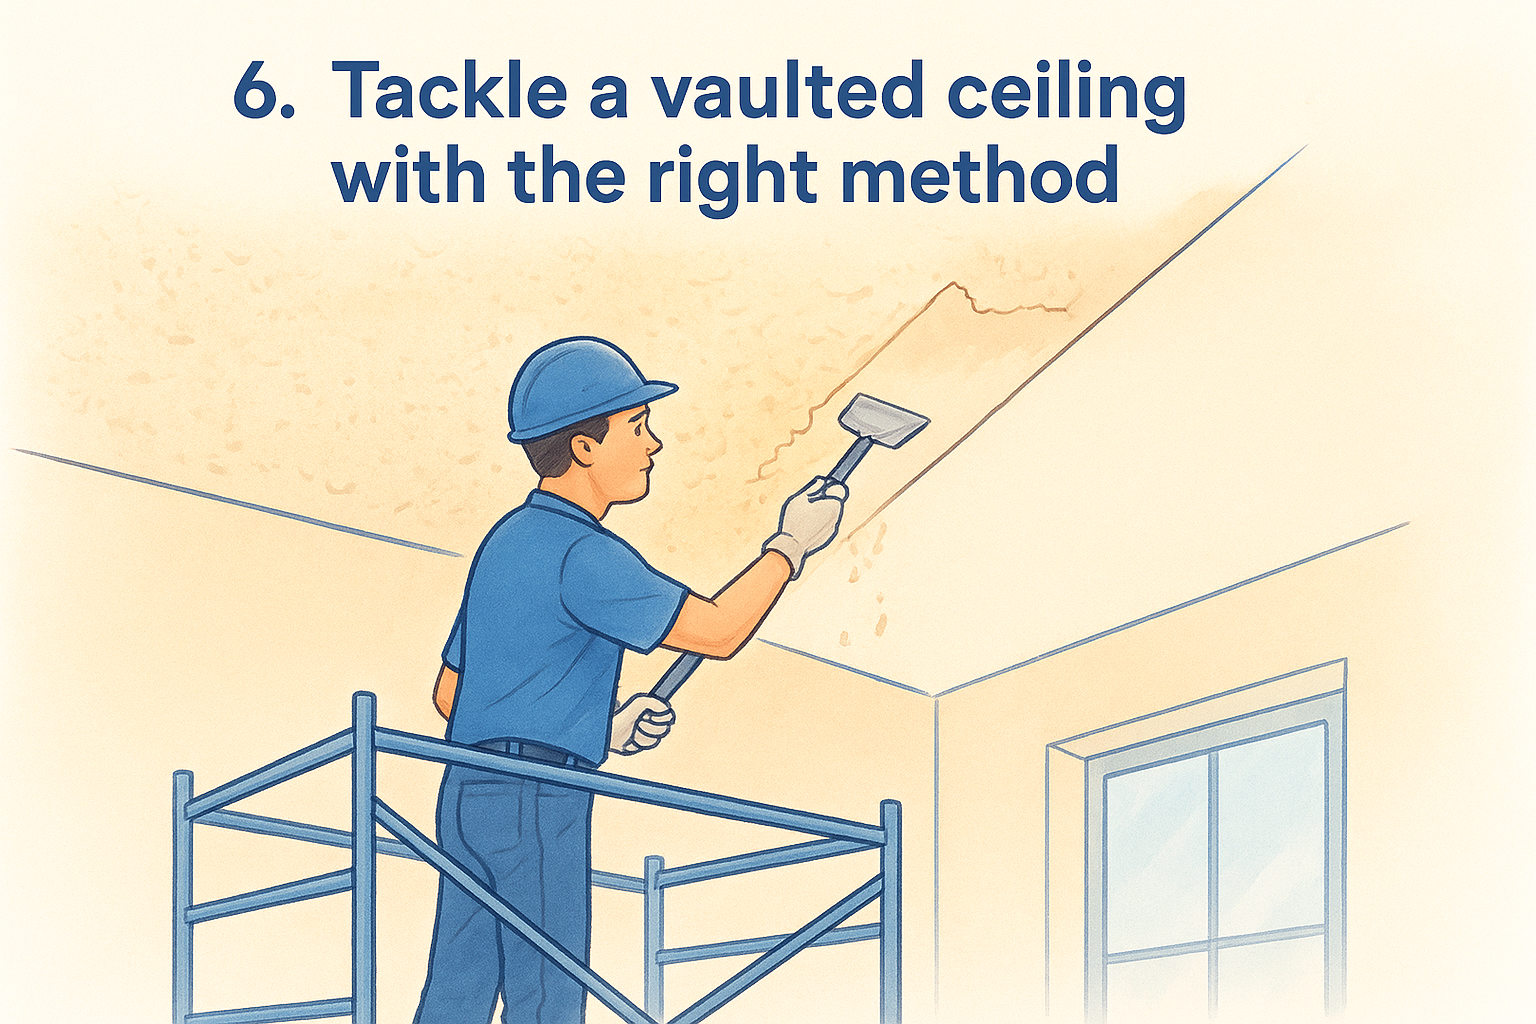
The before
Your starting point is a pitched or cathedral ceiling covered in acoustic texture that once hid seams and imperfections but now looks heavy and dated. The popcorn ceiling removal before and after difference on a vaulted surface is significant because removing the texture opens up the full visual impact of the height and angle that the bumpy coating was actually obscuring.
The after
Once the texture is gone and the surface is skimmed and painted , a vaulted ceiling becomes one of the most striking architectural features in a home. The clean slope draws the eye upward, and smooth paint reflects light in a way that makes the space feel open rather than cramped.
A properly finished vaulted ceiling after popcorn removal often surprises homeowners with how much larger and more intentional the room feels.
What makes this approach work
Working from proper scaffolding rather than ladders keeps the crew safe and allows consistent scraping pressure across the angled surface. Your contractor should also account for finishing the ridgeline and wall transitions carefully, since those joints are the most visible on a sloped ceiling.
Cost and time range
- Per square foot cost: $2.00 to $4.50 due to height and access difficulty
- Timeline: two to four days for a single vaulted room
What can go wrong
Inadequate staging causes uneven scraping pressure, which leaves ridges that show through paint. Your crew may also find that drywall joints at the ridge beam need reinforcement before any finish coat goes on.
7. Deal with painted popcorn without destroying drywall
Painted popcorn texture is the hardest version of this job because the paint layer seals the surface and blocks water from soaking in. Standard spray-and-scrape won't work well here. You need a different approach to lift the texture off without tearing the drywall paper underneath, which is the part that gets destroyed when homeowners rush this step.
The before
Your starting point is a textured ceiling with one or more paint layers sealing the acoustic material beneath it. This is common in homes where previous owners freshened the room with paint but never addressed the aging texture, leaving you with a sealed surface that ordinary moisture can't penetrate.
The after
With the right technique, the popcorn ceiling removal before and after difference is just as striking as any other method. You end up with a clean, consistent surface ready for a skim coat and paint, with no visible evidence of the extra work it took to get there.
What makes this approach work
The most effective method is scoring the painted surface in a crosshatch pattern with a scoring tool before applying any water. This breaks the paint barrier and lets moisture reach the texture layer below. Some contractors use a low-pressure steamer instead of a garden sprayer to push moisture through the paint more effectively without flooding the drywall.
Scoring too deep cuts into the drywall paper, so keep your passes light and let the moisture do the real work.
Cost and time range
- Additional labor cost: 20 to 40 percent more than unpainted removal
- Timeline: one to two extra hours per room due to slower scraping pace
What can go wrong
Torn drywall paper is the most common result of rushing this process. Once the paper lifts, you need to apply a drywall primer-sealer before any joint compound, or the skim coat will bubble and peel as it cures.
8. Swap popcorn for knockdown texture for easier finishing
Not every homeowner wants a perfectly flat ceiling after removal. Knockdown texture is a popular middle ground that hides minor surface imperfections while still looking far more current than the original acoustic material. If your drywall shows some damage after scraping , knockdown gives your finisher a forgiving surface to work with rather than demanding a flawless skim coat.
The before
Your starting point is a bumpy acoustic ceiling that makes the room feel dated and heavy. The popcorn ceiling removal before and after contrast in this scenario is especially useful for homeowners whose drywall is older and more prone to surface tears during scraping.
The after
Once the texture is applied and painted a flat white or soft neutral , the ceiling looks clean and intentional. The irregular, layered pattern of knockdown sits between acoustic texture and smooth drywall in appearance, and most visitors will simply notice that the ceiling looks refreshed rather than identify the specific finish.
Knockdown texture hides drywall paper damage better than any other finish short of a full skim coat, making it a practical choice for scraped ceilings with uneven surfaces.
What makes this approach work
Your contractor applies thinned joint compound through a hopper gun, then flattens the peaks with a wide knife before the compound sets fully. The result is a random, mottled pattern that requires far less sanding and surface prep than a smooth finish.
Cost and time range
- Texture application cost: $0.50 to $1.00 per square foot beyond removal
- Additional timeline: one extra day for application and drying
What can go wrong
Applying the compound too thick or too thin creates an inconsistent pattern that looks sloppy once painted. Your contractor needs to test the spray consistency on cardboard before committing to the ceiling.
9. Finish the edges cleanly with trim or crown
One detail that separates a professional result from a DIY attempt is how the ceiling meets the wall . After scraping, the perimeter often reveals uneven edges, torn paper, and gaps where the texture was holding the transition together. Adding trim or crown molding covers those imperfections and gives the entire popcorn ceiling removal before and after transformation a polished, intentional look.
The before
Your starting point is a ceiling where the acoustic texture ran directly to the wall with no molding to separate the two planes. Once the texture is gone, that junction shows every scrape mark and ragged edge left behind during removal.
The after
With crown molding or simple cove trim installed along the perimeter, the ceiling looks finished from every angle. The transition from wall to ceiling becomes a clean, defined line that draws the eye across the room rather than stopping it at an uneven edge.
Crown molding also hides any slight waviness in the wall-ceiling joint, which is nearly impossible to fix with compound alone.
What makes this approach work
Your installer attaches the trim directly to wall studs and ceiling joists , not just to drywall. That anchoring keeps the molding from separating over time, especially in older homes where slight settling is common.
Cost and time range
- Basic cove trim: $1.00 to $2.50 per linear foot installed
- Crown molding: $3.00 to $8.00 per linear foot installed
- Timeline: one day for a standard room
What can go wrong
Poorly mitered corners are the most visible flaw in any trim installation. If your contractor rushes the corner cuts, gaps open up where walls meet at angles that aren't exactly 90 degrees, which requires caulk and repainting to correct.
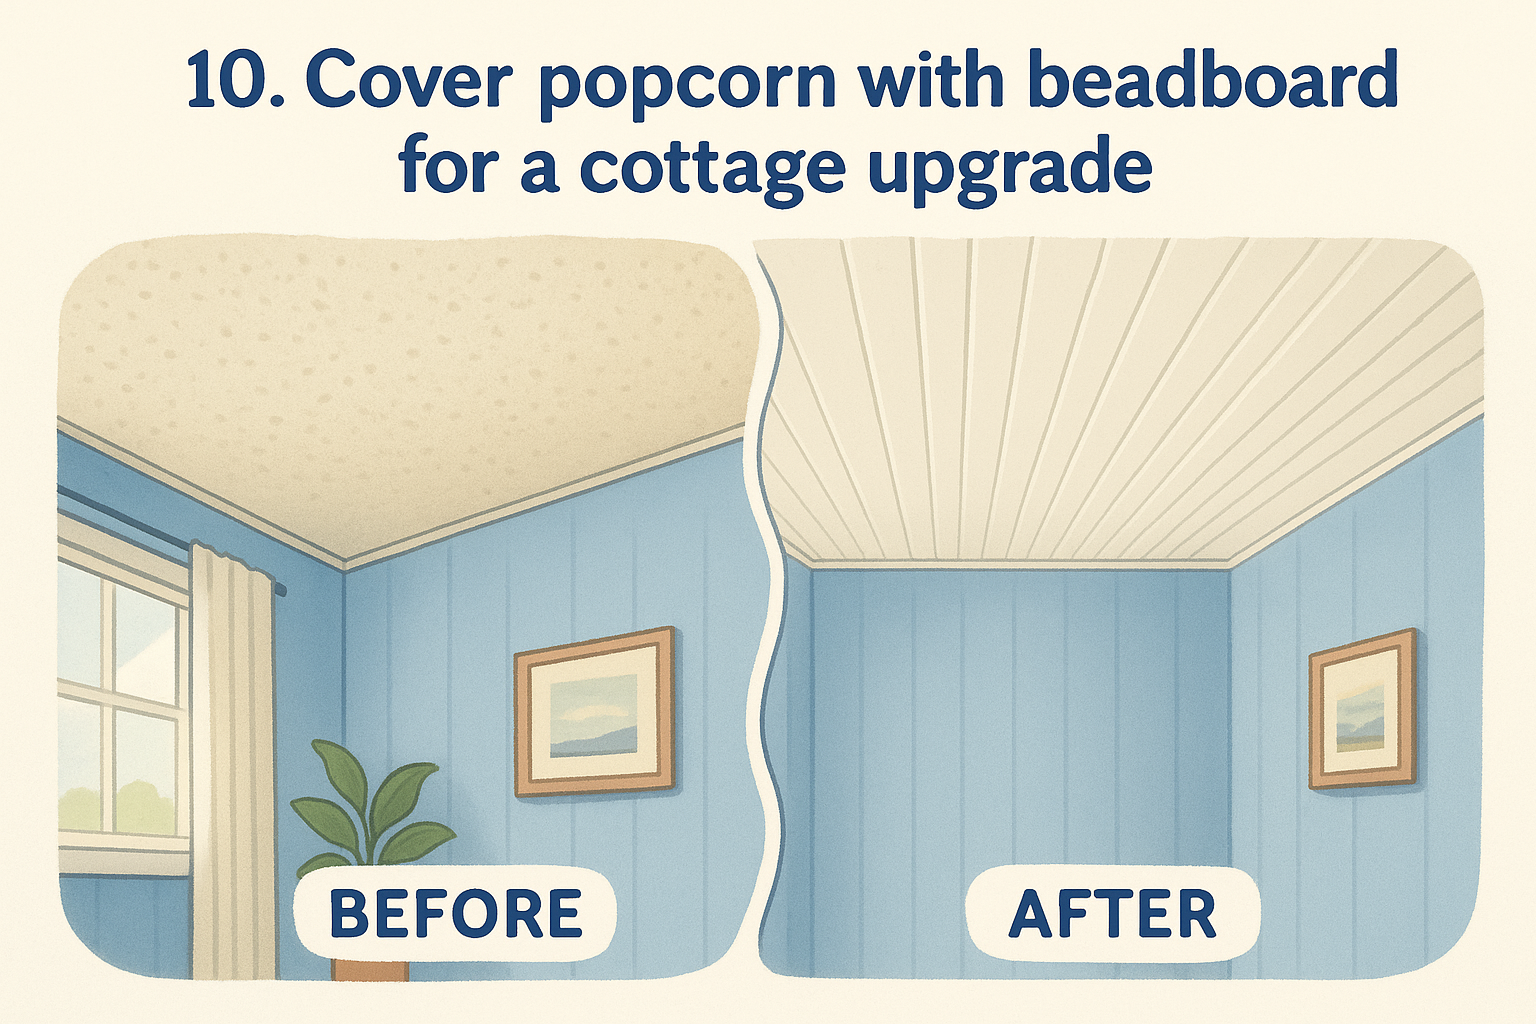
10. Cover popcorn with beadboard for a cottage upgrade
Beadboard panels give you a fast, decorative ceiling upgrade without ever touching the acoustic texture beneath them. Instead of scraping, you attach thin beadboard directly over the existing surface and paint it to create a clean, paneled look that suits farmhouse, coastal, and cottage-style interiors. This approach is one of the most visually distinctive popcorn ceiling removal before and after alternatives on this list.
The before
Your starting point is a textured acoustic ceiling in a room where you want warmth and character rather than a plain flat surface. The popcorn texture is structurally stable but visually outdated , and the room likely lacks any architectural interest above eye level.
The after
Once the beadboard is painted white or a soft accent tone , the ceiling becomes a defining feature of the room. The vertical groove pattern adds visual depth and texture that feels intentional rather than dated, and the overall effect reads as a deliberate design choice.
Beadboard ceilings photograph exceptionally well in living rooms and sunrooms because the groove pattern adds dimension without competing with the rest of the space.
What makes this approach work
Your installer attaches 1/4-inch beadboard panels directly to the ceiling joists through the existing texture using appropriate fastener lengths. Filling the seams between panels and painting the entire surface one uniform color pulls the look together and hides any minor alignment gaps.
Cost and time range
- Material and labor cost: $2.50 to $5.00 per square foot
- Single room timeline: one to two days
What can go wrong
Panels that miss the joists will flex and eventually bow downward. Your installer needs to locate every joist before fastening so the finished ceiling stays flat and secure over time.
11. Cover popcorn with shiplap or wood planks
Shiplap and wood plank ceilings are one of the most dramatic cover-over alternatives available, and they work directly over existing acoustic texture without any scraping. You get a completely transformed ceiling that doubles as a design statement, and the popcorn ceiling removal before and after comparison becomes a conversation piece in its own right.
The before
Your starting point is a standard acoustic ceiling in a room where a flat painted surface wouldn't add much character on its own. The existing texture is intact and stable , meaning no loose sections or water damage that would compromise the new layer above it.
The after
Once the planks are installed and finished , the ceiling draws the eye immediately. Whether you choose a natural wood stain or a crisp painted finish , the horizontal lines of shiplap make any room feel longer and more intentional. The overall effect reads as a full room renovation rather than a single ceiling fix.
Painted white shiplap ceilings in open-plan living areas consistently rank among the most visually impactful single upgrades homeowners report after completing the project.
What makes this approach work
Your installer fastens each plank directly into ceiling joists through the existing texture using screws long enough to reach solid wood. Consistent reveal spacing between boards is what separates a clean installation from one that looks rushed or uneven.
Cost and time range
- Material and labor cost: $3.00 to $7.00 per square foot
- Single room timeline: one to two days
What can go wrong
Weight distribution matters more than most homeowners expect. Standard framing handles the load well, but your installer should confirm joist spacing and condition before committing to a full ceiling installation.
12. Cover popcorn with pressed tin for a bold ceiling
Pressed tin ceiling panels are one of the most visually striking alternatives to scraping, and they install directly over existing acoustic texture without any removal required. You get a dramatic, patterned surface that turns the ceiling into an architectural feature, and the popcorn ceiling removal before and after comparison becomes less relevant because the result looks nothing like either a standard smooth ceiling or the original texture.
The before
Your starting point is an intact popcorn ceiling in a room where character and visual weight are welcome rather than out of place. Bars, dining rooms, kitchens, and entryways are ideal candidates because the bold patterning of pressed tin suits spaces that can handle a strong overhead element.
The after
Once the panels are fastened and painted , the ceiling becomes the focal point of the room. Traditional tin patterns in white, black, or metallic finishes create a layered, almost three-dimensional effect that draws the eye upward and holds attention.
Pressed tin ceilings photograph dramatically in dining rooms because the pattern interacts with overhead lighting in a way that flat painted ceilings simply cannot match.
What makes this approach work
Your installer secures each 2-by-4-foot panel directly into ceiling joists using nails or screws, then finishes the seams with matching tin molding strips. Painting the entire surface one uniform color after installation pulls the pattern together and hides any minor alignment gaps between panels.
Cost and time range
- Material and labor cost: $3.50 to $8.00 per square foot
- Single room timeline: one to two days
What can go wrong
Panels that flex or pop after installation almost always indicate missed joists. Your installer needs to confirm joist locations before fastening so every panel stays flat and secure over time without movement.
13. Create an exposed beam look after removal
This popcorn ceiling removal before and after scenario goes well beyond a flat painted surface. Once the scraping is done, you install decorative wood or polyurethane beams across the clean ceiling to create the impression of exposed structural timbers, turning a routine ceiling fix into a full design statement.
The before
Your starting point is a textured acoustic ceiling in a living room, dining room, or bedroom where warmth and architectural character are priorities. The existing texture is flat and uninspiring , offering no visual interest above eye level and making the room feel more closed off than it needs to be.
The after
Once the ceiling is scraped and painted , decorative beams go up in a planned layout that fits the room's proportions. The finished space looks like a renovated historic home where original timbers were uncovered, even though the beams are entirely decorative additions with no structural role.
Spacing beams parallel to the room's longest wall makes the space feel longer and more open without adding any structural work to the project.
What makes this approach work
Your installer mounts hollow beam boxes to blocking that is fastened directly into ceiling joists. The hollow core keeps weight minimal while the exterior profile mimics solid timber convincingly once stained or painted to match your interior.
Cost and time range
Budget carefully before committing, since beam selection and room size both push costs significantly above a standard removal project.
- Beam materials: $15 to $40 per linear foot
- Installation labor: $300 to $800 per room
- Combined project timeline: two to three days
What can go wrong
Uneven beam spacing is the most visible flaw in this type of project, and it becomes obvious the moment paint goes on the ceiling. Measure and mark your full layout on paper before fastening a single piece to the surface.
14. Combine popcorn removal with water damage repairs
Water damage and acoustic ceilings are a common combination in older homes. If your ceiling already shows brown stains, soft spots, or sagging texture , popcorn ceiling removal before and after comparisons in this scenario reveal more than cosmetic improvement. You're addressing structural integrity and appearance at the same time, which makes combining these two projects the only practical path forward.
The before
Your starting point is a stained or damaged acoustic ceiling where moisture has compromised both the texture and the drywall beneath it. The discoloration may come from a past roof leak, plumbing drip, or HVAC condensation , and the affected area often extends beyond what is visible on the surface.
The after
Once the damaged drywall sections are cut out and replaced , the new panels get finished alongside the rest of the ceiling with a skim coat and paint. The final result shows no evidence of the previous damage , and the entire ceiling surface looks uniform rather than patched.
Fixing the moisture source before any ceiling work begins is the only way to guarantee the repair stays clean long-term.
What makes this approach work
Your contractor removes the damaged drywall, confirms the leak source is resolved , and installs new panels before any finishing begins. Treating the repaired area with a stain-blocking primer prevents bleed-through once paint goes on, which is the step that most DIY repairs skip and later regret.
Cost and time range
- Water damage repair add-on: $200 to $600 per affected area
- Combined project timeline: two to four days
What can go wrong
Starting the ceiling work before the moisture source is confirmed and fixed guarantees the damage returns. New stains will bleed through paint within weeks if any active leak remains above the repaired drywall.
15. Do a phased plan for an occupied home
Removing popcorn ceilings while your family is still living in the home doesn't require you to relocate for a week. A phased approach breaks the project into room-by-room segments so work happens in one section of the house at a time, leaving the rest of your living space functional and clear of dust throughout the entire process.
The before
Your starting point is a fully occupied home with acoustic texture on most or all of your ceilings. The popcorn ceiling removal before and after difference you want is clear, but the timing feels impossible when you have kids, pets, or a work-from-home setup that can't simply be paused for a multi-day project.
The after
Once each room cycles through scraping, finishing, and painting , you move your furniture back in before the crew shifts to the next space. By the time the last room is done, the entire home looks updated without any single week feeling chaotic or unlivable.
A phased schedule also lets you adjust your finishing choices mid-project if you decide the first room's result should look different in the next one.
What makes this approach work
Scheduling two to three rooms per visit keeps the crew efficient while containing dust and disruption to a defined area. Your contractor seals doorways with plastic sheeting between active and occupied zones to prevent debris from spreading through the house.
Cost and time range
- Per-room cost: same as a standard project, no phasing premium
- Total project timeline: two to four weeks across multiple visits
What can go wrong
Skipping the plastic containment barriers between rooms lets drywall dust migrate through HVAC vents and settle on furniture in untouched areas, creating cleanup work that extends well beyond the active project zone.
What to do next
Every popcorn ceiling removal before and after example in this list points to the same conclusion: the finished result is almost always worth the investment, whether you scrape one small bedroom yourself or hire a crew to work through your entire home. The difference between a room that feels dated and one that feels clean and current often comes down to a single ceiling decision .
Your next step is getting a realistic estimate based on your actual ceiling conditions. Factors like paint layers, square footage, and asbestos risk all affect what the project will cost and how long it will take. The best way to get accurate numbers is to have someone look at the ceiling in person rather than guess from general pricing ranges.
If you're in the Sacramento Valley area, schedule a free in-home estimate with Super Shooters and get a clear picture of exactly what your project involves before any work begins.
Recent Posts