October 5, 2026
Vertical Drywall Installation: Is It Okay and How to Do It
You are standing in a room with a stack of 4x8 sheets and a wall that is 8 feet tall, and you wonder which way to hang them. Most guides say horizontal, but plenty of builders go vertical. If you are weighing vertical drywall installation , you want to know whether it is allowed, whether it holds up, and where it makes sense.
Short answer: yes, vertical drywall installation is acceptable . Code does not ban it, as long as every sheet edge lands on framing and you use the right fasteners and spacing. Vertical hanging works well on narrow walls, in corners, and in some basements. It is usually the weaker choice on long walls and ceilings, because you get more butt joints that are harder to finish.
Below, we compare vertical and horizontal layouts for joints, framing, and code. We also cover ceilings, basements, and corners, then walk through the steps. Our crew at Super Shooters has hung and repaired drywall across the Sacramento Valley for over 30 years, so this comes from real jobs, not theory.
Why vertical drywall installation matters
Direction sounds like a small decision, but it shapes the rest of the job. It sets how many seams you tape , how much framing support you need, and how flat the wall looks once paint goes on. Pick well and you save hours. Pick poorly and you will see the mistake in raking light for years.
Joints decide how the wall looks
Every sheet of drywall has two kinds of edges. The long edges are tapered at the factory, so tape and mud sit in a shallow recess and disappear. The cut ends are square, so they leave a hump that needs wider, thinner coats of compound. Tapered joints are easy to hide. Butt joints are not. That one fact drives most of the debate over hanging drywall vertically versus horizontally.
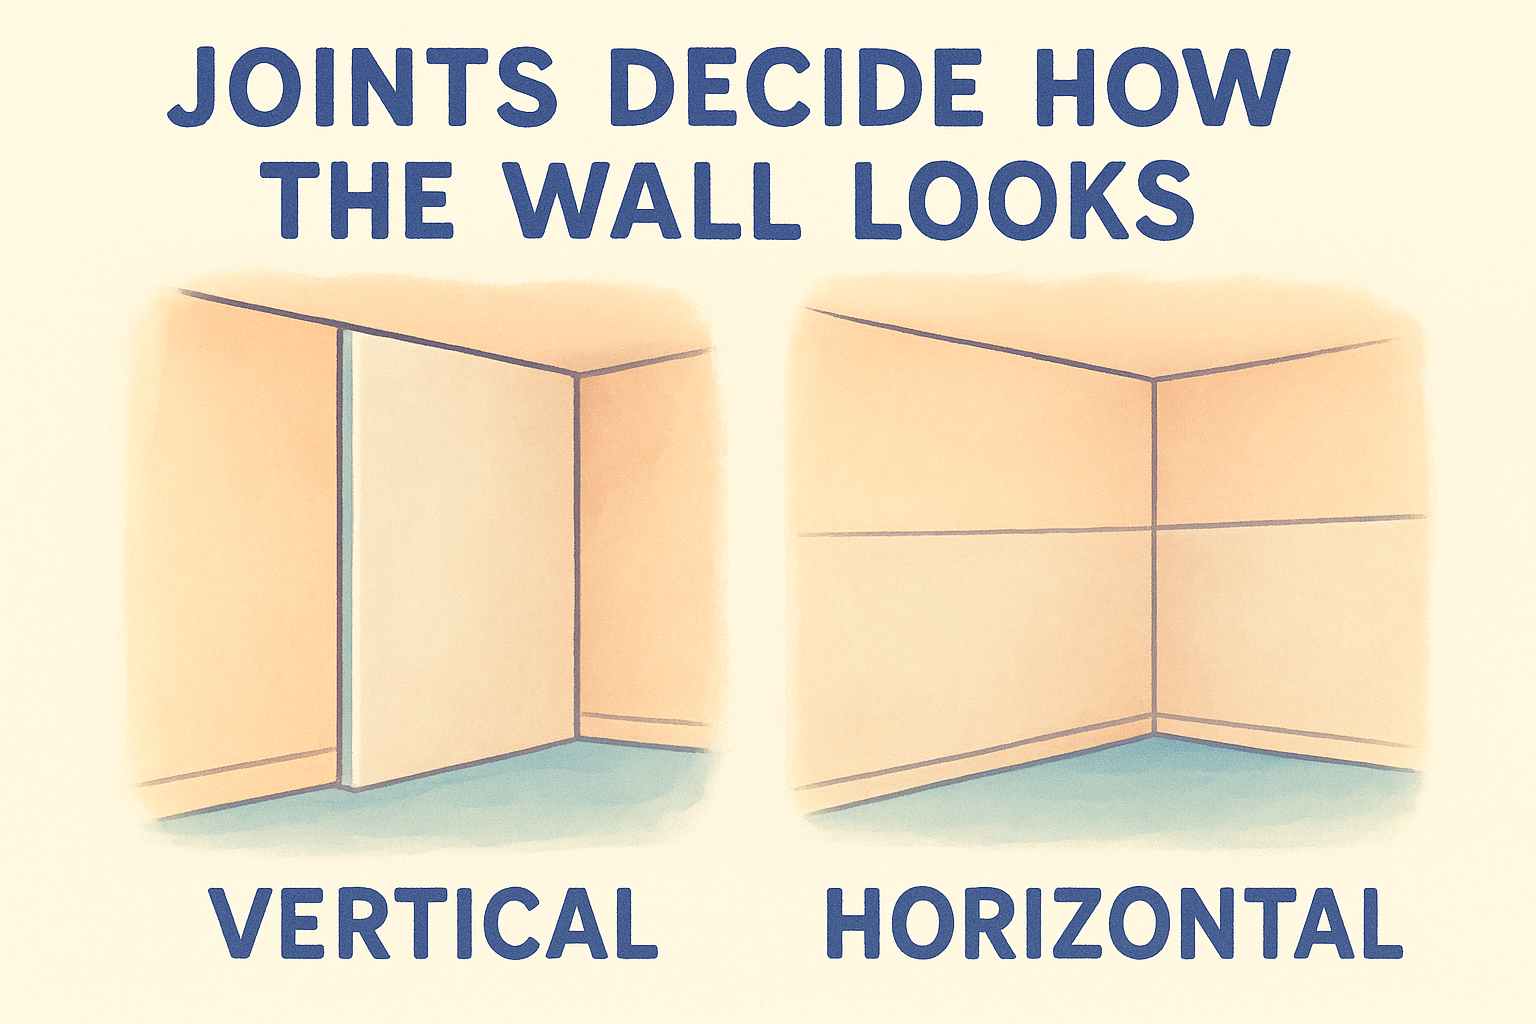
On a standard 8-foot wall, a 4x8 sheet hung vertically runs floor to ceiling, so you get no butt joints at all and every seam is tapered. Once the wall is taller than the sheet, the math flips, and you need a filler strip with a butt joint running across the wall. Here is how common situations compare.
| Situation | Vertical | Horizontal |
|---|---|---|
| Short wall or closet, 8 ft ceiling | No butt joints, one or two tapered seams | Two courses, one seam at 4 ft |
| Long wall, 8 ft ceiling | More seams to tape, all tapered | One long seam plus butt joints on runs longer than the sheet |
| 9 ft ceiling | Needs 9 ft sheets or a strip with a butt joint | Needs 54-inch sheets or a strip |
| Narrow wall sections beside doors | Sheets fit between openings with little cutting | Sheets need more cuts around openings |
Studs and code set the limits
Studs decide whether a layout works. With framing at 16 or 24 inches on center, a 48-inch sheet hung vertically puts both edges on a stud. Horizontal sheets cross the studs, so they pick up support at every one. Either way, every edge must be fastened to solid framing , or the joint will crack at the first seasonal movement.
Code treats both directions as acceptable. The International Residential Code and the Gypsum Association's GA-216 application standard focus on fastener type, spacing, and framing support , not on which way the sheet runs. Fire-rated assemblies are the exception, because some tested listings specify orientation or require staggered joints. If your wall carries a rating, such as a garage wall shared with living space, check the assembly listing before you hang a sheet.
Both directions are legal, so the right choice is the one that leaves you the fewest joints to finish.
What it means for your project
Finishing is where the money goes. Hanging a sheet takes minutes, while taping, coating, and sanding a bad joint takes hours spread across several days. In our experience, most callbacks trace to joint finishing , not to the hanging itself. Fewer or better-placed joints mean fewer visible lines under a window or hallway light.
That is why direction matters even for a small remodel. A homeowner patching one 8-foot wall may do best going vertical. Someone drywalling a 30-foot garage wall will likely do better horizontal. Learn the tradeoffs before you buy sheets, because the layout is hard to change once the screws are in.
How to hang drywall vertically step by step
The process for vertical drywall installation matches any hanging job, with extra attention to the first sheet. Get that sheet right and the rest of the wall follows . Get it wrong and the error grows with every panel.
Prep and layout
Before you lift a sheet, check the framing. Lay a straightedge across the studs and shim or plane any stud that bows more than 1/8 inch. Mark stud centers on the floor and ceiling plates so you can find them once the board covers them. Next, measure 48 inches from the corner stud. With framing at 16 or 24 inches on center, that mark lands on a stud center. Snap a plumb line there, because corners are rarely plumb and you should never use them as your reference.
Plumb the first sheet to a line, not to the corner, and every sheet after it will fall into place.
Hang and fasten
Work from the plumb line outward, one sheet at a time. Use these steps when you hang drywall vertically on a standard 8-foot wall:
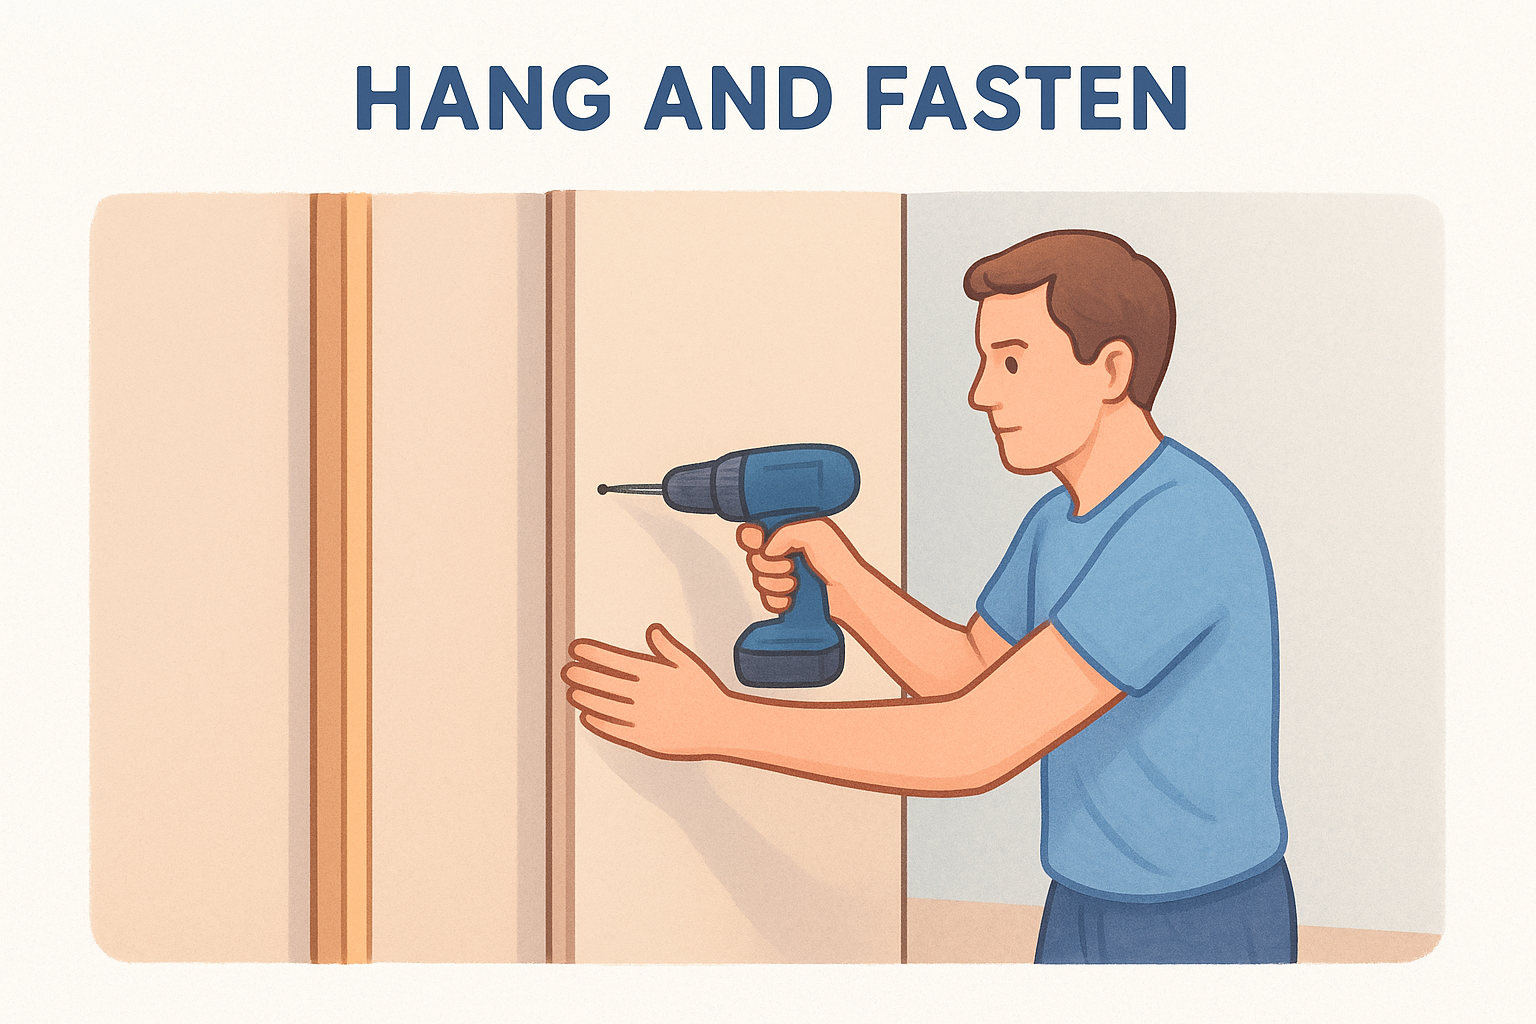
- Cut the sheet about 1/2 inch short of floor-to-ceiling height. Score the face, snap the board, and cut the back paper.
- Stand the sheet on end and push it tight to the ceiling. Use a foot lifter to hold it there. The gap at the bottom stays hidden behind baseboard.
- Line the factory edge up with the plumb line. The edge must land on the center of a stud , not the side of it.
- Drive the first screw at the middle of the sheet, then work out toward the edges. Space screws 12 to 16 inches apart and keep them 3/8 inch from the edges.
- Set each screw just below the paper surface. If the head tears the paper, drive another screw next to it.
- Slide the next sheet in so the tapered edges meet snugly. Do not force them together, and do not leave more than a 1/8 inch gap.
- Cut openings for outlets and windows by measuring from the last sheet, then trimming the board before you lift it.
One rule saves a lot of sanding later. Keep tapered edges against tapered edges , and keep cut ends away from the middle of the wall. If a cut end must meet another, land it on a stud and plan on wider mud coats.
Vertical vs. horizontal: joints, strength, and finishing
The last section explained tapered and butt joints. Here you can see how the two layouts compare once you measure seam length and think about how the wall behaves over time.
Counting joint footage
Numbers settle this better than opinions. Take a 16-foot wall with an 8-foot ceiling and standard 8-foot sheets:
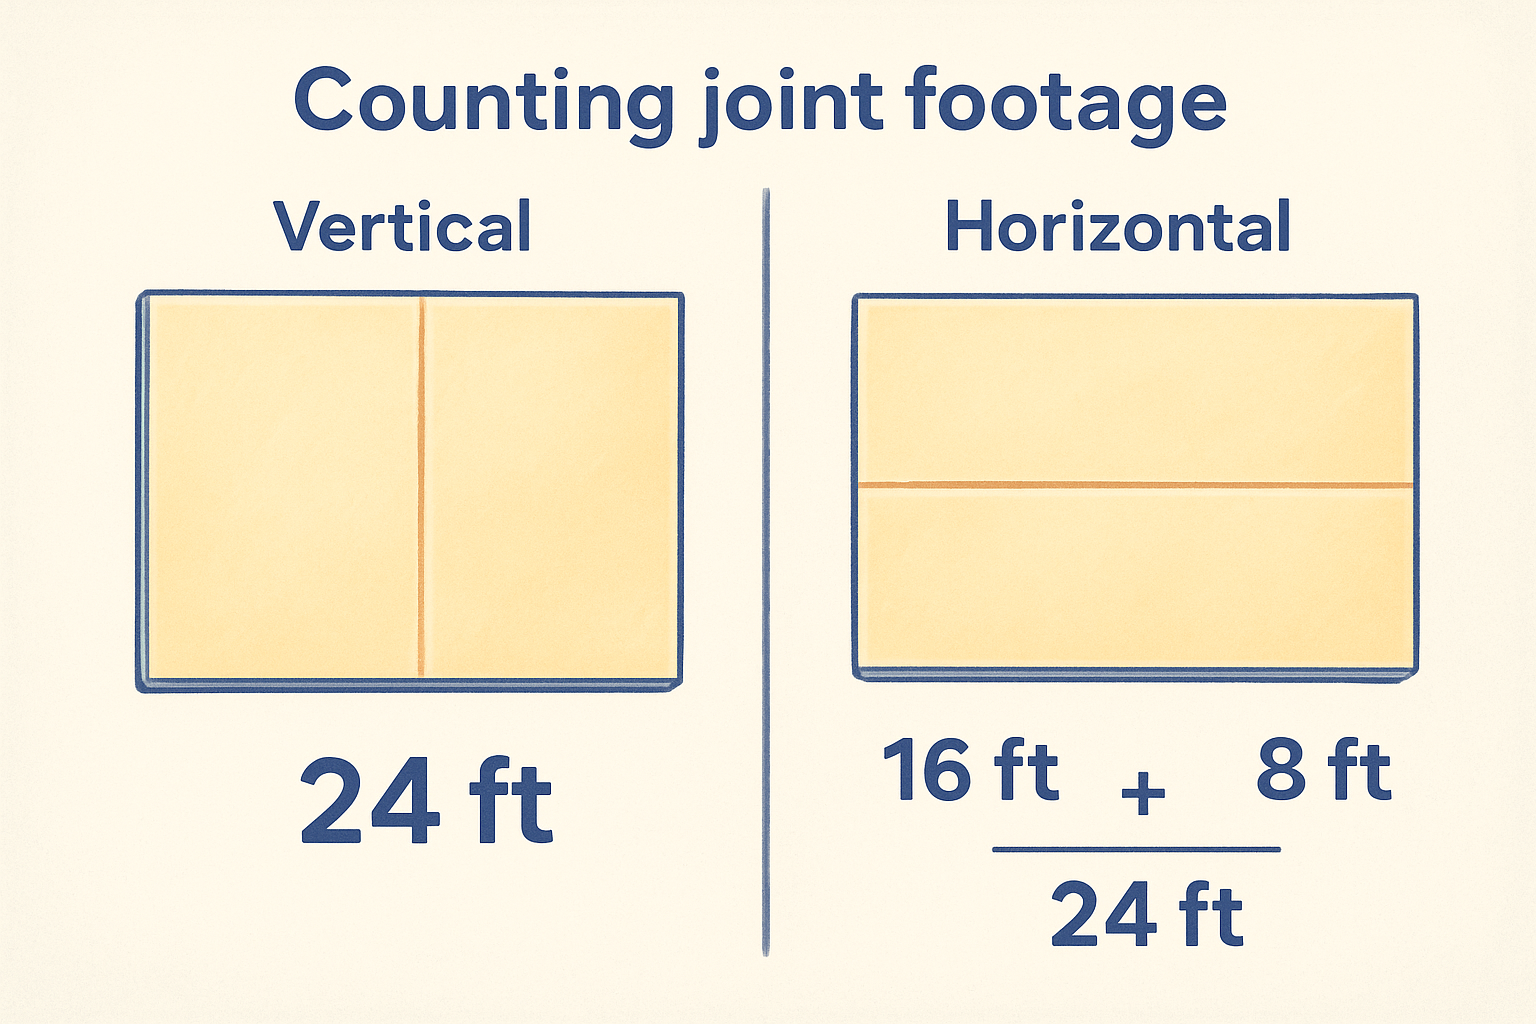
| Layout | Tapered seam | Butt joint | Total to finish |
|---|---|---|---|
| Vertical | 24 ft | 0 ft | 24 ft |
| Horizontal | 16 ft | 8 ft | 24 ft |
Totals match, but the mix does not. Vertical drywall installation gives you only tapered seams , which even a first-timer can finish cleanly. Horizontal leaves 8 feet of butt joint , and that is the part that shows. Long sheets change the picture. On a 12-foot wall, 12-foot sheets hung horizontally leave a single 12-foot tapered seam, against 16 feet when you go vertical. That is why long sheets win on long walls , if you can carry them.
Strength and cracking
Both layouts hold up when you fasten them correctly. Horizontal sheets span several studs, so they stiffen the wall across its width , and the long seam sits near 4 feet, which is comfortable to reach. Vertical seams all land on studs. That is fine, but every seam shares one 1 1/2-inch stud face between two sheets, so screw placement matters more. Drive them too close to the edge and the paper crumbles.
Total seam length is about equal, but a tapered seam costs far less finishing time than a butt joint of the same length.
Seasonal movement shows up at joints first. Lumber shrinks as a house dries out, and a seam over a shrinking stud can pop screws or open a hairline crack. Poor framing causes this far more often than layout does.
Finishing time
Finishing is where the two layouts really split. Tapered seams usually take three coats feathered out to roughly 10 to 12 inches. A butt joint needs coats feathered out to about 24 inches, with more sanding, to hide the hump. Over 8 feet of butt joint, that adds up to an extra hour or two of work for an experienced finisher, and more for a beginner.
So choose based on what you can finish well. If you are comfortable with wide, thin coats, horizontal saves seams. If you are not, vertical trades extra tape for cleaner, easier joints . Whichever way you go, do not skip the final skim and sand under a work light, because raking light shows every flaw.
Framing requirements and code considerations
What the framing has to provide
Framing matters more than direction. For vertical drywall installation , a 48-inch sheet needs a stud center every 16 or 24 inches , so both edges land on solid wood. Older Sacramento Valley homes often have irregular spacing, so measure the actual wall before you order. Run through this checklist first:
| Check | What you want |
|---|---|
| Stud spacing | 16 or 24 in. on center, measured on the real wall |
| Stud faces | Flat within 1/8 in. across the wall |
| Vertical edges | Centered on a stud, not on its side |
| Horizontal joints | Flat 2x4 blocking behind every joint |
| Door and window corners | No joint starting at a corner |
Tall walls catch people out. If you use a filler strip above vertical sheets on a 9-foot wall, the horizontal joint needs blocking behind it, because no stud supports that edge. Skip it and the joint flexes and cracks. Also keep seams off the corners of openings. Cracks start at those corners , so cut the sheet in an L shape or land the seam on the jamb side.
What code requires
Code cares about support, not direction. The International Residential Code, which California adopts as the California Residential Code, sets minimum board thickness, framing spacing, and fastener spacing for each application. Half-inch board is the usual choice for walls. Screws typically run 12 to 16 inches apart, depending on thickness and framing spacing, and the table in your local code gives the exact numbers.
Assemblies with a fire rating or a moisture rule are where direction can matter. A garage wall shared with living space needs at least 1/2-inch board on the garage side, and a ceiling under a habitable room needs 5/8-inch Type X. Wet areas call for moisture-resistant board. Some tested listings also specify joint placement.
Code never asks which way the sheet runs. It asks whether every edge is supported and fastened correctly.
Check local rules before you hang
Requirements vary by city and by project. Remodels that touch fire-rated walls, or that come with a permit, may get inspected before the walls are finished. A quick call to your city or county building department answers most questions in minutes. Ask which code edition applies, whether your wall needs a rated assembly, and when the inspector wants to see the board . Many inspections happen after hanging but before taping, so do not mud anything until you know.
When vertical is the better choice
Vertical wins in a few clear cases, and you can spot them before you buy a single sheet. The pattern is simple. Go vertical when the wall is no taller than the sheet and when a horizontal layout would force extra cuts or awkward seams.
Walls that match the sheet height
On a standard 8-foot wall, vertical drywall installation gives you full-height sheets with no butt joints . Closets, laundry rooms, short hallways, and bedroom walls under roughly 12 feet are the best fits. You hang three or four sheets and tape tapered seams only, so you skip the wide feathering a butt joint demands. In a small room, that can cut hours from the finishing stage.
If the wall is as tall as your sheet and short enough to need only a few seams, hang it vertically.
Walls broken up by openings and tight access
Narrow wall sections between doors, windows, and built-ins are awkward for horizontal sheets, which need notches and extra pieces. A vertical sheet drops in between two jambs with one cut and lands its edges on framing. Access matters too. Long sheets will not turn in a stairwell or narrow hallway, while an 8-foot sheet stands on end and walks through almost anywhere.
Use this quick checklist to decide:
- The wall is 8 feet tall or less, and under about 12 feet long.
- The wall sections between openings are narrower than 4 feet.
- Stairs, tight halls, or low doorways keep long sheets out.
- Studs are plumb, flat, and spaced at a steady 16 or 24 inches.
- You are replacing a damaged section from stud to stud.
Repairs and patches
Repairs are where vertical earns its keep. Say a leak has soaked a section of wall. Cut out a full-height strip from stud to stud , then hang a vertical replacement piece. Its edges land on framing, and you avoid a butt joint in the middle of the wall. A horizontal patch would leave a seam that crosses the repair and shows through paint.
One warning. Vertical only works if the studs cooperate. If spacing wanders, a sheet edge may miss its stud, and horizontal sheets forgive that better because they cross several studs. Measure first, then choose.
Vertical drywall on ceilings, in basements, and at corners
Three spots change the rules you just learned: ceilings, basements, and corners. Each has a clear answer, and only two of them favor vertical drywall installation .
Ceilings: run across the joists
On a ceiling, forget about vertical and horizontal. What matters is the joists. Hang ceiling sheets perpendicular to the joists , so every board crosses several framing members and every edge lands on wood. A sheet running parallel puts its edges between joists, and that is where sagging starts .
On a ceiling, run the sheets across the joists, and hang the ceiling before any wall.
Hang the ceiling first. Wall sheets then push up against the ceiling edges and hold them in place. With joists at 24 inches on center, use 5/8-inch board or a sag-resistant 1/2-inch panel. Ceilings always have butt joints, so stagger them from row to row.
Basements: often a good fit
Basement walls are usually short, often 7 to 8 feet, so vertical sheets run floor to ceiling with tapered seams only. Over concrete, fasten furring strips or build a stud wall first, because you cannot screw into masonry like framing. Space the strips 16 inches on center so each sheet edge lands on one.
Moisture is the bigger concern. Keep the bottom edge about 1/2 inch off the slab, so wicking does not ruin the board. Use paperless or moisture-resistant panels low on the wall. Fix any seepage before you hang anything. Drywall hides a leak for a season, then shows it.
Corners: where seams go wrong
Corners are easier with vertical sheets, because the sheet edge already runs along the corner. Follow these rules and you avoid the usual cracks:
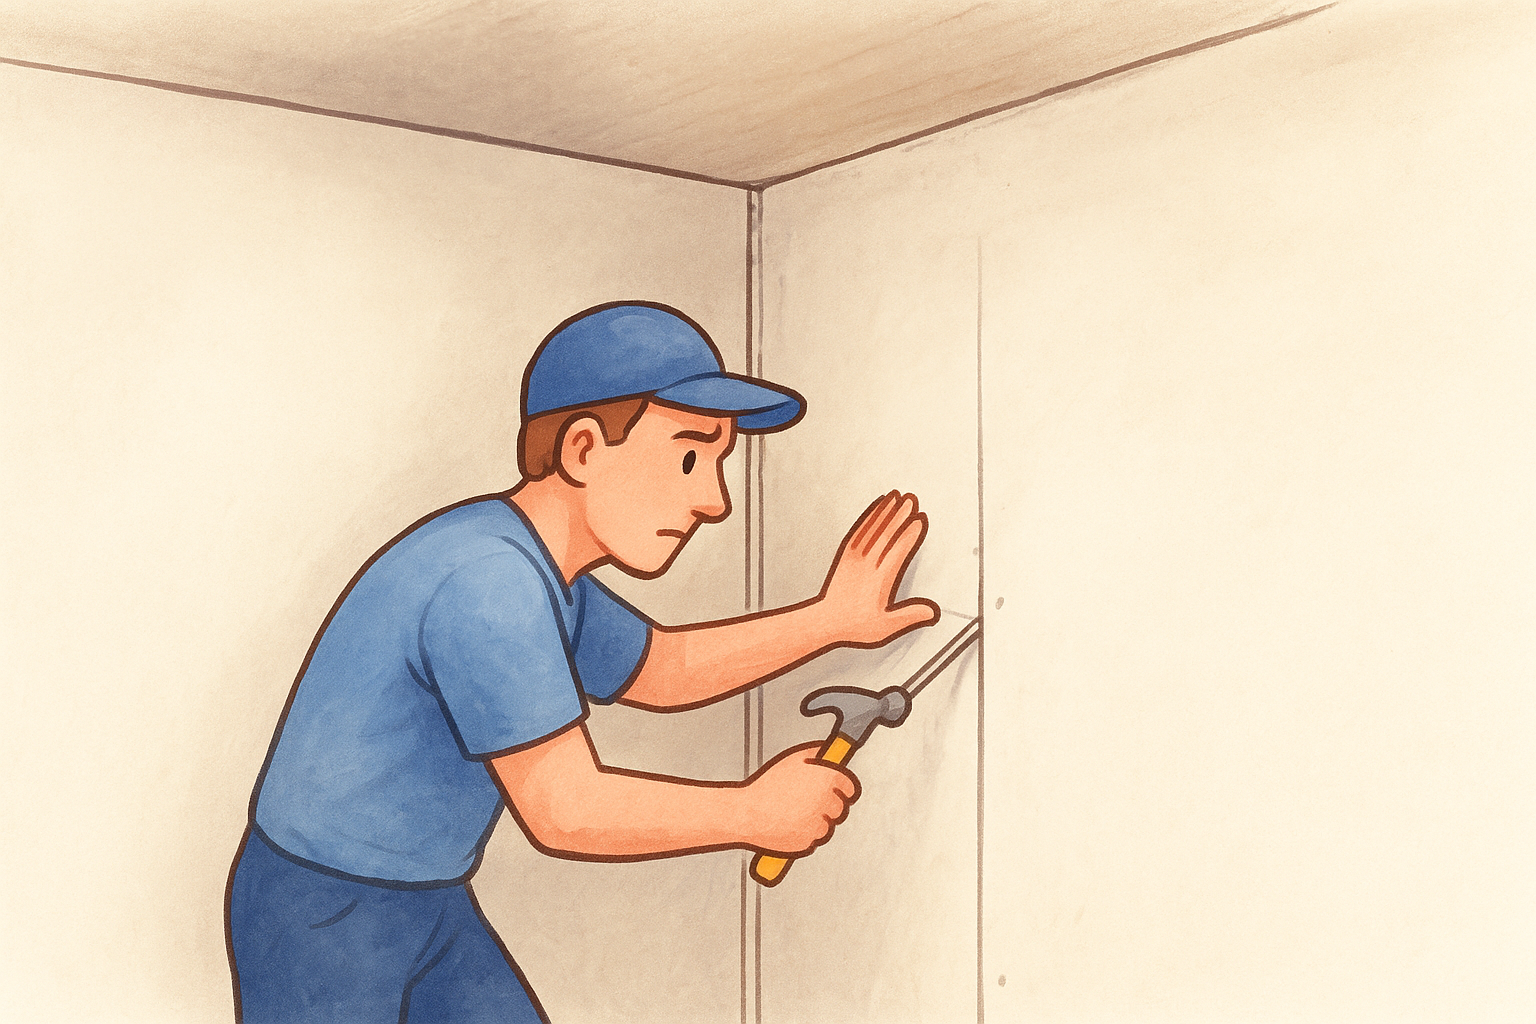
- Inside corners: Butt the first sheet tight into the corner. Let the second sheet meet it, and skip screws within about 8 inches of the corner so the joint can flex.
- Outside corners: Keep the tapered edge away from the corner. Cut the sheet ends cleanly, then cover the corner with metal or paper-faced bead.
- Plumb check: Corners are rarely square, so hold a level against each edge before you fasten.
Finish inside corners with paper tape folded down the center. It resists cracking better than mesh in most situations.
Common mistakes and how to avoid them
Most problems with vertical drywall installation show up weeks after the crew leaves, when a seam cracks or a screw pops. Nearly all of them trace back to a few habits. Here is what we see most often on repair calls, and how to prevent each one before you pick up a screw gun.
Layout and fit mistakes
Seams that miss the framing cause the worst failures. A vertical edge that lands on the side of a stud, or between studs, has nothing to hold it. Mark stud centers before you cut, and if one is off, nail a 2x4 backer beside it. Do not jam sheets tight against each other either. A forced joint bows the board and pops screws once the house settles.
A sheet edge without solid framing behind it will crack, no matter which way the board runs.
| Mistake | What happens | Fix |
|---|---|---|
| Edge lands between studs | Seam cracks, screws pull out | Add a 2x4 backer |
| Sheet cut to exact height | Board binds, bows, and pops | Cut 1/2 in. short |
| Butt joint at eye level | Hump shows in raking light | Order taller sheets, or place the joint high and feather it wide |
| Mixed board thickness | Uneven wall surface | Use one thickness per wall and shim low studs |
Fastening mistakes
Screws cause the other half of the callbacks. Overdriven heads break the paper and lose holding power, while proud heads show through the mud. Set the clutch so each head sits just below the surface, and add a second screw about 2 inches away if one tears through.
Fastener choice matters as well. Use coarse-thread screws on wood studs, not nails, because nails back out as the lumber dries. Fine-thread screws are for metal studs. Keep every screw at least 3/8 inch from a sheet edge, since closer than that the paper crumbles and the edge loses its grip.
Finishing mistakes
Rushing the mud ruins good hanging. Even a flawless vertical wall looks sloppy if you skip the basics of finishing:
- Applying thick coats instead of thin, wide ones.
- Recoating before the last coat dries, which is usually overnight for premixed compound.
- Sanding without a work light held low against the wall.
- Painting without primer, so patches flash through the finish.
Slow down at this stage. Sand lightly between coats, wipe the dust off, and check the wall with a light held flat to the surface before you prime. Ten minutes of checking now saves you from seeing every seam at sunset in your living room.
When to hire a drywall professional
Hanging a few sheets is a fair weekend project, but a whole house is not. Vertical drywall installation on a closet or a short basement wall is within reach for a patient homeowner. Other jobs carry risks that a rented lift and a video tutorial will not cover.
Jobs you should not take on yourself
Safety comes first. Ceilings in homes built before the mid-1980s may contain asbestos , and scraping or sanding them puts fibers in the air your family breathes. Get a lab test before you touch the surface, and if it comes back positive, hire a licensed abatement contractor to handle the removal.
Test before you scrape, and hire out any job you cannot undo once the paint is on.
Other situations also tilt the odds toward a pro:
- Fire-rated walls and ceilings, such as a garage wall shared with living space, where the wrong joint can fail inspection.
- Water-damaged walls, where wet framing or mold must be dealt with before new board goes up.
- Large ceilings, where a 4x12 sheet of 5/8-inch board weighs over 100 pounds.
- Walls under strong window or hallway light, which demand a smooth Level 5 finish.
Signs the job is bigger than it looks
Beyond hazards, watch the framing. If studs wander off 16 or 24 inches, bow past 1/8 inch, or sit out of plumb, every sheet edge becomes a fight . A crew carries the fix, which means furring, blocking, and shims, plus the experience to know which wall needs which.
Speed matters too. A pro hangs a room in a day and finishes the joints in thin, even coats, while a first-timer can spend two weekends and still sand through the paper. When you count tool rentals and the cost of redoing a wavy wall, the savings from DIY often shrink fast .
What to ask before you sign
Finally, vet the contractor, not just the price. Ask these questions up front:
- Is the license active? Check the number on the California Contractors State License Board site.
- Does the written estimate list board thickness, finish level, and texture matching?
- Who removes debris and protects floors?
- What warranty comes with the work?
- When is payment due?
At Super Shooters, we hold License No. 1077675, offer free in-home estimates , and ask for no payment until the project is complete . The Super Shield warranty is included. Hold any contractor you consider to a similar standard.
Choosing the right direction for your walls
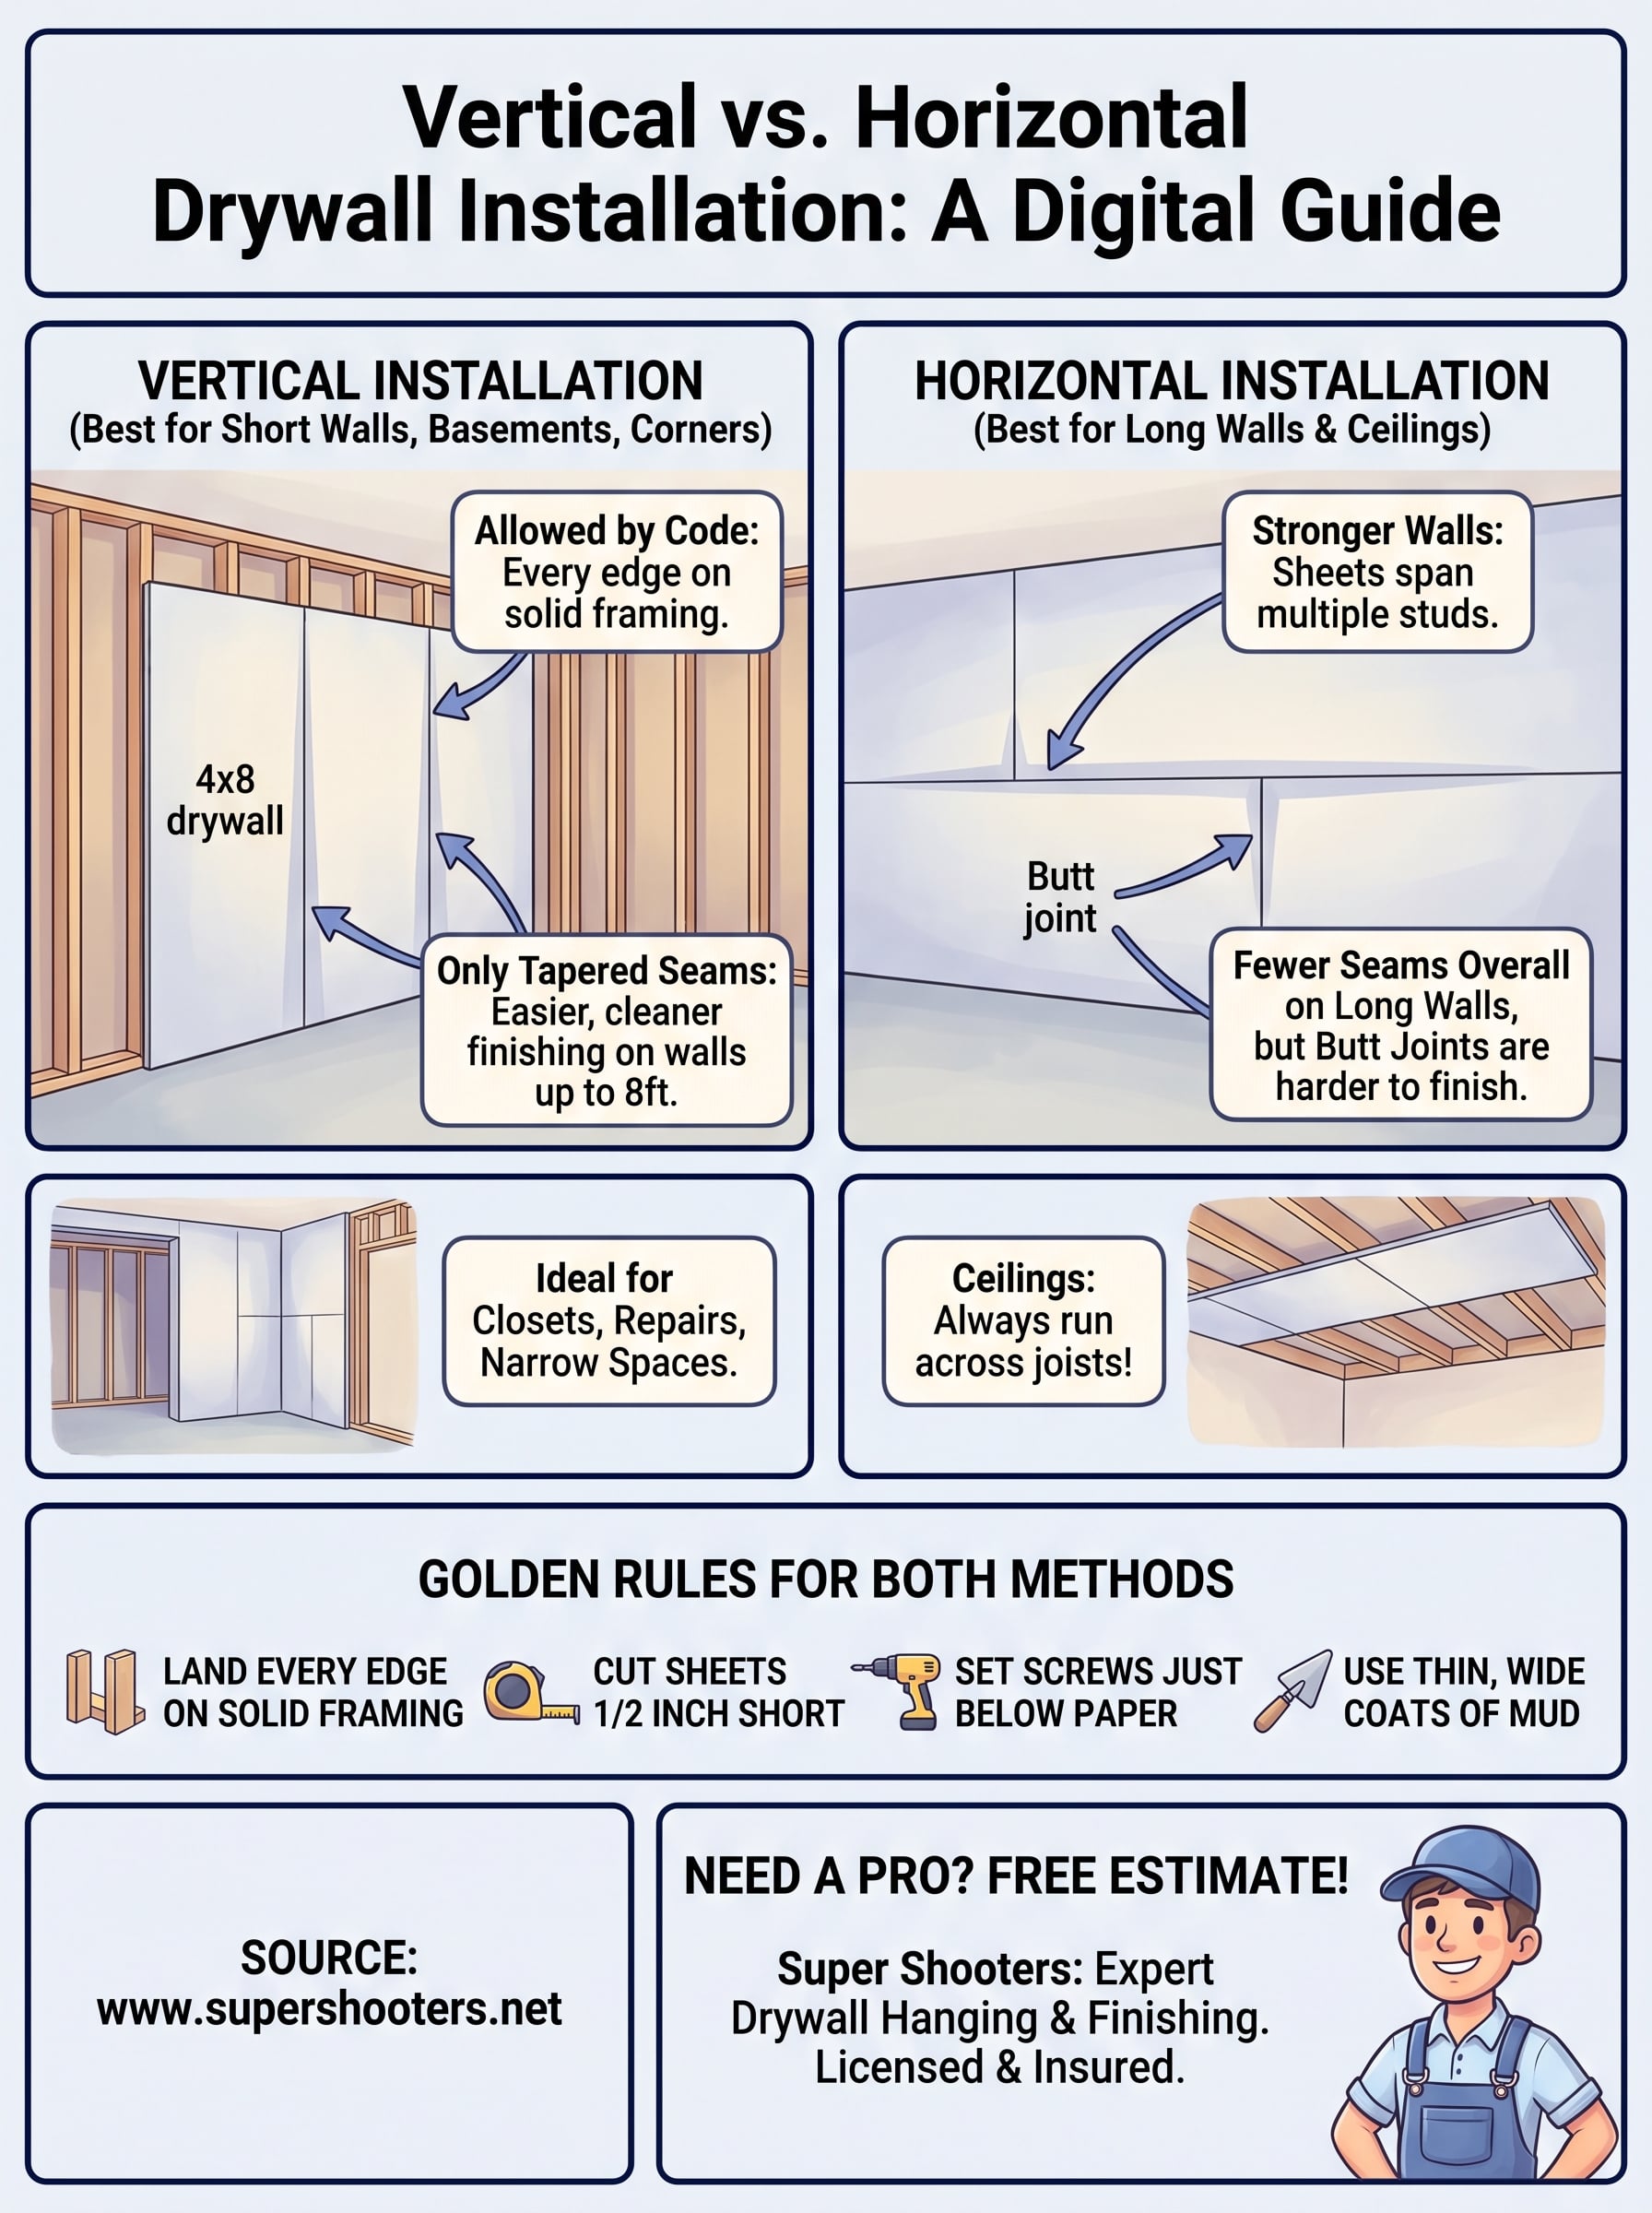
Direction comes down to one question: how many joints will you have to finish? Vertical drywall installation works best on walls as tall as your sheets, in closets, basements, narrow sections, and repairs, where you get tapered seams only . On long walls, horizontal sheets or long boards leave fewer seams. Ceilings should always run across the joists.
Whichever way you hang, the fundamentals stay the same. Land every edge on solid framing , cut sheets a half inch short, set screws just below the paper, and finish with thin, wide coats of mud. Those habits matter more than the direction the sheet runs.
If you would rather skip the guesswork, our crew can handle the layout, hanging, and finishing. Request a free estimate for professional drywall hanging and finishing in the Sacramento Valley, and we will recommend the layout that fits your walls .
Recent Posts